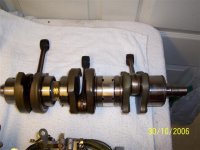
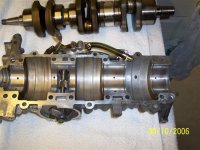
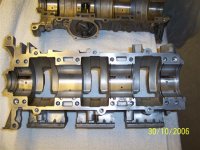
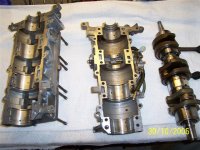
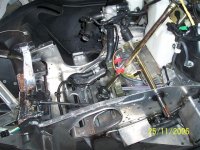
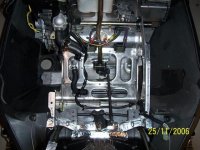
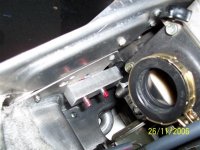
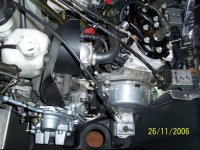
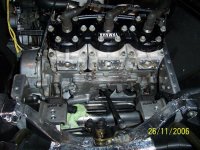
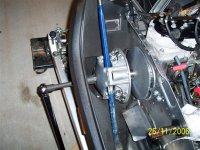
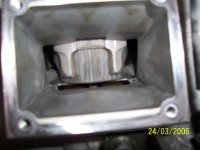
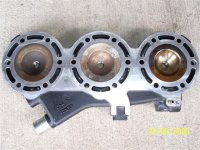
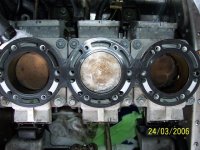
03 viper std, no mods.... Blew a centre piston and just did the teardown.... mag side seal blew and noticed that the mag side bearing was not as free as the others....cleaned bearing and installed it just seems a little looser than the others....Is this normal when that side seal goes or is it the normal play...
Any input would be great, thnks.
Any input would be great, thnks.
daman
New member
check out a new one at your dealer,compare,wile there you can ask too..
daman said:check out a new one at your dealer,compare,wile there you can ask too..
Thanks will do that
daman
New member
daman said:keep us posted")
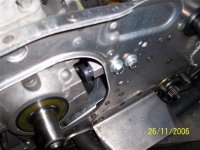
What I did was wash everything out and re-lubed the bearings and the difference is extremely small, no noise, no drag, same resistance. I can feel a slight play cause I played around with engines but two of my sled bud's tried things out and did not notice any play in either bearings. Then I again washed everything up and there is a noticable noise difference in the mag side to the pto side but so did the new one I tried out.... from what I have experienced, most new bearings make noise until they are lubed up... It's not that I'm cheap but I did read about a post and this guy replaced both end bearings with inner races pressed on and they were almost the same as his older one. I think he spent over $200 for the job. Just can't afford to throw money away.... what do you think...thnks
daman
New member
Hmmm...sounds good,make shure your oil pump is within specs run
a little premix at first and she may be good to go.
good luck!")
a little premix at first and she may be good to go.
good luck
daman said:Hmmm...sounds good,make shure your oil pump is within specs run
a little premix at first and she may be good to go.
good luck
I was thinking of making the fuel screw fat ( 1-7/8 to 2 ) turns and re-adjust the oil rich and mix my first tank with one qrt oil...how's this sound after the tank is gone re set fuel to specs and oil cable then do the plug burn test with new plugs low-mid and hi range shut down and pull the plugs each time and see how it looks....What do you think...thnks
daman
New member
theblues said:I was thinking of making the fuel screw fat ( 1-7/8 to 2 ) turns and re-adjust the oil rich and mix my first tank with one qrt oil...how's this sound after the tank is gone re set fuel to specs and oil cable then do the plug burn test with new plugs low-mid and hi range shut down and pull the plugs each time and see how it looks....What do you think...thnks
don't run her over rich tho,,keep an eye on thoes plugs and wash man!!!
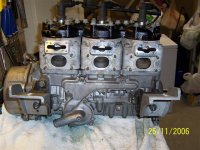
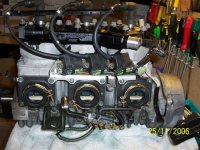
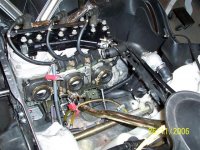
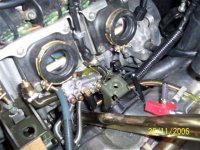
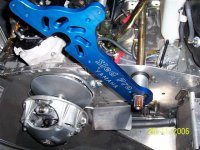
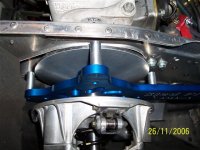
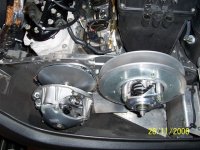
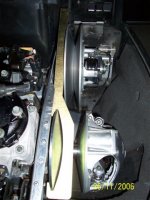
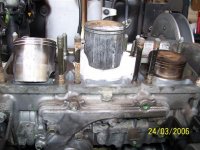
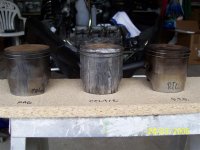
Everything is all cleaned up and ready for the new parts...parts on order will post back progress...
auji700triple
New member
ouch thats rough
redsnake3
New member
do you have new pistons on the way? i have a piston if you wanna buy a slightly used one.
Redsnake3 thanks anyways, I have all replacement parts just waiting on seals and a base gasket to put it all together…I will keep you in mind though, I may buy an extra jug and piston as a spare…How much$$$…Also if you have any tips/hints to offer before I reassemble it would be appreciated…It’s a standard rebuild no mods. I’m passing this sled to my 15yr old son this year…
Aj; that sled looks cool been following your build. I have a spare hood and I'm thinking of having a few cool skulls - blues and whites airbrushed on over the front and spiderwebs suspending the viper logo on the sides. I think my kid is gonna like that...
Aj; that sled looks cool been following your build. I have a spare hood and I'm thinking of having a few cool skulls - blues and whites airbrushed on over the front and spiderwebs suspending the viper logo on the sides. I think my kid is gonna like that...
auji700triple
New member
Sounds Nice man. Thats a Project for yah on your spare time..See i only did this was to be kinda *orginal* i hate having something that other ppl has. that is why i went with pipes, and a cool new look. i want to be different, i want to stand out ya kno?
And your Design sounds freakin cool i hope to see you get into it its quite the project! To me its all worth it in the end man : )
And your Design sounds freakin cool i hope to see you get into it
its quite the project! To me its all worth it in the end man : )