Hi guys !
I`m rebuilding this 1994 V-max 4 750 engine for one of my riding buddies, today I tore into it.
What happened?.
My friend was going slightly uphill and suddenly he lost power and the engine didn`t want to rew, he turned around and then he stopped the engine with the kill switch.
Here`s a pic from when it happened.. . The only good thing about the burndown is that it happened on the last ride of the season!.

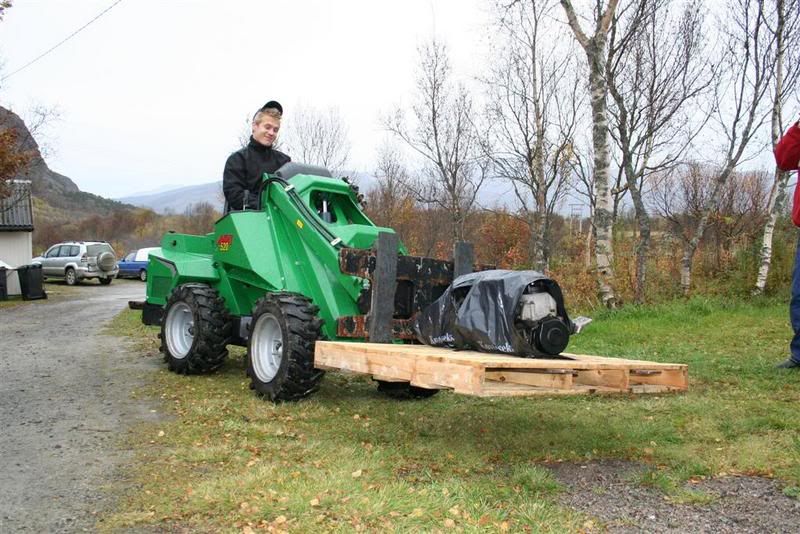
Last weekend my friend and his brother removed the engine from the sled and gave it to me.
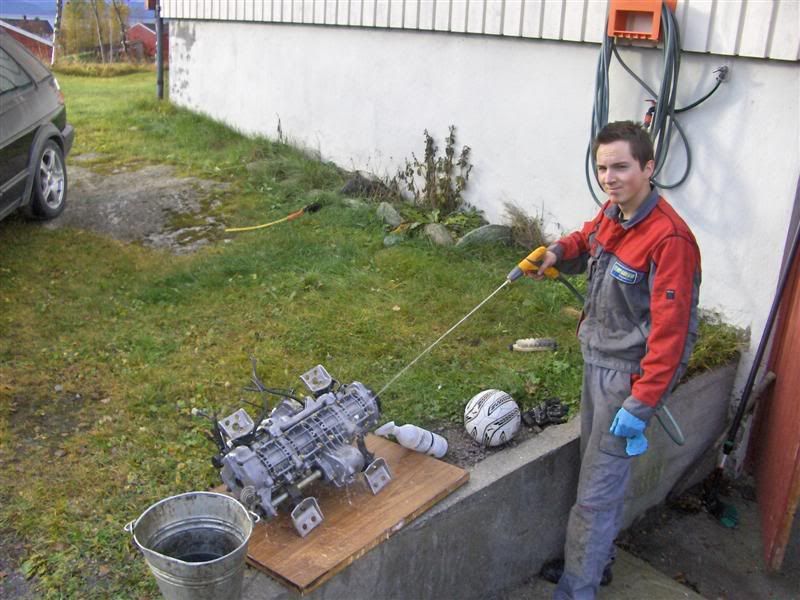
Here I`m cleaning it!.
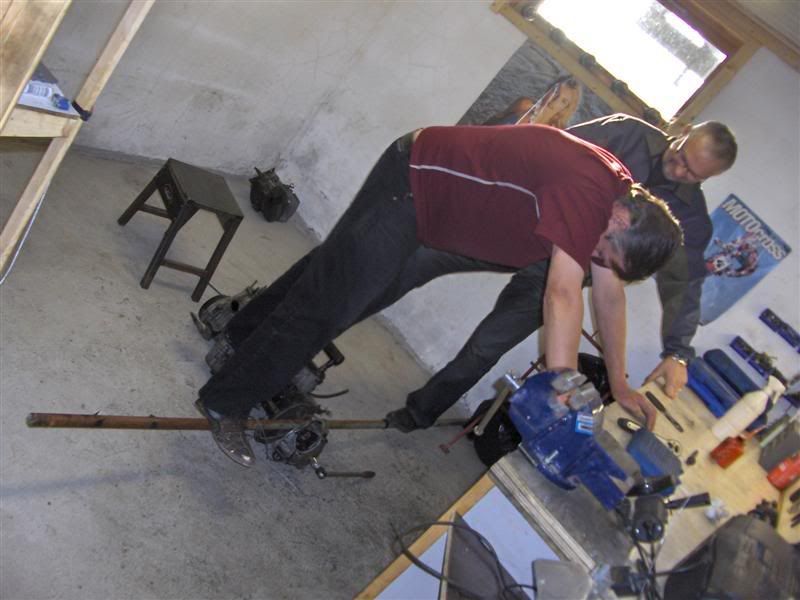
First the primary had to come off. Winded a steel wire around the primary and attached it to the iron pipe, you get the picture... . I hate primaries. My dad and a neighbour had to help me!. (I was the one using the "wrench" that is fitted on the primary, but naturally I couldn`t take the picture while I was torquing the puller)
I`m rebuilding this 1994 V-max 4 750 engine for one of my riding buddies, today I tore into it.
What happened?.
My friend was going slightly uphill and suddenly he lost power and the engine didn`t want to rew, he turned around and then he stopped the engine with the kill switch.
Here`s a pic from when it happened.. . The only good thing about the burndown is that it happened on the last ride of the season!.
Last weekend my friend and his brother removed the engine from the sled and gave it to me.
Here I`m cleaning it!.
First the primary had to come off. Winded a steel wire around the primary and attached it to the iron pipe, you get the picture... . I hate primaries. My dad and a neighbour had to help me!. (I was the one using the "wrench" that is fitted on the primary, but naturally I couldn`t take the picture while I was torquing the puller)
Last edited:
sorry, i don't understand what your do'ing in last picture ")
I`ve made a modified puller because the stock ones gets bent the minute you start torqing them, atleast that`s what I`ve experienced.
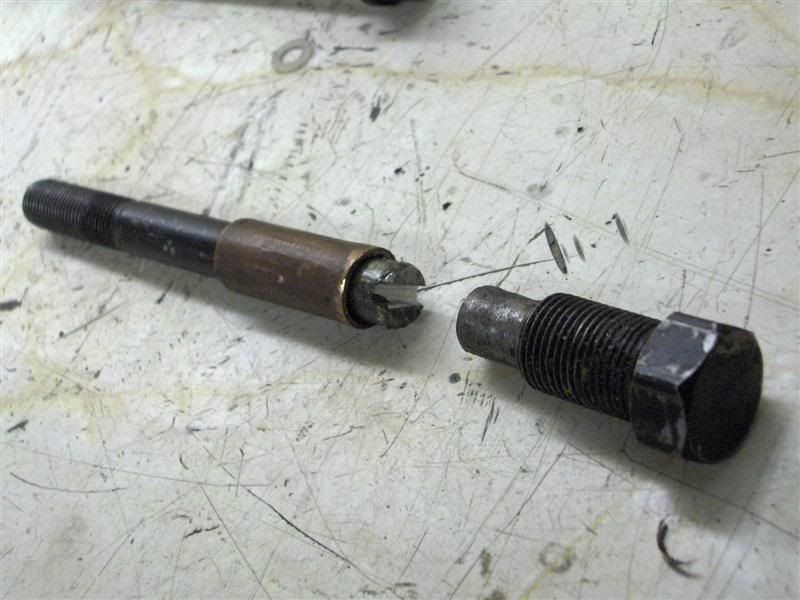
As you can see it`s a cut down primary bolt, I`ve also made a notch in it so that I can screw it in with a flat screwdriver. (the copper tube is slided down only for showing the notch). The copper tube acts as a stabilizer inside the primary to minize the chance of the puller wanting to flex. The cut down standard puller hits the primary bolt and with some torquing the damn thing pops off like a charm!.
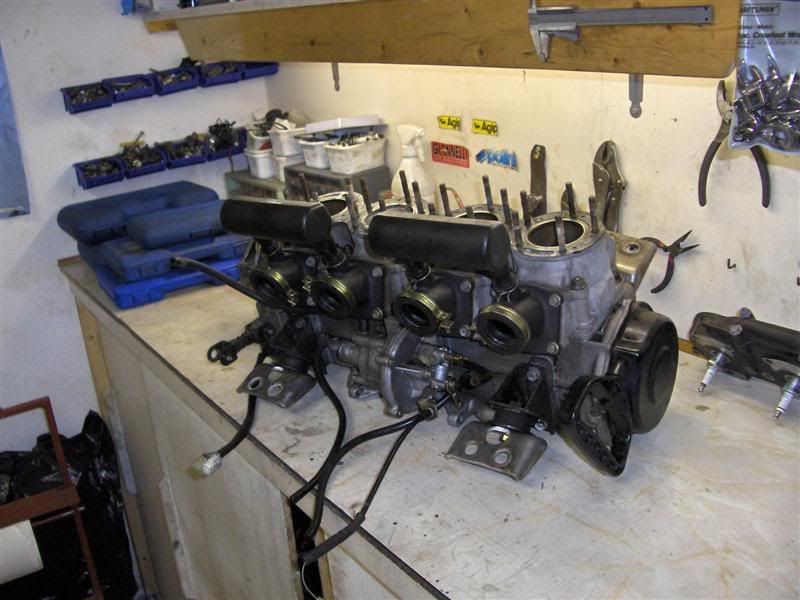
I then removed the starter house, oil pump etc. and all the other "loose" parts.
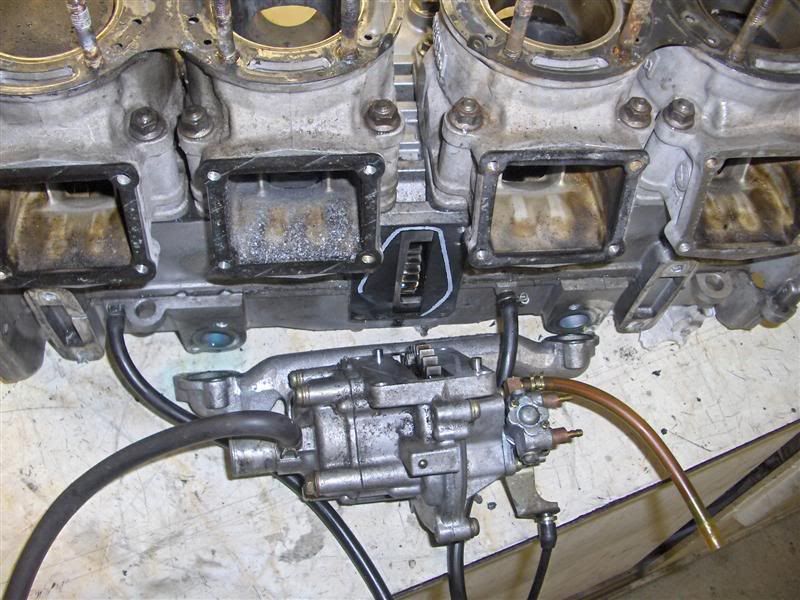
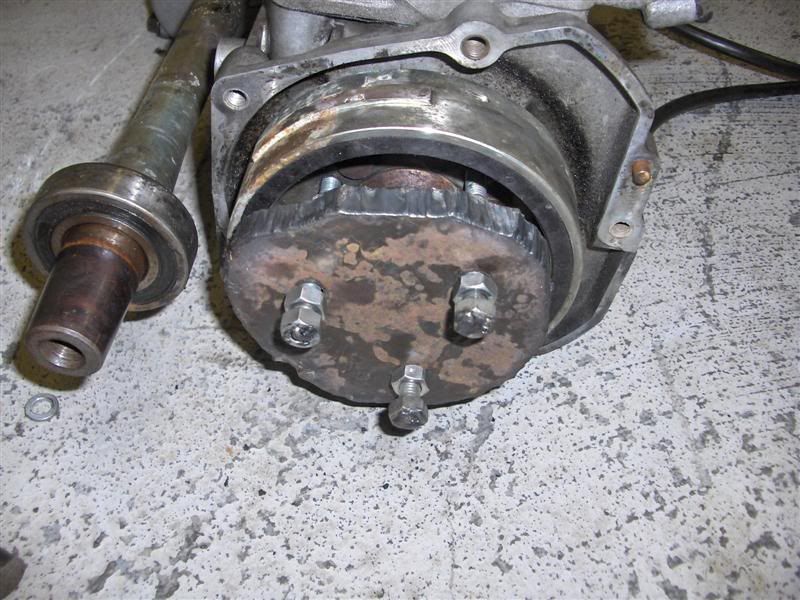
I wonder how this was "built", here you see it.
Next up was the flywheel. I hoped that the puller I made for a V-Max 600 would fit, but it didn`t. Longer distance between the holes on the V-Max 600 puller.
Cut out an iron piece with the blowtorch and then drilled three holes in it, 55mm apart from eachother.
I thought I was ready to remove it, but then I discovered that the bolts I put in the puller-plate would hit the crankhouse if I tightened them, so I had to make special screws for the puller:
Had to be threaded all the way.
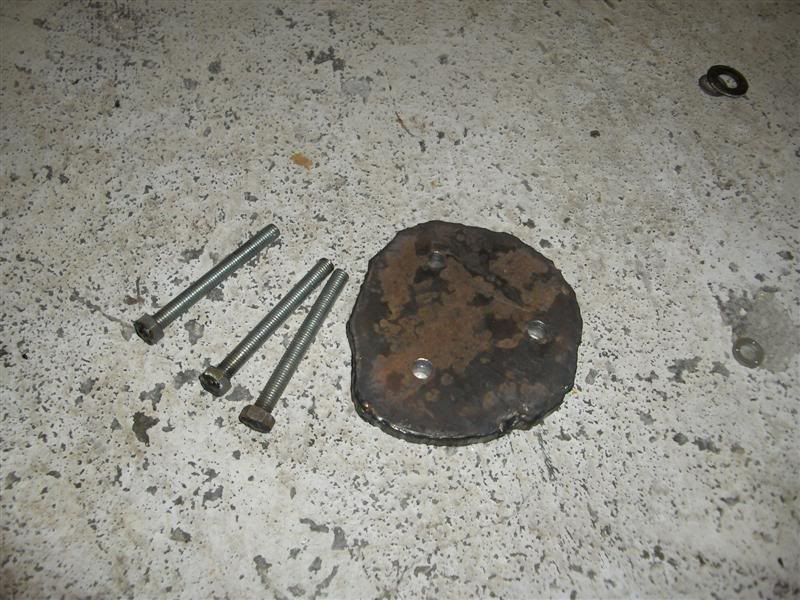
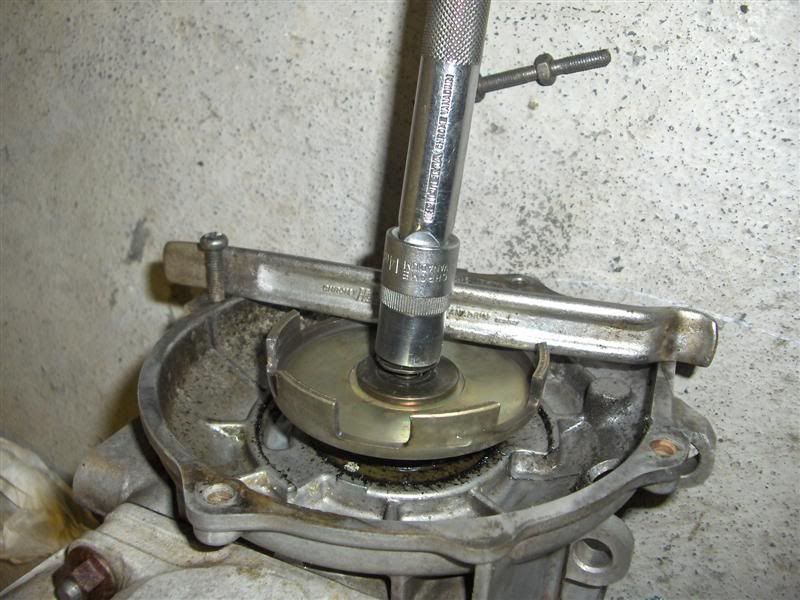
The puller plate with screws.
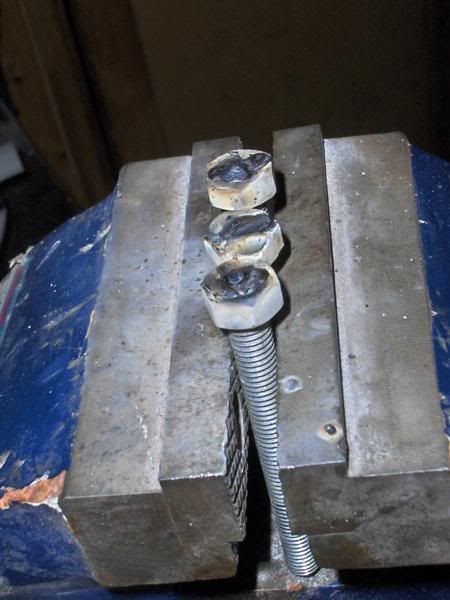
Here you see how it works. Tighten the nuts and then hit the plate with a hammer. Popped off easily.
As you can see it`s a cut down primary bolt, I`ve also made a notch in it so that I can screw it in with a flat screwdriver. (the copper tube is slided down only for showing the notch). The copper tube acts as a stabilizer inside the primary to minize the chance of the puller wanting to flex. The cut down standard puller hits the primary bolt and with some torquing the damn thing pops off like a charm!
.I then removed the starter house, oil pump etc. and all the other "loose" parts.
I wonder how this was "built", here you see it.
Next up was the flywheel. I hoped that the puller I made for a V-Max 600 would fit, but it didn`t. Longer distance between the holes on the V-Max 600 puller.
Cut out an iron piece with the blowtorch and then drilled three holes in it, 55mm apart from eachother.
I thought I was ready to remove it, but then I discovered that the bolts I put in the puller-plate would hit the crankhouse if I tightened them, so I had to make special screws for the puller:
Had to be threaded all the way.
The puller plate with screws.
Here you see how it works. Tighten the nuts and then hit the plate with a hammer. Popped off easily.
Here`s how I stopped the starter-hook-plate from rotating.
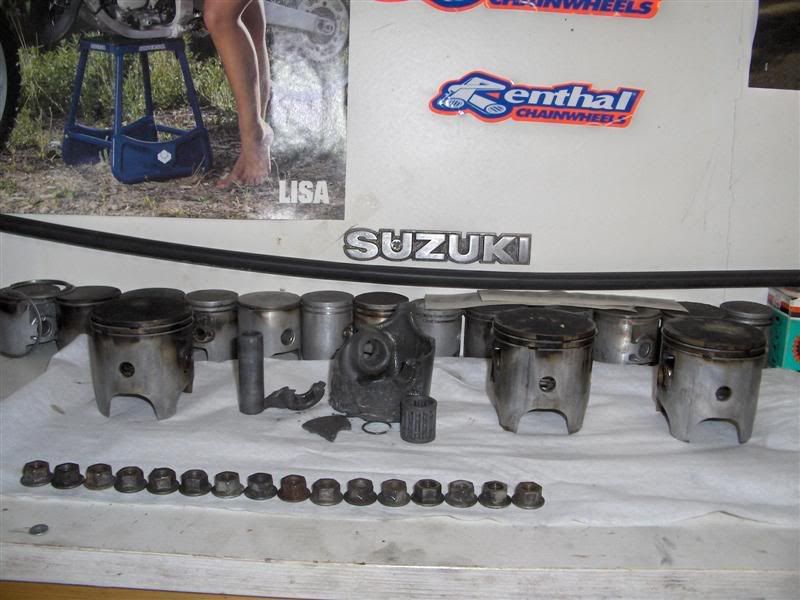
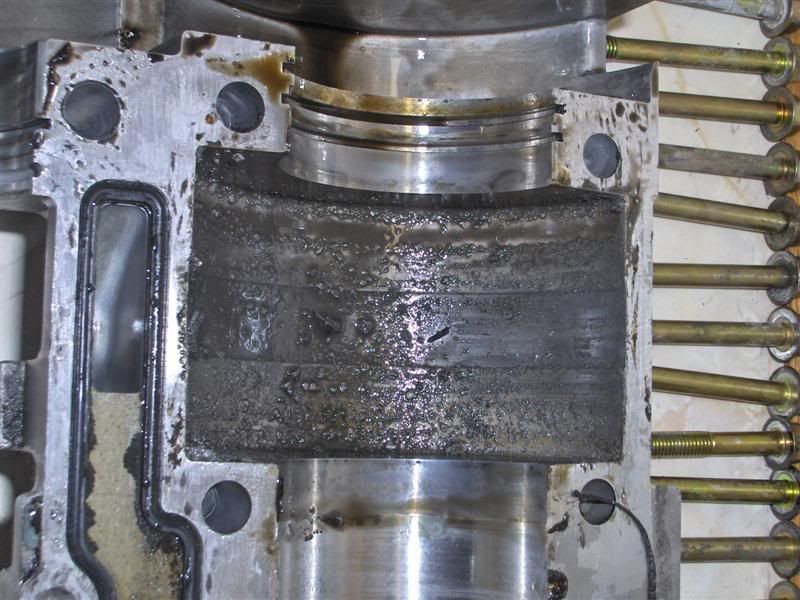
Then I removed the cylinders & pistons. The burned down piston was really stuck, didn`t manage to remove the cylinder so I had to hit the piston downwards in the cylinder until the piston pin came clear of the cylinder skirts, then I removed the pin and that way I got the cylinder off. I then hit it the piston even more with a large hammer (although being carefull) in order to get it out of the cylinder. Gees.
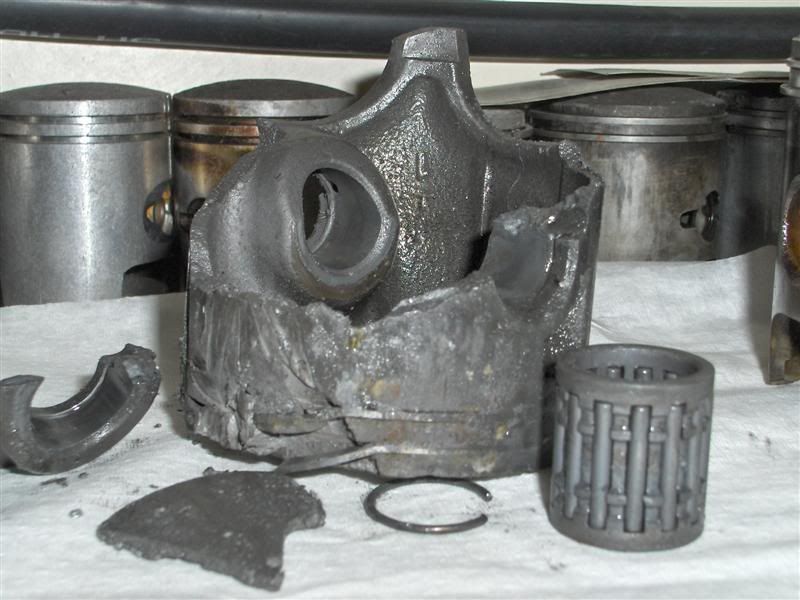

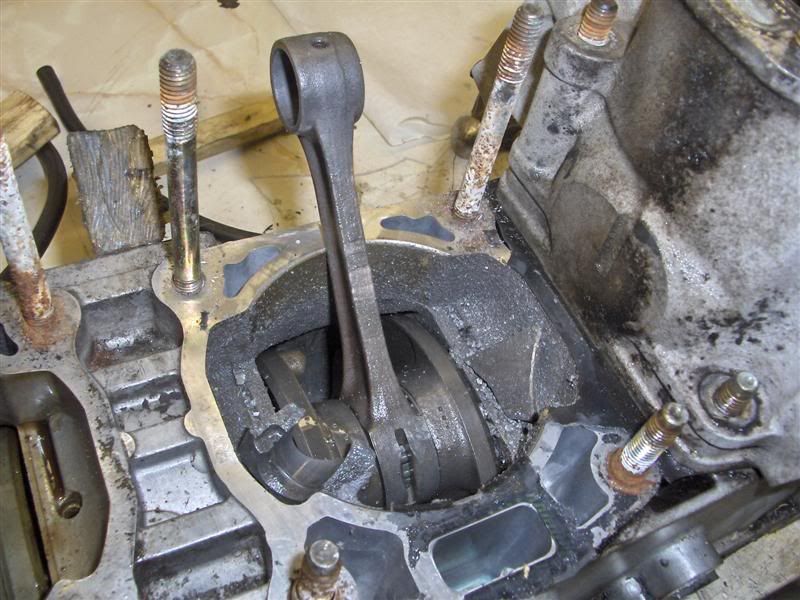
Messy !. Looks like the piston pieces have been crushed into small pieces because the only loose bit I found was the one you can see in this picture.
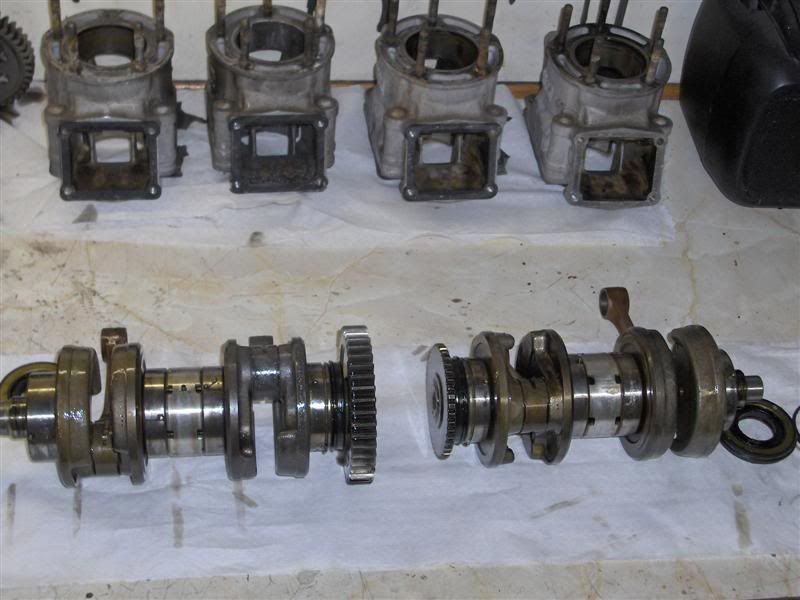
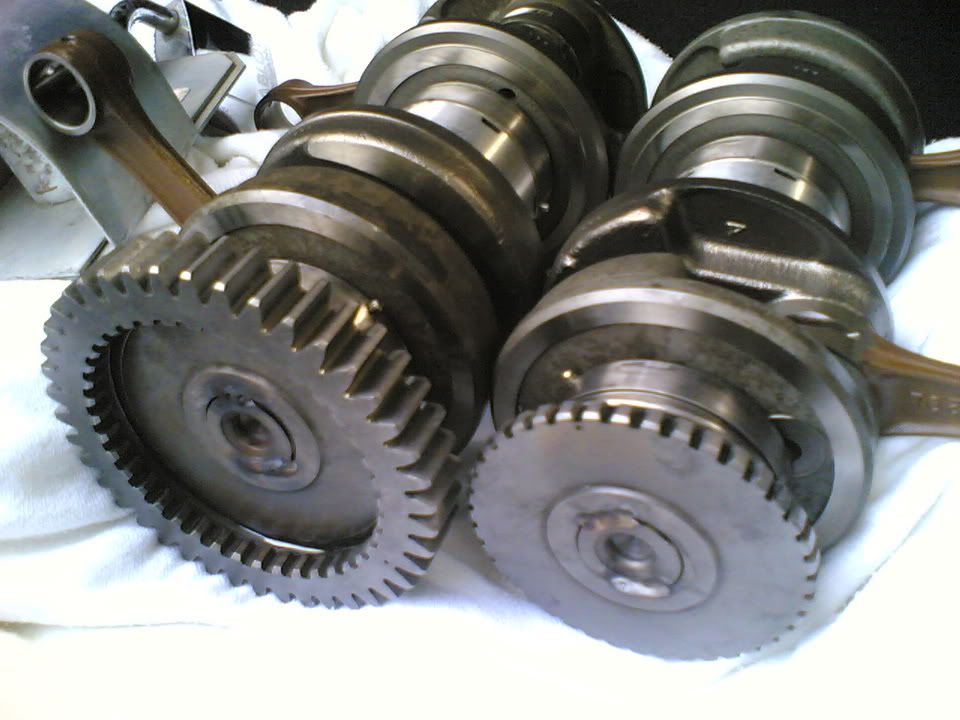
Here`s the crank. One thing I wonder is how you replace the seals that are behind the gears?.
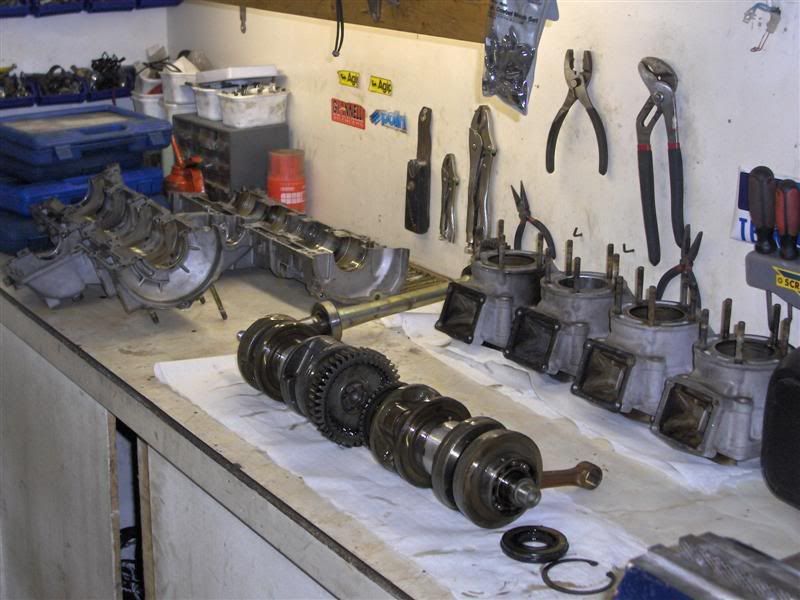
Full of metal debris.. .
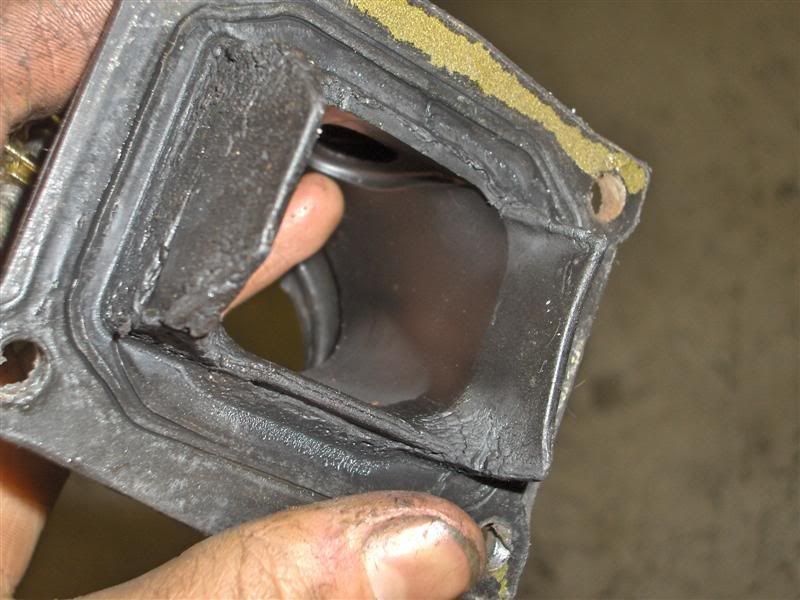
The inlet rubber seemed very hard and "bad" , I think he need new ones!.
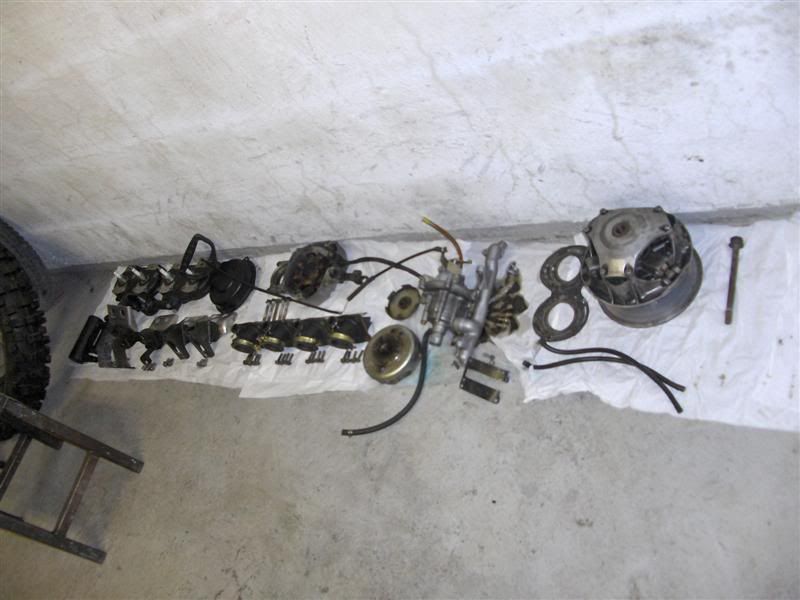
The other removed parts.
I measured the piston ring end gap on cylinder nr. 3 (random choice). I was able to get a 0.70mm "feeler gauge blade" in the gap (the ring was fitted in the cylinder).
That is WAY to much right?.
I didn`t measure all the pistons, but I guess they are about equally worn.. .
I also tried to measure the piston to cylinder clearance, was able to squeeze a 0.30mm feeler gauge between the piston cylinder (from the top of the cylinder).
That is also way to much right?.
Guess I will have to order some parts from Rich now.. 4 new pistons, one new cylinder, gaskets etc. can`t to start putting it back together!!!.
Oh by the way I`m sorry for writing so much, I don`t know why I do it.. .
Wellwell
.Joakim.
yamyrider
Active member
Wow, you have alot of work ahead of you with that motor.
Keep us posted and good luck.
Keep us posted and good luck.
Hey man!
I`m planning to just clean everything really well, then replace all pistons/rings/pin bearings, and ofcourse also the ruined cylinder, and then rebuild it with new gaskets and seals ofcourse.
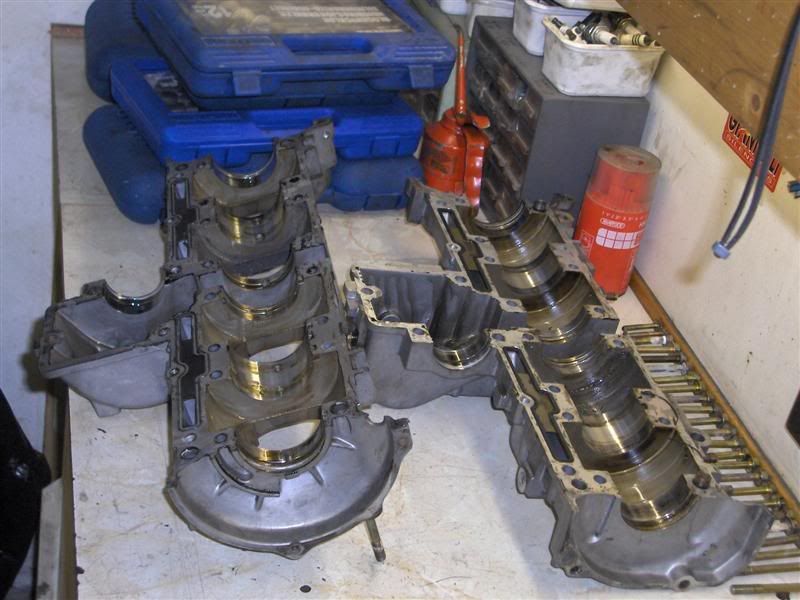
I hope that the crank is OK, it seems allright. My guess is that this was a sudden breakdown, a normal burndown is worse for the crank I think, since it runs a while without lubrication (if to little oil was the reason for the burndown) and then both the piston/cylinder/crank goes to hell.
In this case I think the piston skirts suddenly broke off and therefor the engine hasn`t been running for a long time with debrise in it. However I`m only guessing... hehhehe. So basically I don`t know.. but.. the crank seems fine, normal side to side slack but no play up/down.
What do you guys think?.
I`m planning to just clean everything really well, then replace all pistons/rings/pin bearings, and ofcourse also the ruined cylinder, and then rebuild it with new gaskets and seals ofcourse.
I hope that the crank is OK, it seems allright. My guess is that this was a sudden breakdown, a normal burndown is worse for the crank I think, since it runs a while without lubrication (if to little oil was the reason for the burndown) and then both the piston/cylinder/crank goes to hell.
In this case I think the piston skirts suddenly broke off and therefor the engine hasn`t been running for a long time with debrise in it. However I`m only guessing... hehhehe. So basically I don`t know.. but.. the crank seems fine, normal side to side slack but no play up/down.
What do you guys think?.

Have that crank welded while you have the engine torn down.
Hmm... I`ve heard people talking about that before. Where do they weld them?. (like, where on the crank?).
I`m getting more and more sure that the reason for the piston failure was that the clearance between the cylinder/piston was to great. Am I wrong?.
Like I said, 0.30mm clearance, that is much!.
I`m getting more and more sure that the reason for the piston failure was that the clearance between the cylinder/piston was to great. Am I wrong?.
Like I said, 0.30mm clearance, that is much!.
bluewho
Active member
i 2nd that its so easy for them to get out of phase after a melt down and will mean more work in the end.vmax4rules said:Have that crank welded while you have the engine torn down.
Here is what i did.
Remember to remove some material before welding.
Remember to remove some material before welding.
Hi Reimond!
Thanks for posting the pic!. Is the weld the one that holds the gear to the crank shaft?. If that is the case, the crank is already welded on my friends V-Max 4 !.
I might be stupid but I can`t see any other welds in the picture.. ?.
Hmm
Thanks for posting the pic!. Is the weld the one that holds the gear to the crank shaft?. If that is the case, the crank is already welded on my friends V-Max 4 !.
I might be stupid but I can`t see any other welds in the picture.. ?.
Hmm
Hey guys!. Huge shindig yesterday?. WAKEUP ! .
Another question: When the cylinder to piston clearance is to great, can it be solved by only changing the pistons?.The pistons are softer then the cylinders right?.
How do you change the seals behind the gears?. Are the included in a gasket kit?.
.Another question: When the cylinder to piston clearance is to great, can it be solved by only changing the pistons?.The pistons are softer then the cylinders right?.
How do you change the seals behind the gears?. Are the included in a gasket kit?.
HI,
You will get more good tips from Vmax4.com messageboard if you ask from there.
-Yes, you need to weld those gears but if it's doen you are ok.. but,
-You need to push gears out to replace those sealings.
You will get more good tips from Vmax4.com messageboard if you ask from there.
-Yes, you need to weld those gears but if it's doen you are ok.. but,
-You need to push gears out to replace those sealings.
Hi man!
Ok... yes the gears are already welded.. guess it means that the engine has been apart before.
So, in order to change the seals, the weld has to be grinded down and the gears pulled off the axle?.
Is it stupid not to change the seals when rebuilding the motor?. I`m a huge fan of changing all seals.. . The seals looks OK, but after 13.000km and 12 years of function, they might need to be replaced. On the other hand they might last for 12 years more.. .
Should I replace the seals or not?. Will I need an hydraulic press to get the gears off?.
Ok... yes the gears are already welded.. guess it means that the engine has been apart before
. So, in order to change the seals, the weld has to be grinded down and the gears pulled off the axle?.
Is it stupid not to change the seals when rebuilding the motor?. I`m a huge fan of changing all seals.. . The seals looks OK, but after 13.000km and 12 years of function, they might need to be replaced. On the other hand they might last for 12 years more.. .
Should I replace the seals or not?. Will I need an hydraulic press to get the gears off?.
Yes, Replace. And don't give too much heat for them when welding it back together.
OK man!.
Do the gears sit on a cone or spline?. Will I have to grind the weld down and then pull the gears of?.
How much force does it take to push them off?.
Thanks for all the info you have given me !
Do the gears sit on a cone or spline?. Will I have to grind the weld down and then pull the gears of?.
How much force does it take to push them off?.
Thanks for all the info you have given me !

don't forget to check that exhaust real close for piston debris........It would be a lot of work down the tubes!