rx1jim
New member
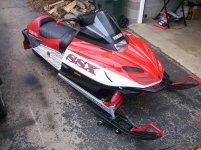
I have started this project way to late in the year, being so close to the start of the riding season. But better late the never! I am rebuilding this sled for my son to ride this season. He has been riding a 1993 Exciter II for the past two seasons and he has outgrown it. I'll post new pictures as I make progress. OK, here goes.....
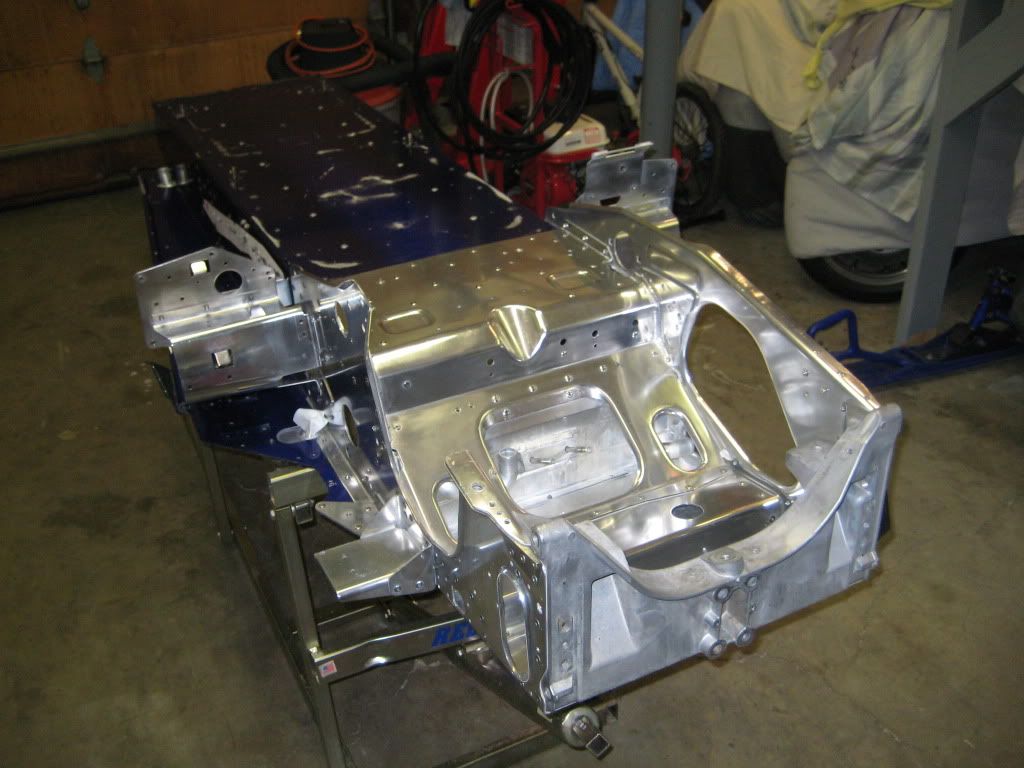
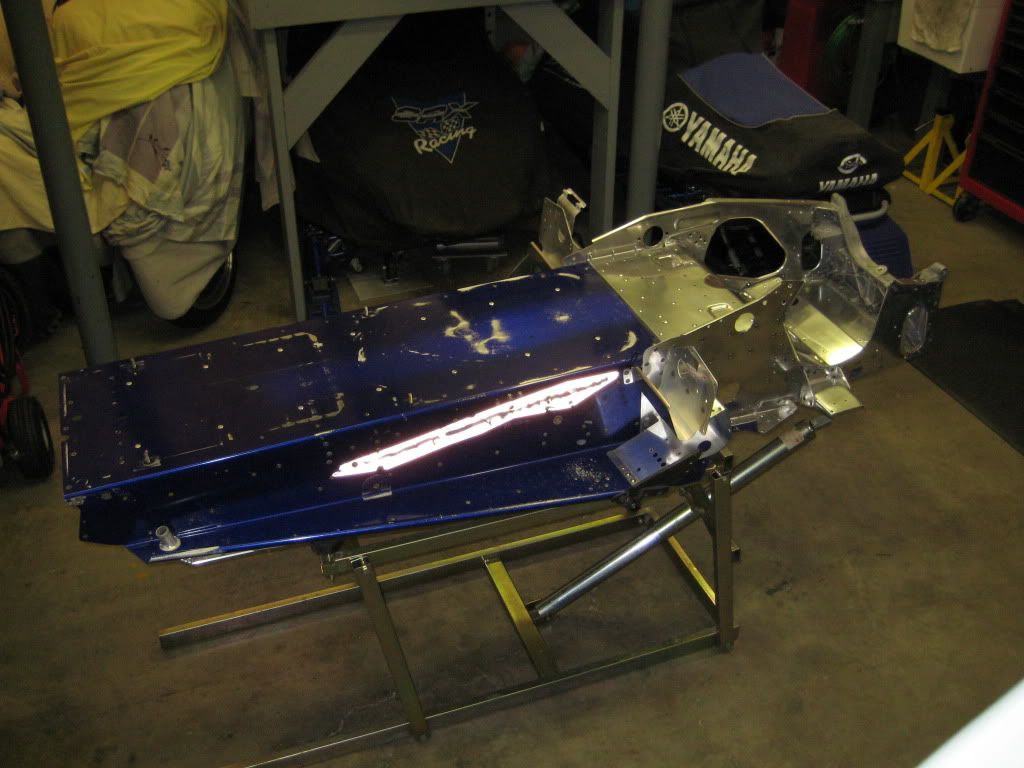
These two pictures are the bare chassis. I have more po;lishing of the aluminum to do and will have the tunnel prepainted with the Yamaha blue paint:
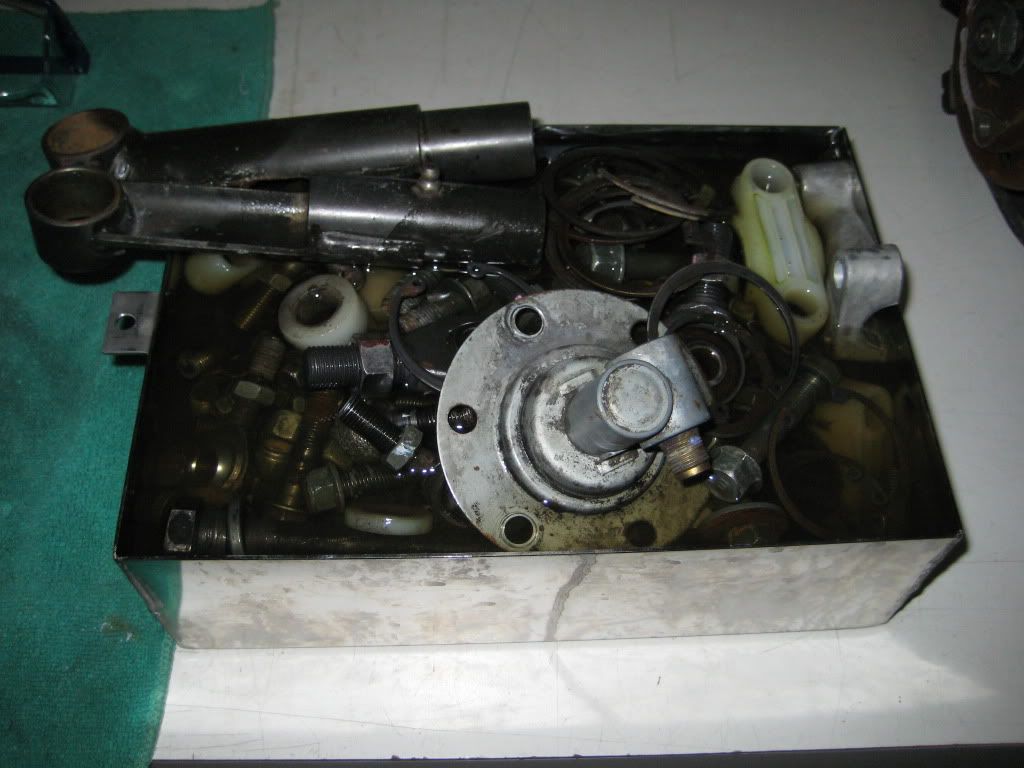
This container holds every nut, bolt and misc. piece of hardware. Soaking in solvent to clean off the accumulated grease and crud:
Here is the engine. It has cylinders which were trail ported by Justin Fuller of Full Power Performance. I bought a set of new cylinders to return the engine to stock.
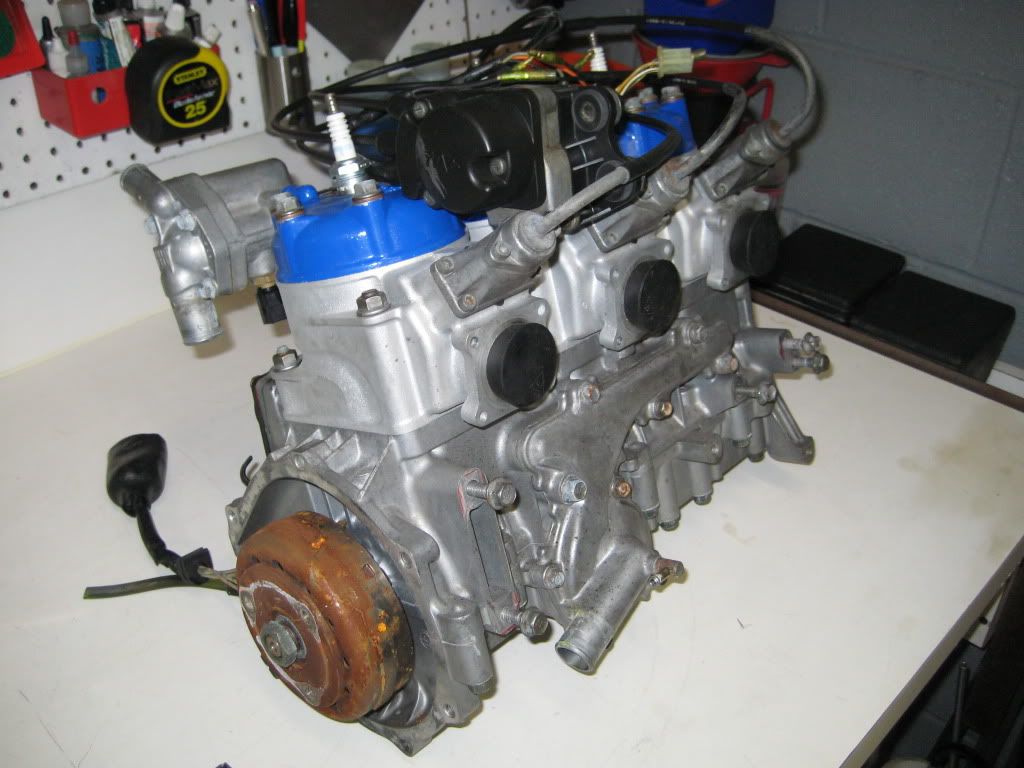
As soon as I have all the chassis parts cleaned, grit blasted and delivered to the powder coater, I'll start work on the engine.
These two pictures are the bare chassis. I have more po;lishing of the aluminum to do and will have the tunnel prepainted with the Yamaha blue paint:
This container holds every nut, bolt and misc. piece of hardware. Soaking in solvent to clean off the accumulated grease and crud:
Here is the engine. It has cylinders which were trail ported by Justin Fuller of Full Power Performance. I bought a set of new cylinders to return the engine to stock.
As soon as I have all the chassis parts cleaned, grit blasted and delivered to the powder coater, I'll start work on the engine.

staggs65
Moderator
looks good, youre actually ahead of me i'm still tearing mine down.. lolI have started this project way to late in the year
what are you doing with the ported setup?
rx1jim
New member
Hello Stagg,
I am going to hold onto the ported cylinders. I may use them on my other SRX. My original SRX has 15,000 miles on it, never had the engine open, original rings. OR if I get another SRX then I have two stock and one setup with the modified engine.
No real progress on the project today. I recieved a braided stainless steel brake line from Galfer to replace the stock rubber line. The brake "feel" with the braided steel lines is so much firmer.
I did not start the grit blasting of the components which will be powder coated. We got a new pressure fed grit blaster, just need to connect the compressed air and fill the machine with garnet media. Hopefully tomorrow afternoon.
rx1jim
New member
I have not made a lot visible progress on the sled rebuild over the last 3 weeks. I was away on a business trip for a week which slowed me down. The powder coating business I have been using screwed me over first tellling me my parts would be done in two weeks then telling me this week they have more important jobs to work on. I had to get my parts back and bring them to another powder coater 2.5 hours away. I brought 225 parts of all shapes and sizes to be powder coated. We installed a new pressure blaster in at work, it worked like a magic eraser getting rid of all paint and rust quickly and easily. I diassembled the engine. No terrible surprises other than I found the seal washer on the water pump impeller failed allowing the coolant to rust the steel impeller drive shaft making it tough to get the impeller off. My orderof OEM yamaha parts came in, $1200 in new parts of all sorts plus some spares. My son tried his hand at repainting the tunnel with the Yamaha blue paint. It came out pretty bad, we learned painting is pretty tricky so I am going to strip all of the paint and have an auto body shop repaint it for me. Who knows how much this is going to cost. This project is turning into a money pit but when I am done I have a 2000 SRX is better than new condition. Plenty of other items to work on while I wait for my parts to come back from the powder coater:
- clean, measure and inspect all engine parts
- engine reassembly
- diassemble, clean, inspect and rebuild the clutches
- strip the paint from the tunnel and repaint
- finish polishing the aluminum bulkhead
- order the last few parts
I'll post pictures as soon as the reassembly begins.
Happy holidays to all, enjoy the holiday season since it is over too quick!!
staggs65
Moderator
how about stripping and polishing the tunnel, save the painting cost? unless your looking to do an origional resto
rx1jim
New member
Hello Stagg,
I am just trying to restore the sled to a very clean condition. I am not going the original restoration route. After looking at your pictures I am thinking of going with the polished tunnel. This would also make it easy for me to remove the new paint job without huting my son's feelings. He really worked very hard on it trying to help me but it just did not turn out good.
What did you use to strip the paint from the tunnel? I can buy ZipStrip paint remover from the local paint store, I hope it will work quickly.
Thanks!!
staggs65
Moderator
i started with zipstrip which worked fine but i only had enough for one side, went down to the hardware store they had tailstrip finished with that. both worked fine, let it set then take the paint off with steelwool so you dont scratch it with a scraper, first application took off 95% of it second got the rest

!") If you want to strip the paint off the tunnel use aircraft stripper in the gel form you can buy it by the gallon or quart can it took 2 quarts to take the paint off my 98 sx project sled. Then I took a 4-1/2" grinder and a felt buffing flapper wheel with brown rouge and cleaned it up with that also used a little fine grit 2000 sand paper to smooth out any nicks in the chassis. Good luck it takes time but worth the effort.
If you want to strip the paint off the tunnel use aircraft stripper in the gel form you can buy it by the gallon or quart can it took 2 quarts to take the paint off my 98 sx project sled. Then I took a 4-1/2" grinder and a felt buffing flapper wheel with brown rouge and cleaned it up with that also used a little fine grit 2000 sand paper to smooth out any nicks in the chassis. Good luck it takes time but worth the effort.Attachments
rx1jim
New member
I am going to go out and buy the paint stripper, pretty much decided to go with the polished tunnel. What should I buy for polishing supplies and should I be able to get the polishing supplies from an auto body supply store? I have no experience with polishing. Thanks!!!
rx1jim
New member
For those folks who have used paint remover to strip the tunnel, what did you do to get the stripper out from the nooks and cranies so it doesn't ooze out over time and mess up the finish? I am thinking I will wash the sled with paint thinner and pressuer wash the entire sled. Thanks!!
I just pressure washed the entire chassis after I got done and blow dried it.
As for polishing supplies you can get the rouge at parts stores or I also have seen it at our local Peterbilt dealer. I order mine from Eastwood company in a kit for $40 which included some polishing wheels for a drill. I got the felt flapper wheel from eastwood also but they have discounted handling them because I wanted to order somemore because they worked so well. I did take the one I bought to my local Fastenal dealer and they were able to order me some but I had to buy a box of 5 of them at $16 a piece which was cheaper than eastwood they were $25 apiece there. If you are interested in try the felt flapper wheel let me know I would part with a couple of them for what I have in them plus shipping. When using the rouge there is different compound and they are a differnt grit so you have to use a different wheel for each compound. I take a GOOD angle grinder to use them also take alot of power I bought a Dewalt 7.5 amp and it really made it work HARD should of got the 10 amp. Good Luck
rx1jim
New member
Thank you very much for the advice and help. I am heading out to see what supplies I can find. Nest step is to remove the heat exchangers then onto stripping the paint. Lots of work to do too close to the start of the season.
staggs65
Moderator
x2 also sears and lowes carry buffing suppliesI just pressure washed the entire chassis after I got done and blow dried it.
rx1jim
New member
Small forward progress
OK, All the remaining parts are now at the powdercoater and I have decided to strip the paint from the tunnel and polish it. Many thanks to the members who have been giving me advice on the tunnel polishing.
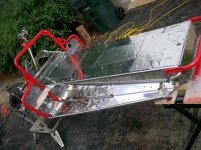
Here is a picture of two tools I made to install the water pump seal and the oil seal in the lower crankcase half. The water pump seal tool has the seal sitting in it. I chucked the impeller shaft in a lathe and polished it with some a red scotchbrite pad and then some metal polish to remove the rust. The seal washer failed allowing coolant to contact the impeller shaft.

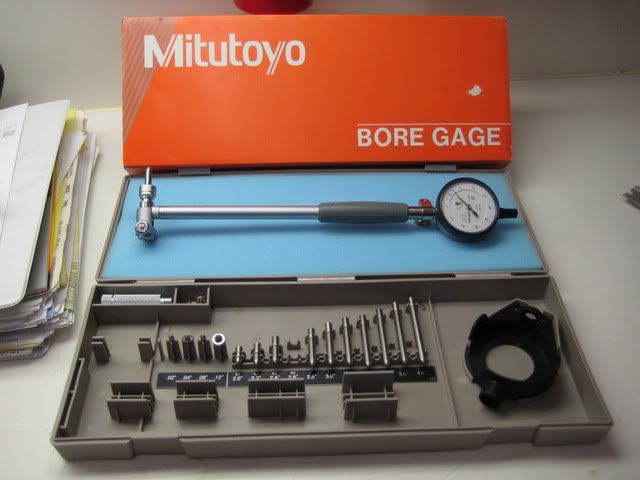
The next picture is a tool I bough to measure the cylinders. It is a bore gauge which I'll use to measure bore dia. and taper. I was not cheap but I figure with 5 sleds and 2 street bikes, I'll put it to good use over time.
This is my sandblaster cabinet which I need to work on, it is not working right now. I'll use it with glass beads to clean up the engine cases, external surfaces of the cylinders and other aluminum engine parts. Glass beading the aluminum engine parts really cleans them up nice, they look brand new. The glass beads work well for cleaning without removing aluminum.

Lastly, here is how I have started to clean my power valves. I put them in warm ATF. NOSBOY says the ATF will loosen up the carbon deposits. I put the valves in the ARF an dheated it to about 100 deg. C. for 30 min.. We'll see how loose the carbon deposits are after this treatment.

Tomorrow I will do some shopping to get the paint stripper and aluminum polishing supplies.
OK, All the remaining parts are now at the powdercoater and I have decided to strip the paint from the tunnel and polish it. Many thanks to the members who have been giving me advice on the tunnel polishing.
Here is a picture of two tools I made to install the water pump seal and the oil seal in the lower crankcase half. The water pump seal tool has the seal sitting in it. I chucked the impeller shaft in a lathe and polished it with some a red scotchbrite pad and then some metal polish to remove the rust. The seal washer failed allowing coolant to contact the impeller shaft.
The next picture is a tool I bough to measure the cylinders. It is a bore gauge which I'll use to measure bore dia. and taper. I was not cheap but I figure with 5 sleds and 2 street bikes, I'll put it to good use over time.
This is my sandblaster cabinet which I need to work on, it is not working right now. I'll use it with glass beads to clean up the engine cases, external surfaces of the cylinders and other aluminum engine parts. Glass beading the aluminum engine parts really cleans them up nice, they look brand new. The glass beads work well for cleaning without removing aluminum.
Lastly, here is how I have started to clean my power valves. I put them in warm ATF. NOSBOY says the ATF will loosen up the carbon deposits. I put the valves in the ARF an dheated it to about 100 deg. C. for 30 min.. We'll see how loose the carbon deposits are after this treatment.
Tomorrow I will do some shopping to get the paint stripper and aluminum polishing supplies.
staggs65
Moderator
let us know how the atf bath works
rx1jim
New member
Tha ATF bath did not help much. There are no miracle cures for removing the carbon deposits on the power valves. Some of the deposits were easy to remove but I still had to use the old elbow grease technique. Can't say that the ATF did any good. I scrubbed them with a wet green scotchbrite pad along with the Fast Orange hand cleaner. It took about 10 min. of scrubbing per valve to get them clean. They are now spotless and ready to install (if only I had the rest of the sled together).