
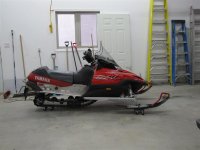
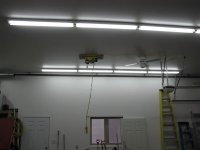
First I started with a call to Rich Motorsports to get the track and the Hartman kit.Then I went down to the local hardware store to get some long bolts to secure my electric winch to the ceiling that was siting around for six months. 
Attachments
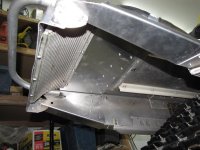
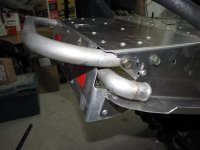
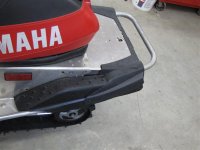
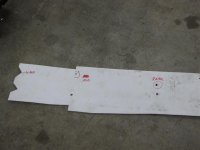
I removed the rear bumper and heat exchanger/snowflap folder. Had to do some readin on how the tunnel ext went on . Found out that the exhanger would not fit in the new ext  .Did some measuring and thinkin. Came up with this: Removed three inches from the new ext. Made the cooler holes larger.Fabbed a couple of small brackets from the cut offs and mounted the old snowflap holder with the exchanger at the end of the ext. Kind-of looks factory
 !")
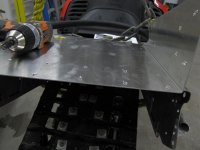
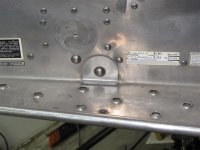
De burring all the drill holes fun to do
. Found out that the exhanger would not fit in the new ext .Did some measuring and thinkin. Came up with this: Removed three inches from the new ext. Made the cooler holes larger.Fabbed a couple of small brackets from the cut offs and mounted the old snowflap holder with the exchanger at the end of the ext. Kind-of looks factory De burring all the drill holes fun to do
Attachments

Truckkid42
New member
keep posting i plan on doin the exact same thing in the spring, this may just be the write up i use ") thanks. use many pictures lol
thanks. use many pictures lol
thanks. use many pictures lolI also put on a 136 X 1.25 on my son's Viper this year. I used Track USA extention though. Very easy install. I did however drill a hole in the extension for the bleed screw. I wished I could have covered the coolant hoses better though. I did reinstall the original cover but this only covers partial now. What are your plans? If nothing else the machine looks better in my opinion, handles the deep snow great also. Al

staggs65
Moderator
looks good
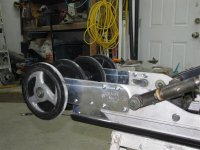
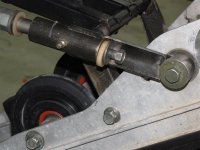
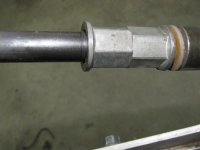
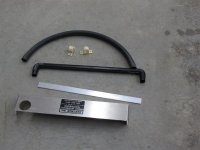
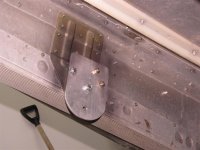
Took the skid out now and installed the rail ext.kit with the added hyfax ext. as well.I clamped the ext. on as per the instructions drilled the holes and bolted everything on using red loctite on the bolts
Attachments
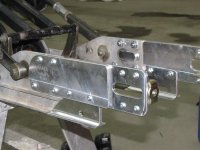
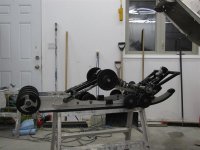
Forgot to mention . I adjusted the transfer rods to the second ring as per instructions and the limiter straps. Installing the skid I bolted the front then rear and then lossened the transfer rods and got the middle bolts in.Here I used blue loctite. The tranfer rod trick was an excellent trick for the middle bolts.Who ever posted this in another thread I read
Attachments
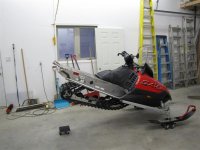
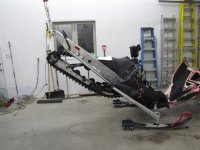
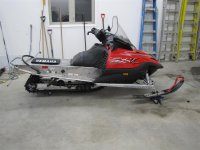
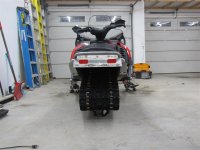
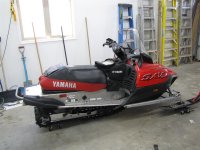
So here's the way it sits as of last night. The tunnel and rail ext's in place. Not sure which snowflap to use yet. Still need to hook up the rear exchanger and mod up some covers. Add some closed cell foam to the seat and build a seat riser.
Attachments
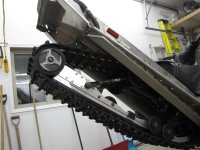
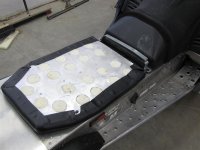
Put the the cooler hose covers on. Frankenstein'd the original and the Hartman ones into one piece. Remove the front half of the seat cover and added 2 inches of closed cell foam to the seat. Re stapled the cover down again with an air stapler. Made a 1.5" seat riser from aluminum and foam. Made a stap for the front of the seat from galvanized strapping.Stepped the strap so the seat would not shift back and forth.
Attachments
I like how the sled is comming. What track did you use? The seat riser is nice also. I plan on installing one of the Boss Seats on the Viper and testing it out. I really like the hose covers, did the side covers come from Hartman? Al
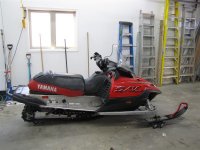
Went with the Ice Attack. The hose covers are a combination of Hartmann and OEM. A little chop,cut and rebuild to look as one piece.
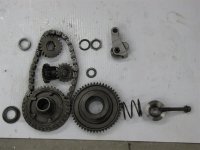
Got the beast running today . Finally! Broke a carb float while cleaning the carbs. Kirk700 srx helped me out big time with a replacement float
Dang cold out today so I rigged up an exhaust sytem so I could run it in the garage without any smell finding its way into the house. I had a 250cfm exhaust fan in my garage already that I use when it gets a little stinky in there. Got some 4" aluminum flex and a 3" elbow. The elbow is almost a perfect fit for the exhaust pipe. The 4 inch flex allows air to come in along with the exhaust and keeps the flex cool. Sounds a little strange not hearing the exhaust pounding the concrete.
Dang cold out today so I rigged up an exhaust sytem so I could run it in the garage without any smell finding its way into the house. I had a 250cfm exhaust fan in my garage already that I use when it gets a little stinky in there. Got some 4" aluminum flex and a 3" elbow. The elbow is almost a perfect fit for the exhaust pipe. The 4 inch flex allows air to come in along with the exhaust and keeps the flex cool. Sounds a little strange not hearing the exhaust pounding the concrete.
Attachments

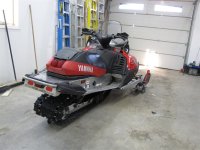
Got the drop brackets in. Made a make-shift template of the oem holes and then rotated it down 2" and marked the holes for the drop bracket and the center skid mount. The skid now sits flat on the floor.Can actually adjust the skid with the limiters not sucked up all the way. Hope to test this soon. Blizzard coming tonight ,maybe.
Attachments
Last edited:
progold
New member
did you have a haed time getting the drive axel out?
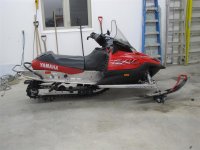
SRX it is
New member
Sweeet
Really nice build. It looks great, keep up the good work. I'd like to know how it handles.
Really nice build. It looks great, keep up the good work. I'd like to know how it handles.
progold said:did you have a haed time getting the drive axel out?
Not really. Just take enuf parts off and it comes out fairly easy.
SRX it is said:Really nice build. It looks great, keep up the good work. I'd like to know how it handles.
Handles really well in a straight line and over the bumps. Just trying to find the bite for skis again. Its hard to slide the back end out in the corners.