akracing101
New member
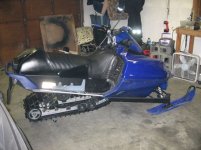
 i just spent the weekend doing a few things to the sled to include painting the tunnel with special textured black paint.
Attachments
MaximaFan
New member
- Joined
- Apr 6, 2004
- Messages
- 74
Looks Nice good job, what kind of handle bars & riser?
JT
JT
Harry Balzonya
New member
- Joined
- Nov 12, 2004
- Messages
- 329
- Age
- 44
- Location
- corner brook,nf canada
- Website
- www.poppaduff.piczo.com
nice job how did u make them foot grips, and i bet that paint on the runner boards looks better in person too. awsome job man
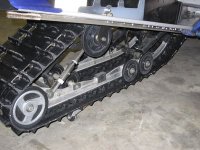
also what did u do to get the suspension to get that high
also what did u do to get the suspension to get that high
madmax
Guest
where did you get those lift brackets?
akracing101
New member
the bars are FLY aero tapered with the rox adjustable riser with a FLY adapter...if you go this route you can get away without having to add cable extentions but i added a longer brake lineMaximaFan said:Looks Nice good job, what kind of handle bars & riser?
JT
akracing101
New member
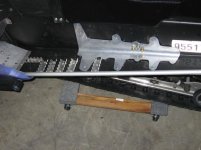
those are rox grips...you can get a pack of 12 for around 30 bucks with rivets included....be careful when positioning and drilling for the the grips so that you dont drill through your heat exchangersHarry Balzonya said:nice job how did u make them foot grips, and i bet that paint on the runner boards looks better in person too. awsome job man
also what did u do to get the suspension to get that high

akracing101
New member
madmax said:where did you get those lift brackets?
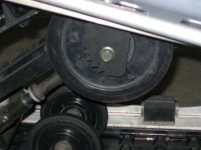
a buddy of mine has a machine shop and custom made the bracket plate for me from carbide steel... theyr very strong and dont flex at all.
p.s. i could probrally make more from the same template now that all is done for mine. PM me if your interested

madmax
Guest
how much relocating was needed?work involved?
akracing101
New member
well the whole procedure involved lowering the two bolts holding the rearmost suspension mount to the tunnel, lift the *** end of the sled and support it with something so that the skid can be brought down. then place the pre drilled mount bracket to the inside of the tunnel, get a good mark from the pilot holes in the bracket using it as a template and drill. my tunnel has reinforcement plates on the inside of it but i added outer tunnel plates just to be sure i am not jepardizing the strength of my tunnel. then i bolted on the upper end of the plates to the tunnel with boltheads on the inside of the tunnel 3 bolts on each side. then remove the outer bushing on the suspension and reassemble. i love the way the sled rides and handles with the new, more aggressive stance!madmax said:how much relocating was needed?work involved?

daman
New member
Wow....she sits up high!!! 

srxbully
New member
not very color cordinated are ya??lol & did you paint the tail light lens?
akracing101
New member
srxbully said:not very color cordinated are ya??lol & did you paint the tail light lens?
i guess you cant possibly say that i may like the colors black and blue for my sled....hopefully not as much for me this season...lol....i did actually paint the tail light sides, top and bottom....it took about 10 coats of spray.


