krellheat
New member
- Joined
- Oct 25, 2006
- Messages
- 35
- Age
- 64
- Location
- Center of the Connecticut Universe
- Website
- www.maplehilltrader.com
To all
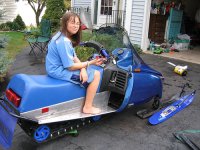
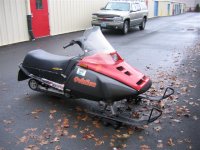
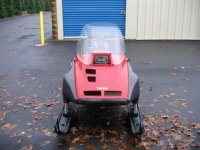
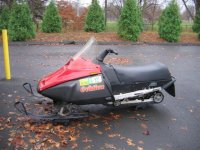
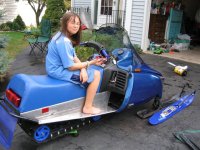
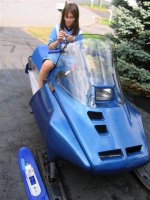
I spent this summer rebuilding an 89 or 90 (can't tell) Yamaha Ovation for a bday present to my daughter. She has outgrown her 120z.
For now, I have the links posted below, but will upload photos here for 'permanent record'.
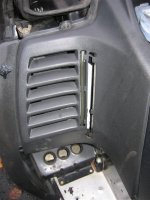
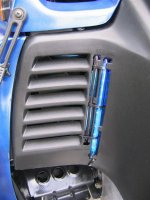
click: Before (red) After (blue)
Complete Teardown and Rebuild
I spent this summer rebuilding an 89 or 90 (can't tell) Yamaha Ovation for a bday present to my daughter. She has outgrown her 120z.
For now, I have the links posted below, but will upload photos here for 'permanent record'.
click: Before (red) After (blue)
Complete Teardown and Rebuild
Attachments
Last edited:
krellheat
New member
- Joined
- Oct 25, 2006
- Messages
- 35
- Age
- 64
- Location
- Center of the Connecticut Universe
- Website
- www.maplehilltrader.com
What I Did (Briefly)
Complete teardown of sled down to tunnel and frame.
Polished tunnel and repainted bulkhead.
Rebuilt skid with new shocks, plastic wheels w/bearings. Powdercoated rails and painted other parts to match.
New track. Old track still good if anyone wants PM an offer.
New skis: Kimpex with 6” Carbides
Rebuilt Carb—easiest carb I’ve ever done!!
New fuel lines and fuel filter. Cleaned oil and gas tank.
New coil. Motor runs purrfect now.
Ceramic coated exhaust and y pipe.
Replaced brake pads and cable.
Rebuilt gear case. Bearings are in excellent condition due to low miles (1500 miles)
Seat cover new one made locally. Replaced plywood support—yes wood!!
Rebuilt and repainted TSS suspension. Struts were replaced by orig owner recently.
Replaced steering handlebar and added heated handgrips and throttle thumb warmer.
Added back lighting to oil and gas level using a rectifer and automotive LED strips.
Replaced insulation dampening material with DynaMat.
Painted hood and side pans (Paint from Lowes close match old Yamaha Blue)
Added tether kill switch and also remote kill switch (www.3built.com)
Replaced windshield.
And replaced a bunch of screws, bolts, nuts, rivets, other parts and where needed.
BTW: Most of the parts needed came from Port Yamaha!!!
Complete teardown of sled down to tunnel and frame.
Polished tunnel and repainted bulkhead.
Rebuilt skid with new shocks, plastic wheels w/bearings. Powdercoated rails and painted other parts to match.
New track. Old track still good if anyone wants PM an offer.
New skis: Kimpex with 6” Carbides
Rebuilt Carb—easiest carb I’ve ever done!!
New fuel lines and fuel filter. Cleaned oil and gas tank.
New coil. Motor runs purrfect now.
Ceramic coated exhaust and y pipe.
Replaced brake pads and cable.
Rebuilt gear case. Bearings are in excellent condition due to low miles (1500 miles)
Seat cover new one made locally. Replaced plywood support—yes wood!!
Rebuilt and repainted TSS suspension. Struts were replaced by orig owner recently.
Replaced steering handlebar and added heated handgrips and throttle thumb warmer.
Added back lighting to oil and gas level using a rectifer and automotive LED strips.
Replaced insulation dampening material with DynaMat.
Painted hood and side pans (Paint from Lowes close match old Yamaha Blue)
Added tether kill switch and also remote kill switch (www.3built.com)
Replaced windshield.
And replaced a bunch of screws, bolts, nuts, rivets, other parts and
 where needed.
BTW: Most of the parts needed came from Port Yamaha!!!
Last edited:
This just reminds me that I did nothing to the ovation that I wanted to use this winter ice fishing......
krellheat
New member
- Joined
- Oct 25, 2006
- Messages
- 35
- Age
- 64
- Location
- Center of the Connecticut Universe
- Website
- www.maplehilltrader.com
dnale said:This just reminds me that I did nothing to the ovation that I wanted to use this winter ice fishing......
Better get moving. After tearing and rebuilding this sled, I could see selling off my newer sleds and getting another Yamaha similar to the Ovation but with more HP.
You did alot more work (made it look alot nicer too!) than what I need. Although I couldn't tell you the condition of the motor since it hasn't had the hood opened in years. I guess I need to whack a deer this weekend so I spend less time hunting.
krellheat
New member
- Joined
- Oct 25, 2006
- Messages
- 35
- Age
- 64
- Location
- Center of the Connecticut Universe
- Website
- www.maplehilltrader.com
Good luck on getting some deer. I probably spent too much time and too much money on it but its for my daughter and hope she'll get a good 5 years out of it. The newer beginner sleds are just too big to handle for kids in the 10 to16 age or those not physically in adult sized bodies.
I'm sure my investment will pay off sledding with her this winter and many more to come. Now if I could get her into hunting...
I'm sure my investment will pay off sledding with her this winter and many more to come. Now if I could get her into hunting...
89 vin# start with 85L or 85N and 90 vin# start with 87D or 87E
krellheat
New member
- Joined
- Oct 25, 2006
- Messages
- 35
- Age
- 64
- Location
- Center of the Connecticut Universe
- Website
- www.maplehilltrader.com
duhr8m said:89 vin# start with 85L or 85N and 90 vin# start with 87D or 87E
Thanks. Its an 89 then.
YamaChris
New member
Nice touch with the backlit fluid levels. That would have been nice back in the day.
Great post. I can move this to the 'working log' forum for you or if you're going to make a new thread with more pics, I would suggest you start it there, may get more hits. 

krellheat
New member
- Joined
- Oct 25, 2006
- Messages
- 35
- Age
- 64
- Location
- Center of the Connecticut Universe
- Website
- www.maplehilltrader.com
crewchief47 said:Great post. I can move this to the 'working log' forum for you or if you're going to make a new thread with more pics, I would suggest you start it there, may get more hits.
Yes. Please do. That makes sense.
Felix
Done!
Wow!!!
You're a really great DAD, and she truly looks happy on her new ride...Hat's off to you...Took me back a few, well many years to when my father threw the 73 Chaparral keys to me, I was ten. He said if you can start it I can have it. Nothing like it...Many great trail rides await...have a safe season...cheers
You're a really great DAD, and she truly looks happy on her new ride...Hat's off to you...Took me back a few, well many years to when my father threw the 73 Chaparral keys to me, I was ten. He said if you can start it I can have it. Nothing like it...Many great trail rides await...have a safe season...cheers
Last edited:
krellheat
New member
- Joined
- Oct 25, 2006
- Messages
- 35
- Age
- 64
- Location
- Center of the Connecticut Universe
- Website
- www.maplehilltrader.com
She discovered the sled apart in the garage two weeks before her Bday. She helped in the cleaning and rebuilding. And painting as well.
krellheat
New member
- Joined
- Oct 25, 2006
- Messages
- 35
- Age
- 64
- Location
- Center of the Connecticut Universe
- Website
- www.maplehilltrader.com
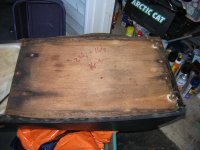
Bottom of seat
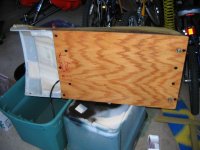
To my surprise Yamaha used plywood for the seat assembly. As you can see in the photo it had almost disintegrated. The wood was still there but the glue holding down the laminates had long since disappeared 18 years later.
I had a peice of Oak the same width and thinkness. Used the original as a template for length and location of holes. Stained it and coated it with polyurathane.
Attachments
krellheat
New member
- Joined
- Oct 25, 2006
- Messages
- 35
- Age
- 64
- Location
- Center of the Connecticut Universe
- Website
- www.maplehilltrader.com
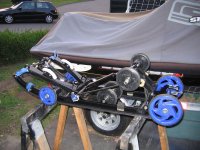
Skid rebuild
I tore the skid down completely. Had the rails powder coated black and painted black all other components of the ski. Replaced all wheels with plastic ones, installed new limiter straps and shocks. I also added inside center wheels. A new track was also added.
I tore the skid down completely. Had the rails powder coated black and painted black all other components of the ski. Replaced all wheels with plastic ones, installed new limiter straps and shocks. I also added inside center wheels. A new track was also added.
Attachments
krellheat
New member
- Joined
- Oct 25, 2006
- Messages
- 35
- Age
- 64
- Location
- Center of the Connecticut Universe
- Website
- www.maplehilltrader.com
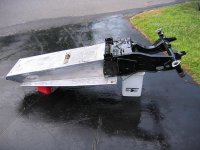
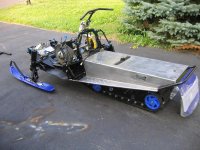
Tunnel
I stripped the paint off the tunnel--not sure if it was original or not--and polished using Flitz and a Flitz ball on a handheld drill. The bulkhead was repainted after removing any surface rust.
Test fitted the barebones chassis with new skis, track, rebuilt skid, and snow flap just to see how it would look.
Attachments
krellheat
New member
- Joined
- Oct 25, 2006
- Messages
- 35
- Age
- 64
- Location
- Center of the Connecticut Universe
- Website
- www.maplehilltrader.com
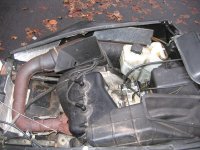
Engine Compartment
Cleaning the plastic and rubber engine compartment parts with a degreaser followed by a bath in Simple Green and then topped off with Armor All appeared to restore them back to original condition.
I had the exhause aluminum ceramic coated. Some benefits of ceramic coating are that it prevents rust, looks like it was chromed, and helps retain heat for the 2-stroke motor.
Attachments
krellheat
New member
- Joined
- Oct 25, 2006
- Messages
- 35
- Age
- 64
- Location
- Center of the Connecticut Universe
- Website
- www.maplehilltrader.com
Tweaks
Some tweaks I did.
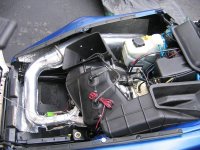
Used aluminum duct tape over the original heat shields.
Added back lighting to the visual oil and fuel indicater for easier reading in low light levels.
Remote kill switch.
Some tweaks I did.
Used aluminum duct tape over the original heat shields.
Added back lighting to the visual oil and fuel indicater for easier reading in low light levels.
Remote kill switch.
Attachments
krellheat
New member
- Joined
- Oct 25, 2006
- Messages
- 35
- Age
- 64
- Location
- Center of the Connecticut Universe
- Website
- www.maplehilltrader.com

