webbe
New member
- Joined
- Sep 19, 2004
- Messages
- 40
will srx pipes as they come fit in the confines of the viper? not worried about hood a little scm and a donor hood to make hood blister hopefully, but not looking to cut up bellypan. how have those pipes worked for you? thanks .
Iceout
New member
- Joined
- Nov 13, 2004
- Messages
- 1
SRX to Viper Pipes..Me Too!
I'm also interested in this retrofit. The Power Inc. pipes on my SXR 700 make great power, but require lots of bumpers and re-fitting from riding rough trails. I'm interested in a better solution for my 2002 Viper. A stock SRX sheilded system sounds like a good idea.
Also, anyone know about J Hall's 165HP single setup?
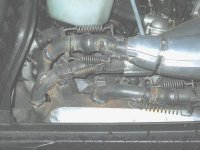
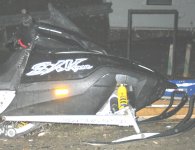
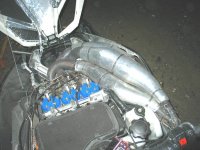
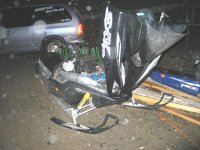
here are some pictures, of the sled in a semi finished state from last year.
the list of things you will need to do this is:
1. 98srx pipes, manifolds, and muffler(aftermarket or stock). Newer pipes have the sliding ends on them and wont give enough room if your using stock muffler. With a can, any pipes will work. An even easier way would be to use newer pipes for the top and outside pipe and a 98 pipe for the middle. This would allow for minute fitting.
if stock muffler is used you will need a srx chain case cover and muffler mount for the frame.
lower and rear muffler mounts. Srx muffler mounts further outboard and lower. You will also need the little metal flap in the footwell or you will have a hot foot.
2. 2001 srx cdi box.
3. Wire with connector to install into your harness for the temperature sending unit to connect to the cdi box. Vipers do not use this to adjust timing curve. I was told srx does adjust with curve but have edited as it is still an unconfirmed question. Since it is unconfirmed, make sure you wire the temp sensor into the cdi box.
4. Resistor in line to trick the gauge into thinking the sled is warm and temp sender is hooked up to it. your gauge will still work as a warning as usual but will be reading through the cdi box .
5. srx jugs and power valves or make flange adapters to go from oval to round ports and make up the distance lost with the viper cylinders. If you use the srx jugs you should port them to viper specs. Why? Why not?
I ran three different cuts of heads and combinations for gaskets. I loved the srx heads for that reason, simple to cut, if you ruin one, your not out a whole head. I ran many version, I believe on trail at the end I had 23cc heads with full gasket though memory may vary. When racing I ran 19 or 21cc heads, 20% toluene and the viper cdi box, shortened pipes, stock muffler and cut heal clickers.
6. For cooling and straight compression you may want to have your head machined, or run srx or mega power heads, this is just an option. For individual heads, you will need to make or buy a water rail. . Mega power and maximum used to sell these.
7. Carburation, I used the srx needles and nozzles as I was having problems and thought that it would help. Not sure as of yet if this is needed. What I know is needed is 40 or 42.5 pilots. Yes these pipes run that small a pilot. I ran the 40 pilots and it ran fine, once in a while the idle would hang up with them in. My slp pipes ran 50 pilots to get rid of this problem and make it run right off idle. I was told pilots are 20% of fuel delivery,?. The mains I was running at the end of the year was 157.5 mains and the sled ran great until it blew apart after 3mile run at wot with. I later found out that dumb *** me had had the viper box in the sled the whole winter. This would explain the blow up and the look of deto on the plugs and exhaust side of pistons. This year I'll check twice to make sure I have the right box in.
In the end, I ran 155 and 153.5 with vents in stock viper carbs with 40 pilots. I never rode below 0 after that and if I had, because it was vented to the box. I could have just pulled the vent and instantly been more than safe. Best mileage I got with this setup the last year, running studs, m10 with extroverts, 8in rear wheel kit was 15mpg.
This was not an easy fit and they do fit tight but it can be done. With the stock srx muffler the sled is quieter than a srx. This is because of all the cones in the airbox(i believe).
This requires some lifting of the hood with a couple blocks in the back inside the grove where it drops over the cowl. I shimmed the front hinge up a little as well. There is some denting of pipes to get them down. The outside pipe needs to be moved out further and forward to allow the top pipe to drop down lower. I also remove a couple covers and dented the pipes in some where they contacted for better fitment. Obviously, I had to cut the ends and reweld for these new angles. The stock muffler was modified to drop down a little lower as well as the inlet pipe angles were changed. The outside inlet pipe was also rolled outward as that pipe moved outward and down. These changes were small, maybe 1/2 inch differences and behind the cone so there is no change to design enough to bother.
In the last year of this sled, I installed reverse with the stock muffler using cable actuation. Just had to cut off the battery ledge a bit. used my park brake actuator to operate it. Another thing Yamaha should have installed from the start.
there is a vent in the cowl that needs a tab cut off. It holds a vent screen. I just left it off. Looks nice from the front seeing the pipe peeking out.
the Belly pan needs a hole. no way around it. Unless you want to run a pipe along your clutch side and use stingers. ( I mocked it up, I will fit) So the pictures below show the bare pipe hanging out. I ran it this way for a year with no issues but wanted it more finished. I loved the look of that pipe hanging out and uses a cover off another pipe re-bent to fit the hole and look like the pipe.
This exhaust system with stock muffler is 12lbs heavier than the stock viper exhaust and probably 20lbs heavier than any other aftermarket exhaust.
These pics are old. Since them I have bought a mega power water rail and installed the factory coolant recovery tank. The fit is much better.
Attachments
Last edited:
98srx6
New member
Hey BETHEVIPER...that looks really cool.
How does it work?
How does it work?
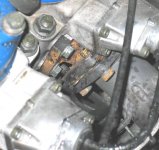
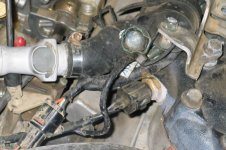
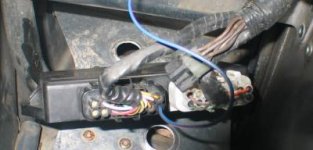
here are some pictures of the dual plug instalation for the temp sensor, one is wired to the cdi, one to the gauge (stock viper location). I made a plug to bypass the viper sender with a sending unit cut in half with a resistor wired in, covered with silicone.
there is a picture of the under side of the shield I made to fill in the belly pan hole.
You can see, using long travel ohlins clickers will not fit after this is done. Be warned. I later ran this sled with sx brackets and short travel ohlins cause the chicks dig it. As you can imagine, handled better and deep bumps were worse.
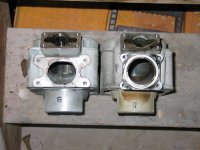
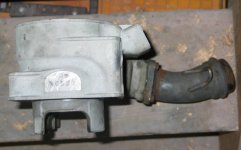
one picture of the comparison of the viper cylinders to the srx cylinder front view, and a side view with a viper cylinder set on top of a srx cylinder to give an idea of the difference in length of port.
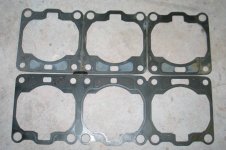
also there is a picture of the different base gaskets the viper one having the large pto side hole. I used the srx base gasket as i used srx heads and pipes.
a note that alot of people have told me that the vipers cooling system pumps in reverse, this is untrue. the viper and srx push water up through the cylinders the same.
Attachments
Last edited:
blue magnaman
New member
scott....yu are one crafty dude....wish yu were my neighbor
Concept Carbon
New member
ttt, so i dont loose it, and otheres can see
Concept Carbon
New member
thanks alot your the best
here is another for a looker
Concept Carbon
New member
bump for info
keeping the memory of my sled alive, r.i.p. black bart
Junior
New member
this was an awesome project. Very good example of a little ingenuity going a long long ways.
good example how ingenuity and a couple mistakes overlooked can cost you thousands of dollars and hundreds of hours durring r+d
Many pistons were harmed in the building of this sled because I had left the Viper CDI box in and was not using the SRX box. * deg more timing. I run piro on the exhaust and could never get the jetting down where I wanted it. Pyro temps with an 8deg change read way different.
Cleaning in the spring I found a box. I am dumb. But It instantly all fell into place. And, I learned alot about timing, head design, cutting my own heads.
Last edited:
Junior
New member
BETHEVIPER said:good example how ingenuity and a couple mistakes overlooked can cost you thousands of dollars and hundreds of hours durring r+d
hehehe, that's the way it goes when you stray that far from the beaten path.
thought i would bring this thread back again, had some people asking
Concept Carbon
New member
bump for info
did you get that carbon viper done yet
Bump for a guy
Bump for a guy
Anyone interested in doing this I have alot of the parts to get this done. The manifold would save a guy alot of time...


