SRXSRULE2
New member
Well I got my sled out of storage this weekend and now its time to get to work! Thanks to Yammapiggy I picked up a 121 Monoshock for my Viper this year and I hope to get it installed over the next few weeks.
First I have researched different threads on here on how to do the swap and I have found that no one has really installed them the same way. So I am asking all User's here for tips to start me in the right direction.
I need to know...
1) Are there any important measurements that I need before I unbolt my proaction? Do I need any measurements from another sled? (the Mono came off an 08 Apex)
2) What front brackets do I need/ which are the best to use? Keep in mind I do not want too much of a fight every time I have to remove the suspension( I know I'm asking for a lot !) I know that Apex brackets will work but are 05 Rx-1 Brackets better?
3) I know I can use the rear holes and they will line up. Would it be better to make a set of drop brackets for the rear so that the skid will sit below the running boards like the Apex? I don't really want to raise the rear of the sled too much, but I was thinking it would make it easier to install the skid.
Pictures to come soon, probably tommorow night If I get a start on it.
SRXSRULE2
New member
Pro-action is out
I spent a few minutes tonight and removed the pro-action from my viper.
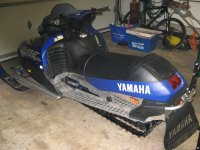
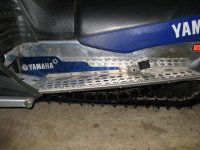
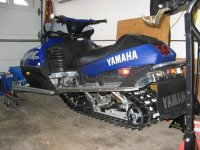
Here is the sled


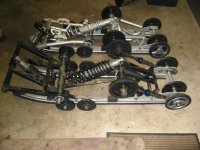
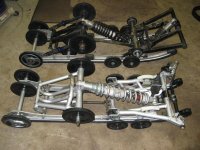
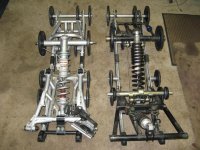
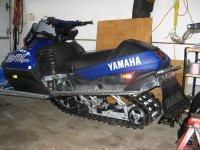
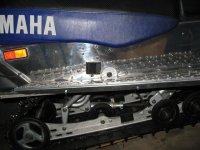
Here are a few side by side shots ..


Now I need some direction as to where I need to drill my holes to mount the Mono. I'm hoping you guys can help me out.
Thanks, Ryan
I spent a few minutes tonight and removed the pro-action from my viper.
Here is the sled
Here are a few side by side shots ..
Now I need some direction as to where I need to drill my holes to mount the Mono. I'm hoping you guys can help me out.
Thanks, Ryan
Attachments
Do a search, and also look in the Tech Pages. There should be all you need already posted.
bluewho
Active member
Ya like ding said the tech pages home page has all the info and than some on mono install/service complete with pics.
SRXSRULE2
New member
Yes I have searched, no one has posted any actual measurements though. I'm looking for like a measurement of the center to center distance from the stock middle hole to the Mono Front. I would measure the suspension but I wouldn't be a correct measurement. I apologize I should have been more specific.
yamajohn
Member
I have a bender reaction skid in my srx, should be the same mounting holes as it uses the same front and rear arms. From the rear most mount to the front mounting hole is 21" center to center and from the outside top of tunnel it is 4-3/4" down, from the middle mount to the front mounting hole is 5-1/4" center to center. Hope this helps. 

I prefer to always measure from the center of the drive axle to the mounting holes, and then between mounting holes. These measuements create a triangle if you will.
This approach ensures that you have the right geometry for the skid to work properly and the right track tension. Basically match the donor sled.
Now once the triangle is figured out, it can be rotated around the drive axle to create the right attitude and balance of the newly fitted sled. This is most important when the donor sled and the implant sled are quite different.
There is a template on this site to help figure this out, and even one with numbers for a 121 mono into a Viper.
There are cases where the relationship of the mounting holes to the drive axle have to change. But never should the measurement between the mounting holes change.
Last edited:
SRXSRULE2
New member
A little update. I have recieved all my new brackets that I need from an Apex, took a couple weeks to get the one on back order. Close to $80 in brackets from Yamaha.
Sent my money to 03Viperguy for his template, awaiting the mail man to bring it to me. I was going to go with the measurements from yamajohn (thank you by the way) because they seamed right, but for 10 dollars, I'd rather go with something I know that will work.
When the template arrives, I will take some more pictures. I will have to trim the front brackets to fit the tunnel (It's a shame they are brand new) then a shot of paint and no one will ever know the difference.
SRXSRULE2
New member
Progress
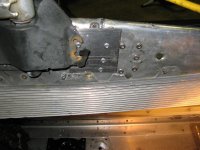
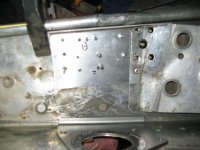
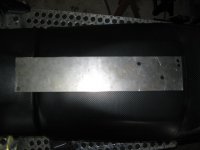
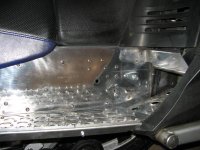
I ran into a little problem that I knew existed but it was a little worse then I thought. I saw a crack in my left running board when I bought the sled, figured it had been wacked but not too badly. Took of my ROX boards that came with the sled and I found this

So with some help of some neighbours we came up with some ideas and I got some plates made to fix the crack. The piece on the top side has a L shape to it and is placed right up against the bend at the edge of the running board(Top of the pic).

The other plate underneath is visable but only when you get on the ground to look.

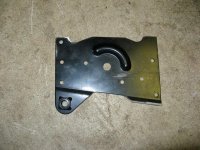
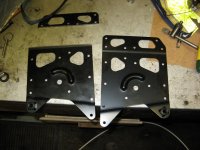
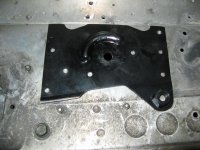
After I fixed that I got to cutting the apex brackets. My First cuts I thought would work ended up not fitting the way I liked as they would not sit flush with the inside of the tunnel. The one on the left is the way they come, the one on the right is the first cut.

Then I cut some more off to look like this.

I ran into a little problem that I knew existed but it was a little worse then I thought. I saw a crack in my left running board when I bought the sled, figured it had been wacked but not too badly. Took of my ROX boards that came with the sled and I found this
So with some help of some neighbours we came up with some ideas and I got some plates made to fix the crack. The piece on the top side has a L shape to it and is placed right up against the bend at the edge of the running board(Top of the pic).
The other plate underneath is visable but only when you get on the ground to look.
After I fixed that I got to cutting the apex brackets. My First cuts I thought would work ended up not fitting the way I liked as they would not sit flush with the inside of the tunnel. The one on the left is the way they come, the one on the right is the first cut.
Then I cut some more off to look like this.
Attachments
SRXSRULE2
New member
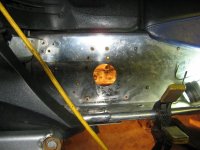
Here is the template I had made from the template that ViperGuy sent me. I just did this to make it easier to work with. This was a one off my neighbour did for me so I can't make any for you guys sorry.

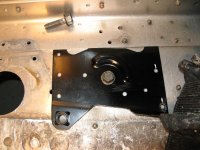
Here is the right side bracket in place

Here is the left side Bracket in place. Notice the paint marks on the two holes on the right side of the picture, these two holes can only be rivoted if you take half the sled apart, so don't drill them. I drilled them but could not install rivots. Instead I drilled a couple holes in other places and installed rivots. Keep in mind do not place the rivots where they will obstruct the skid being bolted into position. I.E. right below the holes for the front arm mounts.

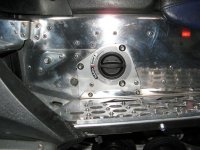
In the next picture you can see where I placed the hole for the adjustment knob. I placed my hole about a 1/4 inch to close to the front arm mount. This isn't a bad thing however I had to notch a piece out of the new Apex bracket. Trust me its a pain when the skid is bolted in. Make sure you place the hole for the adjuster where you want it because you have to drill a pretty big hole that can only be done once.

Here is the right side bracket in place
Here is the left side Bracket in place. Notice the paint marks on the two holes on the right side of the picture, these two holes can only be rivoted if you take half the sled apart, so don't drill them. I drilled them but could not install rivots. Instead I drilled a couple holes in other places and installed rivots. Keep in mind do not place the rivots where they will obstruct the skid being bolted into position. I.E. right below the holes for the front arm mounts.
In the next picture you can see where I placed the hole for the adjustment knob. I placed my hole about a 1/4 inch to close to the front arm mount. This isn't a bad thing however I had to notch a piece out of the new Apex bracket. Trust me its a pain when the skid is bolted in. Make sure you place the hole for the adjuster where you want it because you have to drill a pretty big hole that can only be done once.
Attachments
Last edited:
SRXSRULE2
New member
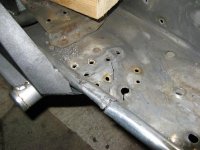
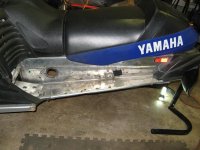
Here are some pictures of the outside of the tunnel after the hole was drilled.


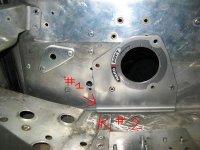
Trying to explain this will be hard but If you look in this picture you can see where I mounted the Adjuster plate(Where it says Harder and Softer). If you line up the leading edge(closest to front of sled #1 in the pic) of this plate with the edge of the left side foot rest where it folds flat to the running board(The edge where the foot rest bends up off of the running board #2 in the pic) Then the adjustment knob should bolt up without touching the Apex Bracket inside the tunnel.

In the next picture you will understand what I meant in the last picture. If you look at where the adjustment knob plate is, you will see the bolt for the front Apex Bracket that holds the bracket in place(not the front arm bolt). I had to use a washer to space the bolt out because it hits the adjustment plate. If you move it to where I showed you in the last pic you shouldn't have any problems.


Trying to explain this will be hard but If you look in this picture you can see where I mounted the Adjuster plate(Where it says Harder and Softer). If you line up the leading edge(closest to front of sled #1 in the pic) of this plate with the edge of the left side foot rest where it folds flat to the running board(The edge where the foot rest bends up off of the running board #2 in the pic) Then the adjustment knob should bolt up without touching the Apex Bracket inside the tunnel.
In the next picture you will understand what I meant in the last picture. If you look at where the adjustment knob plate is, you will see the bolt for the front Apex Bracket that holds the bracket in place(not the front arm bolt). I had to use a washer to space the bolt out because it hits the adjustment plate. If you move it to where I showed you in the last pic you shouldn't have any problems.
Attachments
SRXSRULE2
New member
You can see how close the adjuster is to the front arm in this picture. I couldn't get my camera in there for a better pic.

Here is a couple pics with it installed. ( The sled is sitting on casters in these pics)


With the sled sitting on casters the rear suspension will bottom out (which scared me) but when I placed the sled directly on the ground it reacts normally. The reason for this is because the new skid moves backwards as it folds up into itself (designed that way).
Here is a couple pics with it installed. ( The sled is sitting on casters in these pics)
With the sled sitting on casters the rear suspension will bottom out (which scared me) but when I placed the sled directly on the ground it reacts normally. The reason for this is because the new skid moves backwards as it folds up into itself (designed that way).
Attachments
Last edited:
SRXSRULE2
New member
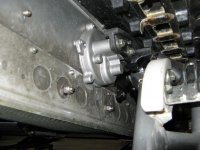
In this pic you can see where the new front arm mounts, and the old existing hole from the original ProAction. Notice the triangle shape brackets on the new front arm. They are also for an Apex and are used in the same place on an Apex. When you go to rivot the inside bracket on, place this outside triangle on first. This way the rivot goes through the triangle, the tunnel and the inside bracket. If you think about it, this tripples the thickness of the tunnel which makes for good strength. There is a reason Yamaha did it, so thats why I did it.

Here is where the rear mounts in with the original rear holes. I used the original outide plates as well. I didn't mention it but I also used the original rear shaft and spacers from the ProAction. You'll notice the Monoshock shaft it narrower. Another choice is to use the drop brackets off an Apex as they will give you the correct width and will also lift the back of the sled depending on where you mount them.

I threw in a pic of the new track, stud setup. I used Stud Boy's plastic double backers. Apparently they are new, all I know is that they are paper light.

Here is where the rear mounts in with the original rear holes. I used the original outide plates as well. I didn't mention it but I also used the original rear shaft and spacers from the ProAction. You'll notice the Monoshock shaft it narrower. Another choice is to use the drop brackets off an Apex as they will give you the correct width and will also lift the back of the sled depending on where you mount them.
I threw in a pic of the new track, stud setup. I used Stud Boy's plastic double backers. Apparently they are new, all I know is that they are paper light.
Attachments
SRXSRULE2
New member
Recap
So there it is, nothing you haven't seen before, just my own job. A few things I had to do because of the running boards on my sled. You'll notice I had to ditch the blue aluminum plates on the side of my tunnel.
All of the rivots I used were Yamaha rivots as I could not find any aftermarket ones that fold the same way almost like a spring. At 3 bucks a rivot it gets expensive so make sure you have everything right before you put them in, if not its another rivot wasted and another one to drill. You'll notice I removed the ProAction mid arm mounts as they were in the way. If you want to save yourself some money, I believe you could use the mid arm brackets for the new front arm mounts. I don't know how well it would work, but the brackets were 30 dollars each. There was about 80 dollars in brackets alone plus 60 dollars in rivots(I bought a few extra).
I have not ridden the sled since the install. Haven't had a chance to get to the snow yet but I will report back when I do... hopefully with a smile on my face.
I would like to Thank 03ViperGuy for giving me the idea and the template.
Thanks to Yammapiggy for the Mono Skid.
Thanks to Yamajohn for the measurements.
Thanks to anyone else who help steer me in the right direction. This is a great Forum and I'm glad I'm a part of it.
yamajohn
Member
Nice job, your gonna love the ride.

