Beautiful work, and a very cool build!
A couple of bucks
VIP Member
It certainly appears that you though all of this through completely. Very fine outcome. An emoji "thumbs up" doesn't come close.
Just awesome! The attention to detail on each system / component is incredible. Love seeing these kind of builds.
got-wood
New member
..and on it goes
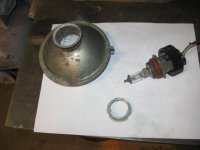
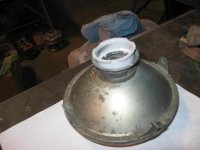
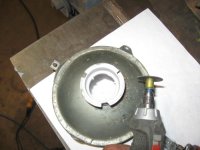
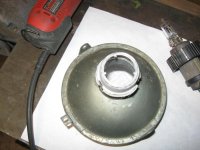
HOW TO PUT A HALOGEN HEADLIGHT IN AN OLD ROUND EYE.
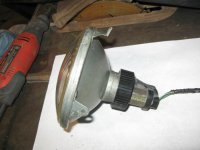
Finally got a minute to update the build a little. After shopping round for a new bulb for the headlight, I once again decided to spend time and labor instead. I shopped round the local auto-wreckers looking at headlight bubs and sockets and finally settled for one from a 98-ish F-150 as the best candidate. The headlight was broken when I found it which was perfect my plans. I used a band-saw to cut away so I could get the bulb flange chucked into the lathe. I would up with this nice little headlight-flange-collar that makes the headlight mounting hole fit the new halogen bulb. I had to grind down the circumference of the lip on the original headlight as well as cut some slots for the plastic hand-nut to tighten the bulb. You also have to flatten the small indent top-center in the headlight for the original bulb. It interferes with the collar going in. Voila! There is no stop on the nut, but the fit is nice and snug and it looks like it should work just fine. More to come. Enjoy.
Attachments
Last edited:
got-wood
New member
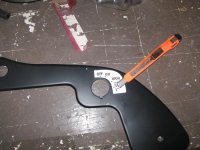
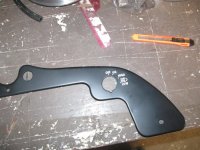
Got these great little stickers made for the headlight decal. But instead of trying to have little letter decals to rub off with my glove, I put the decal on and weeded the letters out, masked off around and painted white. When everything is removed all that's left is the switch detail. The dash is not that nice and it looks like I will have to modify it. The Exciter engine uses the 433 bore spacing so I'm having some fitment issues with the oil tank and, you guessed it, the dash!  I tried using my 433 steering gate and dash but someone robbed the oil tank, the 70 tank will not fit and I can't find a 72 tank...yet. Plus the steering gate change presents some other problems with the steering post that I would rather not deal with. Got my fingers crossed to NOT to modify the steering gate!
 I tried using my 433 steering gate and dash but someone robbed the oil tank, the 70 tank will not fit and I can't find a 72 tank...yet. Plus the steering gate change presents some other problems with the steering post that I would rather not deal with. Got my fingers crossed to NOT to modify the steering gate!
Attachments
sledtillsed
New member
Very cool build. Can't wait to see the finished product
Sent from my iPhone using Tapatalk
Sent from my iPhone using Tapatalk
got-wood
New member
: Blade-runnerz.
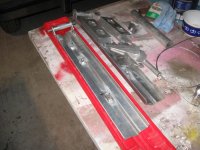
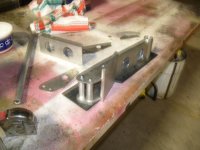
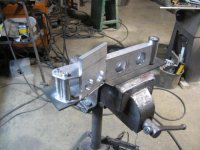
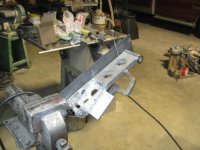
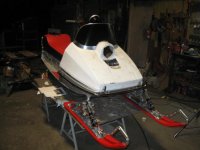
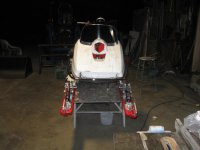
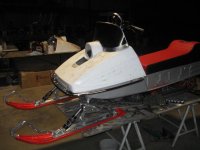
Well I couldn't leave it alone and just had to fab a front suspension to keep pace with the rear. I have always hated leaf springs, liked what Alouette did with the Ski-Sorber and so after a wobbly pop brainstorming session, I thought I would go them 10 better! They didn't have modern plastic bottoms with the better keel tech and Fox Float MXR air-spring-shocks. This little baby weighs 1.1 lbs and has adjustable compression, rebound, damping and spring rate!
The Ski-Sorber was heavy and wasn't any better for eliminating sideways flex than the leaf spring so I knew I had to incorporate scissor-links to solve that problem. It looks pretty simple but it actually took a fair amount of ciphering to make it all work. Then just to be safe I spent an equal amount of time putting a COPYCLAIM on the whole shebang, you never know.
I've already started on Gen II as I figured out a few things I would to do differently, plus I've got another project for them to go on. yuk, yuk. Hey, its a sickness and I've already been told that I need help.
I think its cool. Enjoy.
]: BLADE-RUNNERZ-COPYCLAIM-~2014-~RW775503796CA.[
Well I couldn't leave it alone and just had to fab a front suspension to keep pace with the rear. I have always hated leaf springs, liked what Alouette did with the Ski-Sorber and so after a wobbly pop brainstorming session, I thought I would go them 10 better! They didn't have modern plastic bottoms with the better keel tech and Fox Float MXR air-spring-shocks. This little baby weighs 1.1 lbs and has adjustable compression, rebound, damping and spring rate!
The Ski-Sorber was heavy and wasn't any better for eliminating sideways flex than the leaf spring so I knew I had to incorporate scissor-links to solve that problem. It looks pretty simple but it actually took a fair amount of ciphering to make it all work. Then just to be safe I spent an equal amount of time putting a COPYCLAIM on the whole shebang, you never know.
I've already started on Gen II as I figured out a few things I would to do differently, plus I've got another project for them to go on. yuk, yuk. Hey, its a sickness and I've already been told that I need help.

I think its cool. Enjoy.
]: BLADE-RUNNERZ-COPYCLAIM-~2014-~RW775503796CA.[
Attachments
Last edited:
got-wood
New member
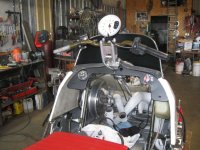
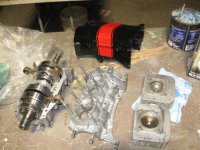
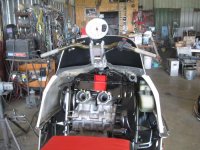
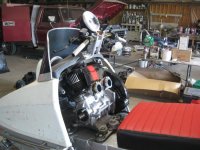
As mentioned previously, the engine is a 77 Exciter 340. The 70 338 that came with this sled was 32 hp stock, the 340 Exciter with a single carb and single pipe is 38hp. I'm very curious what this will make with the porting, Enticer heads and twin carbs and twin pipes. Its also getting nology wires, Hewltech ignition and the pistons have been ceramic coated. The 340 Exciter uses the 433 bore spacing so this is causing some grief with fitment on the mag side. Things are tight!
These are the wrong carb boots on here, I just wanted to see what it would look like. VROOM, VROOM!
These are the wrong carb boots on here, I just wanted to see what it would look like. VROOM, VROOM!
Attachments
Last edited:
Throttle Junkie35
New member
Nice too see this project again. I dig it. 

sledtillsed
New member
That front suspension would look AWSOME on my Exciter
I'll Take a set. Lol
Sent from my iPhone using Tapatalk
I'll Take a set. Lol
Sent from my iPhone using Tapatalk
got-wood
New member
Well, $100.00 for the bottoms, lets say $700 for the shocks by the time you figure in freight, plus a few dollars for the rest of the material and then labor. I figure I could whip another set up for about $2500.00. lol. No seriously, not even sure I could do them for that though the second set should go together quicker and I plan to use chrome-moly for the scissor-links instead of aluminum. My plan is make sure this prototype works, then have them made wholly out of plastic except for the scissor-link, fasteners and wear bar. Even then, I can't see them being under a G-note! I don't see the line forming....... lol
lol
Last edited:
sledtillsed
New member
R. & D is expensive I hear you.
Sent from my iPhone using Tapatalk
Sent from my iPhone using Tapatalk
yamahamark
Member
That's a very good looking build.


