Vmax Al
New member
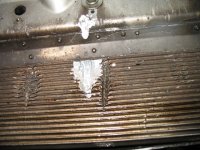
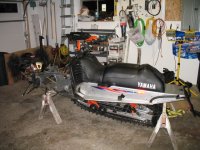
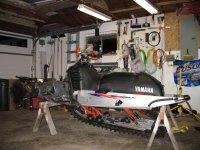
I am finally getting started on my "spring" project. I had 3 studs tear out on me on my final ride last spring which took out my front cooler. Well that was what led me to start this project. I am now installing a new front cooler, Hartman Inc. 136" kit, 1 1/4" Predator 9834, C&A skis, rear skid bushings, new limit straps, replacing RH trailing arm mount, and some engine mods.
I also purchased two "must have" tools, pneumatic riveter and a 90 degree die grinder. The riveter is awesome, rivets look factory and are much tighter than I could pull by hand. The grinder came in handy for modifying the cooler tube covers as well as the tunnel ext so that I could shorten it a few inches since it is only a 136 kit.
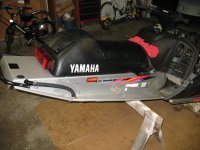
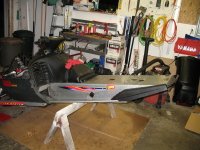
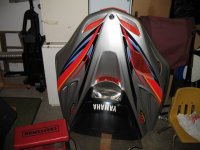
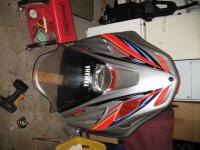
Got the tunnel extension on this weekend, looks pretty good I think, color match is pretty close.
Too bad I have to pull the motor to get to the bolts that hold the cooler on, but I am sure it will be easier. Just wish I would have saved two hours and the skin on my knuckles before giving up, ha.
I also purchased two "must have" tools, pneumatic riveter and a 90 degree die grinder. The riveter is awesome, rivets look factory and are much tighter than I could pull by hand. The grinder came in handy for modifying the cooler tube covers as well as the tunnel ext so that I could shorten it a few inches since it is only a 136 kit.
Got the tunnel extension on this weekend, looks pretty good I think, color match is pretty close.
Too bad I have to pull the motor to get to the bolts that hold the cooler on, but I am sure it will be easier. Just wish I would have saved two hours and the skin on my knuckles before giving up, ha.
Attachments
Vmax Al
New member
03viperguy
Moderator
looking good!
xsivhp
Active member
Looks great!
Could you measure from the back of the gas tank to the back of the extension for me?
Thanks,
xs
Could you measure from the back of the gas tank to the back of the extension for me?
Thanks,
xs
vmaxjohn
New member
Sweet, wanna do mine next? ")
Vmax Al
New member
xs,
Sure, I will make a couple of measurments for you.
Original from tank
Length of ext.
Intended full length with ext
My length now
And I will try to take som better pics of what I did to "shorten" it.
More length could easily be taken out by removing 4 rivets that hold the exchangers on. Since the ext. fits inside the tunnel you can move it forward and then rivet thru 3 pieces. Tabs on the outside would need to be removed so they wouldn't interfere with the exchanger/coolant tubes. Basically another 2 inches shorter is pretty easy.
vmaxjohn,
If you have 8 months and $, no problem, ha.
Will you be running a mountainmax style rear heat exchanger or a srx style?
thanks
thanks
xsivhp
Active member
al - looking forward to the info! Thanks, xs
Vmax Al
New member
norwegian,
Kit comes with a crossover tube, no cooler. Supposedly the extra length in the hose and the crossover are enough. I am somewhat leary of this so I am looking into other options. I run about 80% trail so I think I may be in need of the extra cooling.
xs,
Measurements:
Back of seat to rear of bumper - 13.5"
Back of seat to end of ext., no bumper - 11"
Gas tank bolt to rear of bumper - 40.5"
Extension as sold - 16"
Intended length addition - 13"
With my modification of lengthening the slot reduced it 2"
You can't really get any more reduction without major modification as the rolled edge on the ext. butts up against the foot board.
From an appearance standpoint you could probably trim more and not notice since the covers actually cover but I wasn't interested in trying to trim the entire ext. width and rolled edge.
I took pics but haven't had a chance to upload them yet.
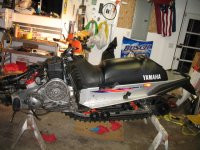
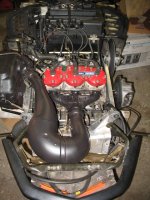
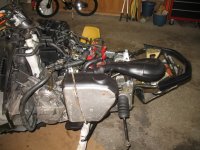
I did get the motor pulled and the front cooler removed, what a pain on the cooler part. I sure hope the reinstall goes easier.
Kit comes with a crossover tube, no cooler. Supposedly the extra length in the hose and the crossover are enough. I am somewhat leary of this so I am looking into other options. I run about 80% trail so I think I may be in need of the extra cooling.
xs,
Measurements:
Back of seat to rear of bumper - 13.5"
Back of seat to end of ext., no bumper - 11"
Gas tank bolt to rear of bumper - 40.5"
Extension as sold - 16"
Intended length addition - 13"
With my modification of lengthening the slot reduced it 2"
You can't really get any more reduction without major modification as the rolled edge on the ext. butts up against the foot board.
From an appearance standpoint you could probably trim more and not notice since the covers actually cover but I wasn't interested in trying to trim the entire ext. width and rolled edge.
I took pics but haven't had a chance to upload them yet.
I did get the motor pulled and the front cooler removed, what a pain on the cooler part. I sure hope the reinstall goes easier.
Vmax Al
New member
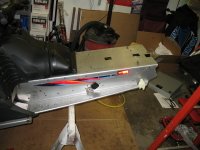
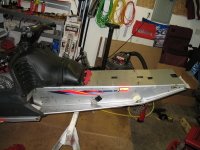
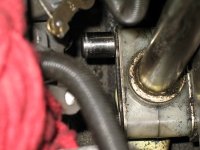
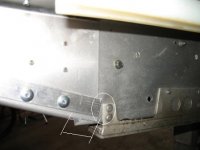
Better detail pics of ext. mod.
You can see the addtional slot length I cut to move the ext. forward some.
You can see where the tab on the ext. on top of the running board pretty much meets right up to the cooler tube, to move further forward the tab would have to be trimmed.
Also you can see where the rolled edge of the ext. meets the running board edge, this would also have to be trimmed.
The last pic is the inside of the tunnel showing that if the ext. moved forward it would have to be trimmed on the inside because of the cooler mounting or the rivets removed and the ext. slipped in between the tunnel and mount.
All of the trimming is hidden under the cooler tube covers. Only time you would notice any trimming is with the sled on its side or if you don't get the covers mounted low enough.
Attachments
Last edited:
Vmax Al
New member
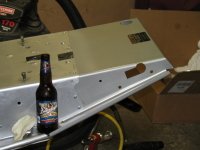
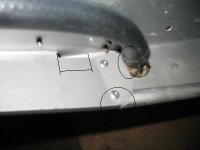
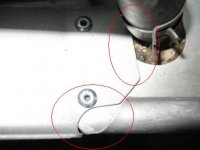
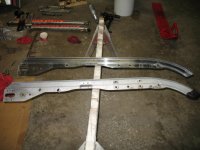
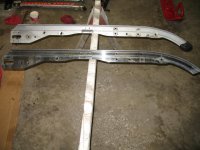
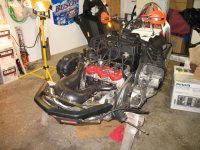
Cleaned up rails and current progress
So while I am waiting for parts to come in I figured I could polish a little....
Have no idea how long the shine will hold up but it will make for some nice "just finished" pics. Some areas don't clean up real well, but after reinstalling the suspension it shouldn't be noticable.
Repaired a slotted out hole in the rail, will have to see how it holds up, first impression looks like it will work. Even tried a bolt in there and banged on it and everything seems fine...
The other pic is of the current state, never thought I would have to go this far to replace a front cooler, but the clean up and finding "stuff" was probably worth it.
Too bad I am slow, now the weather has changed and it is too cold to use my outdoor paint "booth." Might have to throw a few coats when I can and see how it holds up.
Attachments

Vmax Al
New member
Update on 12-3-06
Finally got some things back together...
Rear suspension - tried painting some orange, will see how it holds up, doubt it will since some was coming off during install
136" 1 1/4" 9834 Camo in - was much easier after pulling the tunnel and exchanger protectors like instructed, ha. I didn't think it would be an issue but the track would have to be notched to keep them in, easier to take them out since I am not studding and probably won't.
Seat Riser - added 4" foam of high density from Joanne's fabric store. Best part of this story is being one of two guys at that store the day after Thanksgiving to get 70% off, that's 1 hour of my life I will never get back but the mod cost me $13.
Not sure if it will be stiff enough for my big butt but worth a try on a old seat I had sitting around collecting dust.
Painted hood screens - Had to go with orange but thinking some of the other colors will have to go before I start hearing "rainbow" jokes. Probably end up with gray base and orange accents, have the hand guards, skid plate and skis in orange so when done maybe it will dominate the other colors?
Waiting on reeds and reed stoppers, and clean the carbs before putting the front end together. Nothing a few more late nights working after working all day, but I would rather wrench on a sled any day! Won't be long, can't wait to get it out in some snow instead of sitting in the garage torn apart like it has for 6 months!
Attachments
03viperguy
Moderator
looks darn decent! the seat came out real nice, nice finish to it. doesnt have a homemade feel to it at all! with everything else you are doing, swap to a nice dual bulb headlight while you are at it, theres still time before snow ")
Vmax Al
New member
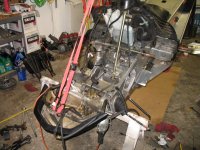
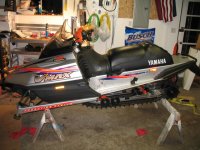
Nearing the end (for this project!) 12-10/11
Finally getting to rideable and the temps head for the 40's, go figure.
After a weekend of garage time, finally made some more progress.
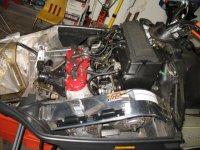
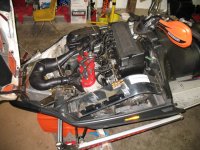
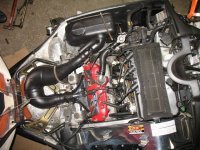
Spent Sat. doing the head gasket mod, cleaning and then dropping the motor back in, and finally clutch attachment and aligning (BIG THANKS to maxdlx-Paul for loaning of the Sled Pro tool!!!)
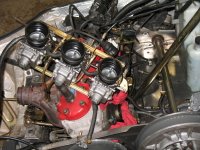
Sun. I cleaned the carbs and installed, fired it up on about 4 tugs! After finding it ran pretty decent on the saw horses (at least at an idle to near engagement) I riveted on the body panels, put on the hood and that's about where it it's at now.
Mon. evening I installed the skid plate, front shocks, added the brake light and wired the heated shield line in.
Pics are as of Sun. night.
Only issue now is getting the C&A skis to fit, grrrr, guess I am glad there isn't snow or I would have been hunting for my originals or heading to a dealer or Rec. Leis. for a set!
I will probably post one more time with "final" pics and a summary under this thread!
Think Snow!
Al
Finally getting to rideable and the temps head for the 40's, go figure.
After a weekend of garage time, finally made some more progress.
Spent Sat. doing the head gasket mod, cleaning and then dropping the motor back in, and finally clutch attachment and aligning (BIG THANKS to maxdlx-Paul for loaning of the Sled Pro tool!!!)
Sun. I cleaned the carbs and installed, fired it up on about 4 tugs! After finding it ran pretty decent on the saw horses (at least at an idle to near engagement) I riveted on the body panels, put on the hood and that's about where it it's at now.
Mon. evening I installed the skid plate, front shocks, added the brake light and wired the heated shield line in.
Pics are as of Sun. night.
Only issue now is getting the C&A skis to fit, grrrr, guess I am glad there isn't snow or I would have been hunting for my originals or heading to a dealer or Rec. Leis. for a set!
I will probably post one more time with "final" pics and a summary under this thread!
Think Snow!
Al
Attachments
Last edited:
Vmax Al
New member
03viperguy
Moderator
really coming together nicely! guess I need to start posting the terribly slow progress of my mono install lol! looks great
Vmax Al
New member
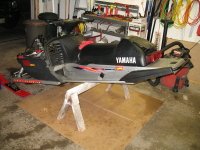
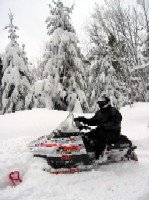
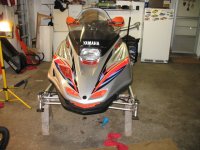
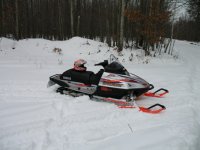
I thought I was done 1/27/07
Got it out on the snow finally! Love the 136" x 1 1/4 9834! Wants to overheat if I run hardpack for a couple miles, so I need to address that. Also over-reving at the moment so some clutch work needs to be done.
I think it looks great and I can't wait to add to the 50 miles I have on it.
Got it out on the snow finally! Love the 136" x 1 1/4 9834! Wants to overheat if I run hardpack for a couple miles, so I need to address that. Also over-reving at the moment so some clutch work needs to be done.
I think it looks great and I can't wait to add to the 50 miles I have on it.
Attachments

03viperguy
Moderator
that does look pretty sharp! handle good, or more push with the longer track?
Vmax Al
New member
It handles about the same as the previously studded track, but I also added the C&A skis. I still need to adjust weight transfer and ski pre-load, but as of 50 miles I much prefer this set-up, it launches instead of spins.