

My brother was looking for a more modern/rider forward seating position on his Viper. We found that getting handlebars in the correct position was easy, but struggled with what to do about a seat. We looked at every option we could think of from just putting a boss on it to mounting seats from other sleds but ultimately decided the only way to get a high rise seat on there that looks like it fits correctly and maintains storage and a tail light was to build one.
Started by removing the cover from the stock seat. Decided that 5" of rise was the desired height.
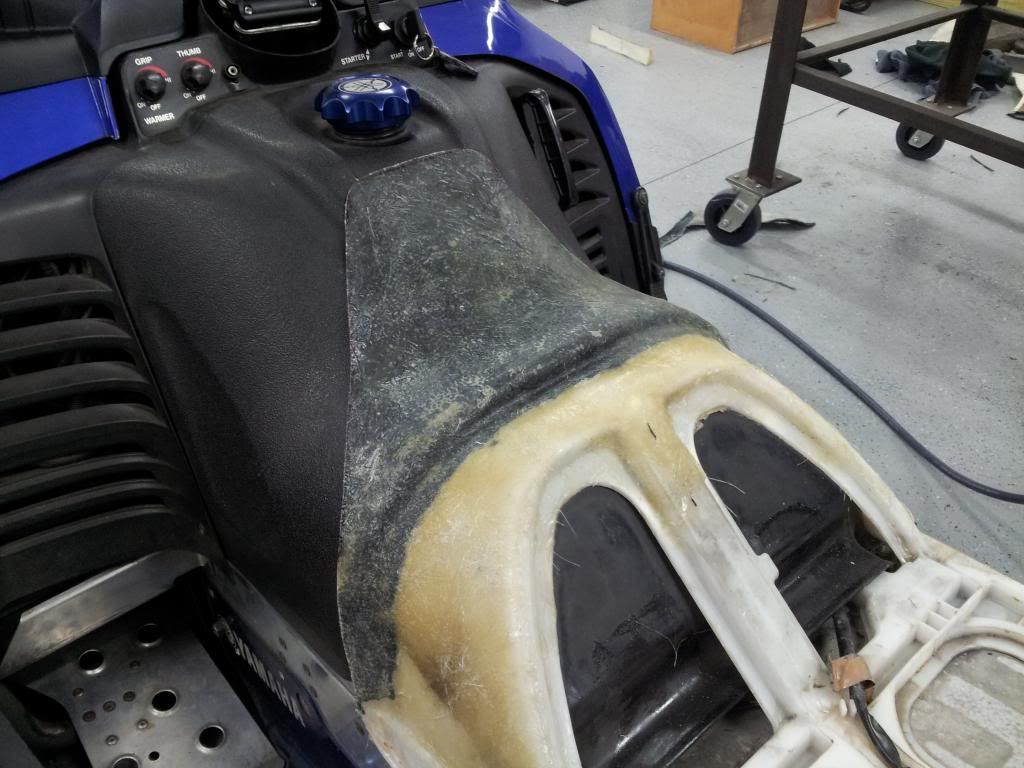
It was pretty obvious then that the seat would need to carry all the way forward to the gas tank, both to allow to rider to slide forward and also look good. We thought about just laying foam on the tank and loosely covering it, but decided to really do it right required a seat pan that fit the tank. Played around with a couple options and decided the way to do it was to form a fiberglass extension on the existing pan. Using fleece material as the backbone, and fiberglass mat for reinforcement we glassed in a pan that fit the tank form.
Resin applied:
Resin dried:
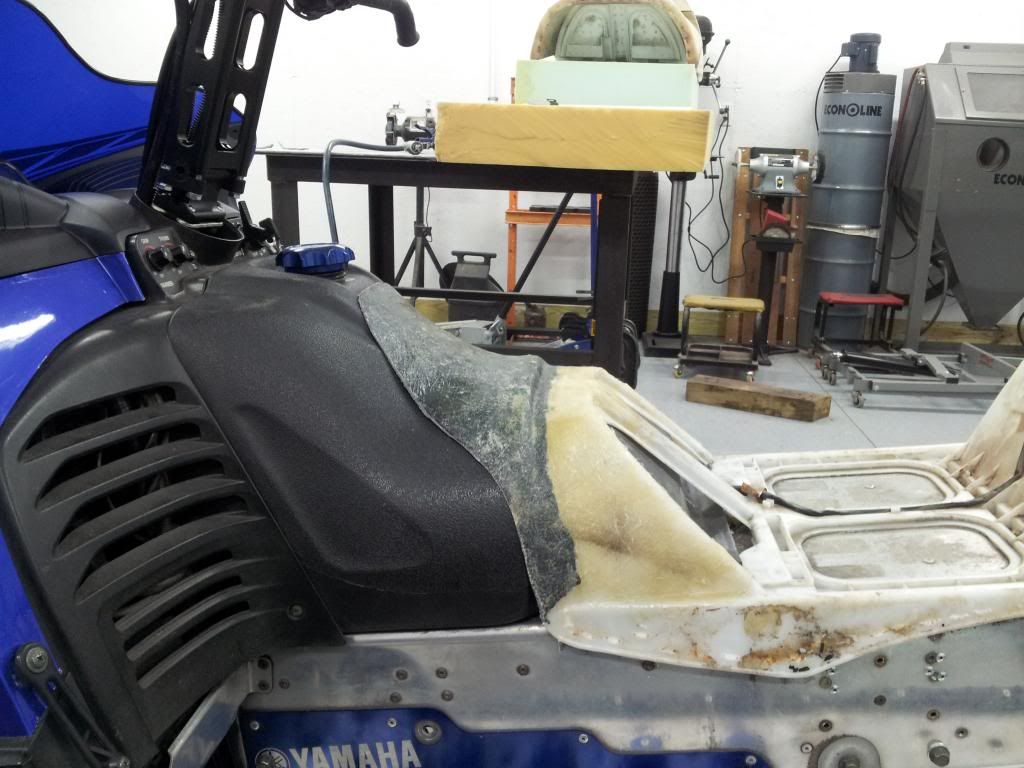
Seat pan trimmed out:
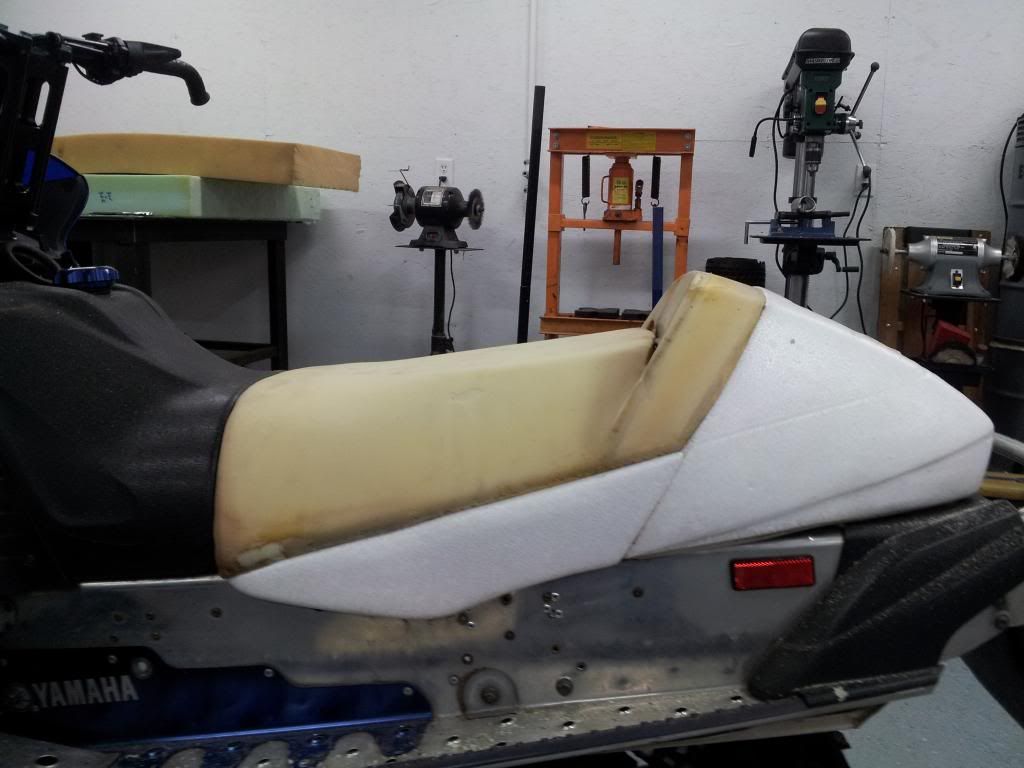
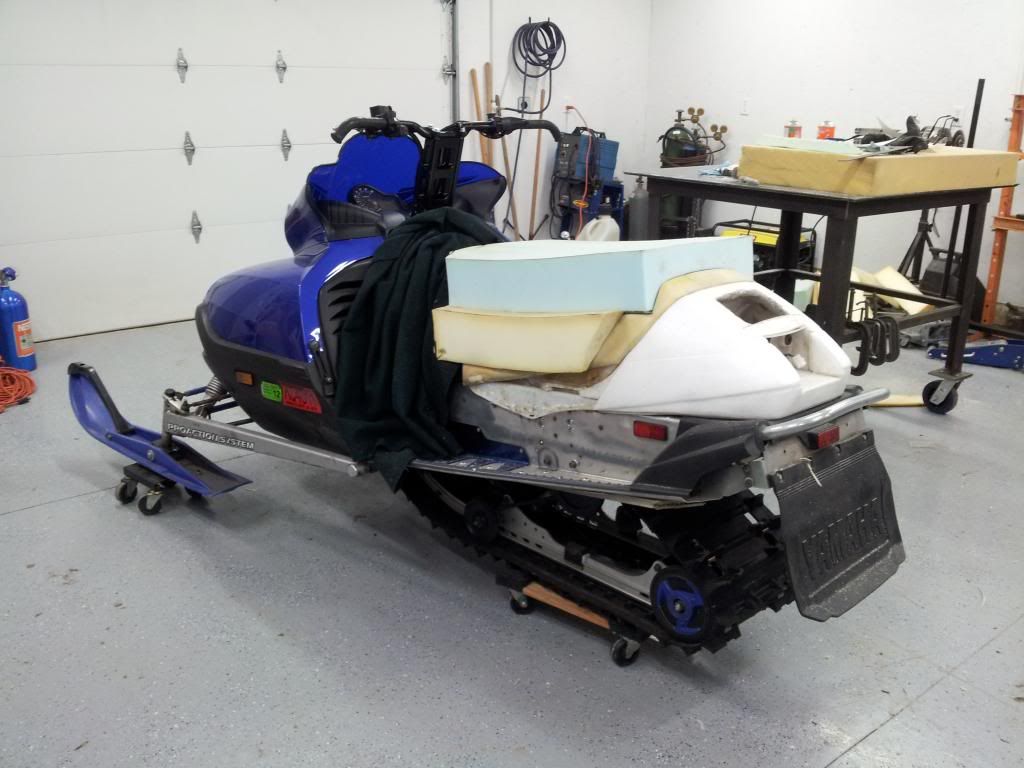
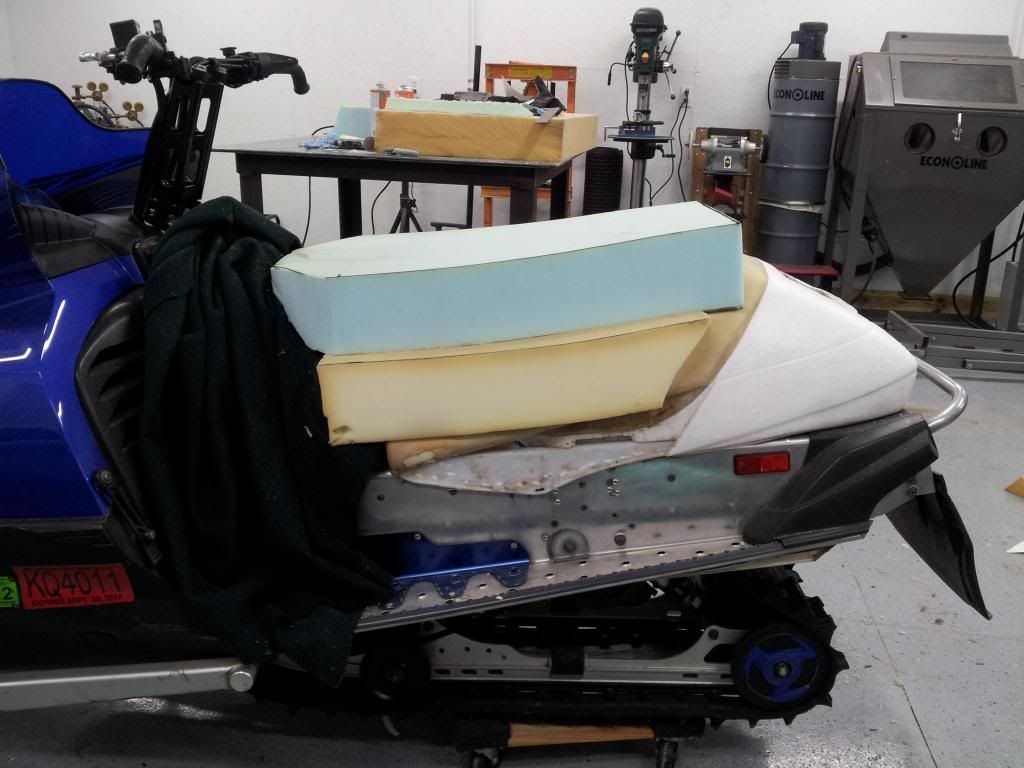
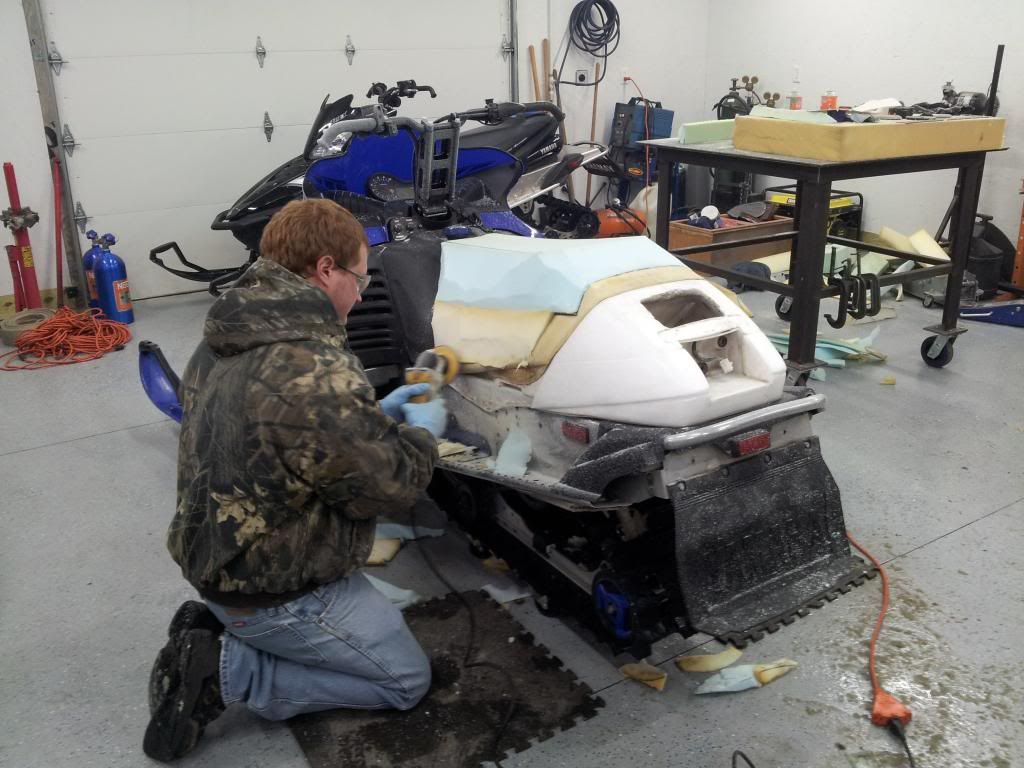
Next step was to attach the additional foam. We placed the stock foam back in place, added a 5" thick piece on top, and filled in the sides. Trimming and forming the side pieces to fit the profile of the original seat was tricky. Everything was glued together and left overnight.
Started by removing the cover from the stock seat. Decided that 5" of rise was the desired height.
It was pretty obvious then that the seat would need to carry all the way forward to the gas tank, both to allow to rider to slide forward and also look good. We thought about just laying foam on the tank and loosely covering it, but decided to really do it right required a seat pan that fit the tank. Played around with a couple options and decided the way to do it was to form a fiberglass extension on the existing pan. Using fleece material as the backbone, and fiberglass mat for reinforcement we glassed in a pan that fit the tank form.
Resin applied:
Resin dried:
Seat pan trimmed out:
Next step was to attach the additional foam. We placed the stock foam back in place, added a 5" thick piece on top, and filled in the sides. Trimming and forming the side pieces to fit the profile of the original seat was tricky. Everything was glued together and left overnight.
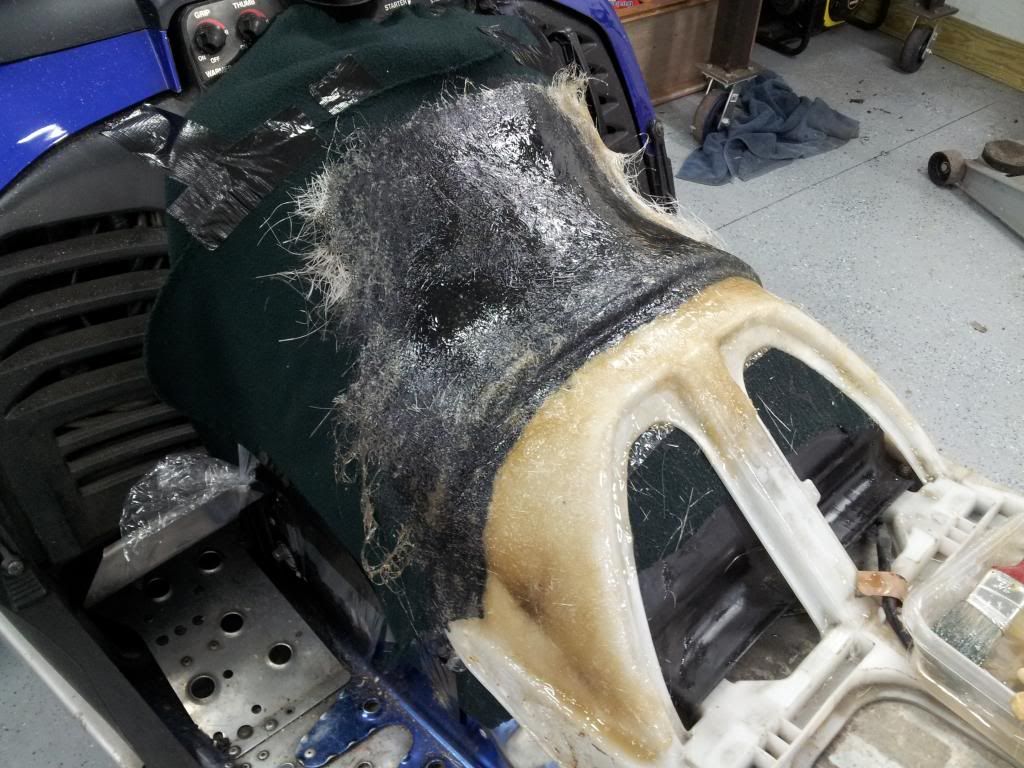
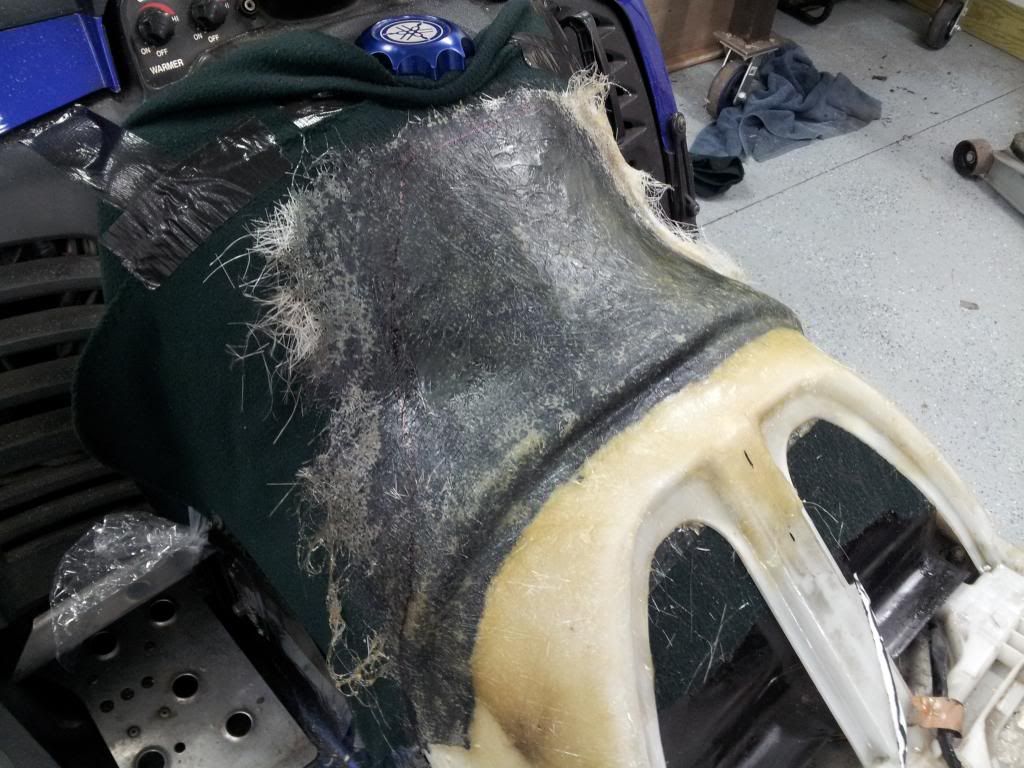
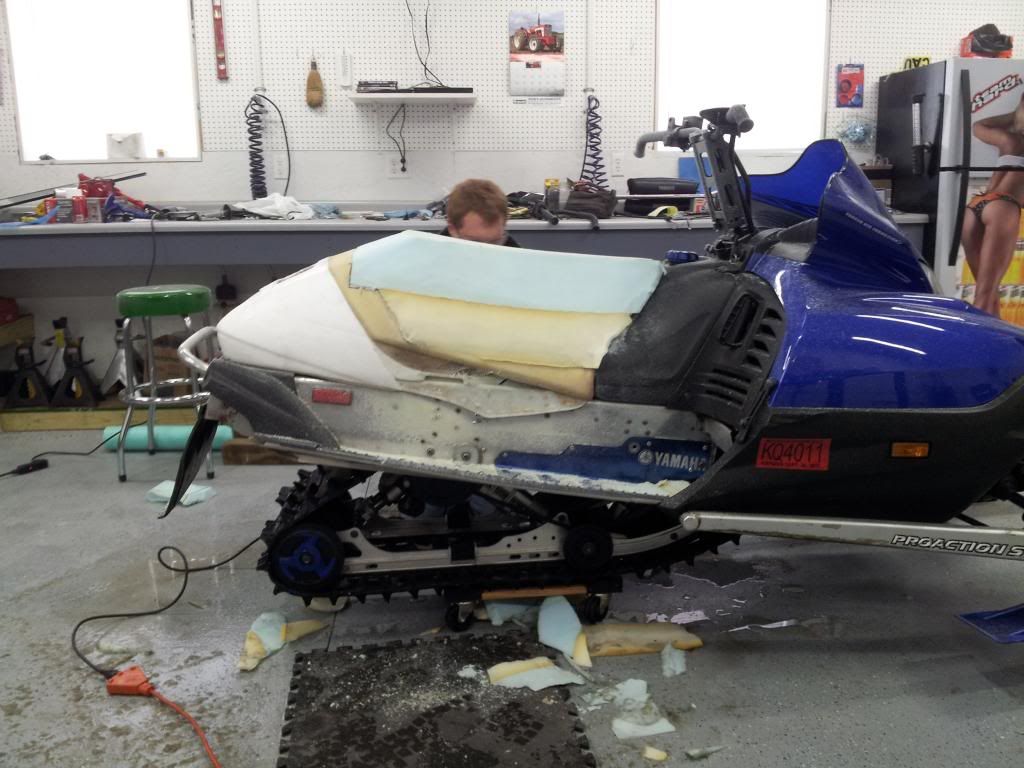
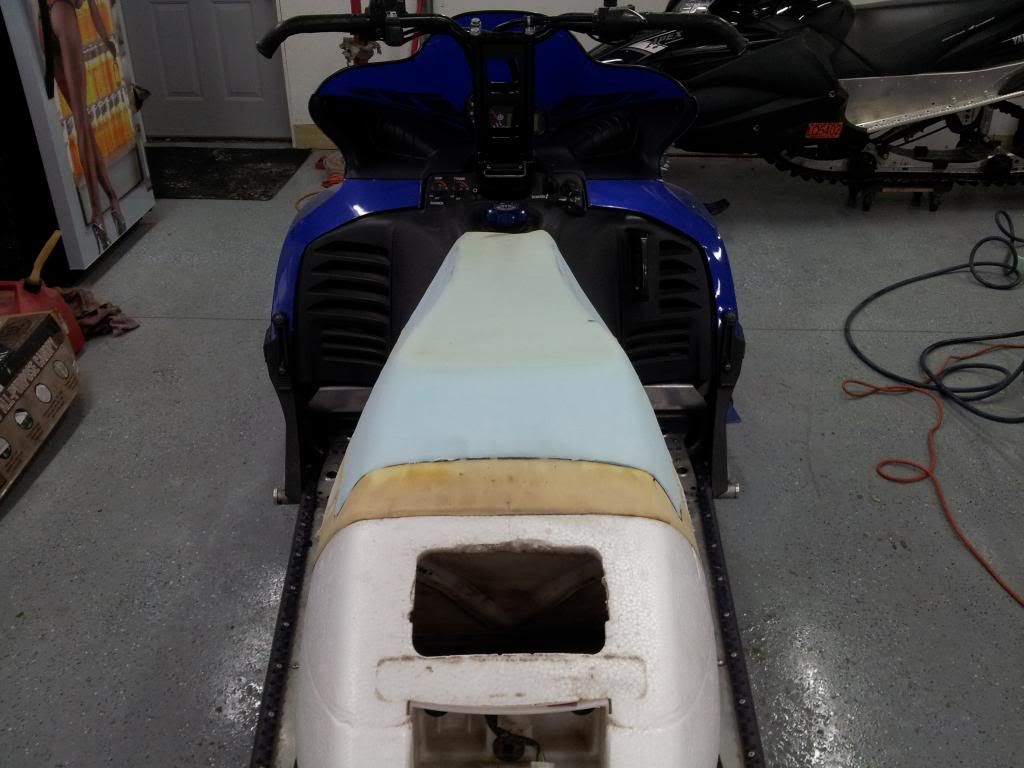
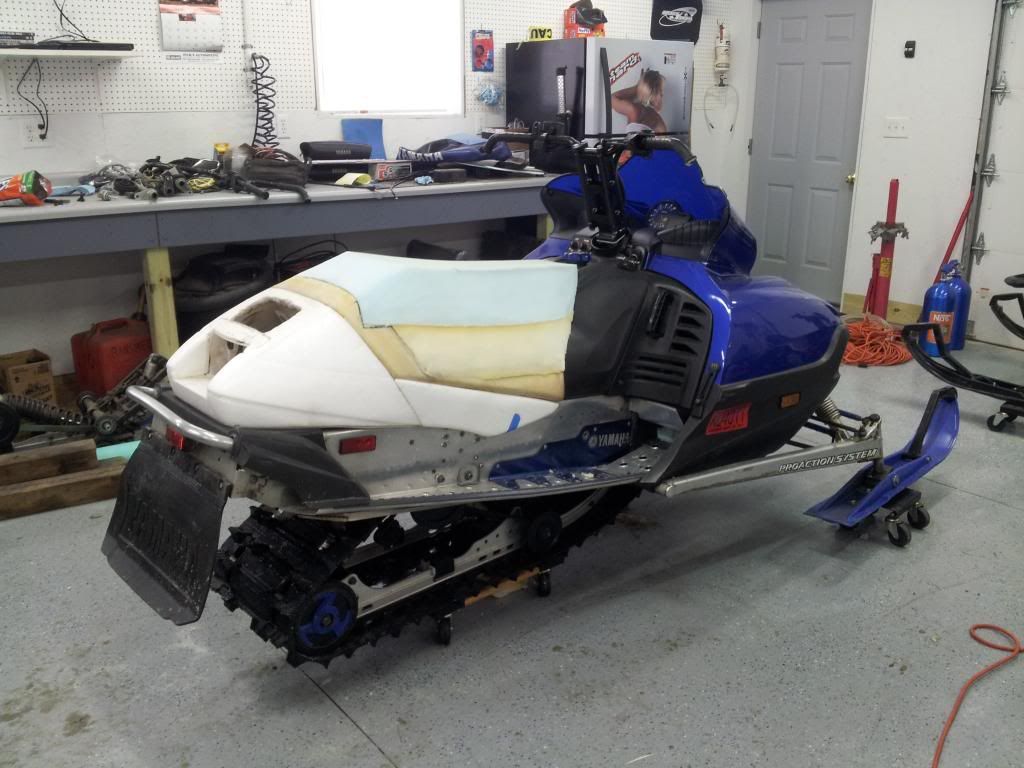
Then the trimming began. We roughed in as far was we could with a foam saw, then finished it out with a 4" angle grinder. Played with a bunch of different wheels and ended up finding the best to be a plain, worn out, grinding wheel. We tried to carry the shape of the rear of the stock seat all the way up, and patterned the top shape off of my Apex.
After roughing out:
Shaping done:
Then it just needed a cover. Dropped it off to an upholstery shop and let them deal with that... We had them use a vinyl that matched the stock black, and reuse as much of the stock cover as possible.
Finished product:
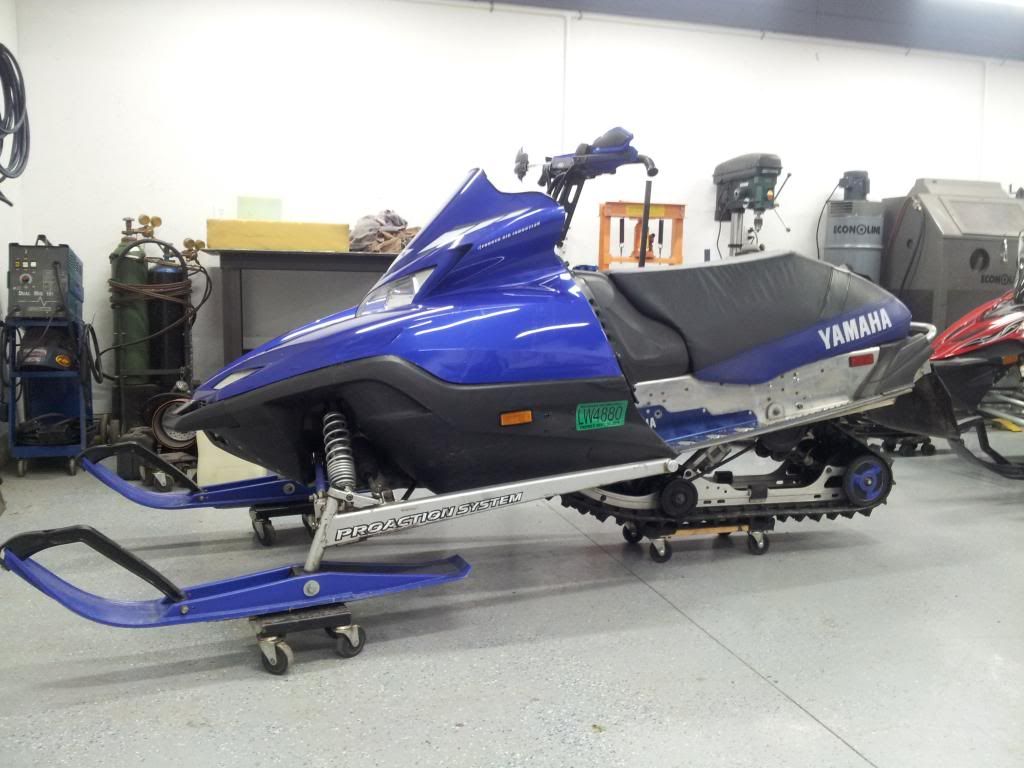
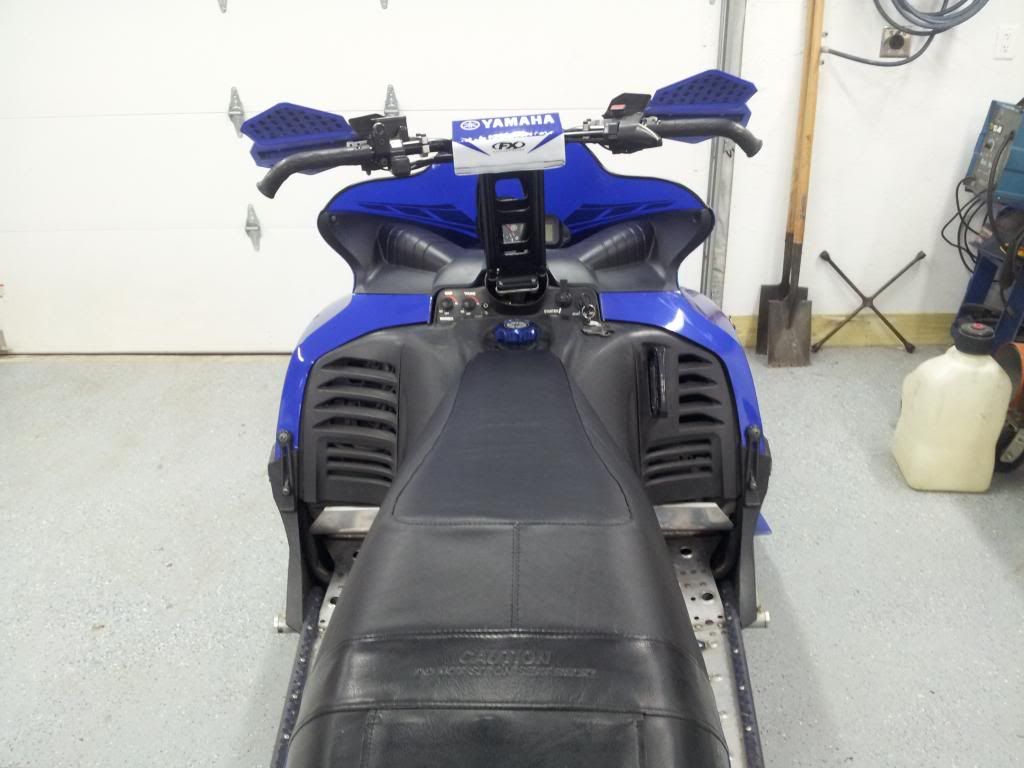
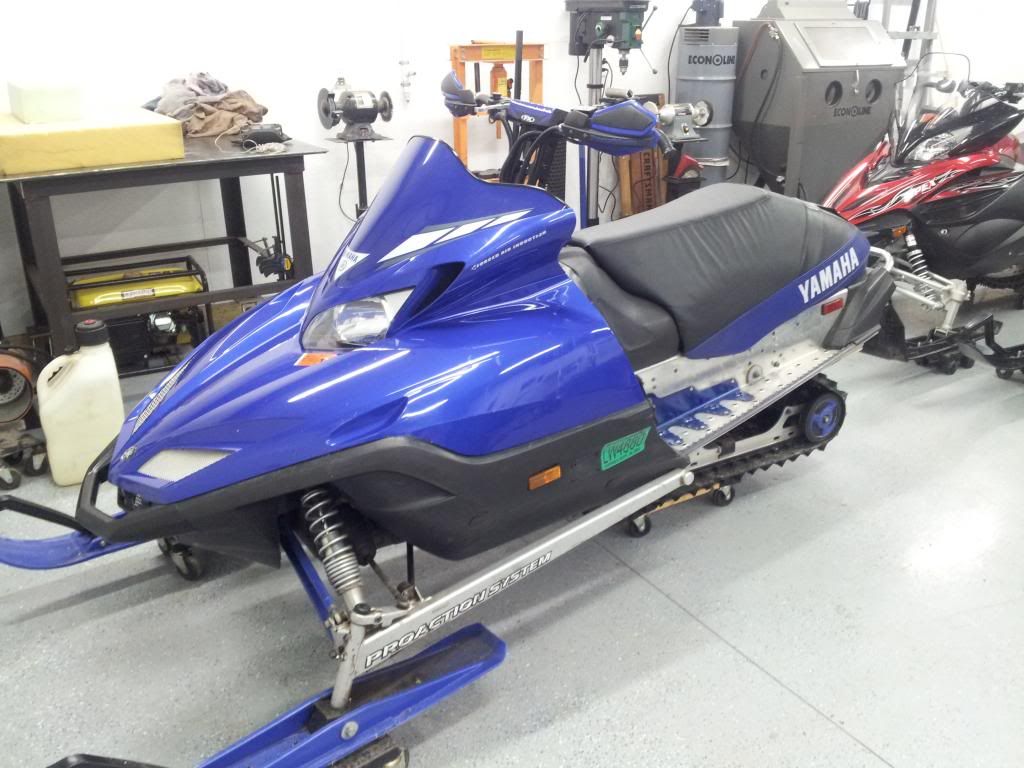
Pretty happy with the results. Its a very comfortable riding position, and the new seat is super plush. After we have bounced around on it now the cover has developed the wrinkles you see in the pictures, so will probably have to tighten it up and re-staple after the first couple rides. Only thing we might change if we were to do it again was the material for the new portion of the cover, thinking maybe using something like the material on the top of the new seats with the "perforated" look may have made the sides of the seat not quite as bland looking, but overall, can't complain.
After roughing out:
Shaping done:
Then it just needed a cover. Dropped it off to an upholstery shop and let them deal with that... We had them use a vinyl that matched the stock black, and reuse as much of the stock cover as possible.
Finished product:
Pretty happy with the results. Its a very comfortable riding position, and the new seat is super plush. After we have bounced around on it now the cover has developed the wrinkles you see in the pictures, so will probably have to tighten it up and re-staple after the first couple rides. Only thing we might change if we were to do it again was the material for the new portion of the cover, thinking maybe using something like the material on the top of the new seats with the "perforated" look may have made the sides of the seat not quite as bland looking, but overall, can't complain.
Is that a CK skid in there????
Yes it is.
Very nice! After having multiple Boss seats, one thing I would add to your design is a strap or hoop which would go around the filler neck attached to the front of the seat. I suspect when you sit on your seat, the top arch's back from the filler, thus creating a larger gap. Is this correct?? I really like the ingenuity which goes into prototyping items for our sleds. Keep up the good work. Al
Here is a photo of the most current Boss design seat for Vipers.

Was the CK from an apex? How. Much fab work went into it? I've seen a couple other swaps, but that one looks the best so far. The others look like snowplows...
alswagg said:Very nice! After having multiple Boss seats, one thing I would add to your design is a strap or hoop which would go around the filler neck attached to the front of the seat. I suspect when you sit on your seat, the top arch's back from the filler, thus creating a larger gap. Is this correct?? I really like the ingenuity which goes into prototyping items for our sleds. Keep up the good work. Al
No, this seat does not do that because it has a rigid pan that the foam and seat cover is attached to in the front. The boss seats have that issue because the foam is just floating out there over the tank.
The boss seats do have a nice look to them, but the tail light is an issue (especially on short track sled with no available extra tunnel to mount anything). Also, the price for the boss I found to be around $530, whereas for the total cost for this seat mod was less than $200.
Last edited:
SXRider7Hundo said:Was the CK from an apex? How. Much fab work went into it? I've seen a couple other swaps, but that one looks the best so far. The others look like snowplows...
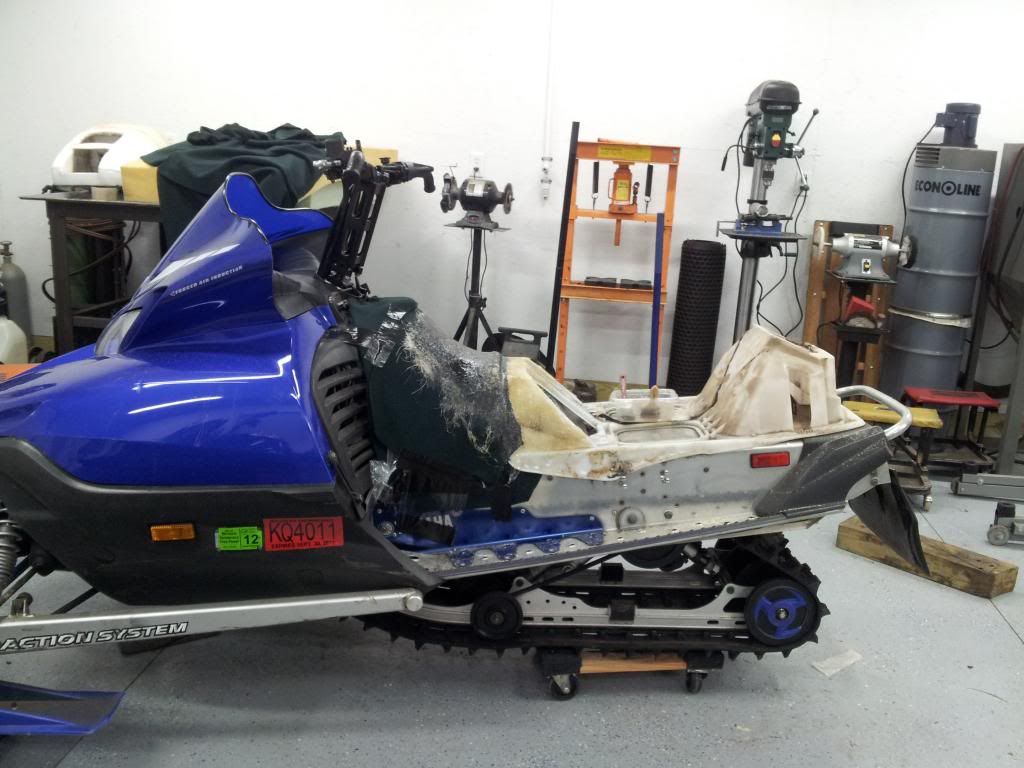
Yes, it came out of an Apex. We used stock drop brackets from an RX-1 for the rear mounts. Just needed a thin spacer inside the tunnel above the heat exchanger for those. The only fab for the front mount was moving the steel reinforcement plates inside the tunnel which needed some trimming to fit properly in their new location.
No serious fabrication really, just a matter of picking the right spot to drill the holes.
Skid works real well in that sled, it actually transfers....so much better than the proaction.
Last edited:
A write up would be awesome from you guys on this one! There's a how to for many skids but this one...
sleddineinar
VIP Member
That seat looks great! I love it!
ridergonwild5692
Member
yea i want in on this skid swap too please
jason knowlton
New member
Nice job on the seat looks really cool
snoprokidf6
Member
Where did you get the foam
ridergonwild5692
Member
can you take better pictures of how you mounted that suspension? i really would like to put a ck in my sled as well. thanks again.
snoprokidf6
Member
or post measurements
SWEDE
New member
Yes, where did you buy your foam and what type of foam did you use?