Backwoods M Max
New member
Hey All,
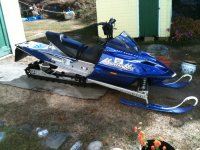
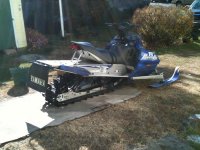
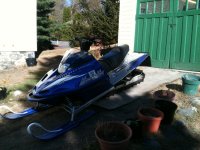
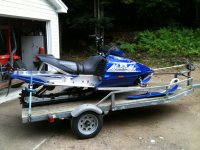
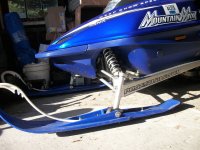
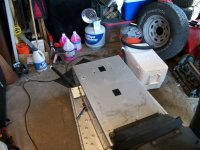
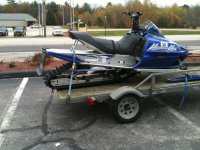
Well it's the middle of september but I can say today that I started my summer build project. This was the first step, 20 miles on the trailer to Barton's Motorsports of Tamworth NH. Dale has very graciously agreed to do the track swap, press the anti ratchet drivers and install the rail extensions. I probably won't have any pictures of the work in progress for this phase. When I get the sled back I'll be doing the hartmann tunnel extension and swapping out the front end for a set of viper trailing arms/spindles/steering arms.
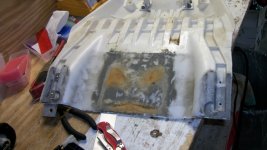
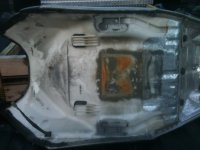
The project started last spring with a 3 ride takeoff track from a mountain max in idaho. The track was brand new accept for 1 small tear in a lug. I cut back the lug at an angle then bonded what I couldn't cut back together with 3M 5200 marine adhesive silicone. We'll see how it holds up, but there won't be any stress from the lug on it, just the track bending over the wheels.
Well it's the middle of september but I can say today that I started my summer build project. This was the first step, 20 miles on the trailer to Barton's Motorsports of Tamworth NH. Dale has very graciously agreed to do the track swap, press the anti ratchet drivers and install the rail extensions. I probably won't have any pictures of the work in progress for this phase. When I get the sled back I'll be doing the hartmann tunnel extension and swapping out the front end for a set of viper trailing arms/spindles/steering arms.
The project started last spring with a 3 ride takeoff track from a mountain max in idaho. The track was brand new accept for 1 small tear in a lug. I cut back the lug at an angle then bonded what I couldn't cut back together with 3M 5200 marine adhesive silicone. We'll see how it holds up, but there won't be any stress from the lug on it, just the track bending over the wheels.
Attachments

Last edited:
Backwoods M Max
New member
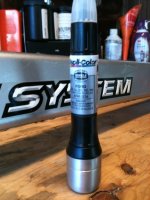
So the first part of this project has kicked off. Brown box santa delivered a set of viper trailing arms the other day. Big thanks to BeTheViper for getting them out so quick. I cut of the sway bar mounts, just one less thing to get hung up in the brush or drag in the snow. I painted the bare metal and touched up some bare spots with the new paint system being sold at autozone. Midnight silver was a special order color, so I took a gamble on a ford color. Silver charcoal ended up being a pretty good match. The new applicator paint kit comes with a cap with a little ceramic scuffing tip, pen tip/brush cap and the little bottle down the bottom has clear coat on a foam applicator. I have to say it matches pretty close. One of the top spindle bushing has a piece of the top surface chip off so I have a new bushing in the mail along with the bolts, caps and circle clips to put the spindles all back together.
Attachments

Backwoods M Max
New member
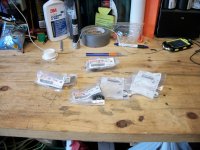
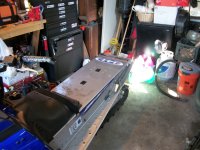
Well I got my box of odds and ends in the mail while I was away on the tug. I got my trailing arms all put back together today. The only thing I realized was that I didn't notice that hollow spacers that go into the spindles are missing. I'll have to try and pound the spacers out of my mm arms without damaging them otherwise I'll have to pick up a couple more odds and ends to get the front end together. I replaced the damaged bushing that got cracked in shipping. They look pretty cool all put together.
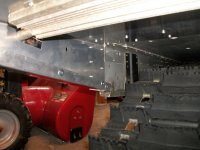
I talked with Dale at Barton's Motorsports last Friday. The track install is 99% back together. The chain was all worn out in the chain case and the slack adjuster was bottoming out before the chain got tight. I should be able to pick it up soon and get to work on the tunnel extension for this winter.
I talked with Dale at Barton's Motorsports last Friday. The track install is 99% back together. The chain was all worn out in the chain case and the slack adjuster was bottoming out before the chain got tight. I should be able to pick it up soon and get to work on the tunnel extension for this winter.
Attachments
Backwoods M Max
New member
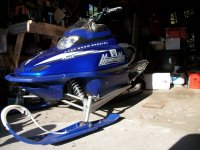
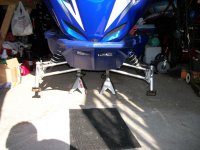
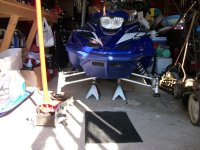
Exciting day today. Picked the sled up from Barton's Motorsports. Big thanks to Dale and his crew for all the time and effort they put into this thing to make sure it was done right and no problems will come up this winter.
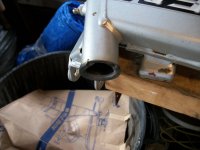
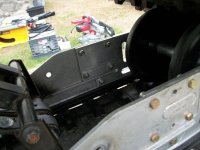
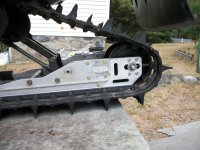
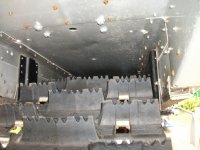
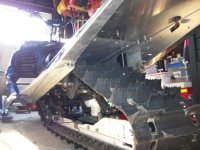
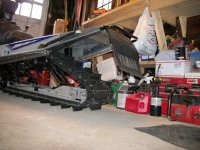
The short (long) list of everything that they did to it while it was apart. rebuilt chaincase with new bearings, seals and chain. replaced clutch side bearings on jack shaft and drive shaft. removed and pressed on extrovert drivers. installed tracksusa rail extensions. Installed the 151" challenger and put it all back together. they ended up using hyfax from a 162 nytro, which is nice because its a factory part and has the wear limits scribed in the side. They also replaced the axle bushings on the w arm since the original bushings were toast.
I took a couple pics then dove right in when i got home stripping parts off the tunnel extension. I'm going to try and get the viper front end on friday and leave the tunnel extension for the next time i'm home from the tug.
I'm very happy with the work from barton's, goes to show why mom and pop dealerships continue to hold a good reputation for doing quality work. I also found that my battery had taken a dive at some point last summer and the vent hose nipple had broken off. I was going to get a 4lb shorai lithium battery anyways, but now its a need not a want. the LFX24 is 24 amp hour and has 110 more cca's and is almost 10 lbs lighter. I also threw my angle finder on the approach since I have one now. It's a 20 degree approach, I will see how that changes when the sled is sitting with the new front end and I adjust the limit straps to harman specs on the front end.
Attachments


super1c
Super Moderator
Looks great! If your looking to get rid of that tunnel ext PM me.
Backwoods M Max
New member
super1c said:Looks great! If your looking to get rid of that tunnel ext PM me.
I need to get my act together and join as a premium member, but all the leftover stock parts will be on clearance once this gets done. Tunnel ex, stock bars, bunch of cables, drivers, trailing arms, wheel mounts.......
I will be as kind as possible to it when I take it off.
super1c
Super Moderator
Thats going to be one awesome Mountain Max. Very sharp and top notch parts and work.
Backwoods M Max
New member
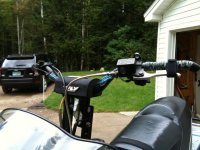
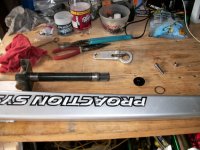
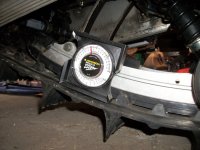
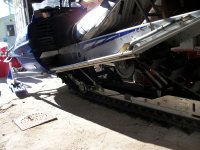
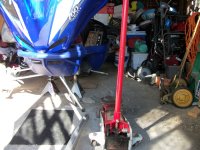
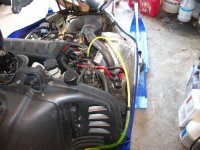
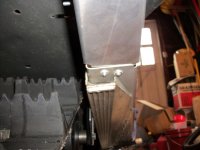
Today brought some good progress that I was finally able to contribute myself. I pulled off the front end and put on the viper front end. The initial reaction is WOW! I wish they built these things like this from the factory. I dropped the limit straps down to the recommended 25mm and ended up with about an 18 degree approach angle with the sled sitting on its own weight. The only real hiccup I found was that the bushing in the lateral links are shot, so I will have to order some new bushing and swap them out. I also got the Shorai light weight battery on the way, looking forward to getting that finished away so it's ready to go. I also started to get a feel on the steel structural rivets holding the tunnel on. They are not like anything I have taken apart before. I removed the snow flap and removed what was left of the rivets. The way these rivets buckle when you set them makes them a PITA to remove. I ground them flat with a flap disc on an angle grinder but there was still a little bit of a lip keeping them from wanting to come out. It took some persuasion with a punch but eventually I won.
I have to apologize, but the garage that I'm working in now doesn't have the most room for taking pictures.
I have to apologize, but the garage that I'm working in now doesn't have the most room for taking pictures.
Attachments


yours is starting to look like mine. you should be impressed with the changes once your done.
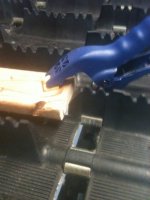
having removed countless oem yamaha rivets, heres a couple of tips that work for me: first punch out that hardened steel mandrel portion with a quality punch. drive it through and out. that portion of the rivet is much harder than the outside of the rivet. from there, drill the center out with the appropriate bit. years back i purchased a rivet removal tool, works well to keep the rivet heads from spinning, but have some extra bits on hand.
if you dont have access to clecos when you go to install the longer extension, save yourself some headache and go by some cheap nuts and bolts, 10-32 comes to mind, maybe 8-32. snugly secure the new extension with the bolts and nuts then rivet and remove as you go.
personally i wont use pop rivets on anything structural, regardless if they are similar, oem's, or even the cherrymax/stavex style. buck rivets all the way if you want it to stay and never worry about rivets loosening. seen too many oem rivets loosen up on the mtn sleds.
Backwoods M Max
New member
Thanks for the heads up. I've come across a bunch of tunnel extension rivets that are loose already. I'll have to get a lock on them with some vice grips to keep them from turning when I drill them out. I'm not sure yet, but I may want to use back up washers and get longer rivets for the tunnel extension. I know that I'm going to use back up washers on some of the low count rivets, like where the tunnel meets the running boards and to put on the snow flap.
Backwoods M Max
New member
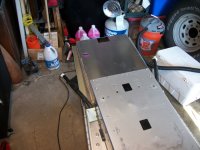
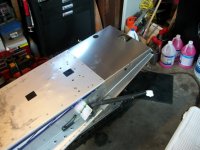
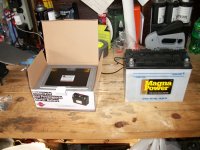
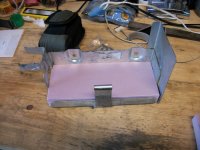
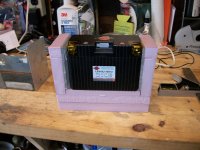
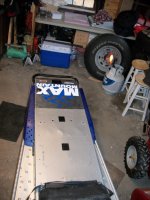
Well I made some visible progress today. I wasn't planning on getting into the tunnel this time home from the tug boat but I had the day and nothing going on so I decided to just start drilling and see how far I got. I sucked the coolant out with my oil changer and avoided the mess in the bellypan and in the floor. The new tunnel is all drilled and held in with some 10-24 machine screws for now. I didn't get a chance to remove the rear cooler from the old tunnel yet. Once the cooler is out, I want to slide it in and slip the hoses on it to see where it wants to live, then mark and drill on the bench. It should be a solid day and the tunnel will be done. I got the left side tunnel reinforcing strip set up, the right side should go pretty quick following the other one as a template. My new battery will be here when I get back and I'm going to make a spacer out of some pink wall foam insulation to give it a nice tight fit. I ended up going with a Shorai LFX18-L1 battery which is 270 cca and weighs 2.1 lbs. I don't mind sacrificing a little bit of weight for the electric start with a battery that's negligible in weight. It will be so much better than that 14lb brick that was riding around in there before, and these things have a 5 year warranty and don't self discharge.
Attachments
kgwmu
New member
can you post more pics on what/how you mounted your seat? I am very interested in doing something similar. does it sit taller than a stock seat?
Backwoods M Max
New member
kgwmu said:can you post more pics on what/how you mounted your seat? I am very interested in doing something similar. does it sit taller than a stock seat?
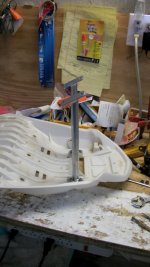
Here are the details on the stock seat. It's an rx1 seat, and the pan is cut back to just behind the front tabs that grab under the tank. I was going to try and use the seat unmolested as some have done before with fx nytro seats but it was not to be. I pulled the cover and the foam off and just started cutting and then saw what I could make of it from there. I do wish I had taken my time a little bit more to do the final fit of the foam, because I ended up with about a 1" gap between the foam and the tank up front. It's not a big deal in the winter because I have a tank bag which covers up most of it. I had a friend at work help me make the support struts. I took off the stock tabs that the j-bolts grab on to and made up backer plates to go on them, then figured out the angle and built the legs. The tabs for the front are just 1.5" (iirc) aluminum flat bar that I bent a drop into so that it sits flush on top of the fuel tank studs. The foam can be lifted out of the way to put the washer and nut on when you put the seat on. I used a piece of 2" nylon with velcro on it to secure the front of the foam. It's like an old school grab strap style strap. It keeps the foam from squishing out to the sides at the front when you actually sit on the seat. You can see that it does have a bit of rake to it compared to a stock seat, is a little shorter and a bit lighter. you do lose the trunk though. For the little bit that I do sit on it, I like it especially with the higher bars. I almost couldn't ride it on the trails to get to the deep with the bars the way they were with the low seat. I can take some pictures of the way the foam was shaped when I get home from work, just got back to the tug for 2 weeks yesterday.
Attachments
Last edited:
Backwoods M Max
New member
I feel honored that I have made it into the top 10 for voting.
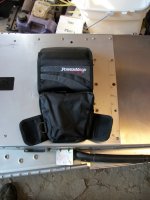
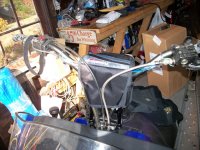
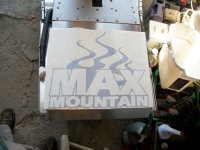
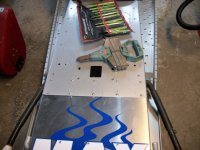
That being said, I am home from the tug for another 14 (more like 11) days and will be making sure that I get this thing all buttoned up. I got a little bit of work done on it the other day. I had a new powermadd riser bag and bolt on grab strap come in the mail while I was away. I also ordered a custom decal for the tunnel extension. I can't wait to see how it is when it's all laid out. The new radius rod bushings are also here so I will dive back into the front end. I found a problem with the steering. The steering arms come up on the stops before the steering post stop does, so when I put it hard over and apply leverage (wrong foot forward counter steer) to pull the sled onto one ski, I can feel all the flex in the steering. So instead of ripping off the idler bellcrank, or busting a drag link, or breaking a steering arm, I am going to cut the aluminum stops off the steering arms so that when I am hard over, I'm on the stops in the steering column, and all that body english goes into the steering post and hoop instead of through all the linkage.
I built a spacer for the new 2lb light weight battery, I used some 1" thick project foam from home cheapo and hot glue to make the spacer. The whole mess slides into the battery box once its installed. It weighs 2.5lbs total weight, a lot better than a 14lb lead acid in there.
The plan for tomorrow is to drill the 8 rivets off the rear heat exchanger, get it in, marked and drilled then try and rivet everything in place tomorrow. If there is time I will get it flooded with coolant again and try and fire her up and bleed it. I got a can of 92 octane ethanol free fuel from the hardware store, I am going to scab into the fuel line at the tank bulkhead fitting and extend it out so I can drop a hose in the can and run it off that. I would not have put gas back in the sled until at least the end of december, so I want it to sit with some nice ethanol free gas in there for the next 6-7 weeks before its ready to go.
Attachments
-
 Bar Bag 1.jpg193.7 KB · Views: 21
 -
 Bar Bag2.jpg166.5 KB · Views: 16
 -
 Bar Bag3.jpg263.4 KB · Views: 19
 -
 Bar Bag4.jpg276.6 KB · Views: 19
 -
 Battery 1.jpg215.3 KB · Views: 21
 -
 Battery 2.jpg191.8 KB · Views: 18
 -
 Battery 3.jpg228.4 KB · Views: 17
 -
 Battery 4.jpg191 KB · Views: 19
 -
 Tunnel Wrap.jpg181.9 KB · Views: 20
for what its worth, try readjusting your steering arms prior to committing to hacking off the bump stops. i have found with the front end geometry, depending on what all you swapped out, that the viper arms like to be a bit outboard of the trailing arms like one groove in the spline when not changing all the components while doing this swap.
bugged me for a while appearance wise, but it works. i narrowed it down to the rad rod differences, bulkhead and angles. lining up the arms parallel to the trailing arms makes for binding or seriously reduced turning radius.
bugged me for a while appearance wise, but it works. i narrowed it down to the rad rod differences, bulkhead and angles. lining up the arms parallel to the trailing arms makes for binding or seriously reduced turning radius.
Backwoods M Max
New member
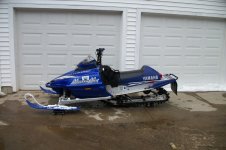
The build is done! I will update tonight with the last round of pics but she is finished.
Snowdad4, thanks for the tip, I did try re clocking the steering arms, but I would have had to extend my drag links in the steering about 1.5" to make it work. If it was a wider front end sled there might have been more adjustability but not here. I pulled off the arms and sawed the stops off then threw it all back together, no bind and I got all the throw back in the steering back. I didn't realize how much I was losing with the stops there. Now that its done, I would have cut them off just for the steering throw.
Snowdad4, thanks for the tip, I did try re clocking the steering arms, but I would have had to extend my drag links in the steering about 1.5" to make it work. If it was a wider front end sled there might have been more adjustability but not here. I pulled off the arms and sawed the stops off then threw it all back together, no bind and I got all the throw back in the steering back. I didn't realize how much I was losing with the stops there. Now that its done, I would have cut them off just for the steering throw.
YooperMike
New member
Backwoods M Max
New member
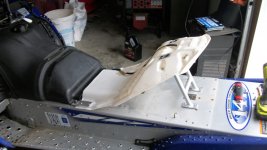
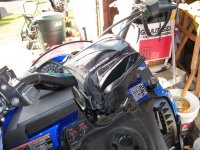
Here are the last round of pics to go along with the build. I still have to put the coolant back in and bleed it, then put in the new radius rod bushings. I put on the tunnel extension decals before it all went together, so the rivets are over the decal instead of trying to stretch it over them. The accordion rivet tool was a life saver, I've got to thank my buddy for letting me borrow it. I set all the tunnel rivets in about 25 minutes with that thing. I broke my tool trying to set the first rivet on the tunnel extension reinforcement strips, so I made the accordion tool work doing the inside of the tunnel as well. Some of the rivets got back up washers if the original hole was sloppy. My grandmothers garage has been host to this project, so she came out today to see what was going on. Really wanting some snow now, I guess I can get onto the other things like waxing the hood and polishing the clutch cover waiting for the snow to show up to pass the time  I will have to get some good shots of it when I can walk it outside and get far enough back to get it all in frame.
I like that parking brake too, its a lot lighter and easier than trying to find an extended length cable.
I will have to get some good shots of it when I can walk it outside and get far enough back to get it all in frame. I like that parking brake too, its a lot lighter and easier than trying to find an extended length cable.
Attachments
-
 boondockin granny.jpg259.5 KB · Views: 56
 -
 cooler rivet.jpg217.1 KB · Views: 23
 -
 covers on.jpg189.5 KB · Views: 26
 -
 drilled tunnel.jpg192.2 KB · Views: 21
 -
 flap on.jpg224 KB · Views: 29
 -
 reinforce strip.jpg164.3 KB · Views: 29
 -
 side coolers.jpg152.6 KB · Views: 25
 -
 side profile.jpg207.5 KB · Views: 33
 -
 tunnel rivet.jpg183.1 KB · Views: 27
 -
 Tunnel Wrap.jpg181.9 KB · Views: 25
Last edited:
super1c
Super Moderator
LOVE IT!! and granny looks to be rocking it out on that sled. I bet she could hang with the best of them. Nice job!
Backwoods M Max
New member
I didn't realize that I hadn't show off the finished project yet. You will have to excuse the bad photos. I had left my point and shoot in my wife's car which I dropped off at the mechanics on the day I took her outside. I had drained the gas so that the sled would be dry until the snow was here, and since I didn't feel like draining the carbs I did the next best thing. I pulled the fuel line off at the tank bulkhead, and spliced a short piece into it so I could run the sled off a can of trufuel in the left foot well. It just gave me a better feeling about having the sled sit around for another 6 weeks having pure gas in the carbs.