Backwoods M Max
New member
Since I didn't find too much in depth information about the reverse chain case and I'm a visual learner, here's the step by step re-assembly of the chain case internals.
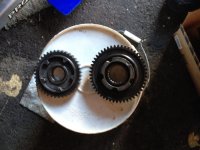
Here's the gear set. If anyone has back lash concerns on a reverse equipped sled, this is where it is. The 5 point drive in-between the chain gear and reverse gear have a little back and forth in there.
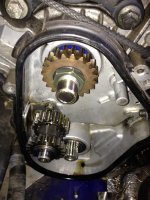
Here's the chain case, with 20Tooth top gear waiting for parts
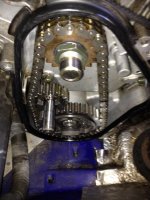
Here the chain in, reverse counter drive gear is in and the bottom gear is hanging on the chain.
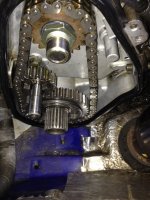
Here is the extension shaft slid onto the drive axle. This is what the bottom gear rides on and free spools on when the sled is in reverse. Don't Forget the spacer between the gear and splined part of the shaft.
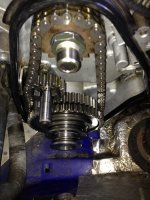
Here is the bottom reverse gear installed. The cupped spring retainer holds the whole mess on. It has a lock washer but still requires lock tite just the same. The large spring pushed the reverse gear against the bottom chain gear. The drive dog is pressed into the bottom chain gear, and the spring behind it keeps it tight onto the bottom drive gear. When you shift into reverse, this big spring is what you feel when pulling the lever.
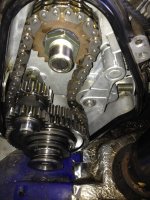
Here is the whole mess before the cover goes on. The reverse counter gear that is driven by the chain is engaged to the reverse bottom gear when it is slid out to engage reverse, and away you go (in reverse). When putting the cover on, don't forget the lock tite on the bolt for the reverse counter gear shaft too. From here, put the cover on, make sure the linkage is in adjustment, install the battery (if you have one), Fill it up with oil and it's time to ride.
Hope this helps everyone, the chain is a 68L chain on 20/39 gears. The roller on the chain tensioner was seized and the roller was more like an egg, so don't forget to take a look the roller while you've got everything apart.

Here's the gear set. If anyone has back lash concerns on a reverse equipped sled, this is where it is. The 5 point drive in-between the chain gear and reverse gear have a little back and forth in there.

Here's the chain case, with 20Tooth top gear waiting for parts

Here the chain in, reverse counter drive gear is in and the bottom gear is hanging on the chain.

Here is the extension shaft slid onto the drive axle. This is what the bottom gear rides on and free spools on when the sled is in reverse. Don't Forget the spacer between the gear and splined part of the shaft.

Here is the bottom reverse gear installed. The cupped spring retainer holds the whole mess on. It has a lock washer but still requires lock tite just the same. The large spring pushed the reverse gear against the bottom chain gear. The drive dog is pressed into the bottom chain gear, and the spring behind it keeps it tight onto the bottom drive gear. When you shift into reverse, this big spring is what you feel when pulling the lever.

Here is the whole mess before the cover goes on. The reverse counter gear that is driven by the chain is engaged to the reverse bottom gear when it is slid out to engage reverse, and away you go (in reverse). When putting the cover on, don't forget the lock tite on the bolt for the reverse counter gear shaft too. From here, put the cover on, make sure the linkage is in adjustment, install the battery (if you have one), Fill it up with oil and it's time to ride.
Hope this helps everyone, the chain is a 68L chain on 20/39 gears. The roller on the chain tensioner was seized and the roller was more like an egg, so don't forget to take a look the roller while you've got everything apart.
SRX500kid
New member
Nice job!! I wish I could put reverse On my sled.
iPhone using the dreaded Crapatalk
iPhone using the dreaded Crapatalk
great help!!! the thing i always have trouble with is figuring out which spacer/wash goes where!! in the manual they all look the same so its a real pain in the a?<!! i was wondering if u remember about which washer goes where? any washers bfore the 2 big gears also??
your the man!!thanx
your the man!!thanx
Backwoods M Max
New member
The spacers on the bottom are the same thickness, one is smaller diameter to go over the splines of the drive axle, the outside one is bigger and goes over the smooth part of the extension shaft. On the top gear there is a thick tube like spacer that goes inside the gear, then a flat washer goes outside the gear and the nut on top.
Thank you for taking the time to do this!
Since I didn't find too much in depth information about the reverse chain case and I'm a visual learner, here's the step by step re-assembly of the chain case internals.
View attachment 53624
Here's the gear set. If anyone has back lash concerns on a reverse equipped sled, this is where it is. The 5 point drive in-between the chain gear and reverse gear have a little back and forth in there.
View attachment 53625
Here's the chain case, with 20Tooth top gear waiting for parts
View attachment 53626
Here the chain in, reverse counter drive gear is in and the bottom gear is hanging on the chain.
View attachment 53627
Here is the extension shaft slid onto the drive axle. This is what the bottom gear rides on and free spools on when the sled is in reverse. Don't Forget the spacer between the gear and splined part of the shaft.
View attachment 53628
Here is the bottom reverse gear installed. The cupped spring retainer holds the whole mess on. It has a lock washer but still requires lock tite just the same. The large spring pushed the reverse gear against the bottom chain gear. The drive dog is pressed into the bottom chain gear, and the spring behind it keeps it tight onto the bottom drive gear. When you shift into reverse, this big spring is what you feel when pulling the lever.
View attachment 53629
Here is the whole mess before the cover goes on. The reverse counter gear that is driven by the chain is engaged to the reverse bottom gear when it is slid out to engage reverse, and away you go (in reverse). When putting the cover on, don't forget the lock tite on the bolt for the reverse counter gear shaft too. From here, put the cover on, make sure the linkage is in adjustment, install the battery (if you have one), Fill it up with oil and it's time to ride.
Hope this helps everyone, the chain is a 68L chain on 20/39 gears. The roller on the chain tensioner was seized and the roller was more like an egg, so don't forget to take a look the roller while you've got everything apart.


