Throttle Junkie35
New member
I have a belly pan that I took off one of my parts chassis. 

And if your p*ssed now........wait untill you get to the scissor arms in the front end.
I gotta tell ya, reading this thread is a deja-vu!!
I have basically just done almost everything the same as in this thread, with the exception of opening up the motor.
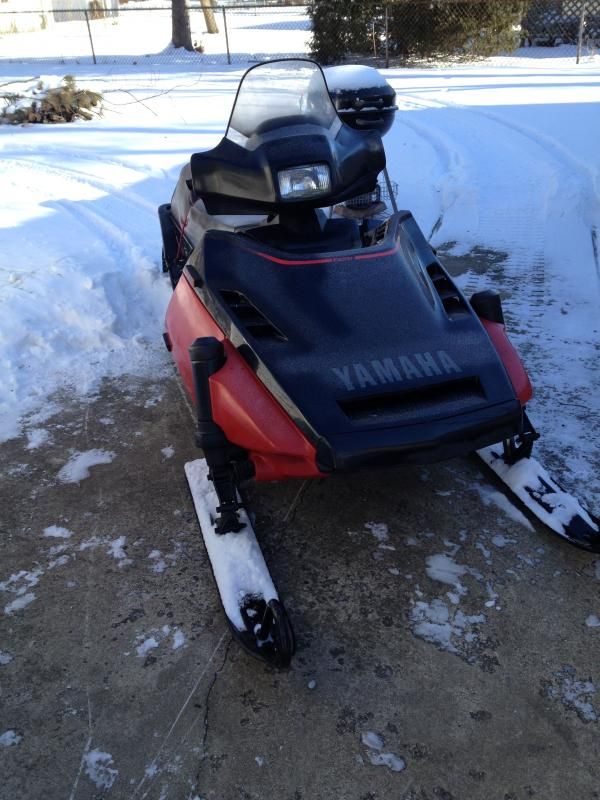
Full on replacement of everything in this $900 1991 SRV I just bought. Sled was basically original, track too!!
Got an almost new Bombardier track (0.9") for $280 and have another $500 into it.
ALL bearings, sliders, carbide, scissor bushings, some skid bushing...
-replaced seat wood, seat material is perfect
-new exhaust gaskets, was missing one?!!
-new hot grips, and thumb warmer
-fixed hood hinges to fit hood properly
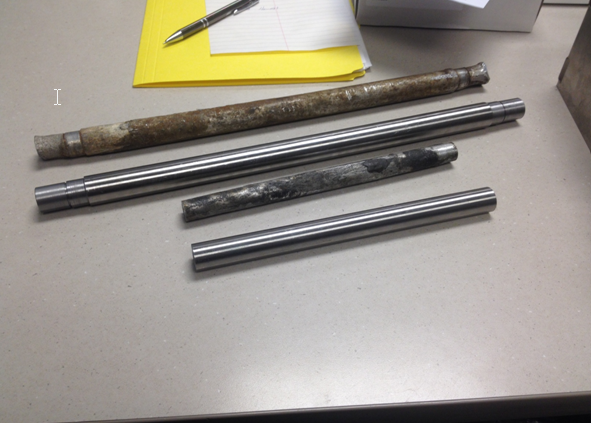
-all shafts seized basically, one new one, rest lubed, etc
-both clutches cleaned and were in excellent shape, ordered a new primary spring
-even that clutch side axle nut was a bugger, I used a pipe wrench on the axle...
-oil everywhere from the missing exhaust gasket....
-all new fuel lines and oil lines and oil filter and a change over to Ipone smelly oil
-new plug caps
-carb cleaned, airbox opened up and cleaned out too
I am sure I have forgotten stuff that I did! I have well over 30 hours into this.
This is a 1st sled for my girlfriend, a great low stable sled to learn on. It was my dream sled when I was a kid!
oh and speaking of the scissors...I just took one off last night...but the bottom bolt won't come out, it turns. I haven't tried hammering it out yet....
Good times.
Good times.
Heck, that aint noth'n. Most of the time heat doesnt do any good and milling them out is the only option. The aluminum shafts are fine IF they are lubed every season or at least every other. Most of the skids I have torn apart probably never saw grease besides what the factory put in.
I bet I have over 8hrs in the last skid that I refurbished. They are very, very time consuming. BTW, carefull with the heat, you could make those arms brittle.
Yup, I bet I have at least 8 hours into mine too!! Hammering the heck out of it, and using a 3 jaw puller on the wheels!
grasshopper
New member
Still waiting on a new shafts that are being made. Having a friend make them out of steel instead of aluminum.
I decided to put all the best parts into 1 sled rather than get both going right now. Then I will do the complete rebuild on the other as time permits. I just go a little overwhelmed with the whole damn thing and want a sled to ride when the snow falls.
I decided to put all the best parts into 1 sled rather than get both going right now. Then I will do the complete rebuild on the other as time permits. I just go a little overwhelmed with the whole damn thing and want a sled to ride when the snow falls.
grasshopper
New member
Is the fuel cock assembly needed? #33 in the diagram http://www.ronniesmailorder.com/fic...Snowmobiles&make=Yamaha&year=1990&fveh=176096
Last edited:
if it is just a fuel shut off, you can leave it off if you want to.
Yamaha Nutz
New member
tip for the scissor arm bolts if they are rusted to the collars try pressing them out if they still do not move cut the bolt off on both sides flush with the scissor arm center punch it and drill it out the arm will come off and now you can get the collar out ............I have rebuild plenty of these front ends and just makes the job go way faster and less stressful
grasshopper
New member
I was a little confused on its function because it had what appeared to be a choke lever connected to it. I guess with the choke lever flipped up it was supposed to shut the fuel off. I will just put a regular fuel petcock on it and call it good.
grasshopper
New member
I was a little confused on its function because it had what appeared to be a choke lever connected to it. I guess with the choke lever flipped up it was supposed to shut the fuel off. I will just put a regular fuel petcock on it and call it good.
the 79 et250 had a fuel shutoff like that as well. i think i bypassed it as we never used it......wait i lied, used it once when fuel pump diaphram split and it was filling the bottom of the motor with gas.
PZ 1
Member
- Joined
- Mar 12, 2005
- Messages
- 987
You could add a skid plate. Then you wouldn't have to change the belly pan. And have a better, stronger belly.
grasshopper
New member
I'm reassembling the skid right now and having problems getting the springs and shock all put back together. Stand on your head and do the hokey pokey
Throttle Junkie35
New member
Put the rear spring hooks on last after you have everything else put together. Then hook the rear springs on the arm hooks, then take the front hooks with the related hardware and muscle them into position. Now that your rear springs are installed, take a ratchet strap on one side of the skid from the top of the rear arm to the cross shaft of the front of the rear shock where it pivots and compress the rear shock and rear arm assy. This will alow you to line up the rear mounting bolts in the tunnel. If you dont know this, your going to have to install the front of the skid in the chassis first.
grasshopper
New member
I finally got the thing together and rode it last week a little bit. We have enough snow now to go blast around and I was out for a bit last night. It seems to run pretty good besides when I slow down and it loads up. I think my air mixture screw needs to be opened up because it's loading up. Also, last night it seems that I bound up the back shock on the skid. It's slammed all the way to the ground. I might have to pull the skid tonight and see what happened with that.


Vmax540
VIP Member
You have to remember that the sled is 25 years old and unforentunely like most sleds the previous owners did not grease the suspension as needed. I feel your pain, been there. I just removed two aluminum shafts from a 1980 John Deere Liquifire and they both came out with a little penetrating oil and a persuader but, then there was still remnants of grease left on the shafts. I take a cut off wheel and put a small grove the length of the shaft and stop 1/2" shy of the end of the shaft which will allow the grease to spread the length and serve as a little reservoir of grease.
A couple of bucks
VIP Member
I like it!!
yamaguy
New member
Hi, Im new to this site and this hole forum thing (JSYK). Im rebuilding my 92 Exciter. Replacing the top end and crank seals. Is there a gasket for the bottom end? like what I'm seeing in the picture? I did not get a gasket for this in the top end gasket kit. Local dealer said to use yamaha gasket seal. It doesn't look like there is a gasket there in the first place. And also, what is the best method for splitting that top from the bottom?
Yamaha Nutz
New member
Hi, Im new to this site and this hole forum thing (JSYK). Im rebuilding my 92 Exciter. Replacing the top end and crank seals. Is there a gasket for the bottom end? like what I'm seeing in the picture? I did not get a gasket for this in the top end gasket kit. Local dealer said to use yamaha gasket seal. It doesn't look like there is a gasket there in the first place. And also, what is the best method for splitting that top from the bottom?
really sounds like you are a rookie at this motor stuff .....please get a manual to help you through this .....for the case halves yes no gasket just use a light coating of yamabond 4 it is a anerobic sealer meaning it never really dries and stays rubbery
Throttle Junkie35
New member
No gasket for the case halves. Use Yamabond4. After you have the clutch, flywheel, stator off, and all the bolts out of the bottom end you can take large screw driver or something a bit softer and tap upwords on the lower half of the case to break the seal. There are a couple of spots on the case where you can get an edge. Do not tap too hard. Just enough to loosen the sealant. Then wiggle it off.


