Hi guys!
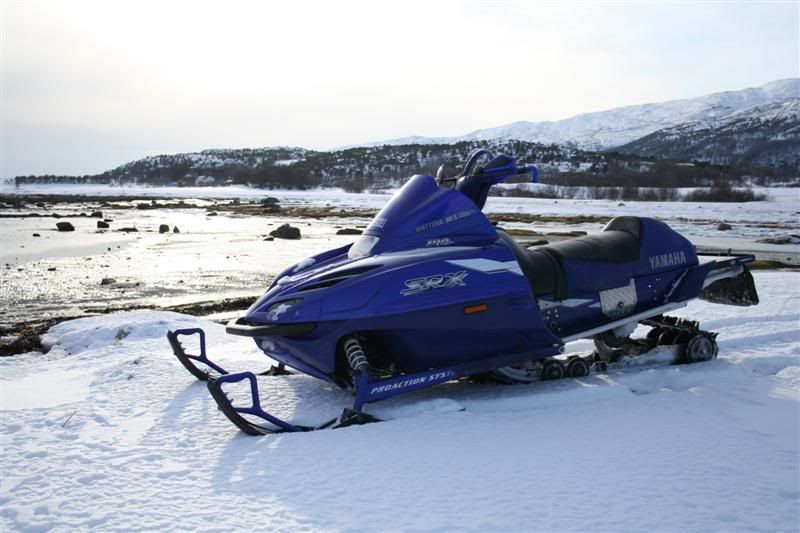
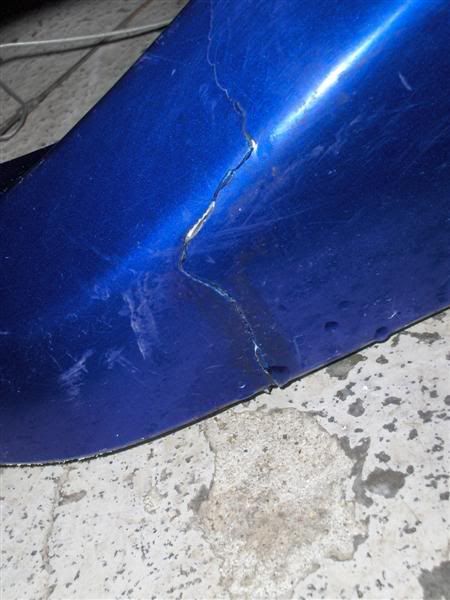
When I bought my SRX last year I thought it looked somewhat "bad". Hood had some cracks and the paint was overall bad. Looks like previous owner had been welding or grinding something near the sled, the hood is full of black spots. Therefor I`m going to repaint it, the trailingarms and the radius rods. Also going to polish the tunnel + a few other things. Going to paint it black metallic.
Today I got the sled up to our house and started working on it.
First a "before" picture taken this winter:
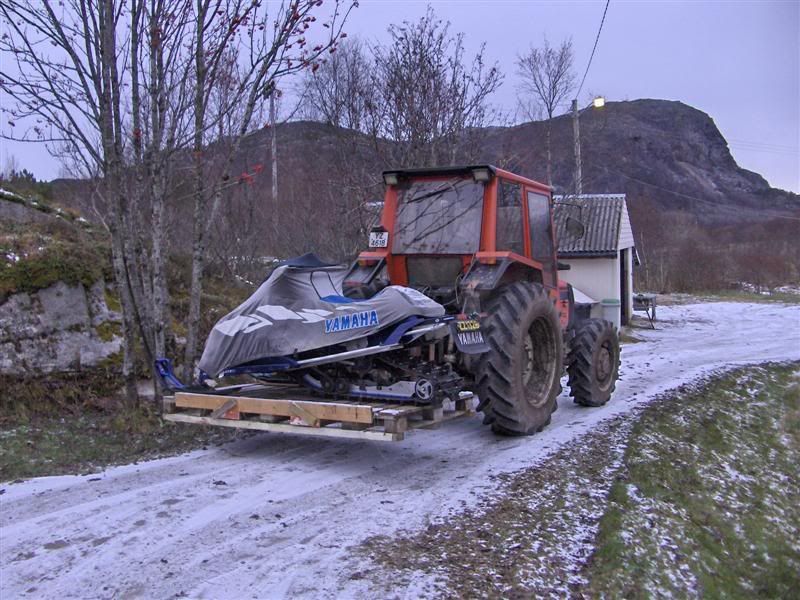
Getting her up to the workshop.. .
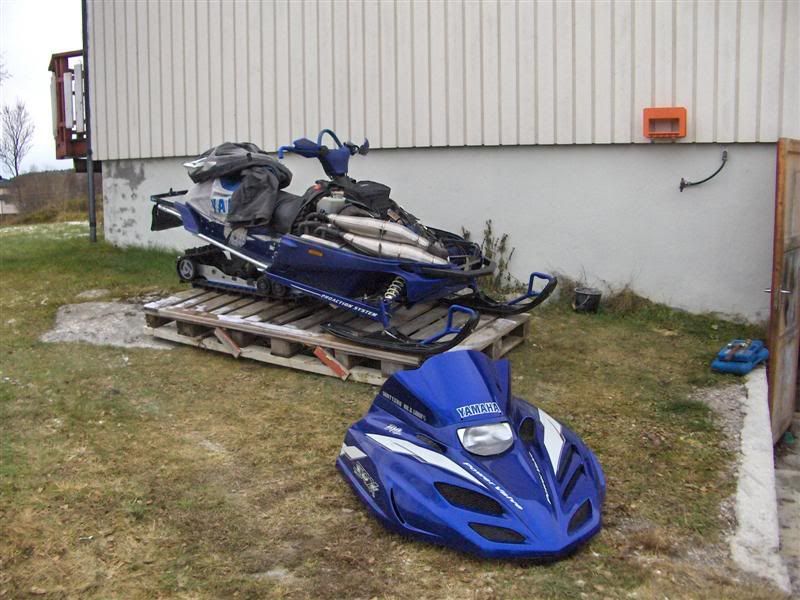
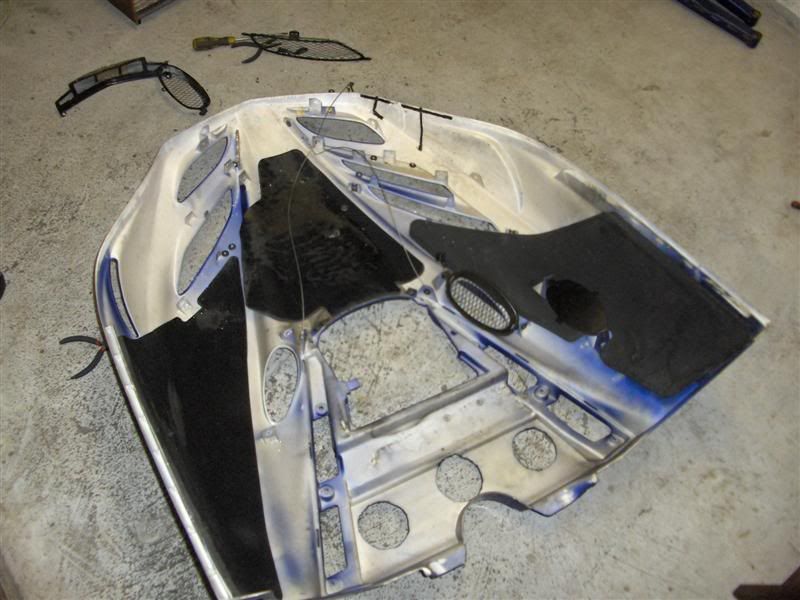
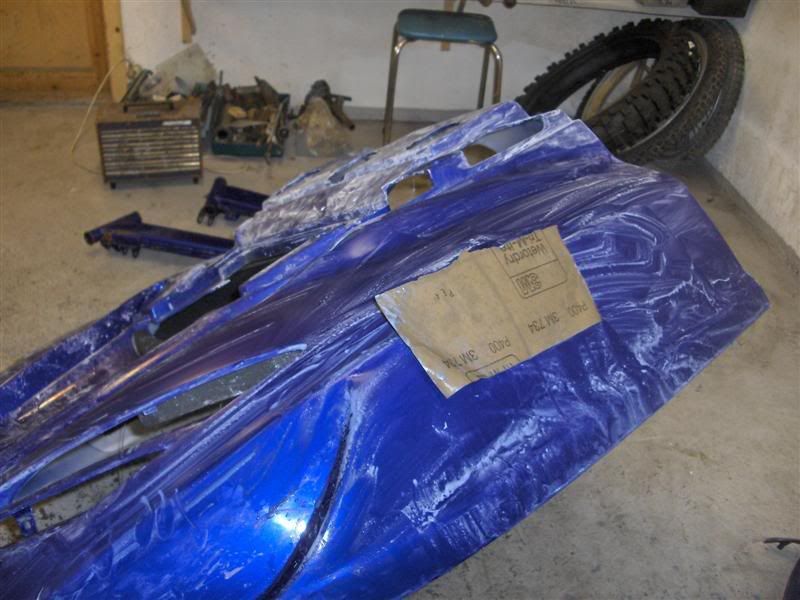
Then the hood came off.. .
When I bought my SRX last year I thought it looked somewhat "bad". Hood had some cracks and the paint was overall bad. Looks like previous owner had been welding or grinding something near the sled, the hood is full of black spots. Therefor I`m going to repaint it, the trailingarms and the radius rods. Also going to polish the tunnel + a few other things. Going to paint it black metallic.
Today I got the sled up to our house and started working on it.
First a "before" picture taken this winter:
Getting her up to the workshop.. .
Then the hood came off.. .
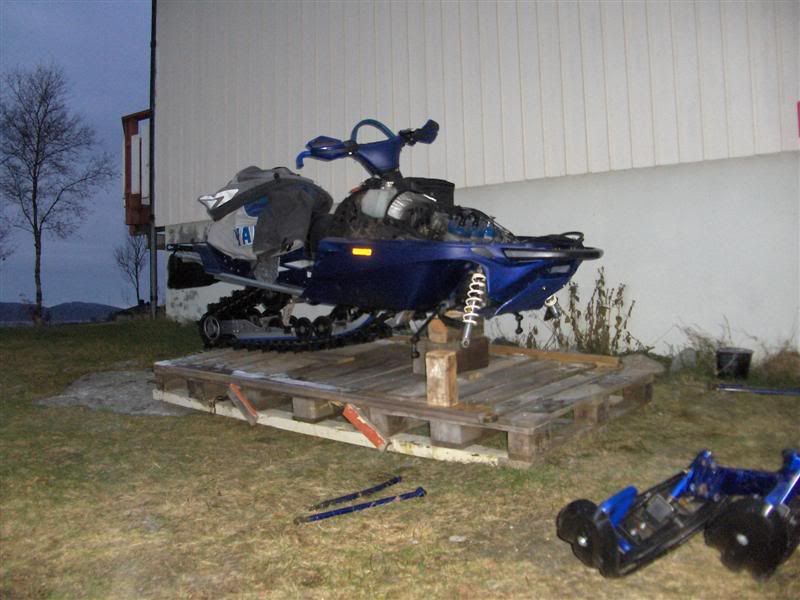
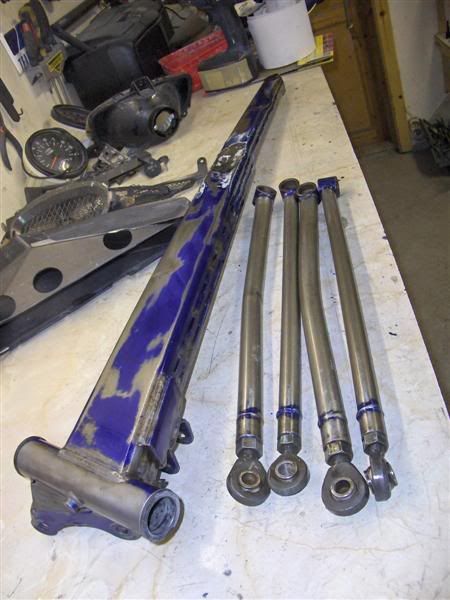
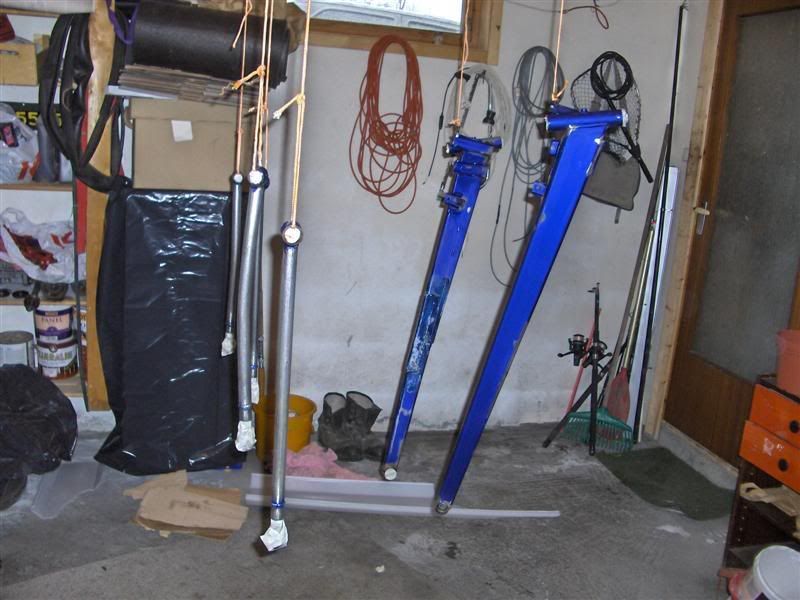
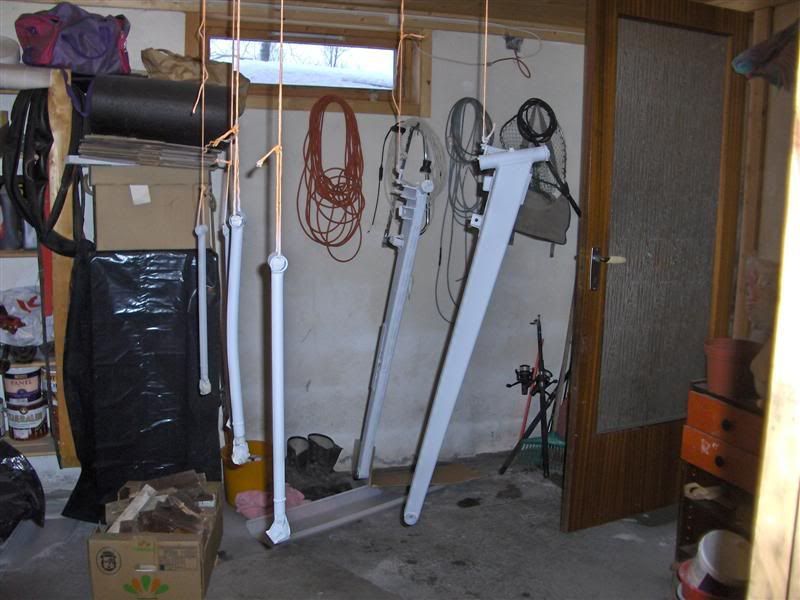
Then the trailingarms and radius rods
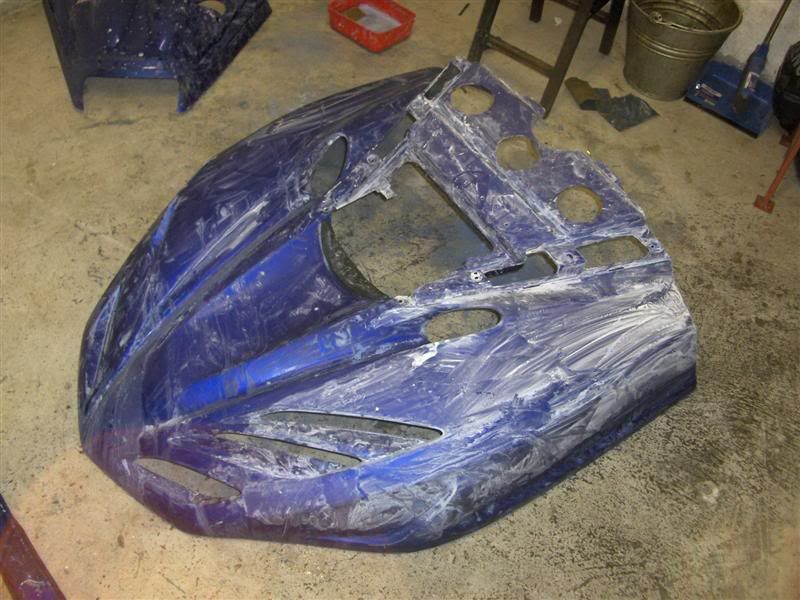
I then drilled out all the rivets holding the " " (what`s it called?) and removed them. For a moment I considered not to remove them and just paint them together with the hood, but it seemed lame.
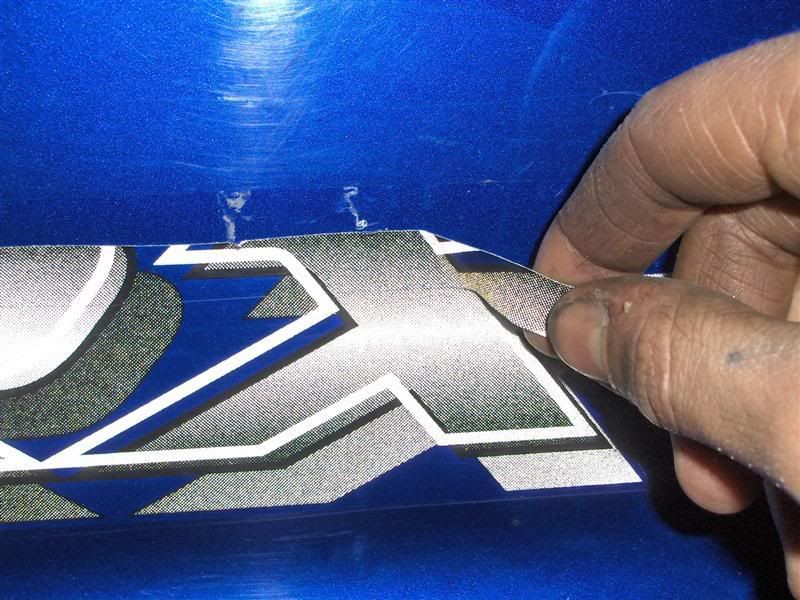
Then I removed all the decals. I was amased by how easy they were to remove. The most difficult ones were the SRX stickers on the side, but I`ve found out that by parting the sticker up in "stripes" with a knife, makes them easier to remove. Easy to peel of a thin stripe. (less tear resistance so the sticker wount "break" ).

There you have it.. . There was some glue left but I did a test and it seemes like normal paint thinner will do the job.
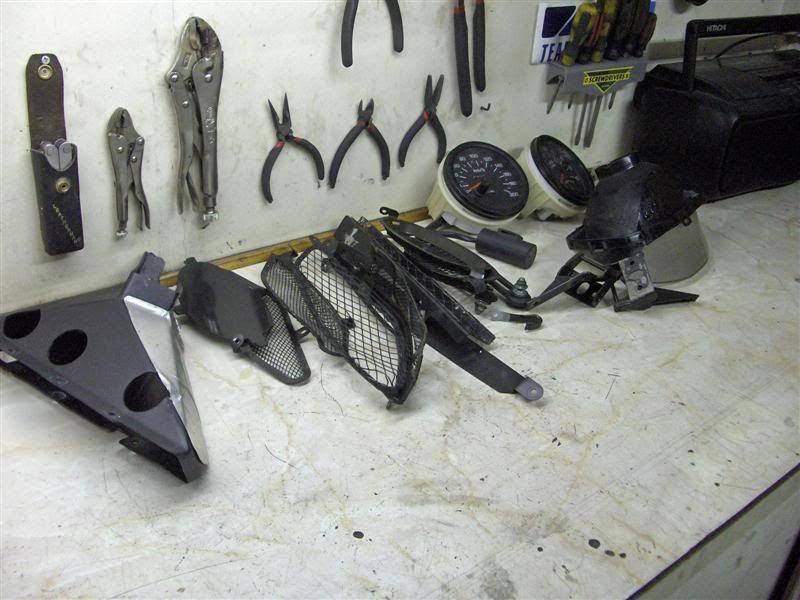
The hood vent-grilles and stuff.. .
I might post alot of un-interesting pictures.. but I think it`s better with to many pics then to less pictures.. .
Will update the thread as soon as there is progress.. .
Joakim
")
TopGunnSrx
New member
Atleast its coming apart good!
BTW looks like you have some bent Radius Rods
BTW looks like you have some bent Radius Rods
Yeah I noticed it.. but who cares as long as it doesn`t affect the ride.. . ?.
If I straighten them I bet they will be just as bent after one season.. . I might be wrong but.. wellwell
.sxviper32
New member
ah man, black?!?! go with somethin different, do pearl white or something with some color!!! if you do black, what about the pans?
Hi guys!
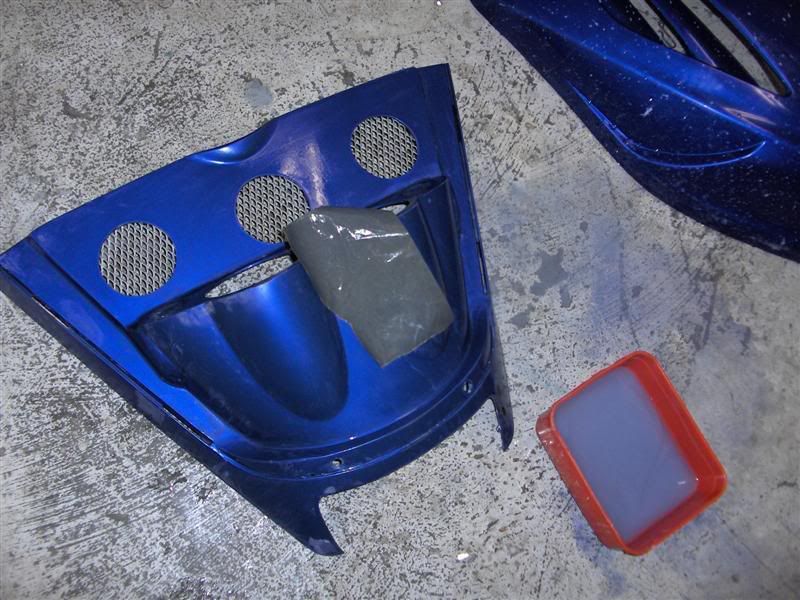
sxviper32, I will go with black.. nothing do discuss.. hehe. You see, I ordered paint by using the paint code from my car, that way I can also painth the bumpers on my car with the same paint.. (economic thinking) . The blue plastic panels will remain blue, I tink it will be OK, a little contrast wount hurt. `
Removing the panels must be a bitch?.
Oh just a question that popped up in my head, do you guys remove the exhaust manifoils and or the steering linkage when removing the radius rods bolt?. I think I spent atleast half an hour on one of the bolts.. they were real hard to get out.
Today I went down to the workshop and removed all the glue from the decals (used normal paint thinner) and then I wet sanded the windshield and the headlight-surrounding with 400grit.
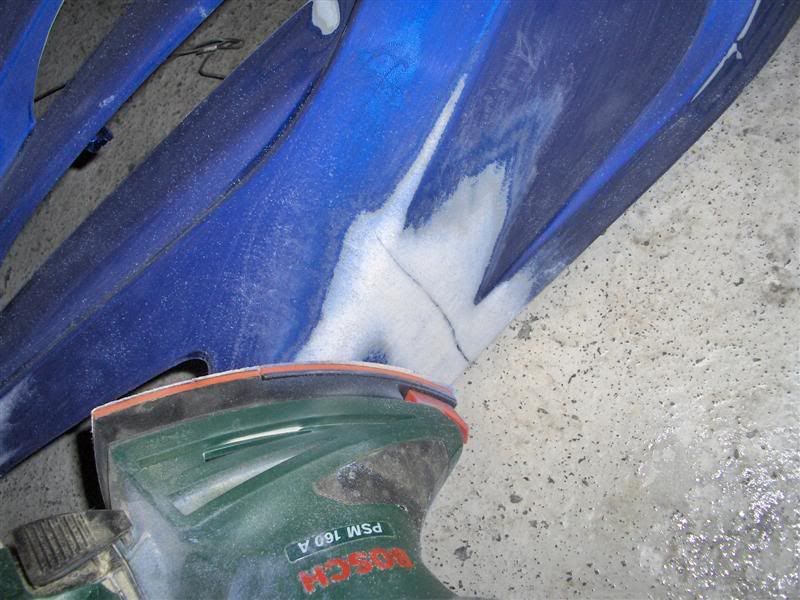
On thing I wonder is how I should fix these cracks, there are three of them. They are plastic-welded properly on the inside, but the outside still requires some work before it can be painted. Should I just sand them and then put plastic padding PP100 in/around them to remove them?.
Another thing I wonder is if I should use plastic primer all over the hood?. Some places I sanded all the way down to the plastic in order to remove sharp edges/dents/dings (whatever it`s called). Or should I just use plastic primer on the few spots were I sanded through the paint, or should I just go straight on with filler?.
Before I went to work I went and picked up the mail, and man was I glad to get this little packet from 2000SRX , with 3 tubes of Simichrome and a couple of cool CBR Performance parts stickers.
It might sound wierd but I guess it`s cool for us Norwegians to have American-dealer stickers on our sleds, or atleast I think so, hehe.
Well that`s all for today.
Joakim
sxviper32, I will go with black.. nothing do discuss.. hehe
. You see, I ordered paint by using the paint code from my car, that way I can also painth the bumpers on my car with the same paint.. (economic thinking) . The blue plastic panels will remain blue, I tink it will be OK, a little contrast wount hurt. `Removing the panels must be a bitch?.
Oh just a question that popped up in my head, do you guys remove the exhaust manifoils and or the steering linkage when removing the radius rods bolt?. I think I spent atleast half an hour on one of the bolts.. they were real hard to get out.
Today I went down to the workshop and removed all the glue from the decals (used normal paint thinner) and then I wet sanded the windshield and the headlight-surrounding with 400grit.
On thing I wonder is how I should fix these cracks, there are three of them. They are plastic-welded properly on the inside, but the outside still requires some work before it can be painted. Should I just sand them and then put plastic padding PP100 in/around them to remove them?.
Another thing I wonder is if I should use plastic primer all over the hood?. Some places I sanded all the way down to the plastic in order to remove sharp edges/dents/dings (whatever it`s called). Or should I just use plastic primer on the few spots were I sanded through the paint, or should I just go straight on with filler?.
Before I went to work I went and picked up the mail, and man was I glad to get this little packet from 2000SRX , with 3 tubes of Simichrome and a couple of cool CBR Performance parts stickers.
It might sound wierd but I guess it`s cool for us Norwegians to have American-dealer stickers on our sleds, or atleast I think so, hehe
.Well that`s all for today.
Joakim

looks like your on your way having a custom looking sled,keep up the good work.things like this take time and patients,but in the long run the results will show.good luck
Thanks for the nice comment REDMATER! . I must also apologize for not getting your awesome graphics, I just didn`t have the money.
I just hope the painting will be nice, I`ve only painted with a real paint gun two times before, both times I was super happy with the result, but I have never painted with metallic paint. They say the clear coat on top is the hardest.. we`ll see.
. I must also apologize for not getting your awesome graphics, I just didn`t have the money. I just hope the painting will be nice, I`ve only painted with a real paint gun two times before, both times I was super happy with the result, but I have never painted with metallic paint. They say the clear coat on top is the hardest.. we`ll see.
Hi !
Today I finished the sanding of the hood, actually didn`t take as long as I expected.
done!
Then I took it out to clean it with a water hose, oh gees look at the white stuff on the ground !!
Then I took it back into the shop and let it dry. The previous owner had repaired some cracks in the hood, it was a good repair but I had to use a grinding machine to get the egdes flush on the outside.
I then used a brush to apply plastic primer to the spots were I had sanded through the paint. I didn`t bother to use the spray gun since it was only a few spots, and cleaning the spraygun takes a while.. .
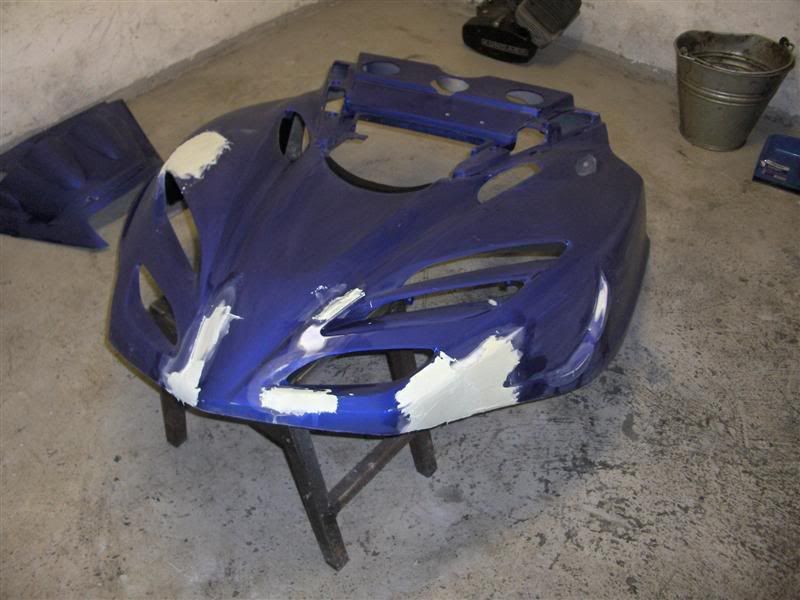
I then used "stopper" (don`t know if it`s the right word, but that`s what my dictionary said) to even out rough edges/dents.
And that`s all for today.. .
I talked to my cousin and he said that I could borrow his "painting room" next week. It`s nothing fancy, just a room with a sucking-fan. My cousin builds furniture so naturally there is some dust everywhere in his shop so I will probably spend a couple of hours in the paiting room to clean it up and get rid of the dust.
Wellwell
Today I finished the sanding of the hood, actually didn`t take as long as I expected.
done!
Then I took it out to clean it with a water hose, oh gees look at the white stuff on the ground !!
Then I took it back into the shop and let it dry. The previous owner had repaired some cracks in the hood, it was a good repair but I had to use a grinding machine to get the egdes flush on the outside.
I then used a brush to apply plastic primer to the spots were I had sanded through the paint. I didn`t bother to use the spray gun since it was only a few spots, and cleaning the spraygun takes a while.. .
I then used "stopper" (don`t know if it`s the right word, but that`s what my dictionary said) to even out rough edges/dents.
And that`s all for today.. .
I talked to my cousin and he said that I could borrow his "painting room" next week. It`s nothing fancy, just a room with a sucking-fan. My cousin builds furniture so naturally there is some dust everywhere in his shop so I will probably spend a couple of hours in the paiting room to clean it up and get rid of the dust.
Wellwell
Hi,
This is way how i repair hoods:
-Use iron wire like you tie the laces (drill holes both sides of crack and also grind material away so iron wire is even with surface)
-Sand with coarce paper under hood and laminate fibreclass under hood (on crack) put resin also on top side to fill iron wire holes
-Finishing and painting
=very strong
Reimond
Het Reimond!. Thanks for the tip, so you "sew" the crack together with steel wire?.
I don`t have to repair the cracks, they are already welded "professionally" on the inside. The previous owner was a crashed-car-fixer (didn`t find a better word), so I think he knew what he was doing. I`ll take a picture of the crack on the inside tomorrow.
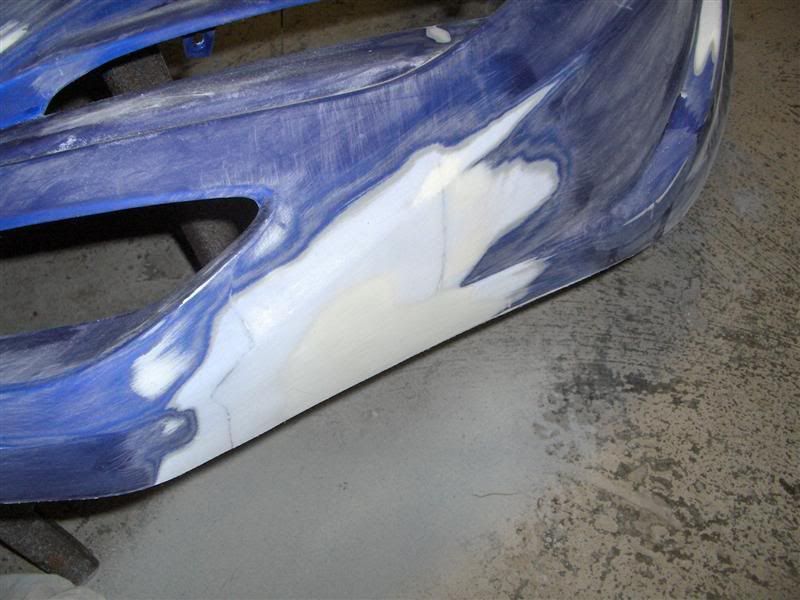
I didn`t spend that much time in the workshop today, sanded down the "stopper" , cleaned it with compressed air and then put on some more plastic primer, and then I applied some more stopper to get the crack 100%.
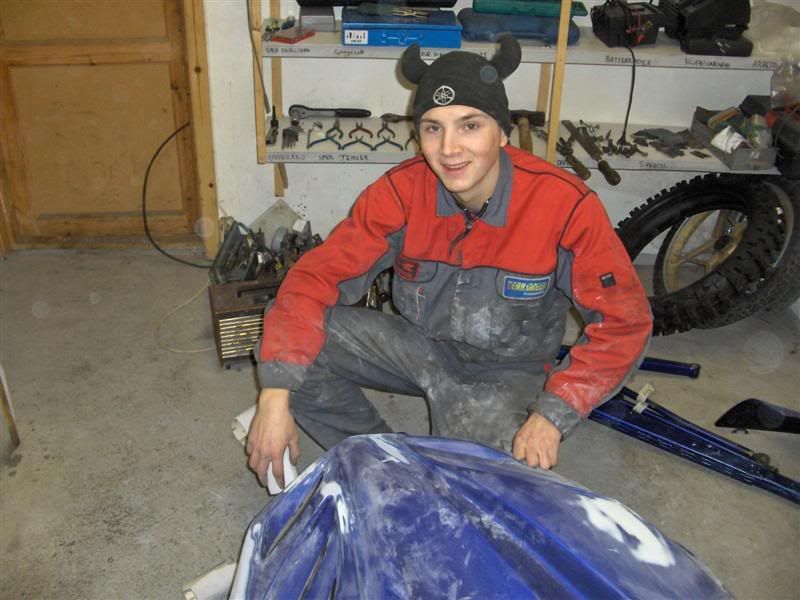
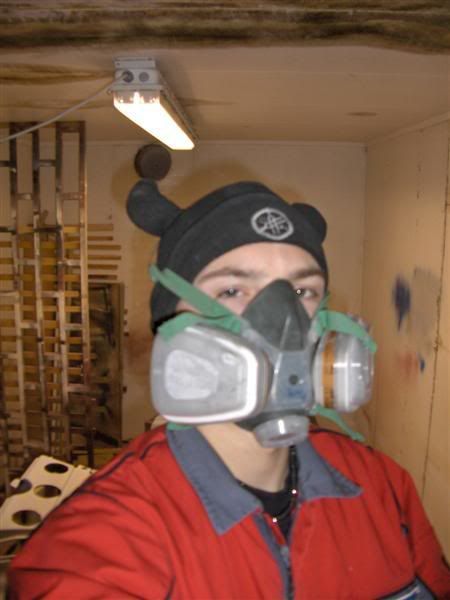
A friend came over so he shot a pic of me PS. Notice the nice hat!
The last thing I did was to put some more "stopper" on.
There is a tiny crack one place in the hood, also there is a crack in the windshield, going to glue them tomorrow if my sister remembered to get me some Araldit (to component glue).
Wellwell
I don`t have to repair the cracks, they are already welded "professionally" on the inside. The previous owner was a crashed-car-fixer (didn`t find a better word), so I think he knew what he was doing. I`ll take a picture of the crack on the inside tomorrow.
I didn`t spend that much time in the workshop today, sanded down the "stopper" , cleaned it with compressed air and then put on some more plastic primer, and then I applied some more stopper to get the crack 100%.
A friend came over so he shot a pic of me
PS. Notice the nice hat!
The last thing I did was to put some more "stopper" on.
There is a tiny crack one place in the hood, also there is a crack in the windshield, going to glue them tomorrow if my sister remembered to get me some Araldit (to component glue).
Wellwell
sxtheviper
Member
Hi there!
Looking great!!")
Where do you work with the sled?
Seems like you have some painting to do, like myself. I forgot to tell that i have to re-paint my left trailing arm and put a new sticker on it. I want the trailing arms to look orginal, thats how i like them.
Do you have any toughts for yours? Just curious since i can see them on the floor behind you
Should there be any graphics on the shroud when the paint work is done?
By the way, any snow at your place?
Its not much here.
I was doing some roof building at work today and it was pretty cold standing still in the lift all day. Havent seen snow falling from the sky for a long time now.
Well, you should keep up the good work! Looking pretty nice this far.
Simon.
Looking great!
Where do you work with the sled?
Seems like you have some painting to do, like myself. I forgot to tell that i have to re-paint my left trailing arm and put a new sticker on it. I want the trailing arms to look orginal, thats how i like them.
Do you have any toughts for yours? Just curious since i can see them on the floor behind you
Should there be any graphics on the shroud when the paint work is done?
By the way, any snow at your place?
Its not much here.
I was doing some roof building at work today and it was pretty cold standing still in the lift all day. Havent seen snow falling from the sky for a long time now.
Well, you should keep up the good work! Looking pretty nice this far.
Simon.
Hi man! Thanks for the nice reply.
I actually don`t have a garage to work in but I do have a little workshop in our basement. Unfortunately the door insn`t wide enough to get a sled in there. Last year I made a "lowered entrance" so that I could get bikes easily in/out of the shop, so it`s kind of nice but still.. sled wount go in there.
I have a garage but my mum doesn`t like it when she has to scrape the windows of her car before going to work.. understandable.
Yes I have some painting infront of me, looking forward to it!. The trailingarms will be painted in the same color as the hood, metallic black. I got new original trailingarm stickers from Rich , so they will look original.
When it comes to the hood, I didn`t bother to buy all the stock decals because it would be so expensive. I got the YAMAHA sticker for the windshield, the SRX stickers on the sides and the 700triple stickers, also got a little "warning" sticker "only premium gas" just to obtain an "original" feel.
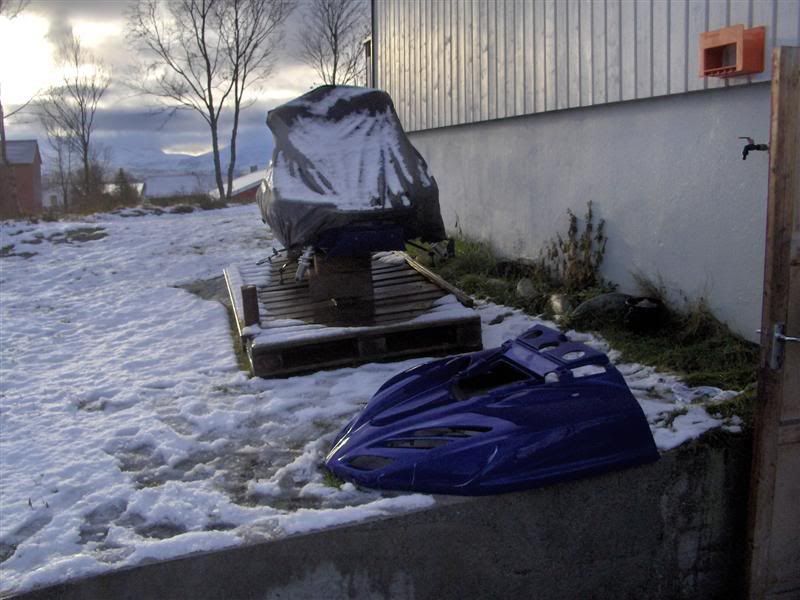
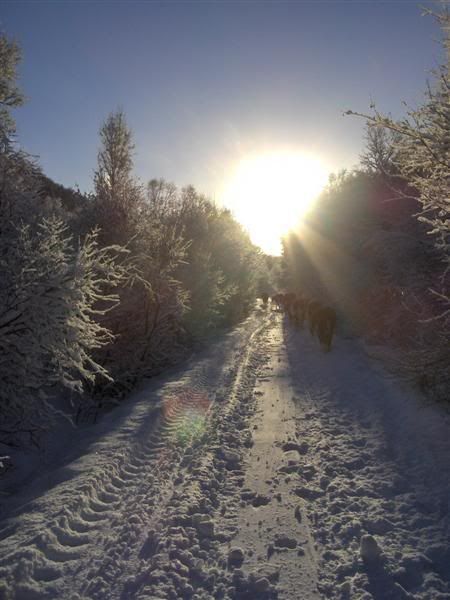
The only snow we`we got is the one you can see on the picture. Although I bet there is more up in the mountains!.
Wellwell I can`t wait to get started with the painting.. I love to paint.
Have a nice weekend !!
Thanks for the nice reply.I actually don`t have a garage to work in but I do have a little workshop in our basement. Unfortunately the door insn`t wide enough to get a sled in there. Last year I made a "lowered entrance" so that I could get bikes easily in/out of the shop, so it`s kind of nice but still.. sled wount go in there.
I have a garage but my mum doesn`t like it when she has to scrape the windows of her car before going to work.. understandable.
Yes I have some painting infront of me, looking forward to it!. The trailingarms will be painted in the same color as the hood, metallic black. I got new original trailingarm stickers from Rich , so they will look original.
When it comes to the hood, I didn`t bother to buy all the stock decals because it would be so expensive. I got the YAMAHA sticker for the windshield, the SRX stickers on the sides and the 700triple stickers, also got a little "warning" sticker "only premium gas" just to obtain an "original" feel
.The only snow we`we got is the one you can see on the picture. Although I bet there is more up in the mountains!.
Wellwell I can`t wait to get started with the painting.. I love to paint.
Have a nice weekend !!
Last edited:
Hi !
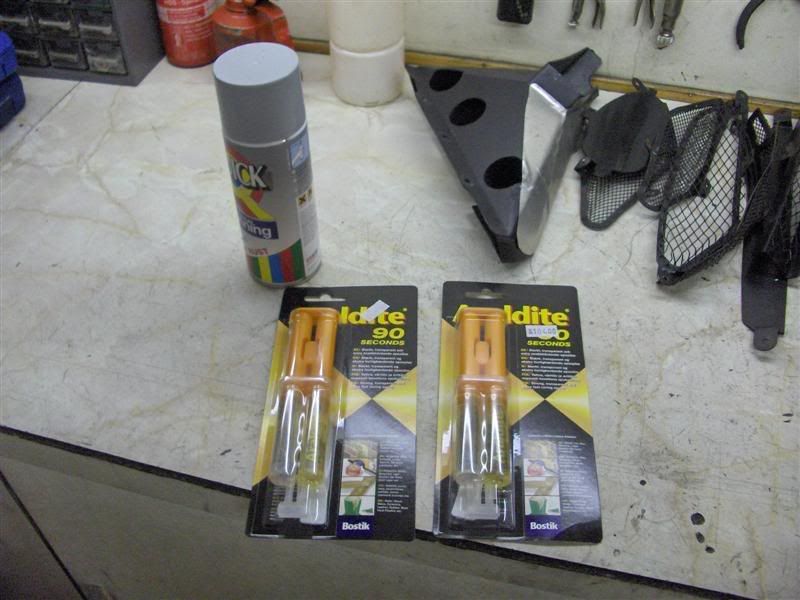
Today I glued the crack in the windshield and the one in the hood. I told my sister to buy Araldite two-component glue, I said that it came in to small tubes. (since the hardener is separated from the glue), well I got to small tubes, hehe.
I drilled holes in the end of the cracks so that the crack wouldnt "continue" if it felt like it.
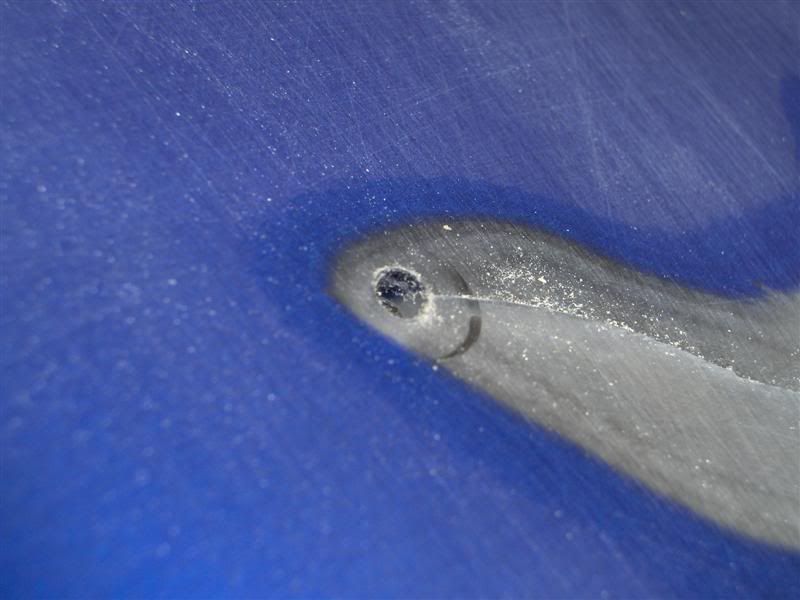

Also a few on the middle, not necessary but I somehow thought it would make it better, wellwell.
After that I started working on the trailing arms.
My left one is basically busted and looks like hell after an emergency repair last season. But I can`t afford a new one right now, tried to find a used on but no luck there.
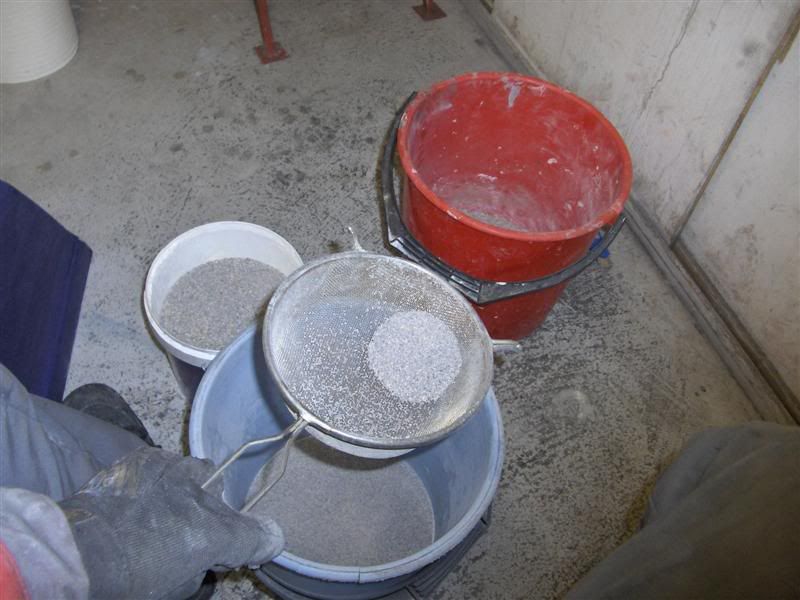
I then used the sandblaster to remove some rust spots here and dere. Actually took quite a while because the blasting sand I have is to big, so I had to do this with all the sand:
Today I glued the crack in the windshield and the one in the hood. I told my sister to buy Araldite two-component glue, I said that it came in to small tubes. (since the hardener is separated from the glue), well I got to small tubes, hehe.
I drilled holes in the end of the cracks so that the crack wouldnt "continue" if it felt like it.
Also a few on the middle, not necessary but I somehow thought it would make it better, wellwell.
After that I started working on the trailing arms.
My left one is basically busted and looks like hell after an emergency repair last season. But I can`t afford a new one right now, tried to find a used on but no luck there.
I then used the sandblaster to remove some rust spots here and dere. Actually took quite a while because the blasting sand I have is to big, so I had to do this with all the sand:

I don`t have a sandblasting cabinet or something like that so I just put on a "Finland-hat" and my dirtbike goggles, the sand flies everywhere!!.
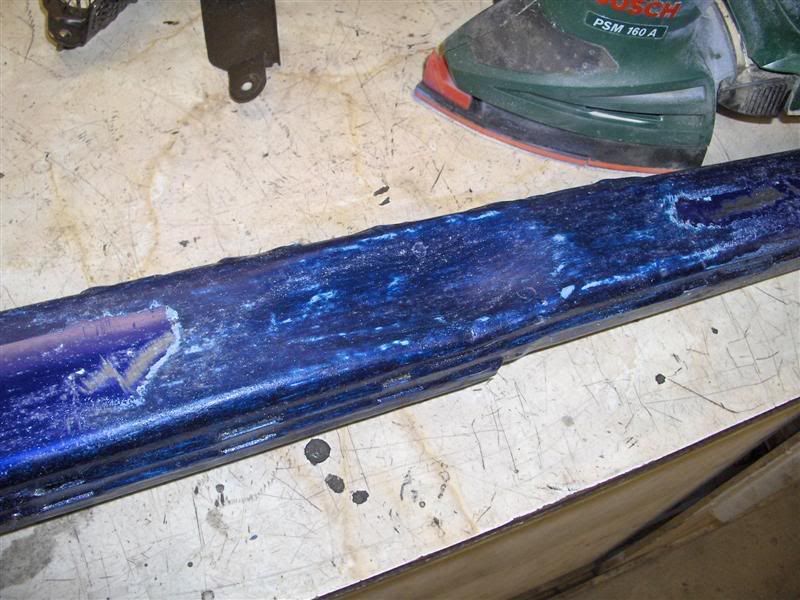
After the sandblasting I wet sanded them with 400grit and then cleaned them.
Then I removed the paint from the radius rods with a little sanding machine, then wet sanded them with 400 paper.
Wellwell that`s all for today.. . Gees I have a tendency to write alot of shit, just tell me to shut up if I babble to much
") .
.Joakim.
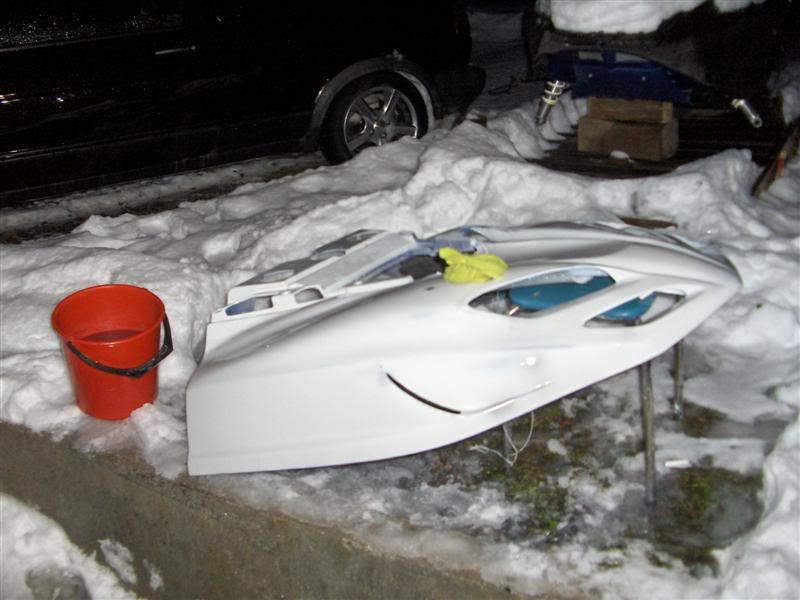
Gees guys look what happened tonight.. .
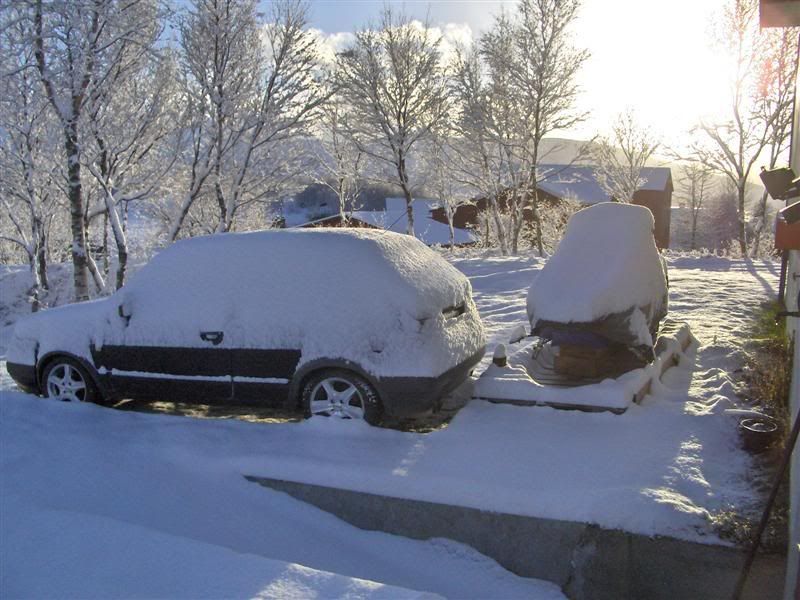
Had to get the "cows" inside...
Had to get the "cows" inside..
.Hi !
Time for a little update.. .
A few days ago I primed the trailingarms & radius rods, I wount spray them with filler because I don`t think it`s necessary.
Oh BTW I used 1k spray can primer for this. (I`ve used it before and I know it handles the soon coming 2k paint).
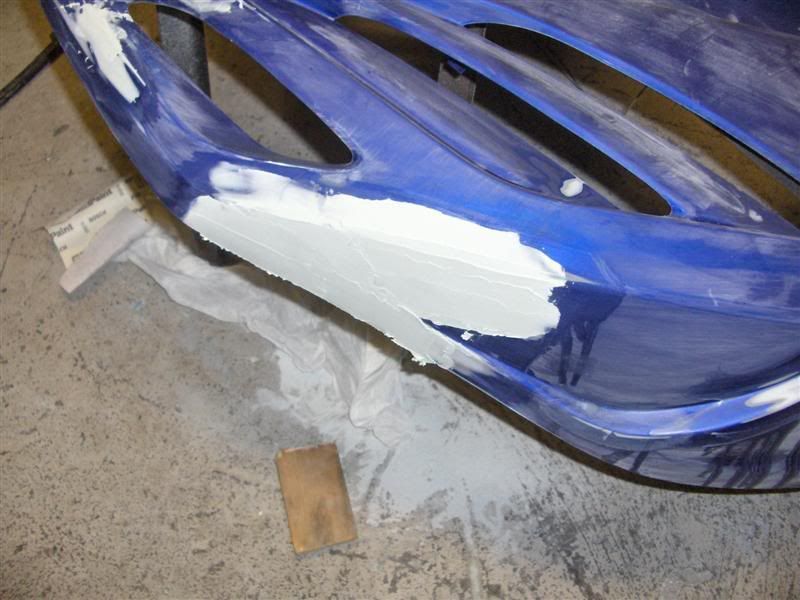
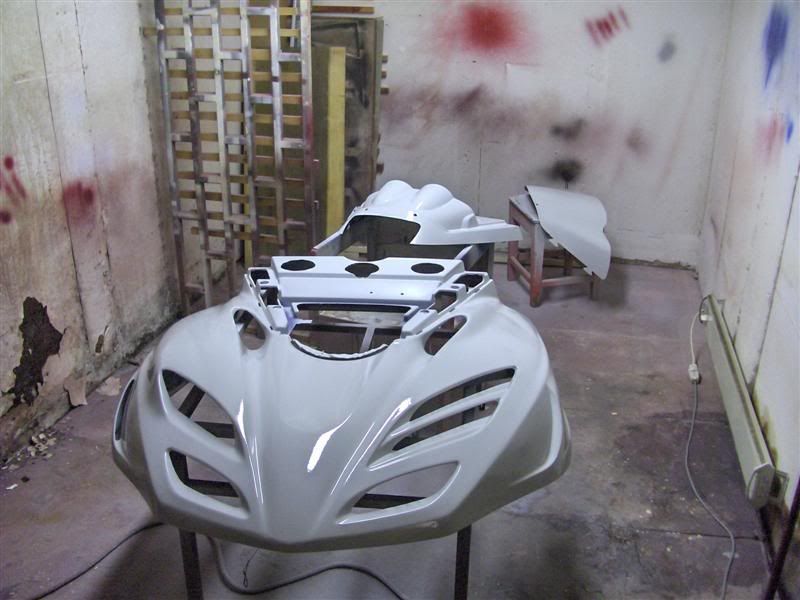
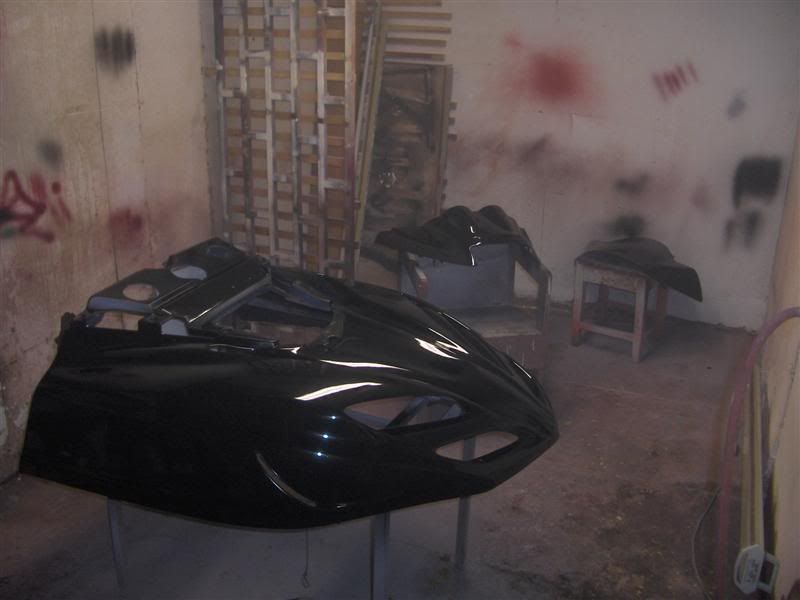
Next up was getting the hood sprayed with body filler.
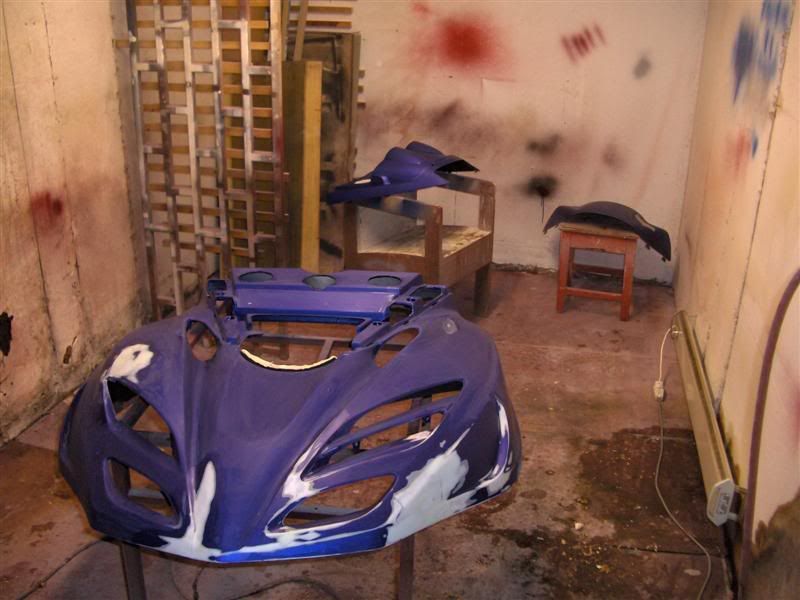
Actually spent quite much time getting the repaired areas ready , had to use PP100 3 times to get everything perfect.

Just a pic.. .
Time for a little update.. .
A few days ago I primed the trailingarms & radius rods, I wount spray them with filler because I don`t think it`s necessary.
Oh BTW I used 1k spray can primer for this. (I`ve used it before and I know it handles the soon coming 2k paint).
Next up was getting the hood sprayed with body filler.
Actually spent quite much time getting the repaired areas ready , had to use PP100 3 times to get everything perfect.
Just a pic.. .
When I was done with the prep work I went to my cousion to clean up his painting room, doesn`t look that good because the whole room is actually totally rotten.. . I also mounted and owen to get some temperature in there.. .
Then I mixed the filler. The largest nozzle I had was 1.8 so I had to thin the filler, the first time I didn`t thin it enough so I didn`t get the finish I wanted. But the last time I mixed it I got a nice mix and oversprayed the whole hood one more time to get rid of some orange-effect.
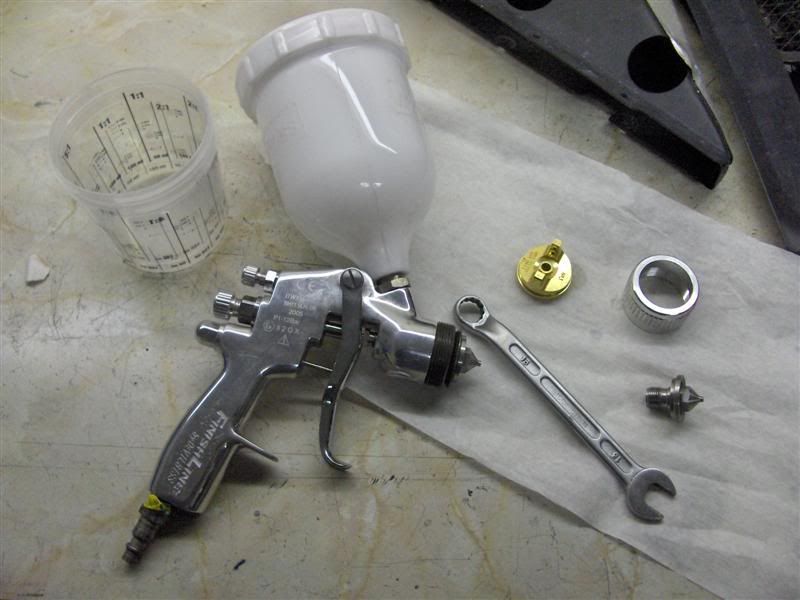
Paint gun.. .
Here I`m done.. 90% satisfied with it, everythings going to be sanded so it doesn`t matter if it`s not perfect.
Hopefully I`ll get them sanded before I go to work tomorrow so that I can paint them on Saturday.. . Gees I`m looking forward to that.
Oh does anyone have and tips when it come to spraying a hood like this?. All the air vents are kind of tricky.
I figure I should reduce the fluid level and work with the gun from several directions, first I thought of reducing the spray pattern but it`s more risky, well actually I guess a combination of both would work good.
Wellwell
Then I mixed the filler. The largest nozzle I had was 1.8 so I had to thin the filler, the first time I didn`t thin it enough so I didn`t get the finish I wanted. But the last time I mixed it I got a nice mix and oversprayed the whole hood one more time to get rid of some orange-effect.
Paint gun.. .
Here I`m done.. 90% satisfied with it, everythings going to be sanded so it doesn`t matter if it`s not perfect.
Hopefully I`ll get them sanded before I go to work tomorrow so that I can paint them on Saturday.. . Gees I`m looking forward to that
.Oh does anyone have and tips when it come to spraying a hood like this?. All the air vents are kind of tricky.
I figure I should reduce the fluid level and work with the gun from several directions, first I thought of reducing the spray pattern but it`s more risky, well actually I guess a combination of both would work good.
Wellwell
Hi guys !
"Today was gonna be the day that" everything was suppost to go so well and I was going to be so happy this evening.
But they didn`t.
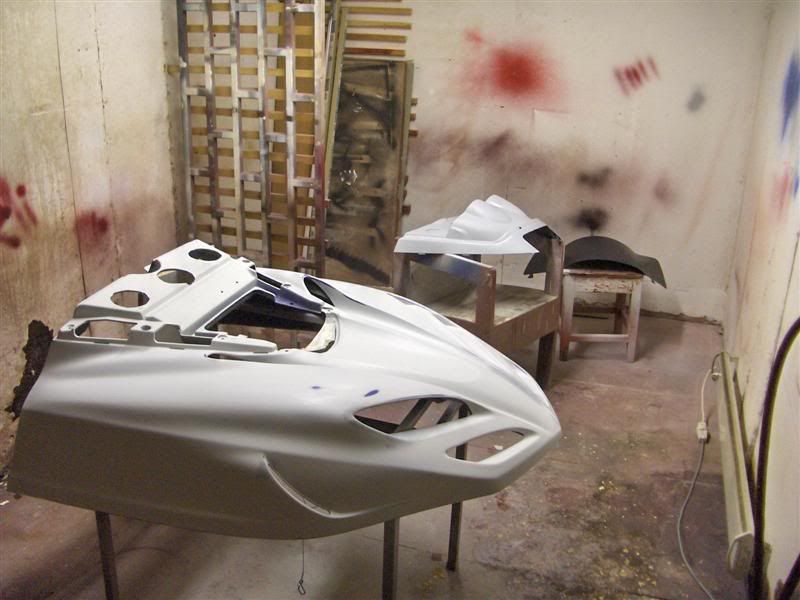
I`ve been working quite much with the hood to get it perfect, today I was finally done.
I halso had to remove all the filler from the headlight-surrounding due to a material-conflict, it just would`t stick to the plastic. So I used another primer and thought everything would be OK.
Here I`m washing the hood for (what was going to be the last time).
 ¨
¨
Then I let it dry and removed all the dust with a special dust-cloth I got from a friend who is a painter, kind of fancy.
Then I got ready for painting. It feels so good when you put the paint in the gun and attach the air, knowing that it will be perfect due to all the prep work.
I then painted it.. . It all seemed so nice, but after a while huge runs developed... so I guess I`m not done with the sanding after all.
I`ve never painted BC/CC paints before, used to normal 2k paint with gloss, so I guess the base paint acts different then a normal 2k paint.
The headlight-surrounding wouldn`t stop reacting with the paint, don`t know why, but it all has to come off again.
Gees.. . Wellwell I guess it will turn out nice in the end.. .
Have nice weekend!
"Today was gonna be the day that" everything was suppost to go so well and I was going to be so happy this evening.
But they didn`t.
I`ve been working quite much with the hood to get it perfect, today I was finally done.
I halso had to remove all the filler from the headlight-surrounding due to a material-conflict, it just would`t stick to the plastic. So I used another primer and thought everything would be OK.
Here I`m washing the hood for (what was going to be the last time).
Then I let it dry and removed all the dust with a special dust-cloth I got from a friend who is a painter, kind of fancy.
Then I got ready for painting. It feels so good when you put the paint in the gun and attach the air, knowing that it will be perfect due to all the prep work.
I then painted it.. . It all seemed so nice, but after a while huge runs developed... so I guess I`m not done with the sanding after all.
I`ve never painted BC/CC paints before, used to normal 2k paint with gloss, so I guess the base paint acts different then a normal 2k paint.
The headlight-surrounding wouldn`t stop reacting with the paint, don`t know why, but it all has to come off again.
Gees.. . Wellwell I guess it will turn out nice in the end.. .
Have nice weekend!
Last edited:
daman
New member
should have straitend them radius rods they look bent.
put thin coats on and let cure 1/2 hr 45mins in bettween coats
and crank the heat to at least 80 deg.
put thin coats on and let cure 1/2 hr 45mins in bettween coats
and crank the heat to at least 80 deg.