auji700triple
New member
looks good!!! Yup shoulda Straitend those Radious bars, i had to!!
Whats your plans for 2ndary color, blue? I donno about black and blue. I Can;t wait to see the finish product! good luck!
Whats your plans for 2ndary color, blue? I donno about black and blue. I Can;t wait to see the finish product! good luck!
Hi guys!
I know about the Radius rods, I bet they will get bent again after straightening them, so I wount bother to straighten them. (bad excuse for not doing it, hehe).
I`ve talked to they guy who got me the paint:
- Three thin coats with base paint
Wait half an hour or until finger dry, then:
- one really thin coat with clear
wait 10 minutes
- one thick clear coat, but stay on the safe side (not too thick)
wait 15 minutes
- another thick clear coat
Going to sand the parts down again on Tuseday, maybe I`ll get them painted on Wednesday.
It`s kind of frustrating because I`ve painted lots of stuff in the past years without runs, actually I think you can compare painting with wheelieing a dirtbike, a little to much throttle (paint) and you flip it (runs), a little less throttle (paint) and the wheel goes down (orange peel).
Did I mention that my workshop air compressor burned down yesterday when I cleaned the spray gun?. Suddenly I heard this typical seizing-sound from the engine, I stopped it and now it`s totally stuck. 750$ out of the window.
Tip of the day: Remember that air compressors also needs oil!.
Although it was an old compressor and it wasn`t the best, but we all know nice it is to have compressed air when working on engines and shit.
(PS, I use another compressor when painting, so it wount delay the painting process).
")
I know about the Radius rods, I bet they will get bent again after straightening them, so I wount bother to straighten them. (bad excuse for not doing it, hehe).
I`ve talked to they guy who got me the paint:
- Three thin coats with base paint
Wait half an hour or until finger dry, then:
- one really thin coat with clear
wait 10 minutes
- one thick clear coat, but stay on the safe side (not too thick)
wait 15 minutes
- another thick clear coat
Going to sand the parts down again on Tuseday, maybe I`ll get them painted on Wednesday.
It`s kind of frustrating because I`ve painted lots of stuff in the past years without runs, actually I think you can compare painting with wheelieing a dirtbike, a little to much throttle (paint) and you flip it (runs), a little less throttle (paint) and the wheel goes down (orange peel).
Did I mention that my workshop air compressor burned down yesterday when I cleaned the spray gun?. Suddenly I heard this typical seizing-sound from the engine, I stopped it and now it`s totally stuck. 750$ out of the window.
Tip of the day: Remember that air compressors also needs oil!.
Although it was an old compressor and it wasn`t the best, but we all know nice it is to have compressed air when working on engines and shit.
(PS, I use another compressor when painting, so it wount delay the painting process).
auji700triple
New member
you forgot to put oil in the compressor...LOL :P
Yup.. .
The darn thing has been running for years and years with no maintainence (spelling?) so I guess it`s our fault.. .
.The darn thing has been running for years and years with no maintainence (spelling?) so I guess it`s our fault.. .
Hi guys!
Today I spent another 9 hours on the hood.
First I used paint thinner to remove paint from the headlight-surrounding, was a pain in the ***. Then I sanded down all the runs on the hood, first with 400, 600 then 800 and finally 1200, same with the headlight surrounding.
I then cleaned everything and put the parts in our house to let them dry. I also sanded the windshield and the Bender scoop for the hood.
Tomorrow I will be spraying plastic primer on the headlight surrounding and the Bender scoop. I wish I did that from the beginning, I only used a brush to add plastic primer on the spots where I saw the plastic, not a good idea.
I plan to paint the hood and everything on Thursday if everything goes according to my plan.
I actually thought of just spraying clear coat on the hood as it is, now that would be a custom paint job !! hehe.
Wellwell that`s all for today.. .
Today I spent another 9 hours on the hood.
First I used paint thinner to remove paint from the headlight-surrounding, was a pain in the ***. Then I sanded down all the runs on the hood, first with 400, 600 then 800 and finally 1200, same with the headlight surrounding.
I then cleaned everything and put the parts in our house to let them dry. I also sanded the windshield and the Bender scoop for the hood.
Tomorrow I will be spraying plastic primer on the headlight surrounding and the Bender scoop. I wish I did that from the beginning, I only used a brush to add plastic primer on the spots where I saw the plastic, not a good idea.
I plan to paint the hood and everything on Thursday if everything goes according to my plan.
I actually thought of just spraying clear coat on the hood as it is, now that would be a custom paint job !! hehe
.Wellwell that`s all for today.. .


2ooosrx
VIP Member
- Joined
- Oct 2, 2004
- Messages
- 2,414
- Age
- 36
- Location
- Gurnee, Illinois
- Website
- www.cbperformanceparts.com
you are one of the most dedicated workers I have ever seen, I guess the snow is making you work as fast as you can?
daman
New member
No kidding to be working in your bedroom too.. LOL !")
2ooosrx
VIP Member
- Joined
- Oct 2, 2004
- Messages
- 2,414
- Age
- 36
- Location
- Gurnee, Illinois
- Website
- www.cbperformanceparts.com
People think I am dedicated but I do not work on my sled everyday, I am almost getting too lazy with my sled, must admit that currently it does not look as good as it did last year, except for the motor.
auji700triple
New member
*smack*... are you serious?!!?
Hi guys!
Thanks for all the nice replies. However I don`t think I am much more dedicated then you, I`ve seen all the polishing work you have done to the SRX 2000SRX and it does require a HUGE amount of dedication to do something like that.
Also I work part time now so I probably have more sparetime (Spelling?) then you!.
Today I sprayed plastic primer on the headlight surrounding and the bender scoop before I went to work.
Kind of un-interesting pics I guess.. but I have a tendency to post alot of pics.. sorry. Anyways the plastic primer is a very thin fluid that basically doesn`t have a color, I hope I wount get any paint-reactions now. (the paint seemed to crack some places, I didn`t think it was necessary to spray plastic primer on the whole item, I regret that now).
I also took a look at my workshop compressor that seized while I was cleaning my spray gun on Saturday, after the miserable paint job.
I though the piston had seized in the cylinder. However I was wrong. The rod had seized on the axel tap.
A few pictures of that to, very off topic but I think it`s interesting because I have never seen the inside of a compressor engine. Kind of cool that the piston looks just like a regular four stroke piston.
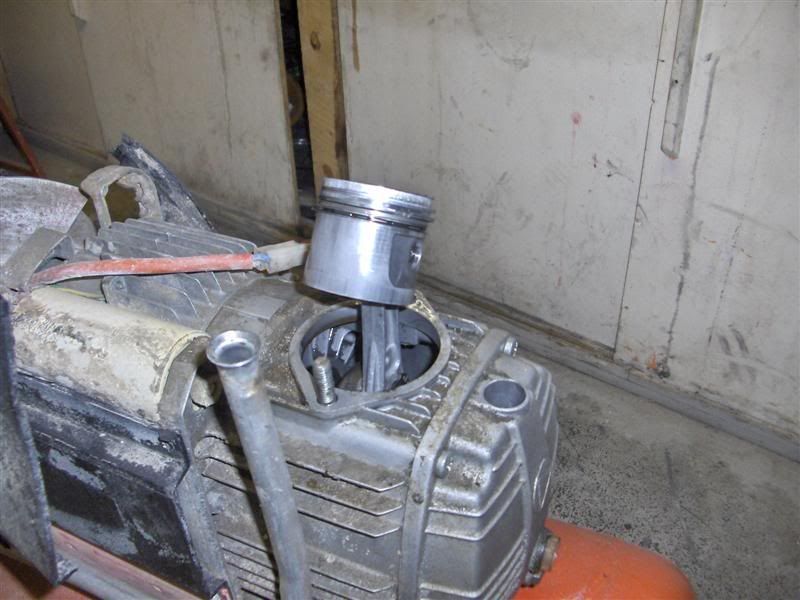
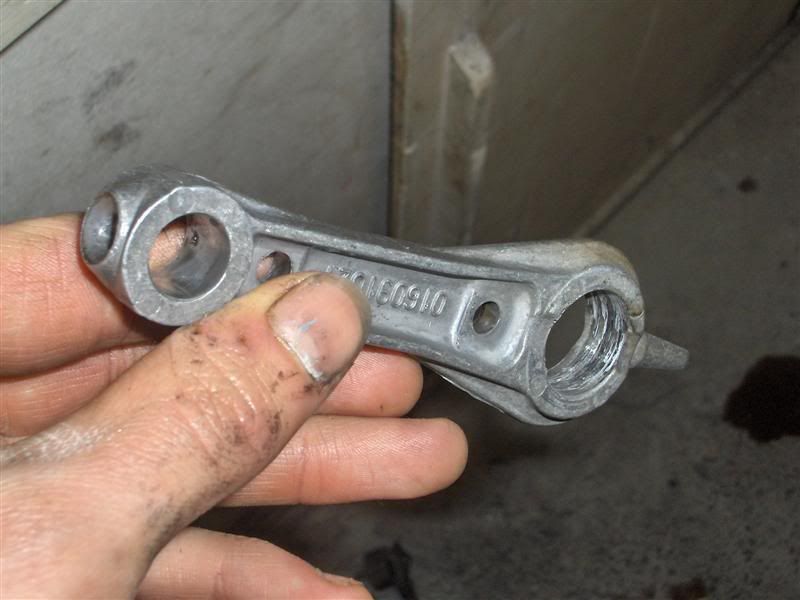
The rod was made of aluminium, very light!.
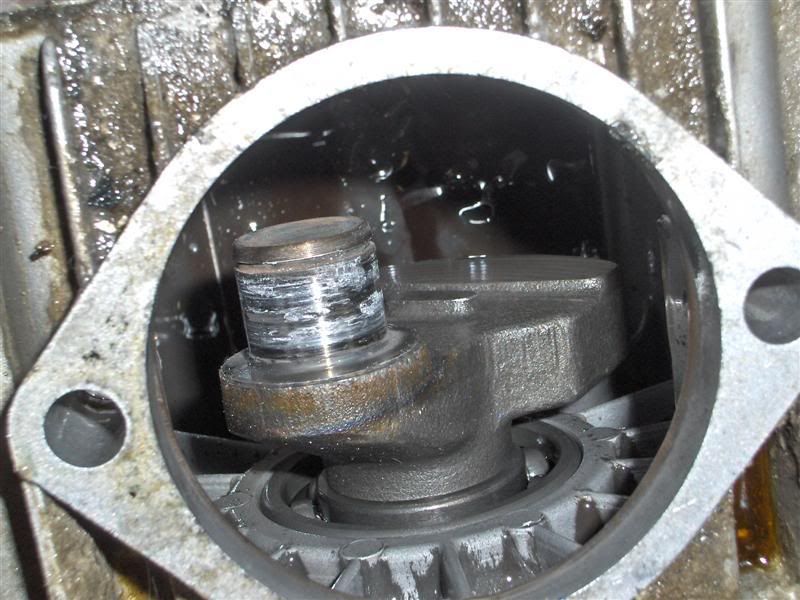
The axel tap.
I sanded the axel tap and the big end of the rod with 400 paper & oil, then 800 and finally 1200. It rotatet freely on the axel tap so I put it back together again and now she runs like a charm, don`t know how long it will last but.. might last forever for all I know.
If my cousin isn`t using the paiting room tomorrow I hope that I will get the hood and everything painted tomorrow.
Wellwell that`s all for today.
Thanks for all the nice replies
. However I don`t think I am much more dedicated then you, I`ve seen all the polishing work you have done to the SRX 2000SRX and it does require a HUGE amount of dedication to do something like that.Also I work part time now so I probably have more sparetime (Spelling?) then you!.
Today I sprayed plastic primer on the headlight surrounding and the bender scoop before I went to work.
Kind of un-interesting pics I guess.. but I have a tendency to post alot of pics.. sorry. Anyways the plastic primer is a very thin fluid that basically doesn`t have a color, I hope I wount get any paint-reactions now. (the paint seemed to crack some places, I didn`t think it was necessary to spray plastic primer on the whole item, I regret that now).
I also took a look at my workshop compressor that seized while I was cleaning my spray gun on Saturday, after the miserable paint job.
I though the piston had seized in the cylinder. However I was wrong. The rod had seized on the axel tap.
A few pictures of that to, very off topic but I think it`s interesting because I have never seen the inside of a compressor engine. Kind of cool that the piston looks just like a regular four stroke piston.
The rod was made of aluminium, very light!.
The axel tap.
I sanded the axel tap and the big end of the rod with 400 paper & oil, then 800 and finally 1200. It rotatet freely on the axel tap so I put it back together again and now she runs like a charm, don`t know how long it will last but.. might last forever for all I know.
If my cousin isn`t using the paiting room tomorrow I hope that I will get the hood and everything painted tomorrow.
Wellwell that`s all for today.
Last edited:
yamaholic22
Active member
you can tell that thing got hot before she failed, look at all the heat marks in the cast iron
Hi!
Yup you`re right yamaholic, the oil level was way to low so I bet it was warm as hell.
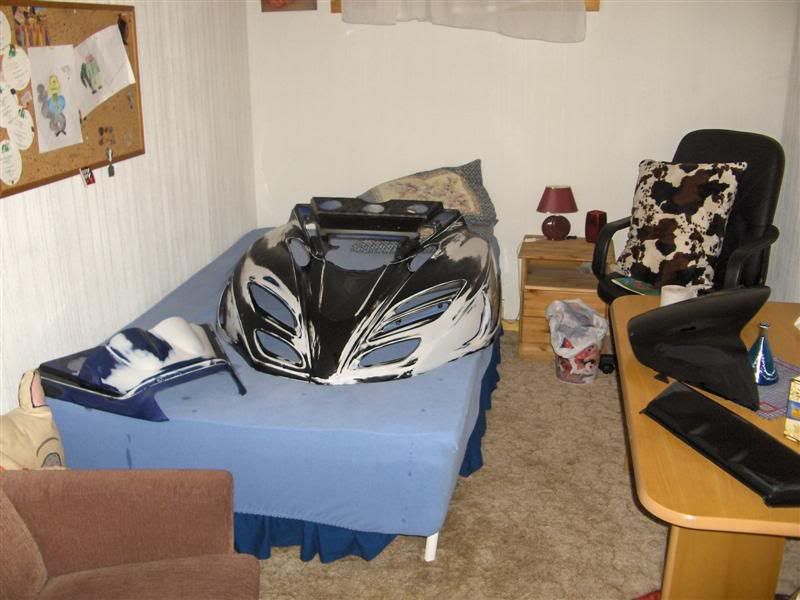
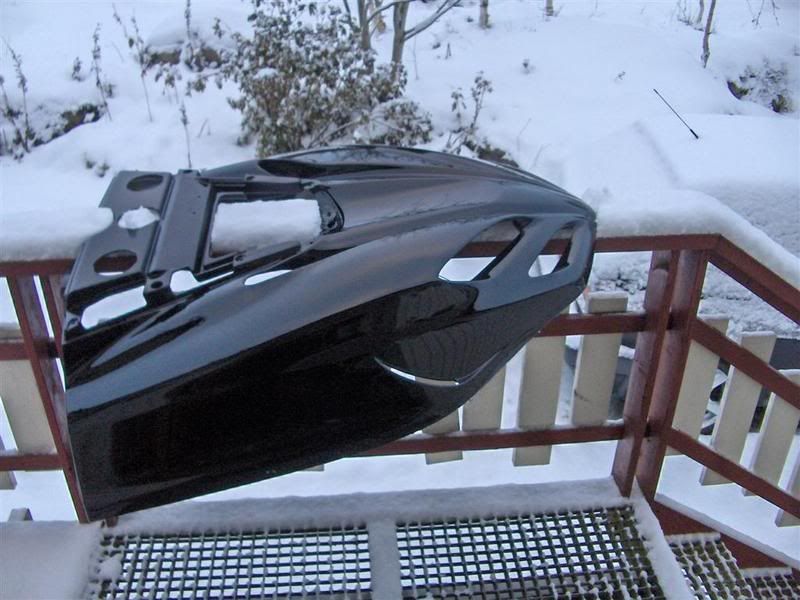
Today made another attempt to paint the hood, windshield, bender scoop and headlight surrounding.
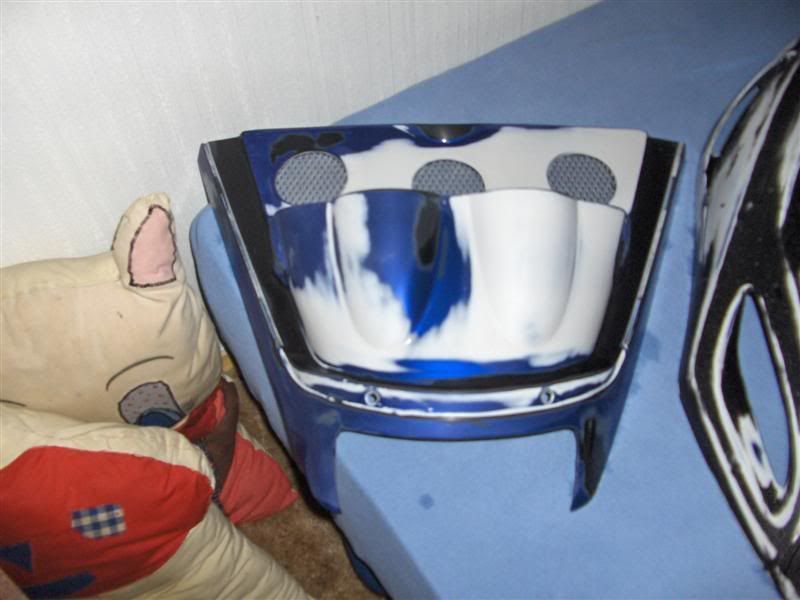
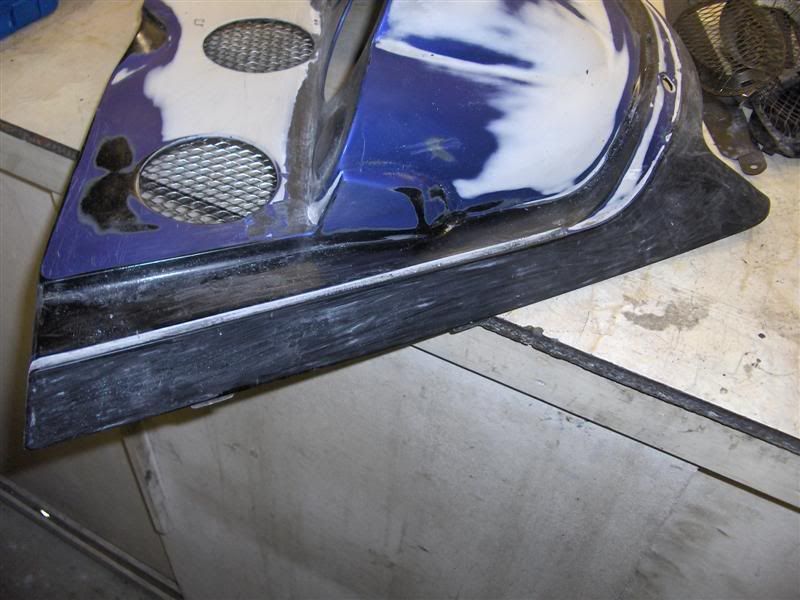
The base coats came on OK, however the paint still reacted with something on the headlight-surrounding, look at this:
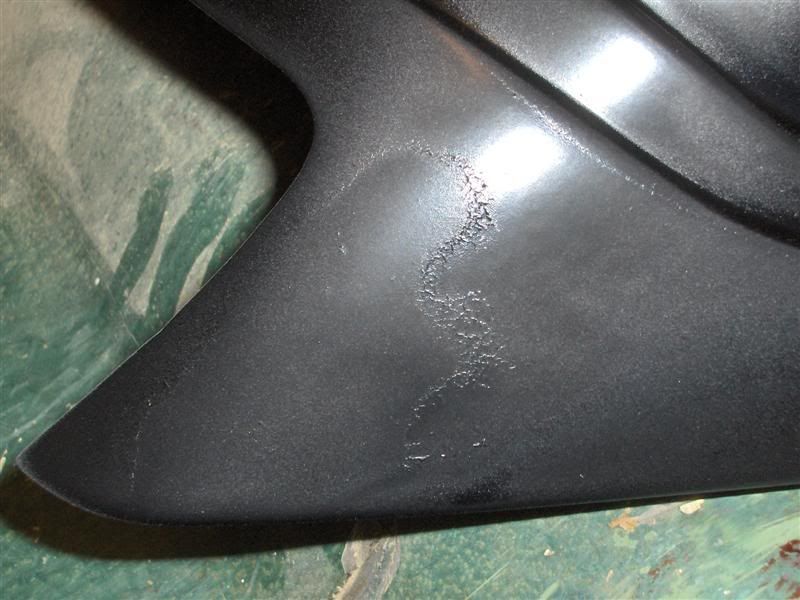
I was 100% sure that it wouldnt appear this time since I had sprayed on plastic primer on the whole thing, and before I did that I cleaned it with thinner, but it still happened.
Today I got some silicon cleaner (got it at a car workshop who does some minor paint work) so I will try to remove all the freakin paint, then clean it with the silicon cleaner and then make another attempt.
I`m 80% satisfied with the hood. Due to little light in the room, and a huge desire to achieve a high gloss shiny surface, I managed to get 2 runs down on the edge two places. Basically no big deal, but it bothers me like hell. I want it to be perfect. So I think I will sand the runs down and paint a third coat of clear paint, might skip it if I`m able to remove the runs and polish the areas to get the gloss back again, but I doubt that will work. I`ve heard people talking about removing runs with a razor, but I think it sounds wierd.
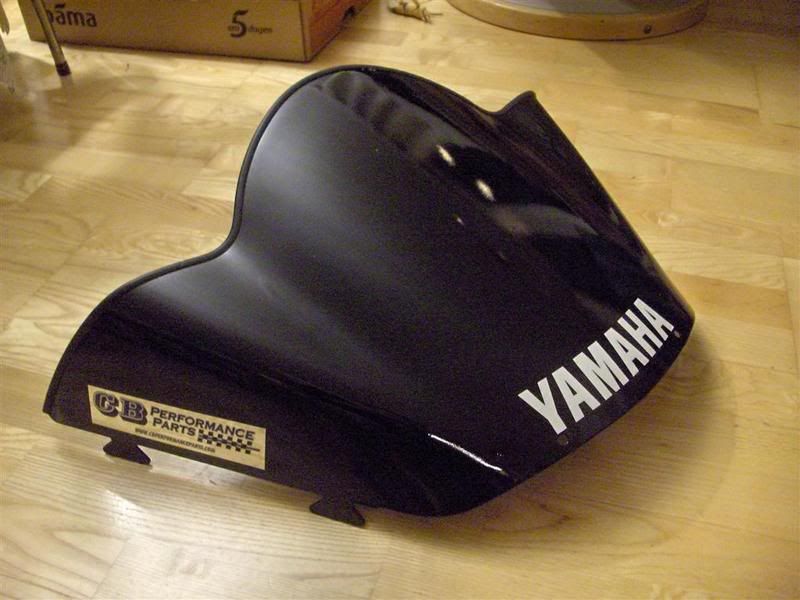
The bender scoop, I`m 98,5% happy with the scoop, got very nice gloss.
I`m actually kind of worried about my health, the air ventilation in the paint room is bad, suction fan very bad so at the end of each coat I have problems seing what I`m doing, my eyes hurt and least but not last the gases in the air that makes my heart unstabile, or atleast it feels like it, hehe. God bless my friend who gave me an air-mask, probably would have died without it. Also some of my fingers are starting to get cracks, probably doesn`t like to mess with the thinner, but I hope they will survive.
Gees it`s snowing outside !!
Yup you`re right yamaholic, the oil level was way to low so I bet it was warm as hell.
Today made another attempt to paint the hood, windshield, bender scoop and headlight surrounding.
The base coats came on OK, however the paint still reacted with something on the headlight-surrounding, look at this:
I was 100% sure that it wouldnt appear this time since I had sprayed on plastic primer on the whole thing, and before I did that I cleaned it with thinner, but it still happened.
Today I got some silicon cleaner (got it at a car workshop who does some minor paint work) so I will try to remove all the freakin paint, then clean it with the silicon cleaner and then make another attempt.
I`m 80% satisfied with the hood. Due to little light in the room, and a huge desire to achieve a high gloss shiny surface, I managed to get 2 runs down on the edge two places. Basically no big deal, but it bothers me like hell. I want it to be perfect. So I think I will sand the runs down and paint a third coat of clear paint, might skip it if I`m able to remove the runs and polish the areas to get the gloss back again, but I doubt that will work. I`ve heard people talking about removing runs with a razor, but I think it sounds wierd.
The bender scoop, I`m 98,5% happy with the scoop, got very nice gloss.
I`m actually kind of worried about my health, the air ventilation in the paint room is bad, suction fan very bad so at the end of each coat I have problems seing what I`m doing, my eyes hurt and least but not last the gases in the air that makes my heart unstabile, or atleast it feels like it, hehe. God bless my friend who gave me an air-mask, probably would have died without it. Also some of my fingers are starting to get cracks, probably doesn`t like to mess with the thinner, but I hope they will survive.
Gees it`s snowing outside !!
Last edited:

Its "lifting" on the headlight surround. Lifting can be a sign of silicone on the surface. I bet that the surround was heavily dressed in a silicone product such as armour-all at one time. Sand the lifted spots down and wipe it down VERY well with a wax and grease remover, not thinner, then apply very thin coats of primer (I'm talking almost a dry spray) to those spots. Lifting spots are always a pain.
As far as your health concerns, you should be real careful. I was an auto body painter for years until I became sensitized to isocyanides found in paint products. I can't even be around a body shop anymore. Once isocyanides are in your system they never leave, they're with you for life.
As far as your health concerns, you should be real careful. I was an auto body painter for years until I became sensitized to isocyanides found in paint products. I can't even be around a body shop anymore. Once isocyanides are in your system they never leave, they're with you for life.
Last edited:
Here's the trick to remove runs with a razor, you don't cut the run off, you scrape it. Take a fresh razor blade and rub the corners on the concrete floor, like you're attempting to cut the concrete. This dulls the corners so there is no 90 degree sharp edge that will leave gouges in your paint. Next put a slight bend in the blade. When you scrape always have the sharp end pointing slightly away from the direction your scraping, another words you will angle the blade at roughly a 45 degree angle with the edges pointing up from the slight bend you put in the blade. After you are satisfied with it you still need to run over the area with 1500-2000 grit wet sand paper before you buff it. Just remember, the sharp edge is always angled away from the direction you are moving the blade, never scrape with the sharp edge pointing towards it.
This trick works good, but you will never get it 100% out, but maybe enough so you are the only one that can notice the run was ever there. I've fooled many a customer with this cheater trick, back in the day!!
This trick works good, but you will never get it 100% out, but maybe enough so you are the only one that can notice the run was ever there. I've fooled many a customer with this cheater trick, back in the day!!
Last edited:
Hi ejcamaro! Thanks SO much for the replies, really helpful hints.
I will remove the paint on the headlight surrounding, there were several liftings, but the one I showed on the picture was the only one that was really visible, but still I want it nice everywhere.
Hope the silicon cleaner will to the job, a guy in Norwegian forum told me that I could use thinner if I didn`t have silicone cleaner.. . But I guess silicon cleaner is the only thing that really works.
When it comes to the runs I think I will remove them, and then shoot a thirt layer of clear. I don`t have razor blade, I somehow imagined that a Mach 3 turbo would do the job, hehe. (could it?) , guess the blades will be in the wrong direction.
It seems like my cousin is going to use the paint room tomorrow to paint some furniture tomorrow, so I can`t paint again before Saturday, hopefully I will get the headlight surrounding OK and also the hood.
Isn`t it best just to sand the runs and put on a third coat of paint or should I try the razor blade method?. (maybe combine them).
Also, this morning I went to a friend and borrowed a propane gas heater-owen, I swear the painting room has neven been so warm as it was today before I started painting. However, had to turn it off when I started painting, so when I put on the last coat of clear today, the temperature was basically back to normal, which means around 10 deegrees.
On saturday I can heat the room like "#¤% and then shoot the clear on the hood, guess it`s cool to have a warm room when painting, I imagine the paint will get more run-resistant?.
Will paint the headlight surrounding after the hood (even though I might have to clean the gun one extra time since I have to spray base on the headlight surrounding, but I would like the temperature to be highest when I paint the clear on the hood, since it`s the most important "part".
Wellwell
Temperature depends on the reducer you use, they make different reducers for the temps your working with, atleast they used to. Cold temps will lay out nicer, but run more often, in your case, I would keep it pretty warm. The heat makes the reducer evaporate faster. Another idea is to spray a little lighter on the sides where its running. Those sides are mostly flat and can be easily buffed out to get your glossy affect.
I would seriously try the razor blade method, its gonna save you some sanding in the end, regardless if you reclear or not. Besides, you might get it out! If you do I would sand down any flat areas (2000 grit wet) that your not 100% happy with and polish away.
Are you wet sanding the clear down on the entire hood before reclearing? If not, how much time will have passed before your next coat goes down?
Hi man!
Thanks for the reply!.
I guess it can be "easier" to get the glossy effect when painting at lower temps, since the paint will float better, but also as you say, bigger chance of getting runs.
But if it`s warm then you can also spray on more paint ?. The more paint the better it will float, so I guess it`s "safer" to paint in a warm room.
Will try to keep the temp around 20c deegrees.
I`ve thought about just the same thing that you thought about, wether to sand the whole hood or not, when thinking of putting on another coat with clear.
I painted the last coat on Thursday afternoon, so I guess I will have to wet sand the hole thing before I paint it tomorrow?.
Will try to remove the runs with a razor blade, less sanding means less chance of sanding through the clear.
I don`t know why but I have always been "ancious" (spelling?) to wet sand a top coat to remove orange peel, I`m afraid I wount get it shiny.. . But if I wet sand with 2000 grit and then polish with Turtle Wax or Autoglym, will it look good?. If that`s the case, then I think I will choose to try to stay alittle on the safe side when thinking of runs.
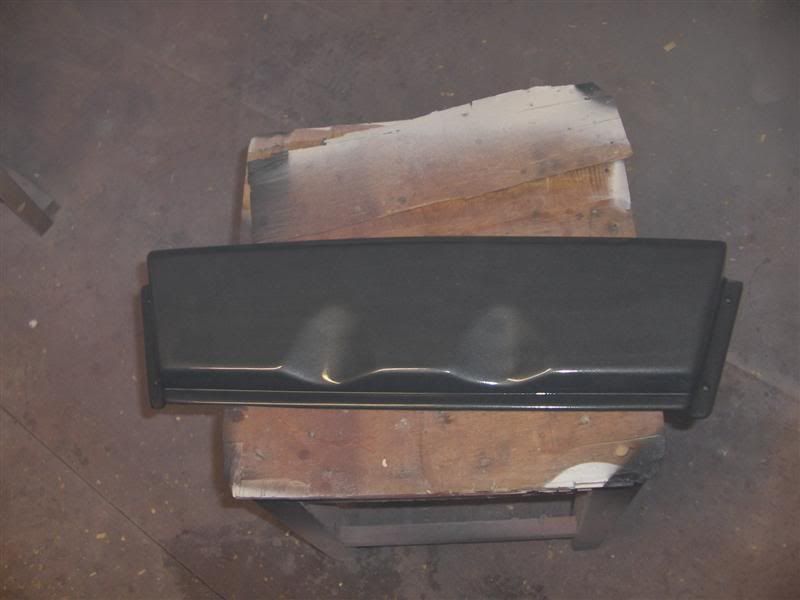
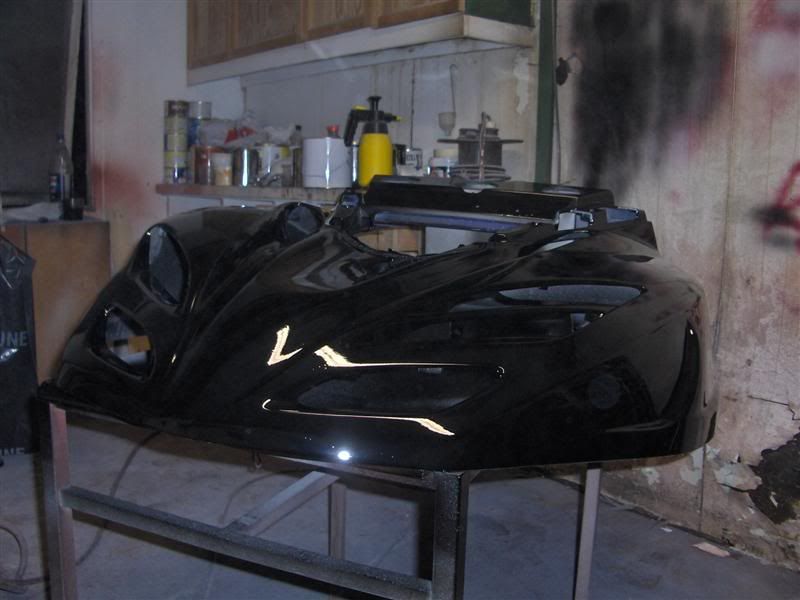
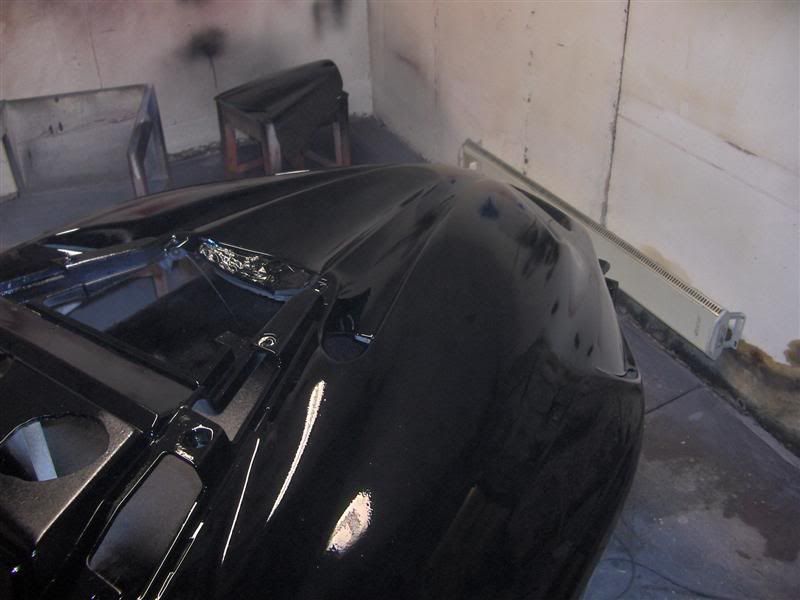
However I don`t feel like staying to much on the safe side because when I got the hood out in the daylight I was amazed by the nice gloss, not to brag of my work but I think it looked good.
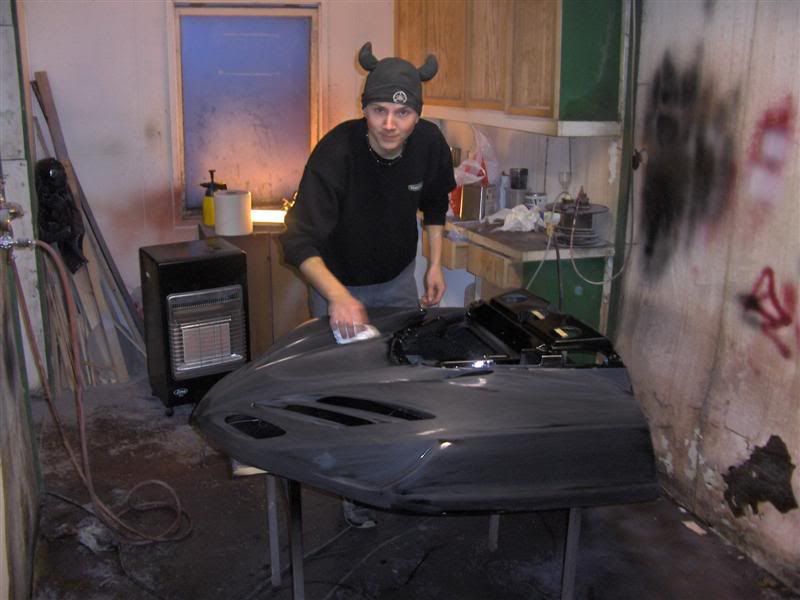
Here`s a pic of the hood:
However there is som dust some places, my painting room is basically in too bad condition to paint things like this, it works for my cousion who paints wood furniture, it cant be compared with automotive-painting.
This evening I did something awesome, might not be as awesome for you Americans who have seen all the 07`s ages ago, but a Yamaha bus visited the Yamaha dealer in town (65km`s away from where I live) , so we went there and I rode the 07 RX-1 Warrior, RX-1 Attack, Phazer FX and the Venture Lite, gees how cool, awesome.
However, we only rode them outside store back and forth on the parking lot.. but still cool.
When I got home I put the trim on the windshield and put on a few stickers. I think it`s OK to put an "aftermarked" sticker on the windshield because if it gets flat/full by the years, it`s easy to remove and or repaint the windshield.
I think it`s cool to have an American dealer sticker on my sled.
Wellwell have a nice weekend everybody!. Hope I will be satisfied after the last coat with clear tomorrow... .
Oh I forgot to mention that I did some work with the light surrounding thing this morning, removed all the base paint & plastic primer with thinner, then I removed all the old paint (where it will be visible), with a knife, might sound drastic but I`m sick of the findings.
Removed it all the way around on the outside.
Also on the gauge surface, the bender scoop will cover the area around the vent holes so I didn`t bother to remove the paint there.
Thanks for the reply!.
I guess it can be "easier" to get the glossy effect when painting at lower temps, since the paint will float better, but also as you say, bigger chance of getting runs.
But if it`s warm then you can also spray on more paint ?. The more paint the better it will float, so I guess it`s "safer" to paint in a warm room.
Will try to keep the temp around 20c deegrees.
I`ve thought about just the same thing that you thought about, wether to sand the whole hood or not, when thinking of putting on another coat with clear.
I painted the last coat on Thursday afternoon, so I guess I will have to wet sand the hole thing before I paint it tomorrow?.
Will try to remove the runs with a razor blade, less sanding means less chance of sanding through the clear.
I don`t know why but I have always been "ancious" (spelling?) to wet sand a top coat to remove orange peel, I`m afraid I wount get it shiny.. . But if I wet sand with 2000 grit and then polish with Turtle Wax or Autoglym, will it look good?. If that`s the case, then I think I will choose to try to stay alittle on the safe side when thinking of runs.
However I don`t feel like staying to much on the safe side because when I got the hood out in the daylight I was amazed by the nice gloss, not to brag of my work but I think it looked good.
Here`s a pic of the hood:
However there is som dust some places, my painting room is basically in too bad condition to paint things like this, it works for my cousion who paints wood furniture, it cant be compared with automotive-painting.
This evening I did something awesome, might not be as awesome for you Americans who have seen all the 07`s ages ago, but a Yamaha bus visited the Yamaha dealer in town (65km`s away from where I live) , so we went there and I rode the 07 RX-1 Warrior, RX-1 Attack, Phazer FX and the Venture Lite, gees how cool, awesome
.However, we only rode them outside store back and forth on the parking lot.. but still cool.
When I got home I put the trim on the windshield and put on a few stickers. I think it`s OK to put an "aftermarked" sticker on the windshield because if it gets flat/full by the years, it`s easy to remove and or repaint the windshield.
I think it`s cool to have an American dealer sticker on my sled
.Wellwell have a nice weekend everybody!. Hope I will be satisfied after the last coat with clear tomorrow... .
Oh I forgot to mention that I did some work with the light surrounding thing this morning, removed all the base paint & plastic primer with thinner, then I removed all the old paint (where it will be visible), with a knife, might sound drastic but I`m sick of the findings.
Removed it all the way around on the outside.
Also on the gauge surface, the bender scoop will cover the area around the vent holes so I didn`t bother to remove the paint there.
Last edited:
Hi guys!
Today I wet sanded the hood with 600 paper (was out of 800 so I took a chance).
I also removed some more paint from the headlight surrounding and wetsanded it so now it`s ready for being painted.
We had an electrician working in our kitchen today so I had to work in the dark until a friend came over with a Honda-generator, hehe.
Anyway I bought the hood down to the paint room, I sprayed water in the air and on the floor to make the dust lay down.
I used silicon cleaner on the hood, much better then thinner I think (for that purpose) an then I removed as much dust as I could with a dust cloth borrowed from my mum.
I also took our old kitchen seeling light and had a friend hold it while I was painting, today I found out how much easier it becomes if you have good light, much easier to know when to stop.
I didn`t get any runs and I think the paint floated nicely.
However I did one mistake, I started on the side of the hood and painted my way around the hood, the last part I painted was the one facing the rider (if you see when I mean), when I sprayd the last edge on the side that was close to the side where I started, the spray dust flew over the edge and kind of made an orange effect, I guess the first paint I painted already had started to dry so the spray-dust wouldn`t mix with the paint, if you see what I mean.. hehe. So I sprayed over the places where I saw the orange effect one more time so the paint floated nicely.
I don`t know if you understood what I ment, but atleast I know what not do to the next time I paint.
I barely had enough clear paint, so I will have to order some more, that sucks because I don`t know how long it will take before I`ll have it.. but.. we`ll see.
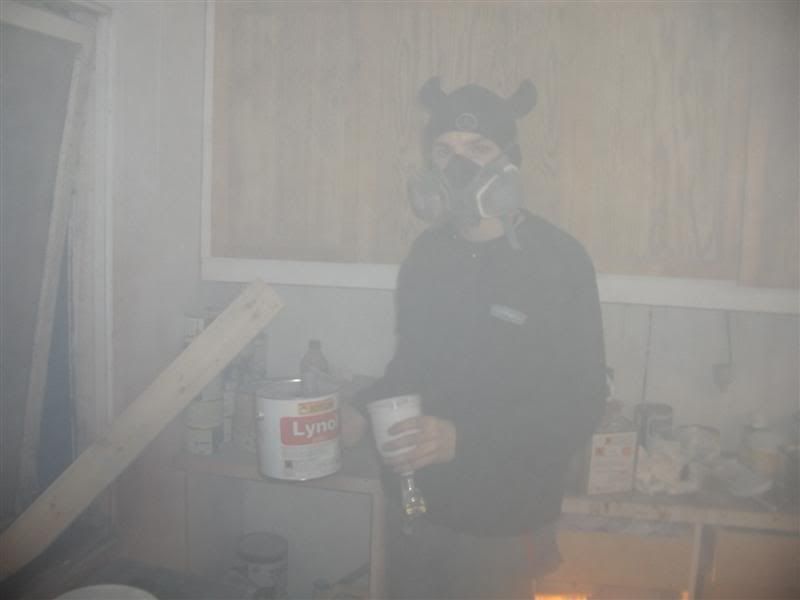
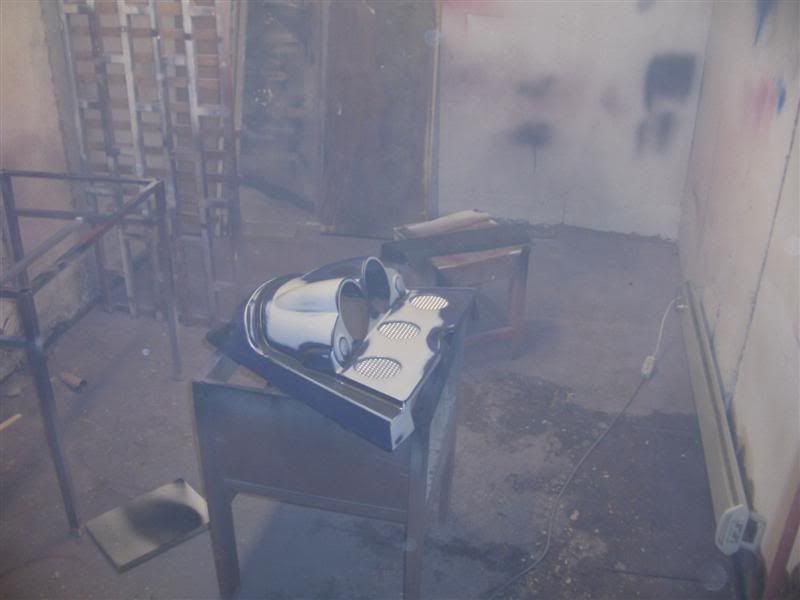
Look at all the spray-gas-dust in the room, this was shot just after I was done, not good for my health I think.
Wellwell
Have a nice weekend
Today I wet sanded the hood with 600 paper (was out of 800 so I took a chance).
I also removed some more paint from the headlight surrounding and wetsanded it so now it`s ready for being painted.
We had an electrician working in our kitchen today so I had to work in the dark until a friend came over with a Honda-generator, hehe
. Anyway I bought the hood down to the paint room, I sprayed water in the air and on the floor to make the dust lay down.
I used silicon cleaner on the hood, much better then thinner I think (for that purpose) an then I removed as much dust as I could with a dust cloth borrowed from my mum.
I also took our old kitchen seeling light and had a friend hold it while I was painting, today I found out how much easier it becomes if you have good light, much easier to know when to stop.
I didn`t get any runs and I think the paint floated nicely
.However I did one mistake, I started on the side of the hood and painted my way around the hood, the last part I painted was the one facing the rider (if you see when I mean), when I sprayd the last edge on the side that was close to the side where I started, the spray dust flew over the edge and kind of made an orange effect, I guess the first paint I painted already had started to dry so the spray-dust wouldn`t mix with the paint, if you see what I mean.. hehe. So I sprayed over the places where I saw the orange effect one more time so the paint floated nicely.
I don`t know if you understood what I ment, but atleast I know what not do to the next time I paint.
I barely had enough clear paint, so I will have to order some more, that sucks because I don`t know how long it will take before I`ll have it.. but.. we`ll see.
Look at all the spray-gas-dust in the room, this was shot just after I was done, not good for my health I think.
Wellwell
Have a nice weekend
daman
New member
LOL...looks like your painting a car,with using the water and all, but yea
good job man!!!
good job man!!!