Jack99
Member
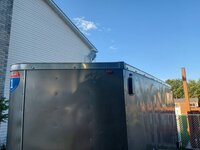
I have a 2016 6x12 V-Nose Enclosed trailer and it's in "Perfect / Mint" condition. Just finished applying underbelly protection. See my other thread for details.
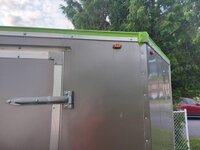
I'm now planning to better protect its factory galvanized flat roof. No rain water leaks yet but since I want to keep this trailer for 7+ more years then give to my son, I want this trailer to last many, many more years - for his future usage as well...
Currently planning:
- Power Sand its galvanized roof with 220 grit paper - to rough it up a bit.
- Clean its steel sheet joints with Varsol. Then, let it fully dry.
- Painter's tape its outer side edges and around its roof vents.
Using a 2" paint brush:
- Apply liquid rubber across its steel sheet joints - 1st coat
- Apply liquid rubber around its roof vents - 1st coat.
Using 3/8" nap lint free roller, apply 1st & 2nd coats across its entire roof.
Chosen Product (1 G can) is: https://henry.com/retail/white-roof-coatings/887-tropi-cool-100-silicone-white-roof-coating
Note: Lots of different U-Tube vids on this 100% silicone product.
Do you have any tips / traps before I start this factory improvement project?
.
Last edited:
Jack99
Member
Update:
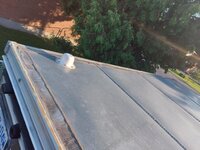
Weather forecast in my region for the next few days appears to be clear / no rain. Thus, time to complete this DIY project.
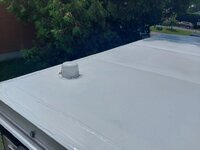
Tonight, I stood on leaning side ladder and manually washed its galvanized roof with Varsol and wide masking taped its outer edges. Ready to brush 1st coat into its joints / edges areas. Will let dry for 1-2 hours, then manually roll on its main flat surface areas.
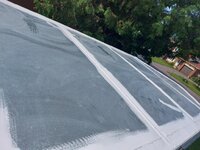
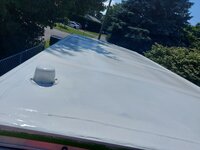
Note: Before cleaning / masking, the factory roof appeared good with a few natural cracks in its 2016 factory caulking and lots of natural rain pollution residue / Stains - as seen in below pics. All now looks clean - ready for its next tasks (planned for tomorrow)....
Weather forecast in my region for the next few days appears to be clear / no rain. Thus, time to complete this DIY project.
Tonight, I stood on leaning side ladder and manually washed its galvanized roof with Varsol and wide masking taped its outer edges. Ready to brush 1st coat into its joints / edges areas. Will let dry for 1-2 hours, then manually roll on its main flat surface areas.
Note: Before cleaning / masking, the factory roof appeared good with a few natural cracks in its 2016 factory caulking and lots of natural rain pollution residue / Stains - as seen in below pics. All now looks clean - ready for its next tasks (planned for tomorrow)....
Attachments
Last edited:
Jack99
Member
Update:
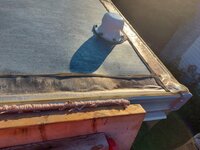
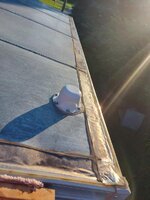
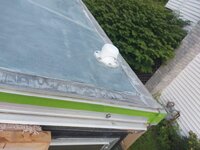
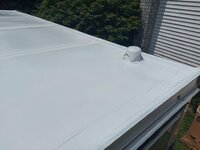
Last night, I cleaned and masking tapped the roof's outer edges. Now ready to apply Silicone Roof coating. See pics for visual.
Note: I used wide masking tape. Next time, I need to apply wider tape or apply 2 x runs of it. Lesson learned....
Last night, I cleaned and masking tapped the roof's outer edges. Now ready to apply Silicone Roof coating. See pics for visual.
Note: I used wide masking tape. Next time, I need to apply wider tape or apply 2 x runs of it. Lesson learned....
Attachments
Jack99
Member
Update:
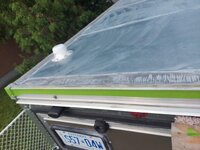
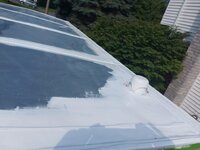
Early this morning while standing on leaning ladder, I applied Henry Tropi-Cool White 100% Silicone product on the factory seams and around its top vent areas. Applied with 2" paint brush (pushing product into its natural old age cracks / pit holes) and it applied like thick milk. Will `Let Dry` during my cloudy day for 6+ hours - before applying 2nd coat. See pics for visual. Its working as planned....
Note: Henry company promotes their 100% silicone product as "makes roof top temps cooler". For me, it isn't about keeping the roof surface cooler (although this is a nice bonus). For me, its more about re-sealing the factory 2016 caulking areas (that gets natural old age cracks in time) and to better coat its factory galvanized sheeting. This upgrade will also reduce black pollution streaks down its external sides - which makes for easy future exterior cleaning as well. Win-win in many different areas - for this low cost DIY upgrade.
Attachments
Last edited:
Jack99
Member
Update:
Within my region, unexpected flash rain tonight. Ouch!
I now plan to apply its main (1st) coating tomorrow late morning - after roof surface has naturally dried for a few hours.
.
Within my region, unexpected flash rain tonight. Ouch!
I now plan to apply its main (1st) coating tomorrow late morning - after roof surface has naturally dried for a few hours.
.
Last edited:
Jack99
Member
Update:
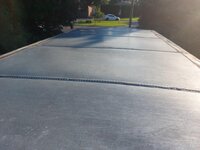
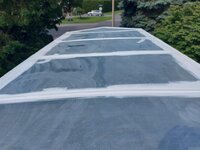
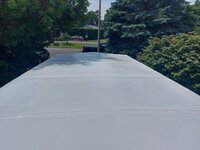
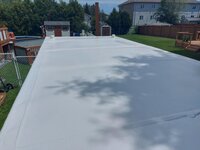
A few moments ago, I applied 1st coat across entire Galvanized sheeting roof. Used 3/8" lint free 7.25" wide roller with 3 ft handle extension. Simply poured some product out of their 1 gallon can and rolled it around (within a reachable section). Then, moved the leaning ladder over 2.5 ft - to repeat on next section - until all sections were completed. Product went on smooth with a roller. I plan to Let Dry, then decide if it needs a 2nd coat. Tomorrow morning, I'll probably skip its planned 2nd coat and manually 2" brush apply its remaining amount of product on top of its factory seams - giving it 3 coats across its old age caulking seams.. Then, remove its side edge masking tape tomorrow. See pics for visual.
Overall, I like this easy and low cost DIY upgrade. Its end results looks great as well. Hoping it lasts for many years and it will proactively prevent any roof leaks - where its factory old age caulking needed some TLC. Will let you know if it last for many years....
Hope this helps others - who are thinking of applying TLC to their enclosed trailer's roof caulking joints....
Attachments

Jack99
Member
Tonight, I decided to only apply 1 main coat.
Also removed its side masking tape.
All turned out great.
Will probably add its 2nd coat in spring of 2022.
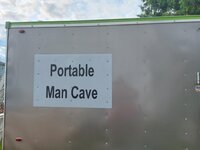
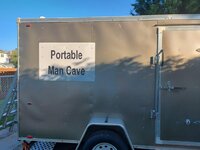
My Portable "man cave" is now better.
And ready to give to my son in 3+ more years....
Also removed its side masking tape.
All turned out great.
Will probably add its 2nd coat in spring of 2022.
My Portable "man cave" is now better.
And ready to give to my son in 3+ more years....
Attachments
Last edited:
Jack99
Member
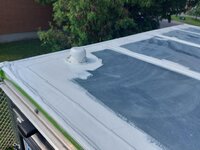
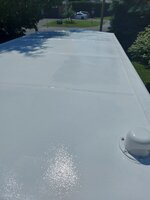
After good night's sleep, I decided to apply 2nd coat (on main roof). Updated pics below.
Turned out better than previous 1st coat... Smiles.
If doing this "better than factory" upgrade to your RV or galvanized trailer's roof, do plan for 2 main coats.
Hope this helps others...
Turned out better than previous 1st coat... Smiles.
If doing this "better than factory" upgrade to your RV or galvanized trailer's roof, do plan for 2 main coats.
Hope this helps others...
Attachments

Last edited: