Hi guys!
Saturday my brother in law`s MM700 decided to kill it`s driveshaft, it snapped right off, had to tow it down from the mountain.
Today I tored it down, hopefully I will get the new shaft on Thursday or Friday.
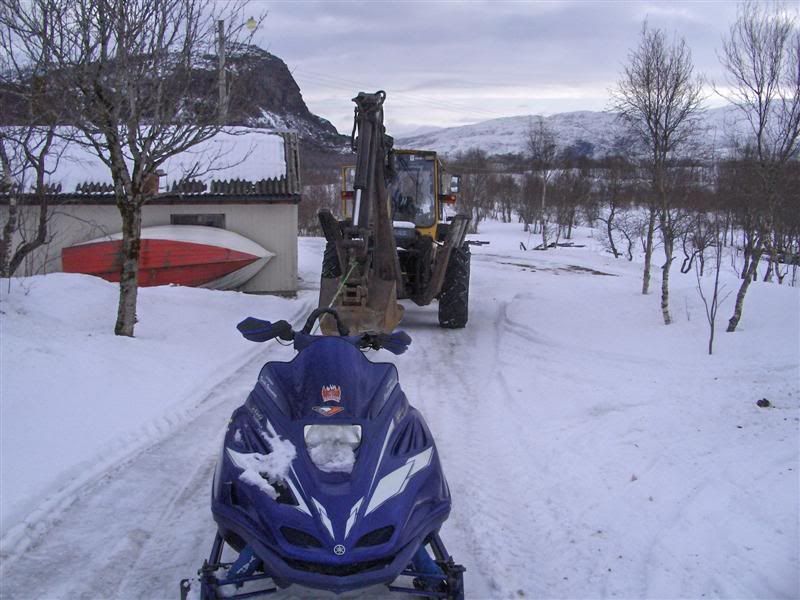
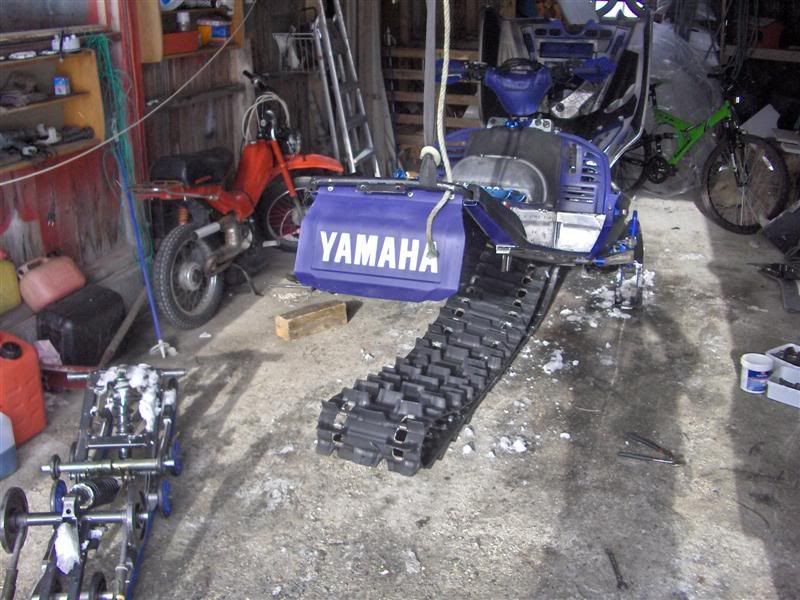
First I had to tow it into the garage
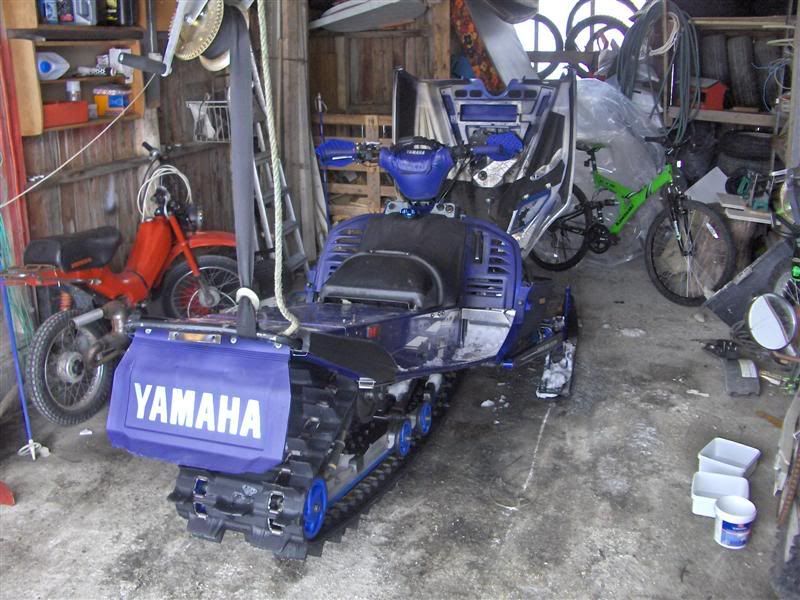
Lifted the rear end up with a boat-winch (or whatever it`s called)
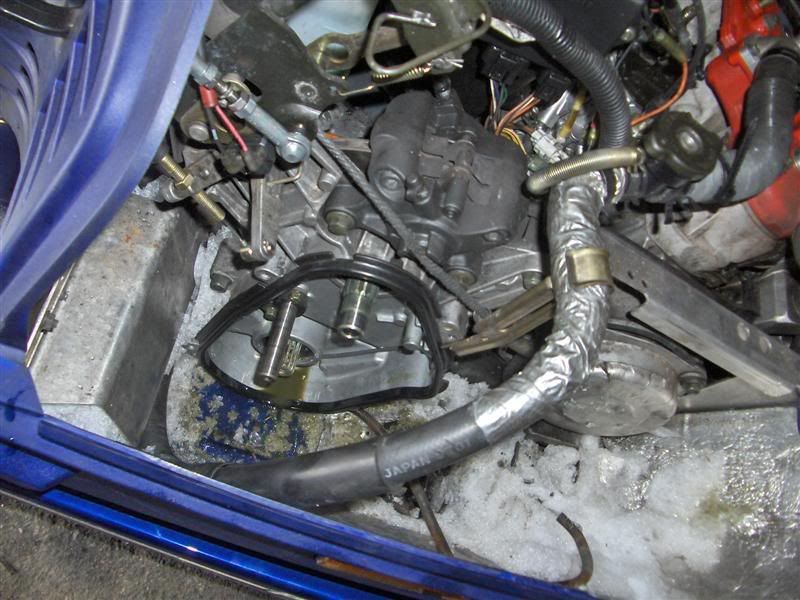
Then removed chaincase cover, gears & chain
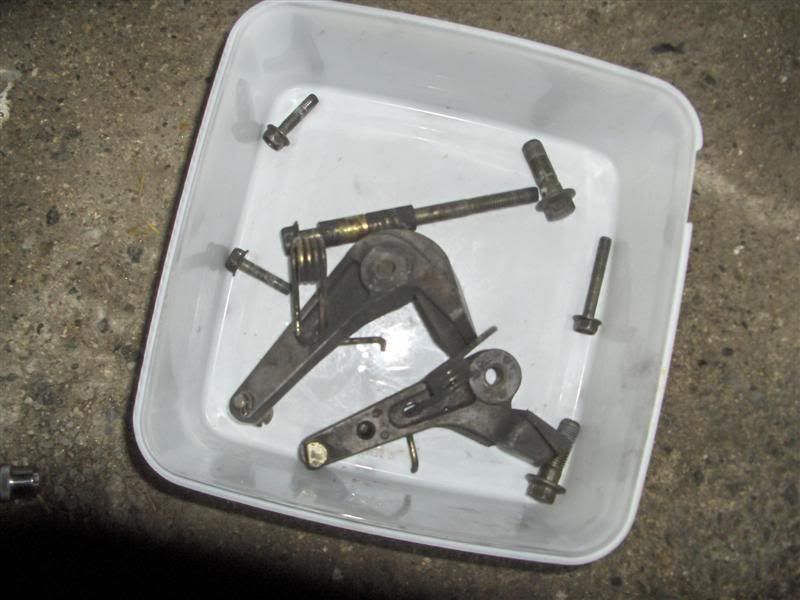
E brake assembly
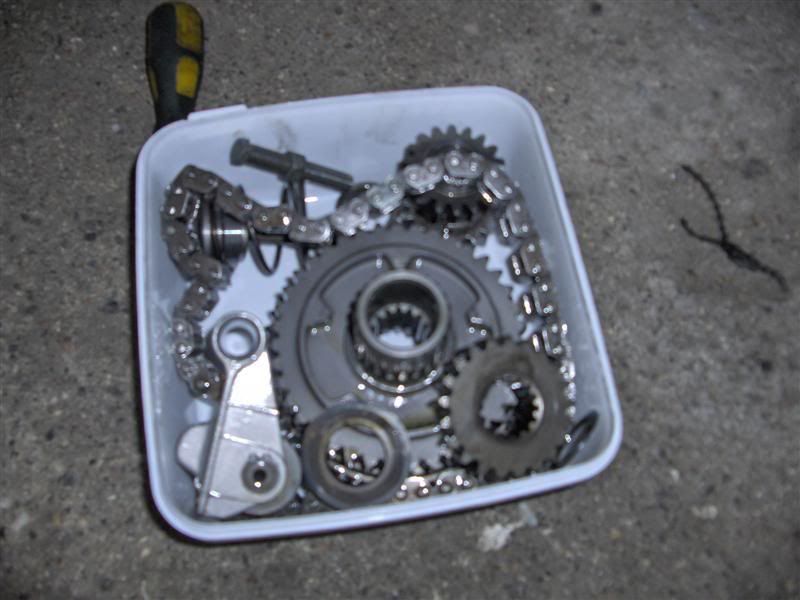
Out of focus, chain & gears
Saturday my brother in law`s MM700 decided to kill it`s driveshaft, it snapped right off, had to tow it down from the mountain.
Today I tored it down, hopefully I will get the new shaft on Thursday or Friday.
First I had to tow it into the garage
Lifted the rear end up with a boat-winch (or whatever it`s called)
Then removed chaincase cover, gears & chain
E brake assembly
Out of focus, chain & gears
Removed the reverse gear lever
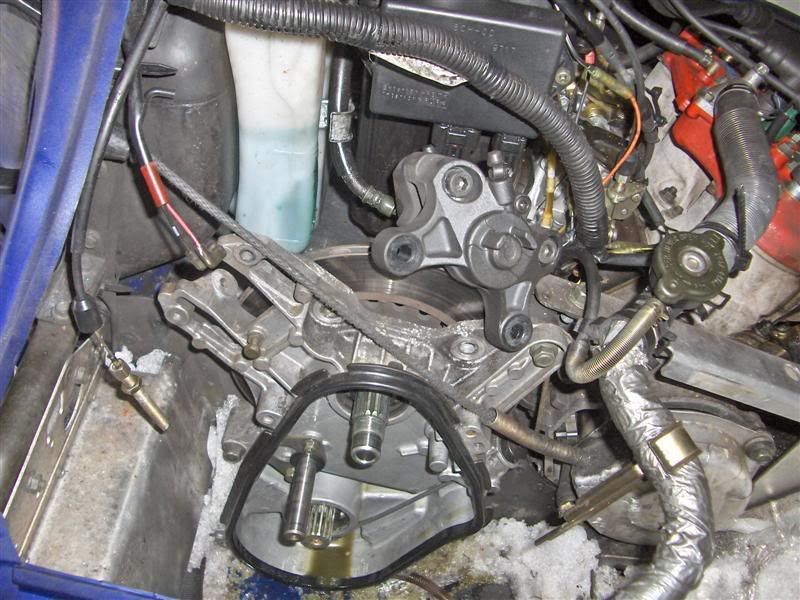
The broken shaft, I got it out after I removed the chaincase
Then removed primary clutch and the speedomter housing
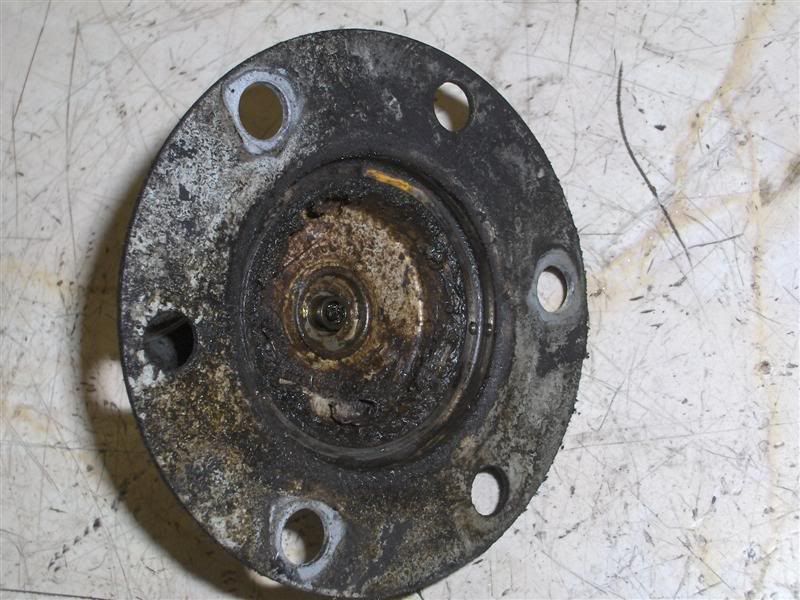
At first I thought something was bent but the bearing jumped out of its hole so nothing was damaged.
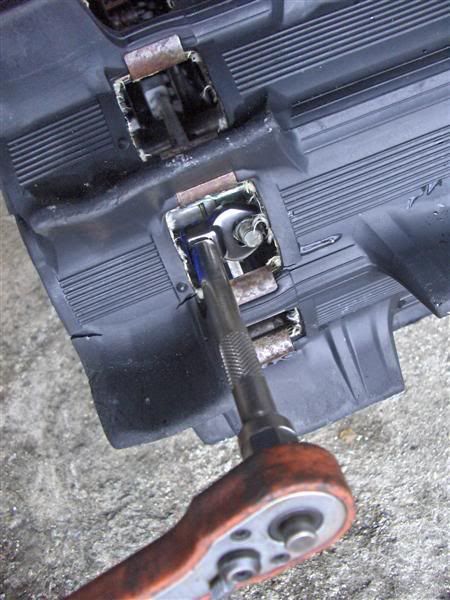
Then I loosened the track as much as I could, remember to loosen the wheel nut before try to slacken the track. I`ve found out that a crowfoot works nice for tightening/slackening the track. Actually the first time I`ve used it, had them for two years.
I then loosened all the skid bolts and sure it came loose and I removed it, felt kind of good since it`s my first time. I recommend supporting the skid from below with something so that the "dropping" becomes more controlled as you remove the bolts. I`ve heard it`s smart to lay the sled on its side when you pull the skid, but I didn`t.
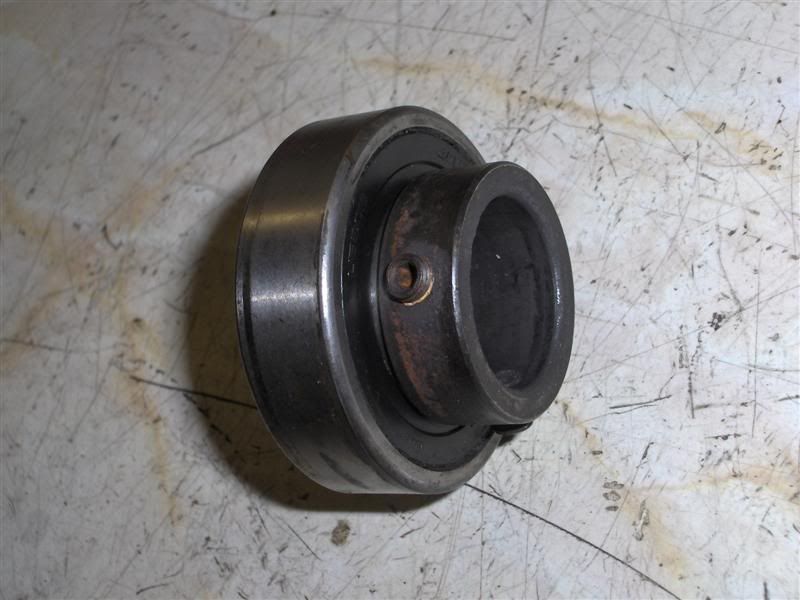
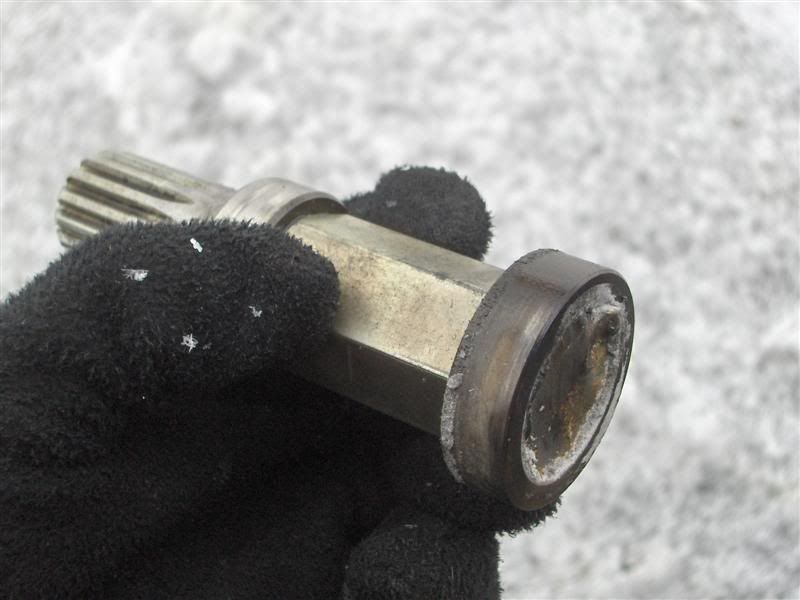
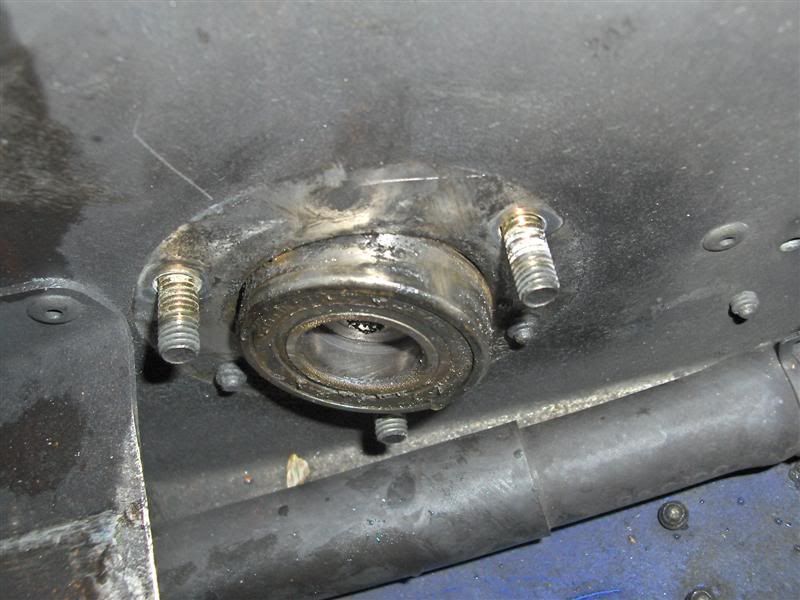
The PTO side bearing, I wonder if this bearing must be locked onto the shaft after having put it through the PTO side hole in the tunnel?.
Now I know why the speedo doesn`t work.. . The little "pin" that drives the speedometer gear was ruined.
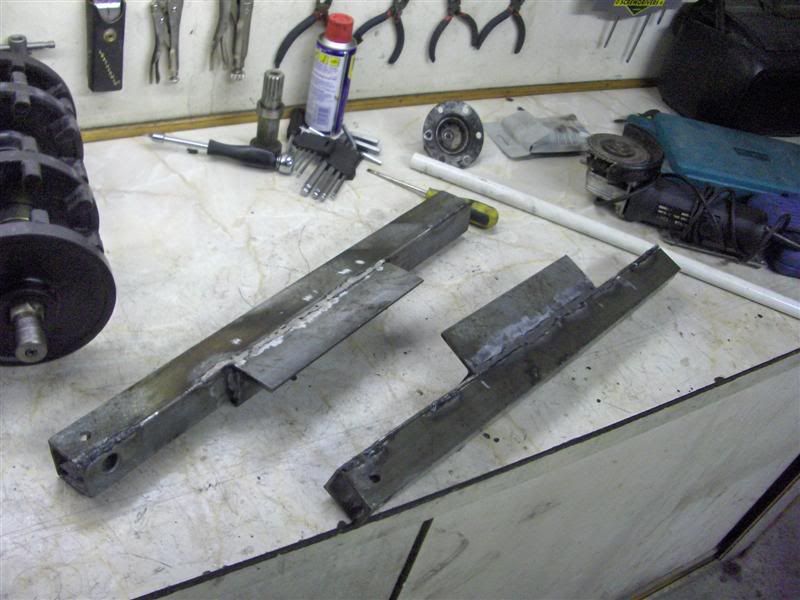
When I got the shaft out I had to remove the drive wheels, I thought it would be a piece of cake but it turned out that the "bridges" on my press was so narrow so that the drivers wouldnt fit between them. So I had to fabricate some new ones, it took me around 2 hours, couldn`t find the large angle grinder so I used my little one so everything took more time. Also the steel was galavanized so it required some grinding before welding.
The PTO side bearing, I wonder if this bearing must be locked onto the shaft after having put it through the PTO side hole in the tunnel?.
Now I know why the speedo doesn`t work.. . The little "pin" that drives the speedometer gear was ruined.
When I got the shaft out I had to remove the drive wheels, I thought it would be a piece of cake but it turned out that the "bridges" on my press was so narrow so that the drivers wouldnt fit between them. So I had to fabricate some new ones, it took me around 2 hours, couldn`t find the large angle grinder so I used my little one so everything took more time. Also the steel was galavanized so it required some grinding before welding.
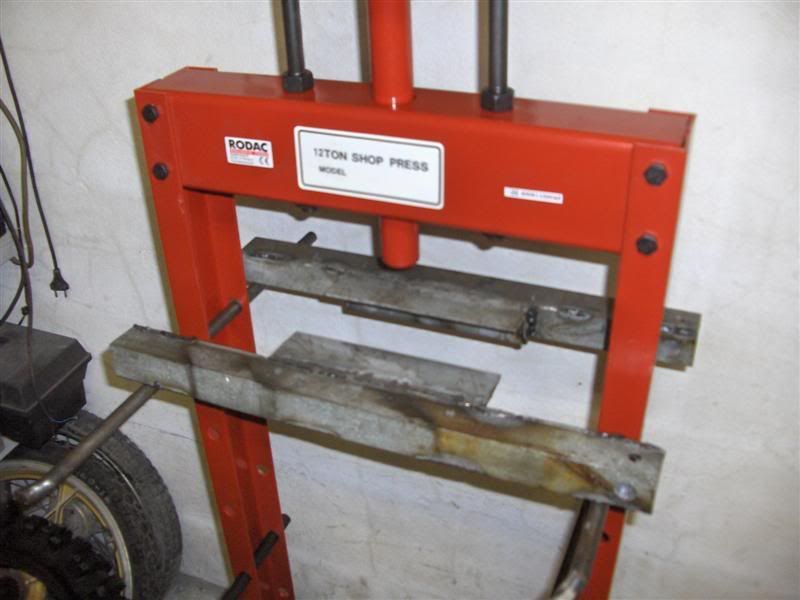
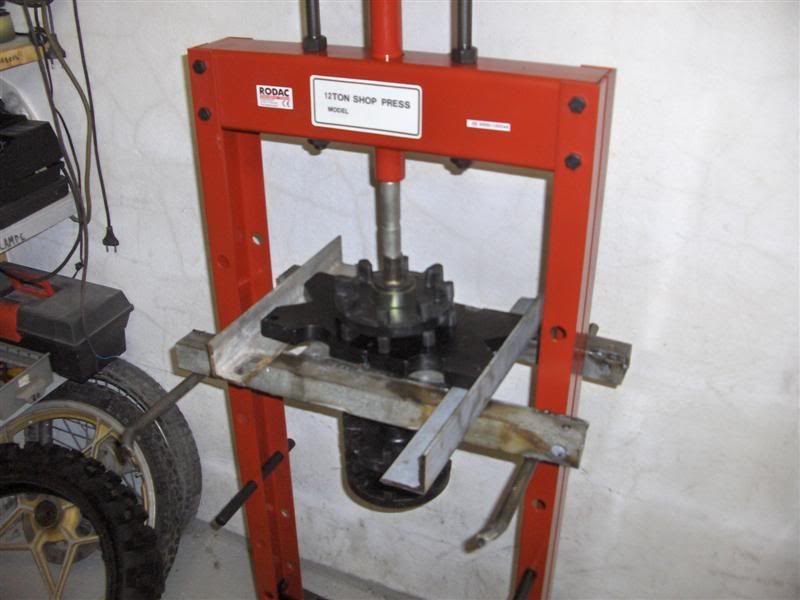
Now it went smooth
")
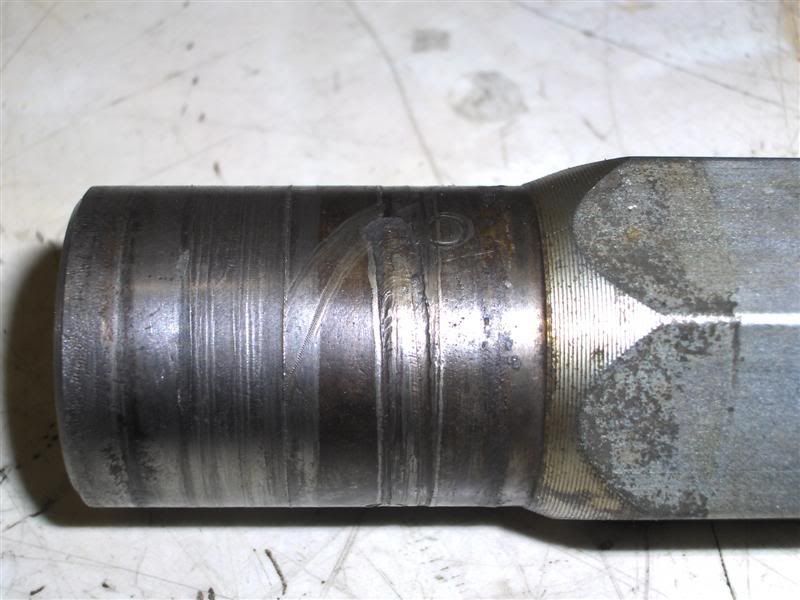
I don`t know why but it seems like the little screw in the collar in the PTO side bearing has slided on the shaft, I can`t understand why because the bearing was all good. Maybe it happened sometime while we towed the sled down from the mountain.. ?. I figure the shaft must have jumped around in there.. .
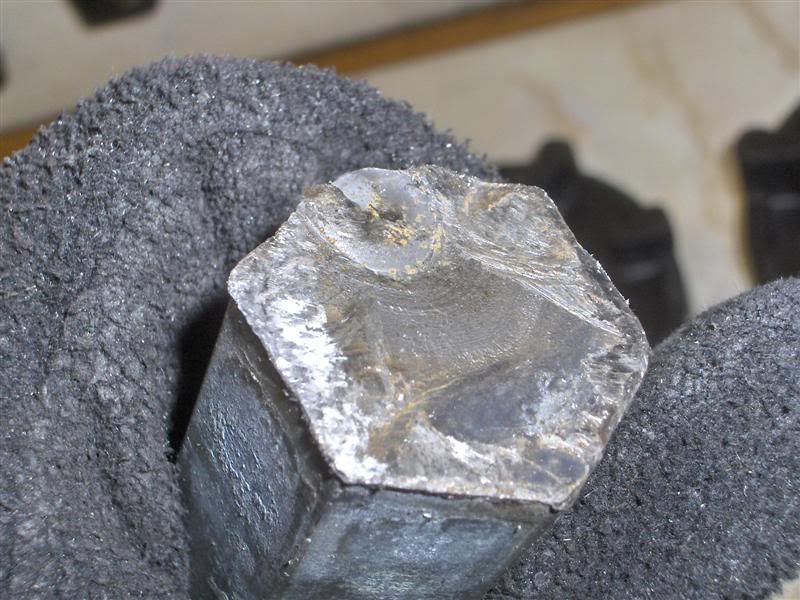
Wierd.. why should such a thick shaft snap right off.
Last edited:
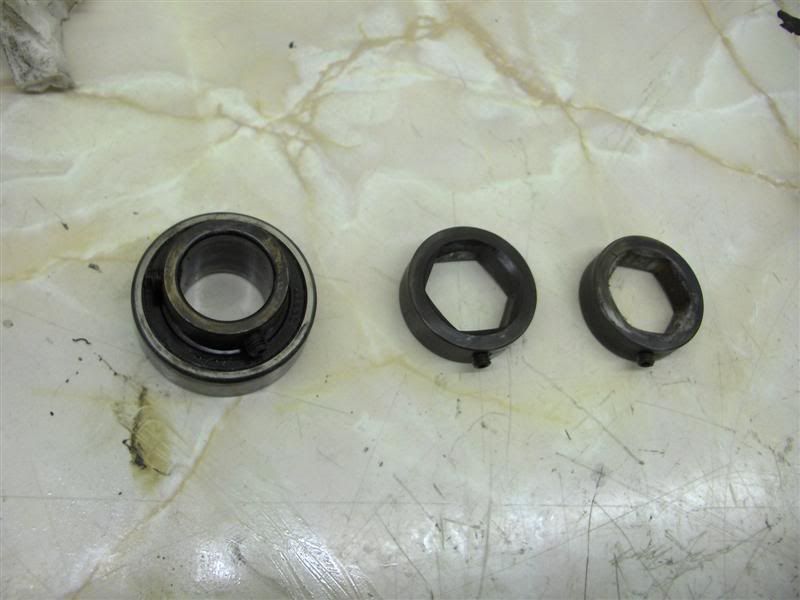
PTO side bearing and locking collars.
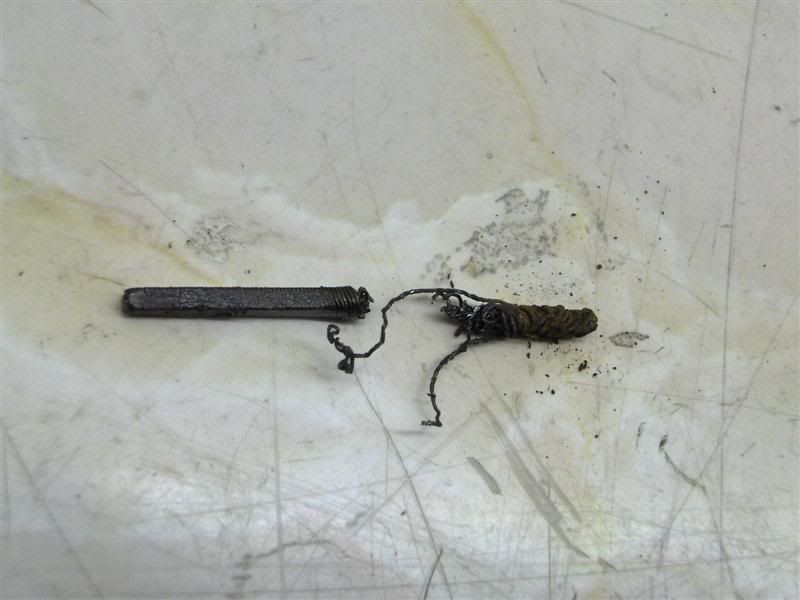
Speedomter gear drive pin
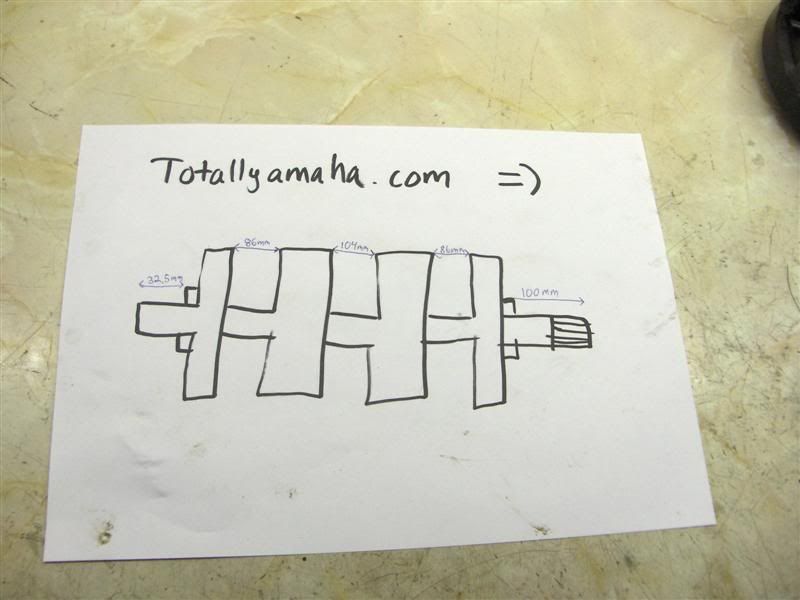
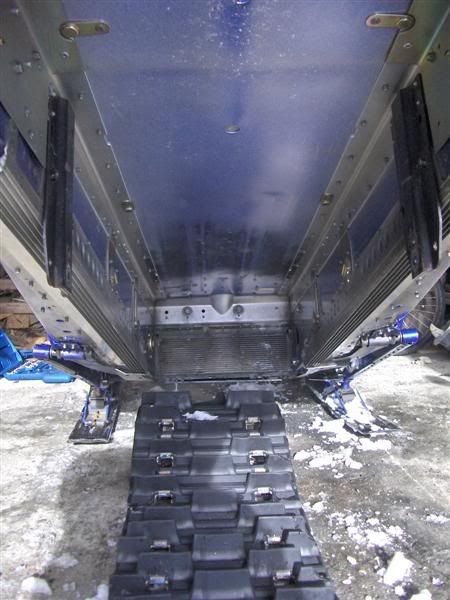
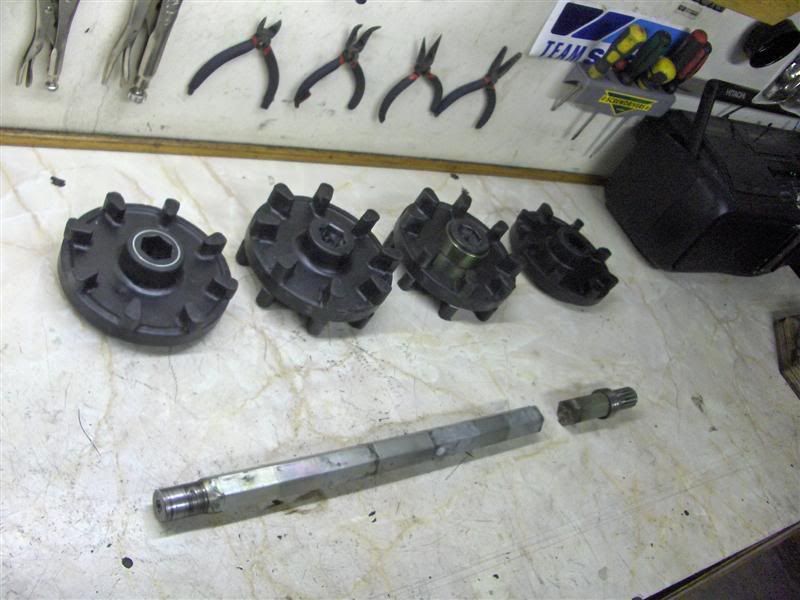
I measured the distance between the drive wheels and noted them on a piece of paper, guess it`s very important to get them 100% correct positioned.
For those who wonder, the measurements are: 22,5mm , 86mm, 104mm, 86mm and 100mm.
Wellwell that`s all for now.. . I hope to get the new shaft on Thursday or Friday so hopefully I`ll have it back up`n running on Friday or Saturday
.M-Max
New member
You have truely missed your calling.
You should be a photo journalist.
By the way that is some nasty looking slime left in your chain case.
Keep the picks and progress reports coming.
You should be a photo journalist.
By the way that is some nasty looking slime left in your chain case.
Keep the picks and progress reports coming.


I'm going to guess that the shaft damage on the PTO side(from the set screw) was probably from a previous failure if the bearing is ok, unless the submarine adventure caused it to freeze for the tow home. The speedo drive key supports this theory if the speedo hasn't worked since he got the sled. That drive key is the first thing to go when the bearing goes bad. Possible that the previous owner didn't replace the key when the bearing failed??? At any rate, pop those seals out of the bearing and have a look and re-grease if it looks good. Even if you put a new one in, I'd keep the old one for a good emergency spare, never know when you may need it in a pinch. Oh ya, I don't think the new bearing comes with set screws....so hold onto those.
It also looks like the drive shaft has been cracked for a while, maybe from a big impact or ??????? The previous owner maybe.
Keep it coming!
It also looks like the drive shaft has been cracked for a while, maybe from a big impact or ??????? The previous owner maybe.
Keep it coming!
Hey man, Now it's time to update to anti-ratched wheels. Bombardier has 50% cheaper wheels than Yamaha and they fit fine.
Also for answer to your question, you will tight those bearing locking screws after you have tight your lower gear on drive shaft. So it's last thing to do.
Also for answer to your question, you will tight those bearing locking screws after you have tight your lower gear on drive shaft. So it's last thing to do.
Hi guys thanks so much for the replies!.
M-Max: Thanks alot for the nice reply, really appreciate it. Will clean the chaincase and keep the pics coming.
crewchief47: That`s some interesting thoughts, not unlikely that the bearing could be frozen and therefor the set screw slided on the shaft. Both of the bearings (PTO side and chaincase side) seemed fine, I don`t know if the previous owner replaced them sometime. The new PTO side bearing costed 86$ at my dealer, so I feel tempted to use the old one, but since I already ordered it I`ll just replace it and keep the old one as a spare.
I guess the shaft must have been cracked and then suddenly it just snapped off.. my brother in law doesnt ride it that hard since he has just started snowmobiling.. .
Reimond: I totally agree on the anti-ratchet idea, but the thing is I want to get the sled back together asap because I don`t know how many days of snow we have left, but to be honest I don`t think my brother in law needs them because his riding style isn`t that aggresive, but sure as he learns he will get more aggressive and I might regret that I didn`t replace the drivers with anti-ratchet.. but that`s the way it is. Thanks for the tip tho.
As for the bearing locking screw, wount I have to fit the driveshaft through the tunnel and then put the bearing on the shaft?. Since the bearing can`t go through the tunnel.. . I might be wrong, I haven`t looked that much on it.. but atleast that`s what I think. But it seems wierd.. .
I guess I will figure it out but don`t hesitate to teach me some more Reimond.
Wellwell I hope to see the parts tomorrow.. .
M-Max: Thanks alot for the nice reply, really appreciate it
. Will clean the chaincase and keep the pics coming.crewchief47: That`s some interesting thoughts, not unlikely that the bearing could be frozen and therefor the set screw slided on the shaft. Both of the bearings (PTO side and chaincase side) seemed fine, I don`t know if the previous owner replaced them sometime. The new PTO side bearing costed 86$ at my dealer, so I feel tempted to use the old one, but since I already ordered it I`ll just replace it and keep the old one as a spare.
I guess the shaft must have been cracked and then suddenly it just snapped off.. my brother in law doesnt ride it that hard since he has just started snowmobiling.. .
Reimond: I totally agree on the anti-ratchet idea, but the thing is I want to get the sled back together asap because I don`t know how many days of snow we have left, but to be honest I don`t think my brother in law needs them because his riding style isn`t that aggresive, but sure as he learns he will get more aggressive and I might regret that I didn`t replace the drivers with anti-ratchet.. but that`s the way it is. Thanks for the tip tho.
As for the bearing locking screw, wount I have to fit the driveshaft through the tunnel and then put the bearing on the shaft?. Since the bearing can`t go through the tunnel.. . I might be wrong, I haven`t looked that much on it.. but atleast that`s what I think. But it seems wierd.. .
I guess I will figure it out but don`t hesitate to teach me some more Reimond
.Wellwell I hope to see the parts tomorrow.. .
Last edited:
kimoaj said:Hi guys thanks so much for the replies!.
As for the bearing locking screw, wount I have to fit the driveshaft through the tunnel and then put the bearing on the shaft?. Since the bearing can`t go through the tunnel.. . I might be wrong, I haven`t looked that much on it.. but atleast that`s what I think. But it seems wierd.. .
I guess I will figure it out but don`t hesitate to teach me some more Reimond
Wellwell I hope to see the parts tomorrow.. .
He means to leave the screws loose untill you have the chaincase side finished. If the set screws are tightened before the chaincase, some side loading of the speedo bearing could happen, with early failure the result. Judging from your previous work, you probably would have done it this way anyway but the big happy family is just looking out for you.

Hi again there crewchief47, now I understand. Yes that is exactly what I was thinking of, last night I was lying in my bed thinking of how I could make sure that the collar on the PTO side bearing was installed correctly on the shaft, like, not too far out or too far in. But as you tell me this I remember that the driveshaft will hit the outside of the chaincase bearing and when I tighten the lower gear nut the shaft will be in the correct position.
But, wount the set screws on the PTO side bearing be hard to reach after the shaft is installed in the tunnel?. Or am I just worrying without reason.. . Guess they will have to be tightened from the inside of the tunnel?. Or am I overlooking something here?.
Gees I feel much more confident now, thanks so much for the tips.
If I get the parts tomorrow night I will start rebuilding early Friday morning, you think it`s possible that I can have it done by 13.00 when I have to go to work?. If I start wrenching 07.00 that would give me 6 hours. Should be enough. But I figure I will spend some time pressing the drivers onto the new shaft.
Since I will be wrenching alone I think it might be a good idea to tip the sled over on its side when I`m about to install the skid?. It seems much easier to get the screw-holes ligned up this way.
So, first I put the track up into the tunnel, put the shaft in there, put then chaincase back on and tighten the lower gear nut, then slide the PTO side bearing onto the shaft, I will probably have to hammer it on?. Then tighten the set screws on the bearing. Then tip the sled over and install the skid.
Gees I`m so excited to get the parts and start wrenching.
Wellwell goodnight.
. Yes that is exactly what I was thinking of, last night I was lying in my bed thinking of how I could make sure that the collar on the PTO side bearing was installed correctly on the shaft, like, not too far out or too far in. But as you tell me this I remember that the driveshaft will hit the outside of the chaincase bearing and when I tighten the lower gear nut the shaft will be in the correct position.But, wount the set screws on the PTO side bearing be hard to reach after the shaft is installed in the tunnel?. Or am I just worrying without reason.. . Guess they will have to be tightened from the inside of the tunnel?. Or am I overlooking something here?.
Gees I feel much more confident now, thanks so much for the tips.
If I get the parts tomorrow night I will start rebuilding early Friday morning, you think it`s possible that I can have it done by 13.00 when I have to go to work?. If I start wrenching 07.00 that would give me 6 hours. Should be enough. But I figure I will spend some time pressing the drivers onto the new shaft.
Since I will be wrenching alone I think it might be a good idea to tip the sled over on its side when I`m about to install the skid?. It seems much easier to get the screw-holes ligned up this way.
So, first I put the track up into the tunnel, put the shaft in there, put then chaincase back on and tighten the lower gear nut, then slide the PTO side bearing onto the shaft, I will probably have to hammer it on?. Then tighten the set screws on the bearing. Then tip the sled over and install the skid.
Gees I`m so excited to get the parts and start wrenching.
Wellwell goodnight
.
kimoaj - I love your posts, I feel like I was out riding all day! THANK YOU! ITs 65 and raining here in iowa today!
When I installed my Edge skid which is easier because its only 4 bolts I found it very easy to lower the sled with a ratchet strap on to the skid which I had already placed in the track. I did no lifting at all. I was prepared for the side roll thing but didn't need it one bit. My advice is get the skid back in the track and then position it and slowly lower the tunnel on to it. Get it close then muscle it around to get the holes to line up. Start at the front and work back. Good luck and keep posting those pictures, if your camera ever breaks TY would probably start a fund raiser to get you a new one LOL
When I installed my Edge skid which is easier because its only 4 bolts I found it very easy to lower the sled with a ratchet strap on to the skid which I had already placed in the track. I did no lifting at all. I was prepared for the side roll thing but didn't need it one bit. My advice is get the skid back in the track and then position it and slowly lower the tunnel on to it. Get it close then muscle it around to get the holes to line up. Start at the front and work back. Good luck and keep posting those pictures, if your camera ever breaks TY would probably start a fund raiser to get you a new one LOL
Hi Kimoaj,
Before you put drive axel in, you can file PTO bearing end a bit, so you don't have to hammer it... I mean file edges off if someone has hammered it before.
Slide also PTO end bearing on axle before tightening lower gear so axle will be straight. There is enough room to tight bearing locking screws.
Good luck... I believe you are almoust ready now
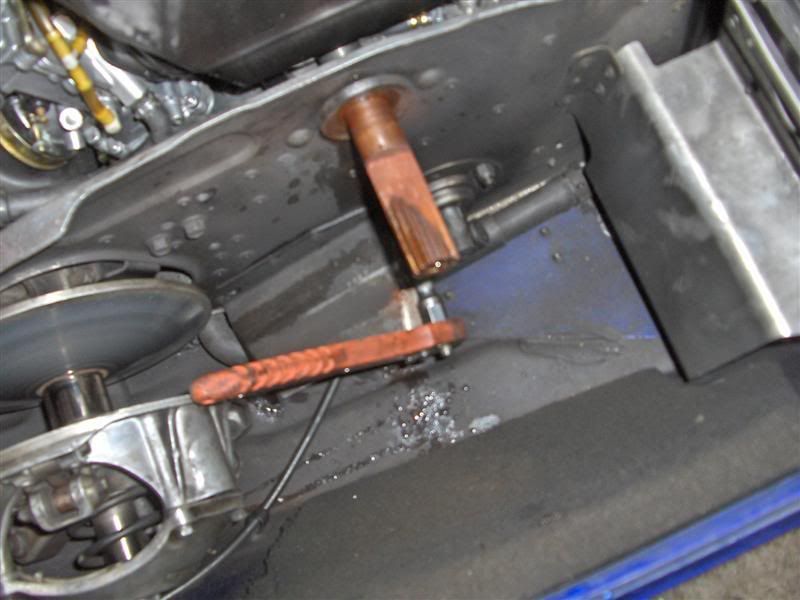
kimoaj i love your posts too and i read them all, i don't know if you did this when you removed the skid, on the bottom of the transfer rods loosen the bolts as much as you can without removing them this will loosen the load on the spring and it will be easier to line up the bolt holes
Take care and keep them coming.
Take care and keep them coming.
Hi guys!
Thanks so much for the replies!.
Kinger: Thanks. I will try to do it as you said, since I already have the tunnel lifted up and can easily let it down. I should have thought about that before.. I was picturing myself struggling to lift the skid up and then put the bolts in hehe.. . I`m not worried about my camera, it`s just a cheap HP camera that I bought on a supermaked, I call it my "workshop camera". I have a Canon EOS 350D for "normal" photographing. I spent alot of time deciding wether to buy such an expensive camera or not, but I don`t regret it.
Reimond: Thanks so much for the tips, will follow them. I will be installing a new bearing and a new shaft so they should be untouched by human hands until I get them, so hopefully the bearing will slide on easily. But thanks for the tip.
BenderSRX: Thanks! .Another helpful tip!. Will loosen them before I try to put the skid back in. Bingo.
BAD NEWS.
A friend of mine who goes to school in town dropped by the dealer and asked about my parts, but that hadn`t showed up. The guys at the dealer talked about a delayed plane or something, they didn`t know if it would show up tomorrow either .
.
But my friend will be dropping by them tomorrow too so if they arrive I will get them.
Bad thing is that I can`t start putting it back together tomorrow morning, as I planned.. but that`s just the way it is.
Will keep you posted!.
Thanks again for the replies, really appreciate them.
Thanks so much for the replies!.
Kinger: Thanks
. I will try to do it as you said, since I already have the tunnel lifted up and can easily let it down. I should have thought about that before.. I was picturing myself struggling to lift the skid up and then put the bolts in hehe.. . I`m not worried about my camera, it`s just a cheap HP camera that I bought on a supermaked, I call it my "workshop camera". I have a Canon EOS 350D for "normal" photographing. I spent alot of time deciding wether to buy such an expensive camera or not, but I don`t regret it.Reimond: Thanks so much for the tips, will follow them. I will be installing a new bearing and a new shaft so they should be untouched by human hands until I get them, so hopefully the bearing will slide on easily. But thanks for the tip.
BenderSRX: Thanks! .Another helpful tip!. Will loosen them before I try to put the skid back in. Bingo.
BAD NEWS.
A friend of mine who goes to school in town dropped by the dealer and asked about my parts, but that hadn`t showed up. The guys at the dealer talked about a delayed plane or something, they didn`t know if it would show up tomorrow either
But my friend will be dropping by them tomorrow too so if they arrive I will get them.
Bad thing is that I can`t start putting it back together tomorrow morning, as I planned.. but that`s just the way it is.
Will keep you posted!.
Thanks again for the replies, really appreciate them.
xt700
New member
- Joined
- Jan 27, 2006
- Messages
- 262
One note about the set screws, some are torx some allen, check if theres any play between the wrench and set srew. There not expensive and if theres slop it probably will get worse when you tighten them up, no big deal this time but really frustrates you when you go to take it off the next time and strip em. I have to note that they will not strip when you have lots of time to spare, it usally happens when you want to go ridding and the dealership just closed, so you cant get new ones. my tip put some new ones in.
Pat
Pat
xt700: Thanks alot for the tip, will pay attention to the screws and make sure I use the right tool.
Good news!. I finally got the new driveshaft, bearings and seal.
I called the dealer yesterday morning and asked about the parts that they were suppost to get in stock last Thursday. The bearings and seal are here but no shaft, the supplier was out. Gees I thought.
I asked if it would show up before the weekend, he didn`t know.
The snow is almost gone so if there will be some more riding it will be this weekend, so I got kind of depressed when thinking of this. (on behalf of my brother inlaw).
But 10 minutes later the guy from the dealer called "ordered the shaft from Netherland, with super-fast shipping , should be here tomorrow" he said. I really doubted it, but gees this morning he called "I got the shaft".
I was impressed.
A friend of me dropped by the shop and got the shaft, bearings, seal & o-rings, he also get a set of new sparkplugs for my Viper and some stock main jets for my Viper.
.
At first I thought the shaft didn`t fit but I found out that the collar-ring must be removed from the old shaft and then pressed onto the new one?.
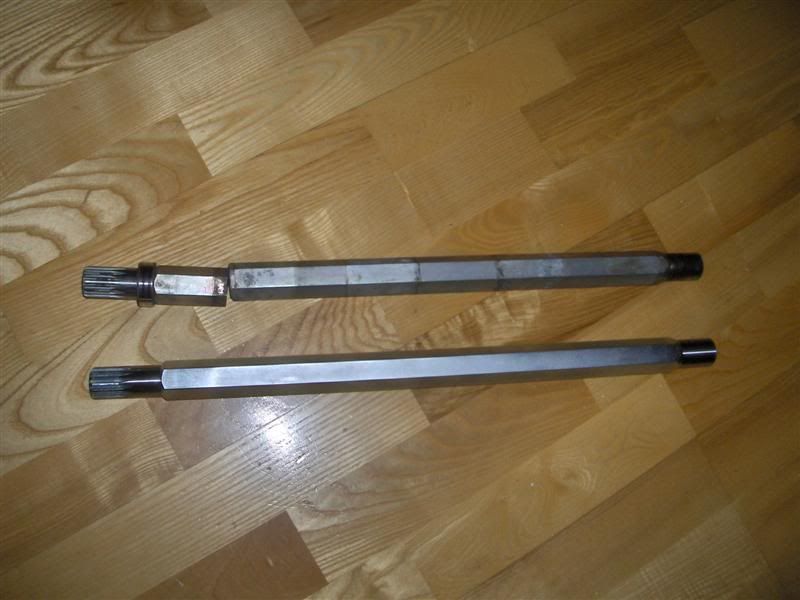
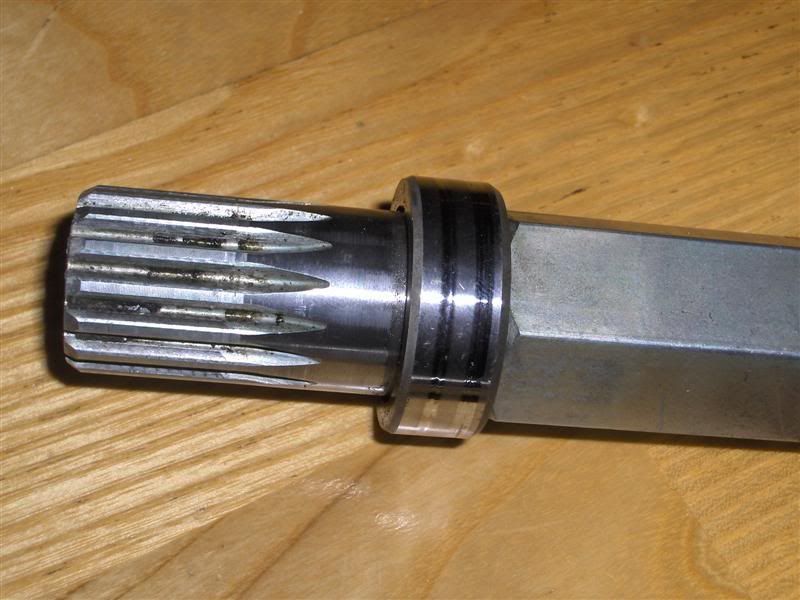
"collar-bushing-ring" or whatever I should call it.
I guess this is removable?.
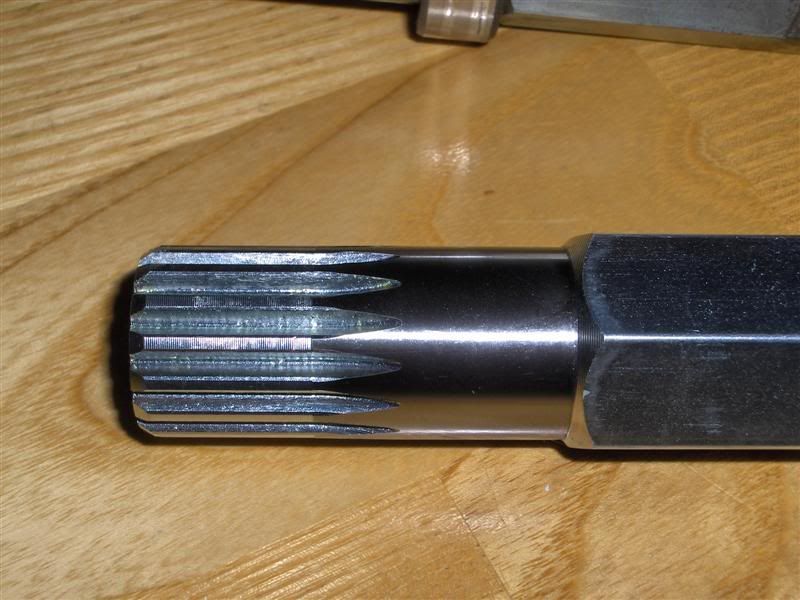
New shaft end.. .
Good news!. I finally got the new driveshaft, bearings and seal.
I called the dealer yesterday morning and asked about the parts that they were suppost to get in stock last Thursday. The bearings and seal are here but no shaft, the supplier was out. Gees I thought.
I asked if it would show up before the weekend, he didn`t know.
The snow is almost gone so if there will be some more riding it will be this weekend, so I got kind of depressed when thinking of this. (on behalf of my brother inlaw).
But 10 minutes later the guy from the dealer called "ordered the shaft from Netherland, with super-fast shipping , should be here tomorrow" he said. I really doubted it, but gees this morning he called "I got the shaft".
I was impressed.
A friend of me dropped by the shop and got the shaft, bearings, seal & o-rings, he also get a set of new sparkplugs for my Viper and some stock main jets for my Viper.
.At first I thought the shaft didn`t fit but I found out that the collar-ring must be removed from the old shaft and then pressed onto the new one?.
"collar-bushing-ring" or whatever I should call it.
I guess this is removable?.
New shaft end.. .
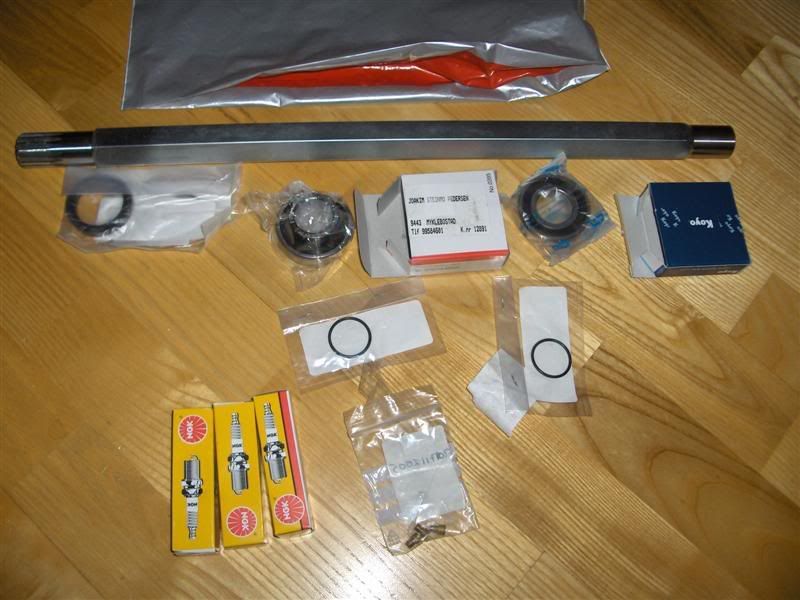
Other parts
Can`t wait to start wrenching tomorrow, I hope the ring on the shaft will be easy to get loose and then fit it on the new shaft. Will be so fun to reassemble this. Will start wrenching tomorrow morning so I hope to have it done tomorrow.
blue missile
New member
you changed the chaincase oil after it sank right? looks cloudy.
Hi guys!
blue_missile: Yes ofcourse, I tore it apart and cleaned it as good managed.
From my experience the chaincase oil doesnt stay nice colorwise for long.. .
As for the ring I mentioned above, the one that I thought I would have to press off, it was loose.. I tapped it gently with a hammer and it came loose.. .
I started wrenching 06.30 this morning. I got a really nice surprise when I woke up.
There was a package in my bed. I didn`t understand anything. My mom had found it while she sorted post at the post sorting station where she works. So she took it home so I got it faster.
First I thought it was a package from Rich, but it turned out it was the package from 03viperguy with the helmet camera he helped med purchase!. Thanks alot 03viperguy, you`re the best.
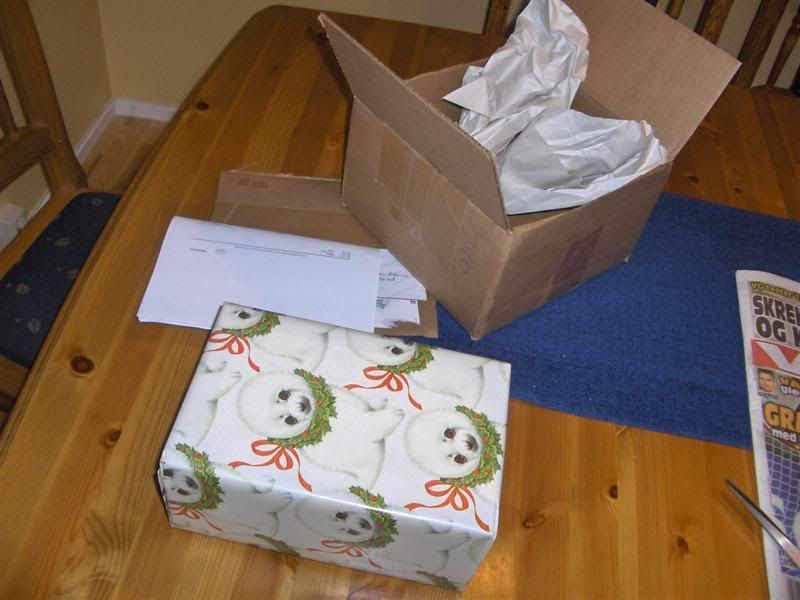
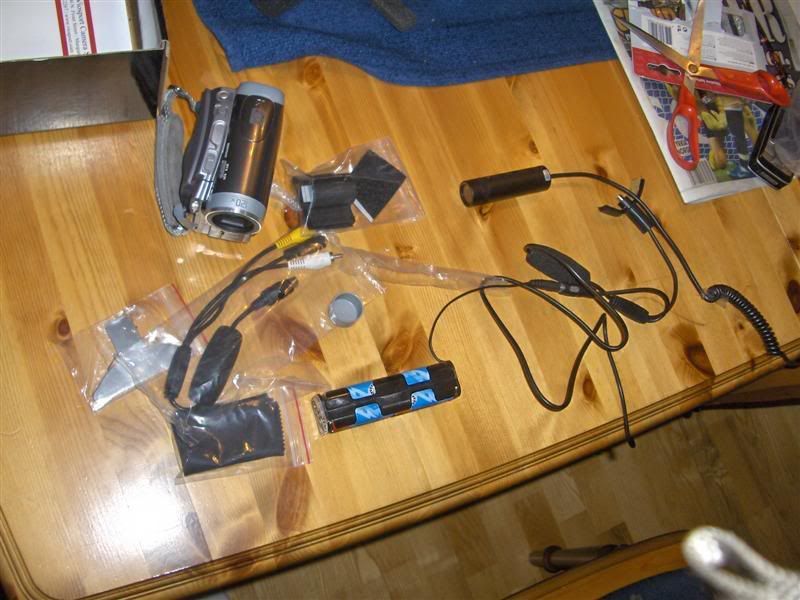
Can`t wait to test it on the sled.. .
Wellwell back to topic.
First I fit the drivewheels on the shaft.
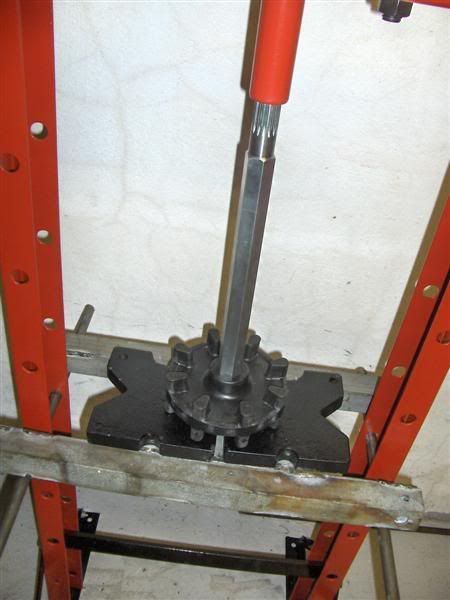
First I pressed on drivewheel nr. 2 from PTO side
Then I pressed on drivewheel nr. 1
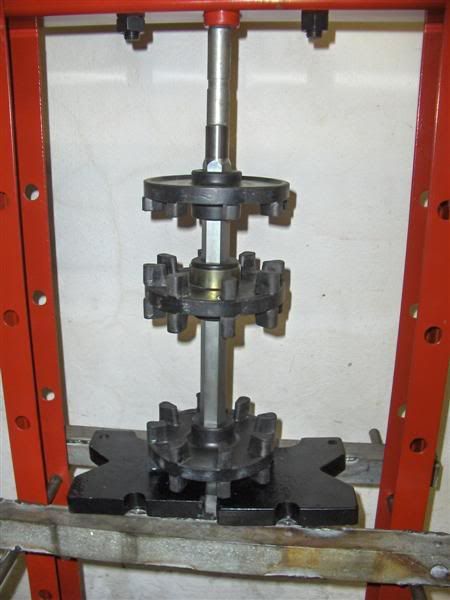
Then number 3 was next
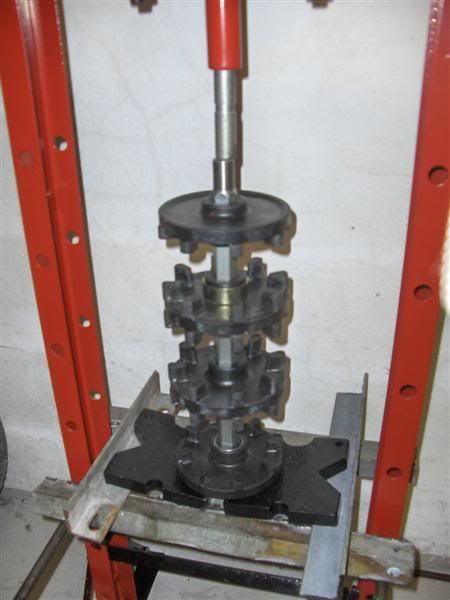
And finally the last one.. .
blue_missile: Yes ofcourse, I tore it apart and cleaned it as good managed.
From my experience the chaincase oil doesnt stay nice colorwise for long.. .
As for the ring I mentioned above, the one that I thought I would have to press off, it was loose.. I tapped it gently with a hammer and it came loose.. .
I started wrenching 06.30 this morning. I got a really nice surprise when I woke up.
There was a package in my bed. I didn`t understand anything. My mom had found it while she sorted post at the post sorting station where she works. So she took it home so I got it faster.
First I thought it was a package from Rich, but it turned out it was the package from 03viperguy with the helmet camera he helped med purchase!. Thanks alot 03viperguy, you`re the best.
Can`t wait to test it on the sled.. .
Wellwell back to topic.
First I fit the drivewheels on the shaft.
First I pressed on drivewheel nr. 2 from PTO side
Then I pressed on drivewheel nr. 1
Then number 3 was next
And finally the last one.. .