toydoc
Member
Looks good! IMO, I'd teflon coat on the drive wheels. Or some non-stick coat. That may add some mph. Stock "slick" PPD wheels will pull/hold on the track, aluminum maybe more of a issue.
We use to Armor-all stock drivers and see a gain
We use to Armor-all stock drivers and see a gain
valin
Active member
I ended up 4th in Earlton with the drag bike. I should have been 2nd for sure. Gates would have been hard to beat, but it would have been one hell of a race. I pulled a damn redlight in the semi finals because my hand slipped right off the clutch lever while i was leaving.....stood the bike up to 12:00 in a split second. It didn't spin at all, even wth it lowered and stretched 7". Gotta love Mickey Thompson drag tires  I still don't know how it didn't go over.
I had nitrous issues, so I had to run all motor, and on race fuel to boot, so my times were down about 1/2 second because my motor won't burn the fuel. I think I have it figured out now though.......way too much fuel pressure. The NOS system was completely drowning out the motor. I picked up a fuel pressure regulator today, and am going to cut the pressure back to 5-7 psi. I'm sure this will fix my problem. At least I errored on the safe side
Toydoc, I'll look into that. That's something I have never thought of.
 I still don't know how it didn't go over.
I had nitrous issues, so I had to run all motor, and on race fuel to boot, so my times were down about 1/2 second because my motor won't burn the fuel. I think I have it figured out now though.......way too much fuel pressure. The NOS system was completely drowning out the motor. I picked up a fuel pressure regulator today, and am going to cut the pressure back to 5-7 psi. I'm sure this will fix my problem. At least I errored on the safe side

Toydoc, I'll look into that. That's something I have never thought of.
jabber800
New member
Always good to be on the safe side!!! Wish I could have seen that wheelie, I bet the crowd loved it.. Let me know if you find someone to coat the drivers Ryan. I may give it a try myself..
valin
Active member
The custom built lightweight race seat off of this chassis is for sale. Check it here:
http://www.totallyamaha.net/forums/showthread.php?t=50975
http://www.totallyamaha.net/forums/showthread.php?t=50975
valin
Active member
Seat is sold.
valin
Active member
Happy Birthday to me..........turned 31 today.
Happy belated Valin
valin
Active member
I'll get some more progress photos up soon. I'm waiting for parts, so I can't really move ahead.
All I can tell you for now is that I spent another $2400 last week. That is nearly all for spending this year, other than powdercoating the trailing arms and ceramic coating the pipes......well........except for new Price intake manifolds, pistons, and rings.
All I can tell you for now is that I spent another $2400 last week. That is nearly all for spending this year, other than powdercoating the trailing arms and ceramic coating the pipes......well........except for new Price intake manifolds, pistons, and rings.

jabber800
New member
Happy Birthday Ryan.. We'll have a few cold beer next time we get together on me...
valin
Active member
I will get going on this next week. Still waiting for my brake setup to come in, and rear suspension. Everything should be in late this week, or early next week......then it shall begin!
valin
Active member
Here's a minor update:
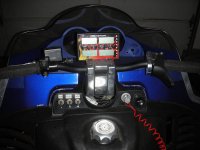
Well, I mounted the Digitron that I picked up off of Snowdad4. I decided to mount it to the handlebars so I don't have anything mounted on the hood. I am going to mount the front of the hood with pins, and use the stock mounting straps for the rear of the hood. That way I can remove the hood with ease.
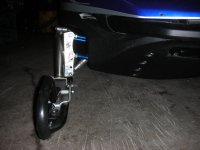
I picked up a set of USI flatline drag skis, and a set of MSD 8.5mm ignition wires to run on the MSD coils. Other than that, I really haven't done much. I threw on the titanium trailing arms, and installed the 11" Wahl prostock shocks. I have to have some aluminum brackets made in order to lower the mounting point for the shocks on the trailing arms. Since the arms are build for a viper, they are 1" longer through the spindle below the arm, so I need to gain that 1" back, and I will do it with some minor custom aluminum work. No biggie. After that is done, it's off to Fireball Coatings for some powder coating. The trailing arms are going to be gloss black, and I am going to have my pipes and silencers ceramic coated chrome for some bling under the hood.
Attachments
valin
Active member
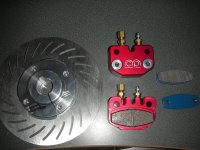
Ahhh......finally, the brake setup came in. This brake setup is designed for Kart racing. It is made by MCP Racing. The calipers are Mini-lite's, 7" lightweight rotor, aluminum hub, and I picked up a set of upgraded pads to go with the system. In the end, it cost me $205, shipped to the door. This setup is going to be installed on my driveshaft, with the calipers mounted inside the tunnel, which is a bit of a shame, since they look so good!
Now all I need is to figure out a bearing housing and proper bearing to run for the driveshaft, and I can start putting the driveline together.
Now all I need is to figure out a bearing housing and proper bearing to run for the driveshaft, and I can start putting the driveline together.
Attachments
Danger Dog
Member
Nice!
valin
Active member
Argh, after inspecting the caliper, I have decided to send it back and get the full sized caliper. The pads are very small, and I don't think there will be enough stopping power with this caliper. MCP agreed when I called them and explained my situation, so a new caliper is now in the mail.
valin
Active member
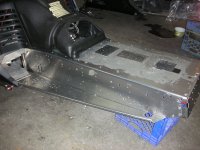
Well, I was a feeling a bit ambitious today, so I did some work. I decided to strip the paint off the tunnel and polish it. I couldn't have my trail sled looking better than the new race sled! So, I just had to polish the tunnel. I picked up some new paint stripper, which worked amazing. Nearly all of the paint was off with the first coat. I gave it a quick once-over with some mothers hand aluminum cleaner/polish, but it is not nearly good enough for my liking, so I'll attack it with some compound and a buffing wheel tomorrow possibly.
That's all I did with the race sled today. Most of my work was on the trail sled build (old race chassis in my avatar). I brought the front suspension back up to stock ride height and threw in some stock Ohlins with black powdercoated springs. I installed the handlebars and pad, and I also pulled the track and suspension out of it, and put it back to my "trail" settings. I have to pick up some old, thin, Vmax sliders tomorrow, and cut down an older Camoplast 9791 track that I have laying around to 14" wide, then I can throw it back together. In case you're wondering, I am cutting it down for 2 reasons......to cut off some weight , and because it has a few lugs cut at the very ends, so I'll cut out that 1/2" that's slightly (and I mean slightly) damaged, and have to get it resealed by a local rubber company.
I will be (well, my wife will be actually) running the trail sled this year in the 800 Improved Trail class, since it is going to have a fairly well ported 780 pump gas motor (cases and cylinders), 40.5mm mach Z carbs, and stock pipes. I figure it should be good for about 125 mph in 2000', with 96 trail studs, at stock ride height. I'll get some pictures of this build up here as well......or I guess I should call it a re-build.
That's all I did with the race sled today. Most of my work was on the trail sled build (old race chassis in my avatar). I brought the front suspension back up to stock ride height and threw in some stock Ohlins with black powdercoated springs. I installed the handlebars and pad, and I also pulled the track and suspension out of it, and put it back to my "trail" settings. I have to pick up some old, thin, Vmax sliders tomorrow, and cut down an older Camoplast 9791 track that I have laying around to 14" wide, then I can throw it back together. In case you're wondering, I am cutting it down for 2 reasons......to cut off some weight
 , and because it has a few lugs cut at the very ends, so I'll cut out that 1/2" that's slightly (and I mean slightly) damaged, and have to get it resealed by a local rubber company.
I will be (well, my wife will be actually) running the trail sled this year in the 800 Improved Trail class, since it is going to have a fairly well ported 780 pump gas motor (cases and cylinders), 40.5mm mach Z carbs, and stock pipes. I figure it should be good for about 125 mph in 2000', with 96 trail studs, at stock ride height. I'll get some pictures of this build up here as well......or I guess I should call it a re-build.

valin
Active member
Argh.
I threw the big motor up on the workbench today to give the base a nice cleaning and get it ready for it's new home. I pulled the intake manifolds off the big motor to check out the reeds. Damn broken pedals again. That motor is damn hard on reeds. I have 3 pedals with issues. I wasn't able to run spacers last year because of the middle carburetor having to be on an angle to clear the steering post, but this year I will space the reeds out a bit to see if it helps with reed life.........it'll help smooth out the airflow a bit as well.
I threw the big motor up on the workbench today to give the base a nice cleaning and get it ready for it's new home. I pulled the intake manifolds off the big motor to check out the reeds. Damn broken pedals again. That motor is damn hard on reeds. I have 3 pedals with issues. I wasn't able to run spacers last year because of the middle carburetor having to be on an angle to clear the steering post, but this year I will space the reeds out a bit to see if it helps with reed life.........it'll help smooth out the airflow a bit as well.
valin
Active member
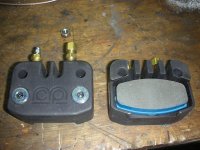
The new brake calipers and pads arrived. They are quite a bit bigger than the Mini-Lite's, which makes me happy to know there will be alot more braking power there. They are not nearly as nice to look at, but you won't be able to see it anyways, since they are mounted inside the tunnel.
Attachments
valin
Active member
valin
Active member
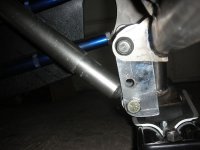
Now for the front suspension. Because I am running titanium trailing arms that were designed for a Viper, and the spindle height is 1" longer below the trailing arm, so I had to build some custom brackets to lower the mounting point for the Wahl prostock shocks. I am running the shortest shocks Wahl offers, at 11" in length, so it left me no choice. I ended making the brackets out of 1/4" aluminum, and gave them two different mounting height options, which will work out well since the shock length is also adjustable an inch or so.
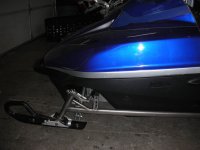
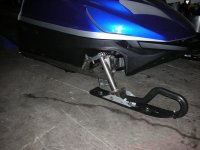
Right now it is lowered as much as I can go legally for my class. It allows for 1" of vertical suspension travel, but I can raise it up very easily by moving the mounting location or threading out the lower rod end on the shock. I do not yet know where it is going to sit, since my drivers and suspension are not installed yet, but it will probably be fairly close the the current height.
It is sitting currently at 2" of ground clearance to the bellypan.


