valin
Active member
btw, those Mountain Performance trailing arms are probably going to be for sale. PM me if you are interested.


2ooosrx
VIP Member
- Joined
- Oct 2, 2004
- Messages
- 2,414
- Age
- 36
- Location
- Gurnee, Illinois
- Website
- www.cbperformanceparts.com
LB....nice looking trailing arm
LB Racing
New member
Thanks! They are light and they look good! What else could anyone ask for!? lol
Danger Dog
Member
Nice chasis Valin. I have seen it run on the tar a couple of times. How much for the trailing arms. LB where did you get your hood?
valin
Active member
I am trying to work out a deal to trade the arms as a partial for a proline skid. If it doesn't work out, i'll let you know danger.
Danger Dog
Member
OK thanks.
i would also be interested in the trailing arms ...want to put on a srx ...these will work if i wanted to widen the front end correct? not trying to step on your toes danger dog but want to be second in line if you dont take them ......
LB Racing
New member
Danger Dog said:Nice chasis Valin. I have seen it run on the tar a couple of times. How much for the trailing arms. LB where did you get your hood?
Got the hood from BR Tech.
Danger Dog
Member
Did you paint it and how much does it weigh?
LB Racing
New member
It weighs 7lbs. Yes we painted it. You can get them painted, but they don't offer many colors.
Danger Dog
Member
What kind of paint? I thought I had one bought but the mold was no good so the hood did not come out good. I was told it would weigh less then 5lbs, 7 seems heavy. I wonder why?
LB Racing
New member
Well 7lbs is what BR Tech claims it weighs. With paint it probably weighs a little more. I will put it on a scale though and let you know for sure. I will tell you though that the hood is not a direct fit. You will have to come up with some brackets to hold it up in the front.
valin
Active member
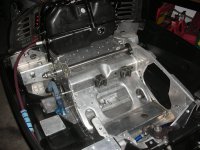
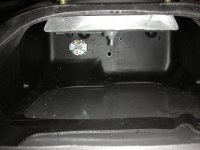
Well, I started to work on the new chassis a bit. Here's what I have done so far:
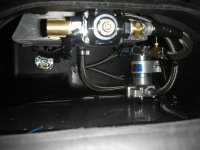
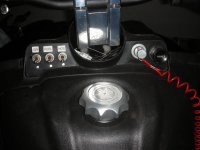
- Cut up one of my fuel tanks, and installed a 5.5 litre tank that I had custom made by a buddy of mine out of aluminum. I also installed a fuel pressure gauge in the front of the tank shell. I will end up mounting the Holley Blue fuel pump and regulator inside the tank shell, as well as the battery.
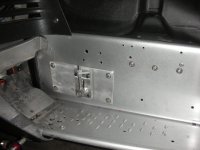
- Pulled off the hood and bellypan, and thoroughlly cleaned everything.
- Removed and painted the steering gate and cable steering brackets gloss black, and painted the front steering knuckle and bumper support high temperature black.
- Installed a brand new black bellypan.
The next step is to remove the front suspension, and strip all of the anodizing off of the radius rods and steering rods, and polish them to a mirror finish.
Here are some pics for ya.
Attachments
valin
Active member
valin
Active member
Well, I started to do some more work to the new chassis. Now that I am finished with drag racing on the bike, I can finally start to put some time into this project.
I installed the fuel system into the tank, which consists of a Holley Blue fuel pump, fuel pressure regulator, fuel pressure gauge, billet fuel rail, fuel shutoff valve, and primer. I ran all braided stainless lines for the fuel system up the fuel rail, and from there I will run clear lines to the carbs so I can see the fuel pumping.
I installed the fuel system into the tank, which consists of a Holley Blue fuel pump, fuel pressure regulator, fuel pressure gauge, billet fuel rail, fuel shutoff valve, and primer. I ran all braided stainless lines for the fuel system up the fuel rail, and from there I will run clear lines to the carbs so I can see the fuel pumping.
Attachments
valin
Active member
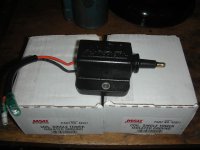
I also finished the wiring of the entire sled. I am going to run 3 switches - ignition, fuel pump, and nitrous, but I will not be running nitrous this season. I just wanted to have the system wired for when I decide to run it next season. I also put some small LED lights under each switch so I know if they are getting power, and are on.
Attachments
valin
Active member
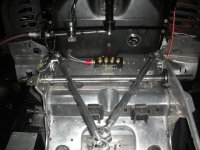
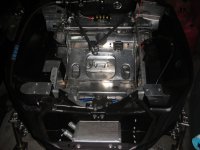
I mounted the small radiator up in the front of the bellypan, and installed the engine torque arms. For cooling, I am only going to be running the front heat exchanger and this small radiator. The running board heat exchangers and rear exchanger have been removed. I still have to run the plumbing for the cooling system.
Attachments
valin
Active member
valin
Active member
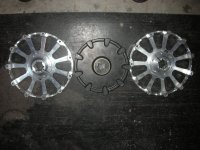
Here's the 11 tooth Proline billet aluminum drivers and hubs for my 1 1/8" MicroAlloy driveshaft. They measure at 8.62" in diameter. I also threw in a stock SRX 9-tooth driver in there to see how big the prolines are. I am able to fit these big wheels in my chassis because I am running a Crankshop magnesium dropped and rolled chaincase. These wheels and hubs cost me a small fortune.
Attachments
jabber800
New member
Things are really starting to come together!! How did you make out in Earlton?? I got stuck working and couldn't make it..


