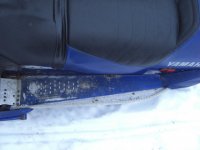
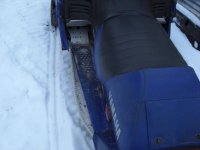
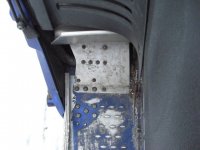
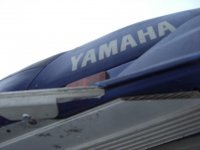
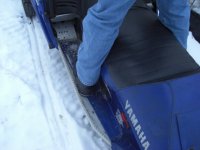
Here is an easy way to make your running boards wide for all you wild, side hillin, house jumpin, mogal mashin, big footed standup wannnaabee snowcross riders.
To buy these from yamaha each side will be about 90bucks.
Doner sled for this project was 99sx500 long traveled, with custom bars owned by Hugh's father and on loan pending good behavior to Hew.
We first removed the sides of the trailing arms and the belly pans in the back of the sled with the sled raised off the floor.
We cut the ends of the tubes where they meet the front of the footwell on the side. This allows the tube part of the running board to roll down easier.
The egdes we used were from a worrior but any will work. The longer ones from a venture would be better as they could go right out the end. The ones we used were about 3 inches too short. The joint doesnt show thought as it is under the bumper cover.
Once the cuts are made at the front and in the back keeping in mind the legnth of the egding you have, you can start bending.
I used a spoon(flat body tool) to protect the floor board while I pryed against it with a very small claw foot pry tool. I moved along the board prying up on it a little at a time. I then went to a larger pry bar and did the same, making sure to keep the spoon under the bar at all times.
Once the board is rolled up straight, you can grab it with your hands. PUT ON A PAIR OF GLOVES DUMMY. Sorry about the warrning. Lay the board flat out straight.
Using a flat faced body hammer and flat piece of steel tap all the curves out of the board. Do not try to over hammer them, slower is better. If you smash the hammer hard against the metal with the steel behind it, you can stretch it (bad) you just want to bend it back into being straight. The board will be warped a little no matter what you do so dont worry if it looks warped the edging has a recessed lip in it to fit the edge of the running board after being trimmed.
The tube left in the footwell needs to first have the three rivets removed from the outside. Then roll up the tube so it is straight up. Using a sharp chissle, cut the inside corner off so you can remove the curl down to the flat part of the board. A cutoff tool might be able to get into some of this.
Carefully bend the edging so that it matches the curve you want the board to take. Be carefull not to bend it too much. It can break easily if over bent.
Once the shape is bent, lay it on the board and clamp it down, drill the holes and using a grease pencil or tape, mark the edge of the guard. When it is removed, figure the amount you need to add to the line and mark the board for the cut. Use tin snips to cut the edge off.
In the front where it goes onto the footwell, the edge will need to be riveted on top. This means that there will be a transfer made at that point as the rest of the edge is mounted underneath for a cleaner look. At the transfer point, drill a clean hole. This wont look as bad as a saw mark and will be less likely to crack.
Rivet the edge in place. Up front where the edge runs in past the footwell, the brace running up the outside of the footwell is at the wrong angle. This can be cured with a large hammer and a few good hits so that it matches the angle of the edging. This can now be drilled and riveted.
Trim the bumper cover if you need to and your all done. Exept for the tunnel polishing since now your black/blue tunnel is now striped with silver.
Sorry for the lack of work in progress pictures. I never thought of this being something anyone would want to do till we did it.
If anyone knows of a cheaper place to buy this extrusion to do this mod with please post it on here. Yamaha stuff is pricy.
And of coarse, Thanks Hugh for the ability to seamingly destroy your sled while doing this. I told you it would work.
Attachments
Last edited:
It looks better in person as the different color kinda throws it off. Dont forget to vote on wether Hugh should strip his tunnel?
Last edited:
Yamaha=Awsome
New member
It does look better in person and I had complete confidence in you when we where tearing it down. It does look funky with the two colored tunnel but nothing a little blue paint can't handle. Maybe this summer it can be striped and polished. Thanks for your help again, Hugh
Last edited:
Betheviper, You didn't leave an option to cover the "siver streak" with running board traction mat liners. You know the foam grippy stuff.
a nice piece of hardwood flooring would look good as well. he is going to crack on the polishing the tunnel idea, im sure he wont make it till spring.
got some pictues of what the venture edges look like up close, will post tonight and clean the thread up a little.
feel free to post on here, later in the winter when it calms down, ill clean it out.
anyone find a cheaper venue to get the edges from ?
got some pictues of what the venture edges look like up close, will post tonight and clean the thread up a little.
feel free to post on here, later in the winter when it calms down, ill clean it out.
anyone find a cheaper venue to get the edges from ?
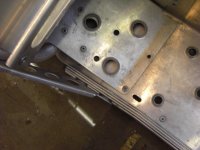
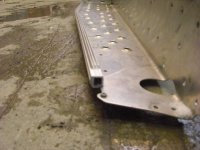
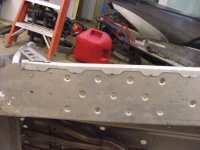
Here are pictures of the longer style edges from a 06 venture (rs). These have a smoother top but you could make them rough very easy where you want them to be. I noticed that the ends come bent the correct amount to fit the foot well angle. The apex, worrior style are straight up front and will need some bending.
Hope the pictures help your choice out.
Hope the pictures help your choice out.
Attachments
I found a cheaper option over on the 4stroke side that guy used.
these are a little taller and wider. They are cat but the price difference is amazing.
Artic Cat Roll, tunnel m7 153 2005
3606-478 rh $31.99
3606-479 lh $30.99
these are a little taller and wider. They are cat but the price difference is amazing.
Artic Cat Roll, tunnel m7 153 2005
3606-478 rh $31.99
3606-479 lh $30.99
Robnoxious
New member
How much extra material do you get when the edge is unrolled? I definatly want to do this mod over the summer on my Viper.
you end up with about 2-3inches wider all the way back. more than enough to make it as wide as the front all the way straight back.
BETHEVIPER said:I found a cheaper option over on the 4stroke side that guy used.
these are a little taller and wider. They are cat but the price difference is amazing.
Artic Cat Roll, tunnel m7 153 2005
3606-478 rh $31.99
3606-479 lh $30.99
Do you have any pics of these?
Have you seen them in person? They look good and much cheaper. I can afford these. Thanks
I really, really like these. I just wish I was mechanically inclined enough to install those wider boards on my sled!!!!!!!!
bump this mod for a looker
sleddineinar
VIP Member
I think this will be one of the things I do this summer. I like the way it looks, and I always hate the way my feet set in the running boards, if I want to sit/stand back a bit.
BETHEVIPER said:I found a cheaper option over on the 4stroke side that a guy used.
These are a little taller and wider.
They are Arctic Cat but the price difference is amazing.
Artic Cat Roll, tunnel M7 153 2005
3606-478 rh $31.99
3606-479 lh $30.99
Pictures ?
musselman
Active member
musselman said:Here you go:
Do you have any more pictures ?
musselman
Active member
simple as can be, I have a set of cat edges to add to the daughters viper


