sagerider
New member
Quick overview: I've got three mountain maxes, 2 700's and 1 600. I've decided its time to learn how to work on them. My son's 600 is new to us, 2900 miles (no other info on history) have only run it enough to load it, and unload it into the shop. It is terribly dirty (was stored outside under a plastic tarp, when it didn't blow off) but seemed to run good and was only $900. So before we run it, I'm trying to go through the whole thing cleaning, inspecting, repairing/replacing as I go. This is my first time going beyond basic maint. I do have a Clymer shop manual I'm using to baby step me through it.
Question #1: Airbox, carbs, exhaust, head, and cylinders are out as specified. How do I get the piston pin clips out. It reads simply "Remove the piston pin clip from the outside of the piston with needlenose pliers. Hold a thumb over one edge of the clip when removing it to prevent it from springing out." Well, I grabbed hold of it with needlenose but can't seem to budge it. I might be being too gentle, but I'm trying to be careful?? Also, do both need to be removed to remove the pin? The book isn't specific.
Question #2: The cylinders don't have any obvious scoring or staining. I've seen chewed up cylinders before... these aren't chewed up. I can still see the crosshatching. However, all three pistons have some "light" scaring. Book says I can w/400 grit or fine oilstone. Also, all three pistons have light to dark tan and a some black staining around (but mostly above) the piston pins. Is this normal...are they good or bad? If good, how to clean/repair them? I plan on installing new rings.
I could provide pictures if anyone is interested. So far, things look better than expected, I think. Gaskets all appeared intact.
Thanks for your help.
motor tech
New member
on the pin clip turn the C shape in the direction of the opening and pull, as for the pistons i would replace them if there is scoring just my opinion start fresh
mmx600
New member
light scoring is ok,its usualy from not warming up engine before riding.
i wouldnt recomend reusing piston pin clips there only like 1$ and if one falls out you can loose the whole motor ,always stuff clean rags in the crank before removing clips when assembling dont forget about ring locating pins
i wouldnt recomend reusing piston pin clips there only like 1$ and if one falls out you can loose the whole motor ,always stuff clean rags in the crank before removing clips when assembling dont forget about ring locating pins
Hey GFU Sagerider! I get great satisfaction from fixing my own stuff! Be patient with yourself and you'll get it done!
So the wrist pins are stuck is that it?
If they are, I just grab a two sockets, or one to start, a small, narrow socket to push the wrist pin out. They are often stuck. To do this you get a C-Clamp and put it on one side of the piston and use it as a driver. But it looks like you're reusing the pistons (which if it only has 3K miles on it seems totally ok) be careful, using a rag or some other method to protect the piston surface from damage.
And I too would recommend replacing the circlips and keeping extras on-hand. They fly off and get lost easily.
Also, when reinstalling pistons, I always put one circlip on prior to installation. And CLEARLY you put the one on the inside on first for two cylinder engines. For a three cylinder, pick your side for the center slug (AKA piston).
Also, can you tell us that your plan is? Why did you take the cylinders off? Just for an inspection? Or is this part of your preventative maintenance?
AND DO NOT REUSE GASKETS, IMO. Please any and all feel free to disagree with me, but if you've removed an engine component (head, cylinder) don't reuse the gasket. The only exception I have to this is what I call non-critical engine components, e.g., power valves. Always exceptions to any rule if you know what you're doing.
Now go and make us proud!
Last edited:
sagerider
New member
Thanks
Thanks for all the response... that's awesome.
Reason for tear down: preventative maint and inspection. Also, I noticed the boots on the airbox were NOT attached to the carbs, not even completely lined up. I was VERY concerned that it had been ridden that way and I was looking at a major lean problem. I put 2500 miles on my 01 700 last year. Started loosing some power (and lots of compression I found out later) on the last ride. It's piped. Well, I got a sweet deal on a new 153 camo mountain track and anti-ratchets ($200) and it was going to be my summer project. However between farming and my real job, summer is horribly busy and it never got touched. So I took it in to the sled mechanic to have the extensions and track put on. Since he had it in, I told him I was pretty sure it needed a new top end or rings. Well, I'd blown a head gasket and the jugs and pistons were shot (PTO and Center). I just bought it and my wifes 00 700 last year... so I am very aware now of checking out a "new to you" sled before putting miles on it. My work is slow in the winter, and its our time to play. I like to ride a lot and can right out the barn door... so I definetly need to gain the ability to keep these sleds in tip top shape. With the whole family now riding (four sleds) it's awful expensive to do otherwise.
I'm still in the office, but hopefully will get back into it this evening. Going to go pick up some parts from the dealer (adding circlips to the list).
Gaskets: Yes... I am replacing every gasket I come across, already ordered a complete gasket kit. Pulled and going to open up and inspect reeds too.
Again, thank all of you for the info and support.

sagerider
New member
Stuck pilot screw/mixture screw
Okay. Fixed a lingering problem, then fell into another. Went back to finish cleaning the carbs. I had to get one of those tiny pair of vice gribs to get the float bowl screws out. Only three screws came out with a driver, all the others with vice grips. They were stuck hard. Anyway, that's done, jets cleaned.
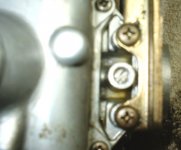
I tried to dismantle, clean, and reassemble each carb at a time (less confusion). One of the stinking Pilot Screws/pilot mixture screws is seized. It won't budge, neither in nor out. It looks like someone hit the exit hole/port on the inside of the carb with a scraper or something. I don't know how near this little hole the screw is, but I'm wondering if that did it. There is similar scraping 180 degrees around, on the larger hole/port on the same side. It's not a horrible gouge, but it's more than a light scratch. None of the other carbs have anything like this wrong with them. This screw is recessed in the threads (typical I believe) so theres no getting anything else on it that I can think of.
How to get it out? Why would someone scratch at these ports?

mmx600
New member
you should post a picture,is the opening where the needle threads out damaged?Try turning the carb upsidedown and fill the hole with wd-40 and let it sit overnite.mabey if the threads and the needle arent damaged try drilling the hole out a little bit verry carfully...just some ideas ive never had this problem before
Last edited:
sagerider
New member
Carb Pictures
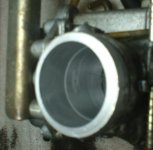
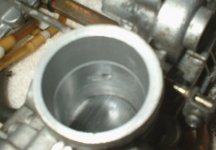
Okay... here's pictures. I've tried breakfree and wd-40 from both sides. Every night I hose it down with one or the other to sit all night/day. What is really strange is I got it to move about a 1/4 turn out yesterday, then it stopped again. Fouled threads? Or maybe the tip bent/stuck? Crap... I don't know.
Okay... here's pictures. I've tried breakfree and wd-40 from both sides. Every night I hose it down with one or the other to sit all night/day. What is really strange is I got it to move about a 1/4 turn out yesterday, then it stopped again. Fouled threads? Or maybe the tip bent/stuck? Crap... I don't know.
Attachments
Last edited:
sagerider
New member
The pictures are "ok." You can see light hash marks around the ports. It is definitely intentional, like a dremal tool or small scraper or something. Like I said, not really deep, but surely worked. Something must be seriously wrong because the screw won't rotate IN either.
nitris223
New member
When ever I tear down carbs with the phillips screws in them I replace them with allen head screws. Less tendancy to strip the head. All my sleds are set up this way.
sagerider
New member
nitris223 said:When ever I tear down carbs with the phillips screws in them I replace them with allen head screws. Less tendancy to strip the head. All my sleds are set up this way.
Awesome! Will do. As for the mixture screw... I'm taking it to someone else monday. My patience is gone. I've been fondling the 16lbs sledge.
How much of the carbon buildup should I remove from the pistons? I found a fine wire brush/wheel I was going to put in the drill press for the tops. The book refers to something like this. And do I do anything at all about the skirt?
sagerider
New member
daman
New member
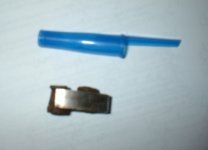
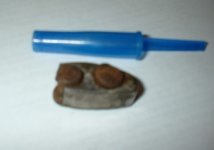
thats part of a primary clutch weight the tip..
I have never seen the tip of a fly weight break off like that. Maybe a bad batch from the factory!!!!!
I would say you at least need to rebuild your entire primary clutch new bushings, rollers, spring fly weights
I would say you at least need to rebuild your entire primary clutch new bushings, rollers, spring fly weights
daman
New member
Thats what can happen if one pounds the rivit in to hard,mushrooms it too much,stresses the weight,seen it before, look out!!! 

mmx600
New member
any luck?those marks are from a diegrinder it looks like,i have seen this before they do that at the factory to cleanup burrs after drilling.this shouldn't make the pilot screw get suck though
daman
New member
yup from the factory all carbs have them clean up marks.mmx600 said:those marks are from a diegrinder it looks like,i have seen this before they do that at the factory to cleanup burrs after drilling
sagerider
New member
daman said:thats part of a primary clutch weight the tip..
I was wondering that. There's a brand new comet clutch on the primary, that's why. There's also some strange scoring on some other parts (outside of one carb, part of tub etc... like sh** was flying everywhere.
"any luck?those marks are from a diegrinder it looks like,i have seen this before they do that at the factory to cleanup burrs after drilling.this shouldn't make the pilot screw get suck though"
Okay... thanks. That's the only carb that has them, and its the one with the stuck mix screw. No I've had no luck getting it out. I finally walked away from it and began scooping out the tons of gunk in the tub and cleanining and checking all the cables and hoses. I had to put the sledge back in the work truck so it wouldn't tempt me anymore. I'm taking it to a mechanic friends's shop tomorrow and drop it in his lap. I'm done with that screw, before I completely shred the thread.
Could I get some comments/ POV on piston cleaning before installing new rings and putting this thing back together. Gaskets and rings should be here tomorrow, so I hope to get this put back together tomorrow night. My son is going bonkers wanting to ride it.

