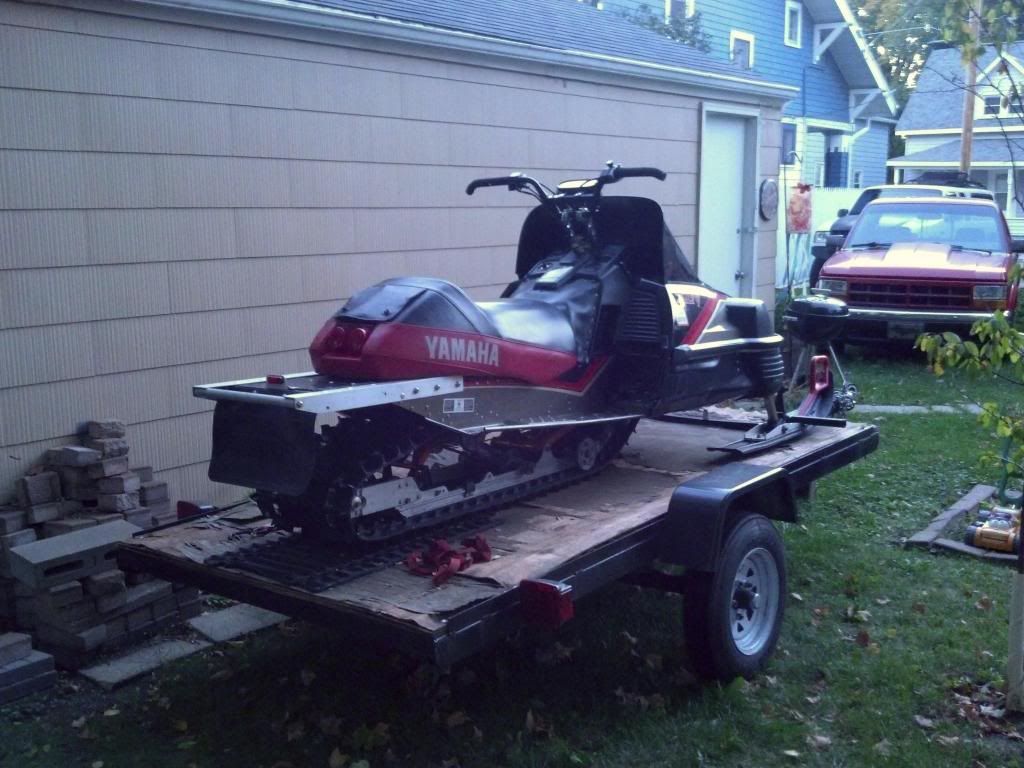
Well if you can imagine the SS 440 paint scheme of your choice on my machine then you pretty much have it! Glad you like it.Vmax540 said:Awesome.... I love the custom build's ! I have always thought a T.S.S. SS440 would be a lightweight cool looking sled.
I'm running without a front limiter strap and after I dropped the front of the skid down in the tunnel, there was only about 3/8ths of an inch or less of clearance between the track clips and the tips of the rails. There are also no plastic tips on the rails of these machines. It's more peace of mind than anything.sleddineinar said:Doesn't look like you need an anti-stab kit...
Last edited:
low slung
Active member
What sweet *** sled for deep powder riding.Great job.
Thank you! I'm looking forward to putting some miles on it with the more recent work since last season.
sleddineinar
VIP Member
I see... then the anti-stab kit makes perfect sense. That sled looks real nice!
03viperguy
Moderator
end result is pretty damn cool! why cut up a fairly rare inviter though? nice work
The inviter was absolutely trashed. Smashed into trees, rolled, rear ended, busted skid, bent handlebars, cracked plastics, junk! The only thing left in good shape on that machine was the engine. That of which I sold to another Inviter owner. Had it been in good shape, I NEVER would have cut it up.
Edit: Later found out the guy that I sold the Inviter motor to, stuck it in a go cart.
Edit: Later found out the guy that I sold the Inviter motor to, stuck it in a go cart.
Last edited:
03viperguy
Moderator
yeah, that makes sense. cool project either way, really came around
Little update on this pig.. It started having fuel delivery issues mid season and I got too busy with work to figure the problem out. I'll pick back up on it in early October. It has great power but it seems to suck the float bowl dry. Going to replace the pump, clean the tank out and go through the carb AGAIN! Going to switch back to the factory gearing as well. Went one tooth down on the top and its way too low for the clutching. Top speed is about 55 but it pulls like a freight train with the skis in the air to about 30. Rpms sit perfect at 7400 wide open. The boyesen reeds fall flat on their face after 7500. Hopefully get the fuel issue figured out this fall and get a video or two of it in action. I'm getting married in November so I'll have to pick up a sled for the little lady too.
Last edited:
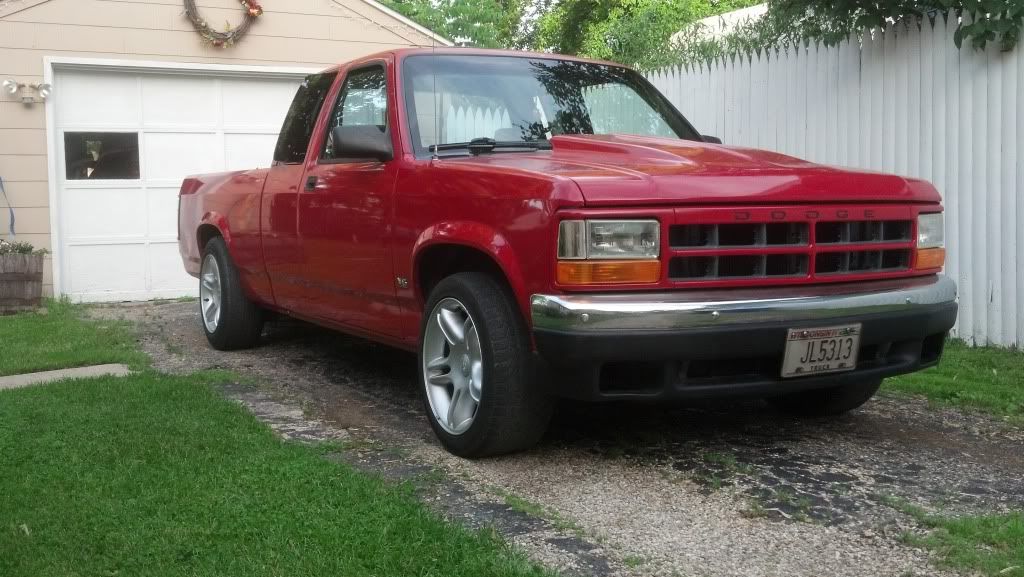
Heres a pic of the truck the V8 went in if anyone cares. Its supposed to be my winter beater/tow pig but I can't leave well enough alone...

03viperguy
Moderator
That old truck is in nice shape! Good luck with the sled, sounds like you are going in the right direction.
Thank you. I built the whole thing out of junk yard parts. It was a V6 truck with rusty fenders and a serious lack of good maintenance.. was always a Ford man until I got a taste of Mopar torque!
Last edited:
Hey. Nice seat! 

Hey, Thanks! It's just sitting there for now. Pulled an old rotten SRV seat apart for the plastic tank shroud. The Viper seat is going to take a little more doing to make it look clean on the X than the SX chassis seats. A little Vinyl and some foam and I should have it looking decent. Thanks again for hooking me up with the seat and ski's!
HANDSOME
New member
Awesome
Viper seat is on. I don't like the feel of the side bolsters on it but I'm not going to pass judgement until I get it out and ride it. I may end up peeling the cover off and trimming them back.
I've also been doing some digging on changing the running boards and after a couple trips to the local Cat dealer, I may end up running something off an M8 which would give me wider, stronger boards so the seat may be non issue after that.
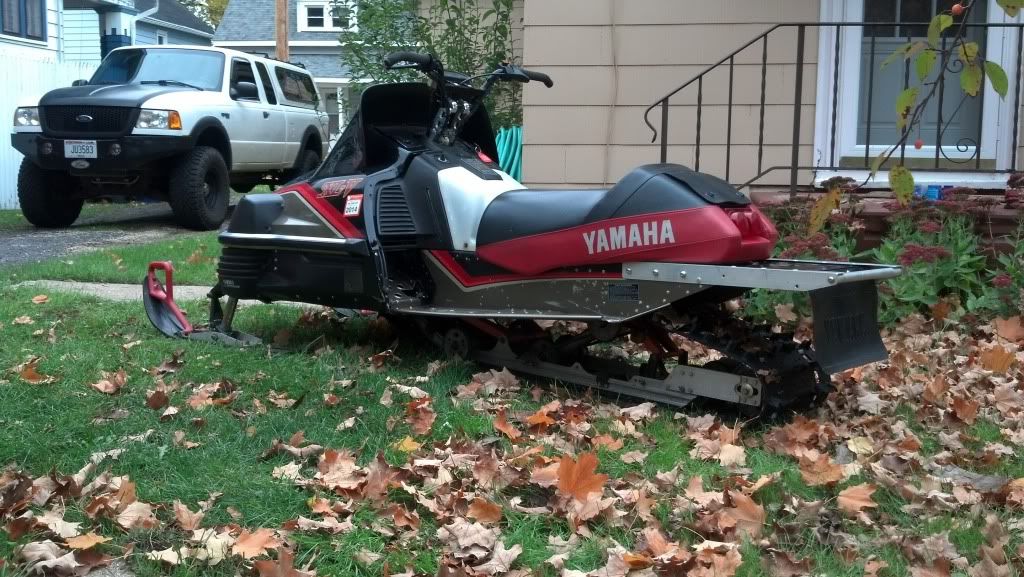
Hood looks messed up in this pic but it's not sitting down where it belongs.
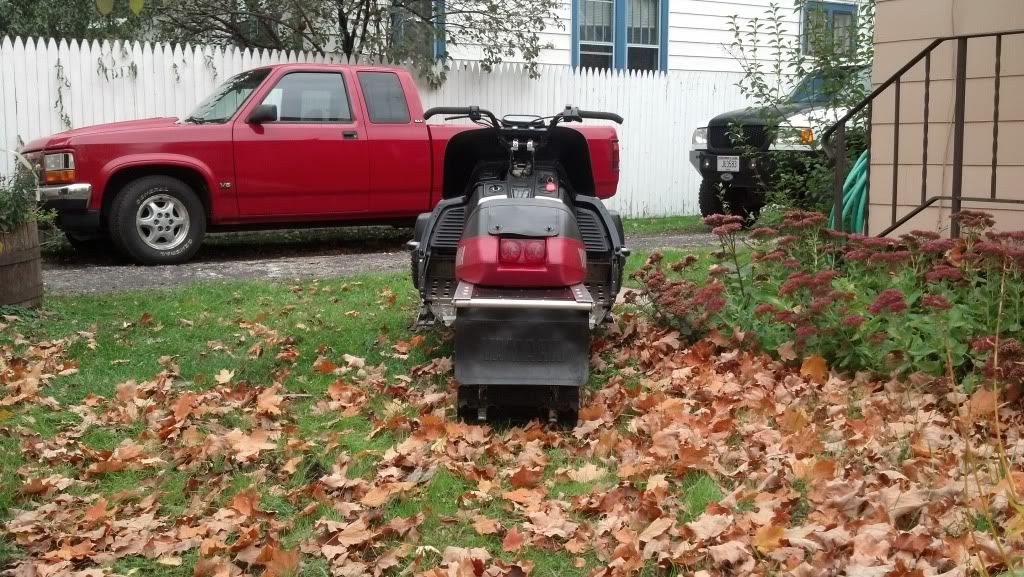
And some pics I posted in the build thread for the SS but I'll stick over here too..
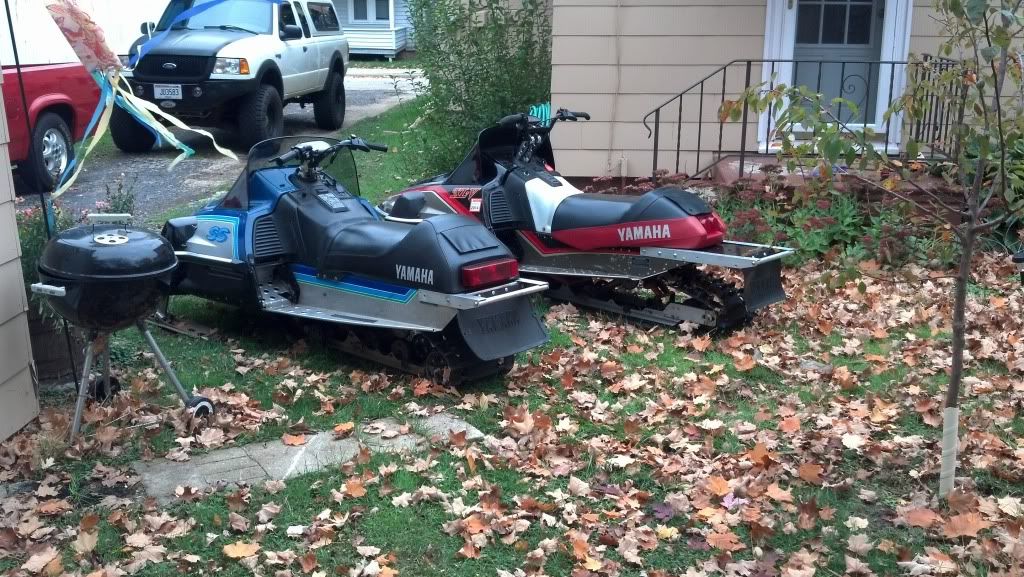
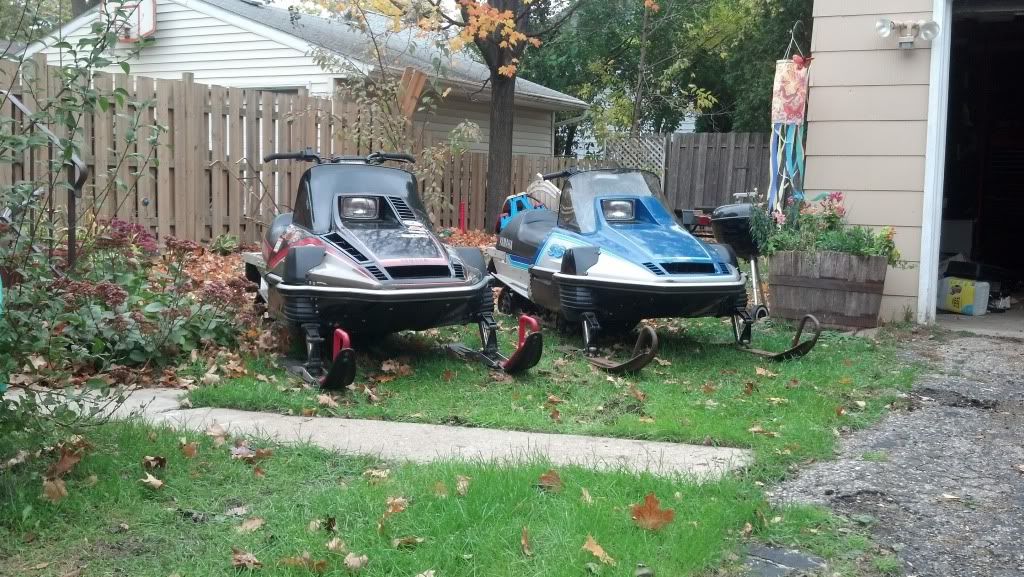
I've also been doing some digging on changing the running boards and after a couple trips to the local Cat dealer, I may end up running something off an M8 which would give me wider, stronger boards so the seat may be non issue after that.

Hood looks messed up in this pic but it's not sitting down where it belongs.

And some pics I posted in the build thread for the SS but I'll stick over here too..


03viperguy
Moderator
Looks good!
After some coaxing from Throttle Junkie35 (and probably annoying the p*** out of him with questions) and studying the pictures in this thread --http://www.totallyamaha.net/forums/showthread.php?89856-EX-570-PHAZER-hydrolic-brakes-coversion-90-complete--, I put Polaris hydraulic brakes on this thing. Its a tight fit using the Poo master cylinder as either the brake light switch or the brake line on the caliper comes out right up against the side of the gas tank. Shawn advised me to use an Arctic Cat Wilwood master cylinder because the brake light switch is up on the bars like a Yamaha, but being my stubborn self and wanting to get rid of some of the wiring on the bars, I made it work. MAN-O-MAN WHAT AN IMPROVEMENT! I havent had a chance to ride it and get a feel for the brakes yet but they stop the track dead on the stand! Shawn keeps telling me to be carefull the fist time I ride it or I might go over the bars and now I see why! 
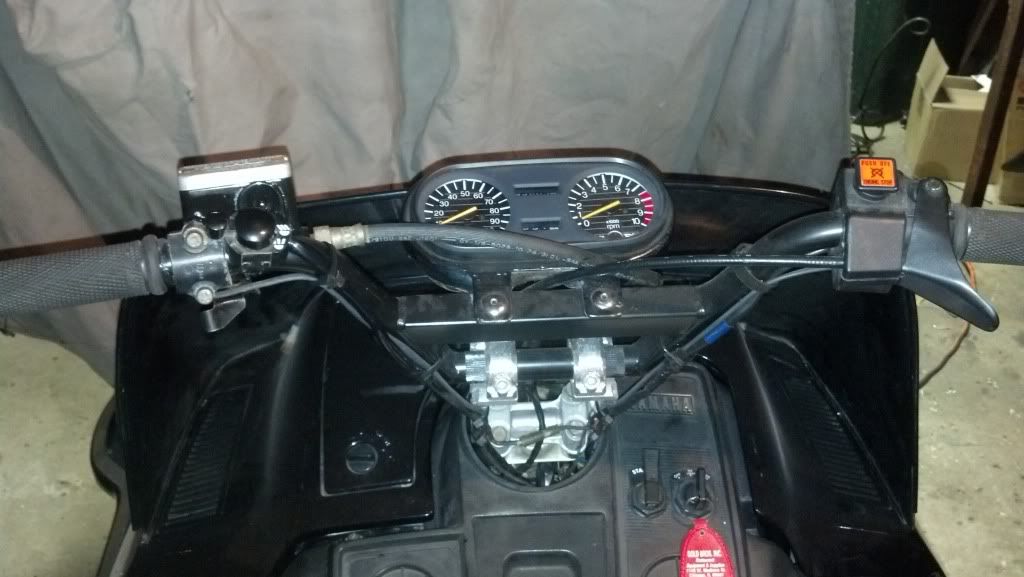
Polaris master with Parking brake. You also lose the headlight switch in this conversion which Shawn remedied by making the factory switch work, I opted to go with a Pigolaris switch for the simplicity of it.
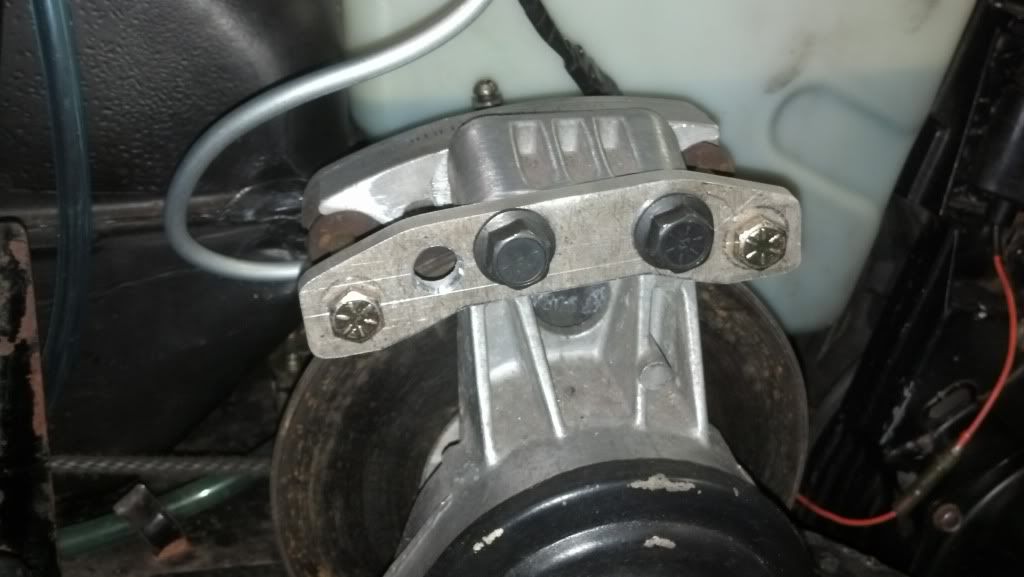
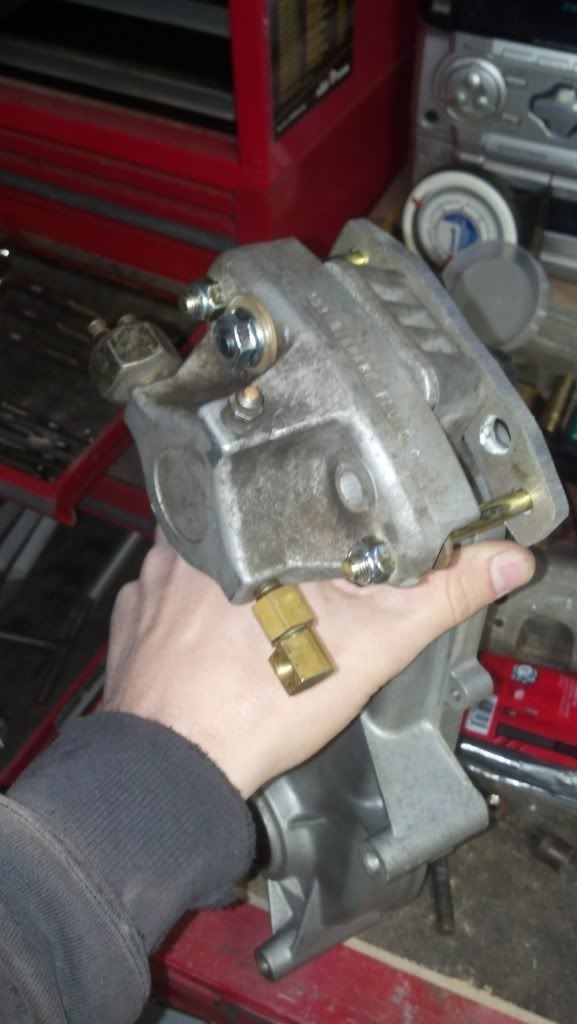
1/4" Aluminum bracket necessary to install the caliper. I used 5/16 grade 8 hardware with nylock nuts for the pad pins. The same as Yamaha Nutz (thanks for posting up on this!) in the thread above and 3/8 - 16 flanged bolts to mount the caliper to the chaincase.
Mocked up on a spare case. One caliper mounting bolt uses an original hole in both the caliper and the mount on the case. I used a washer with a whiz-lock on this side. For the other mounting bolt, I had to TIG a hole in the mounting face of the caliper shut and drill/tap for the bolt. I helicoiled the threads so they wont strip out. Ever.
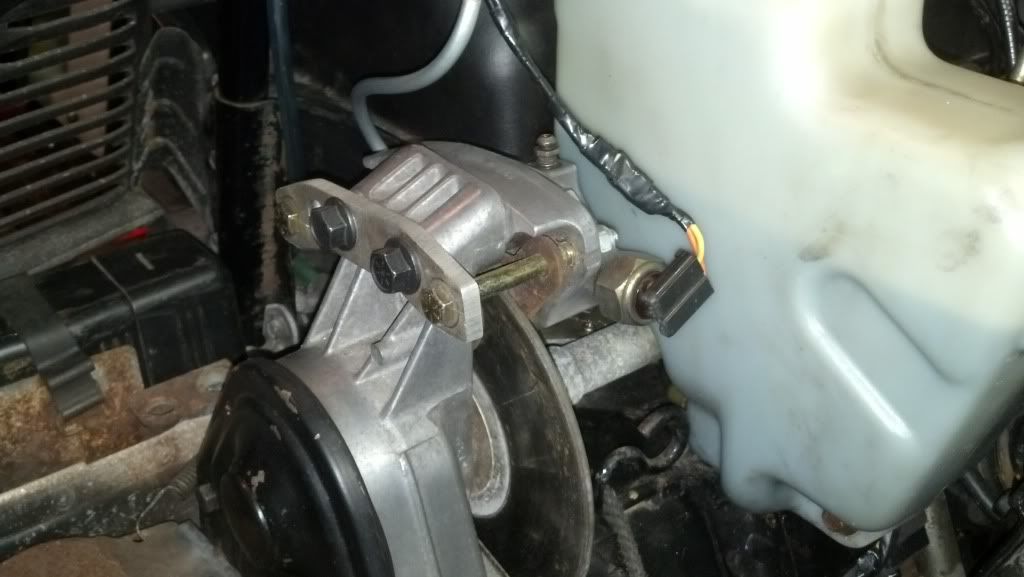
Mounted in the sled showing the brake light switch hooked up.
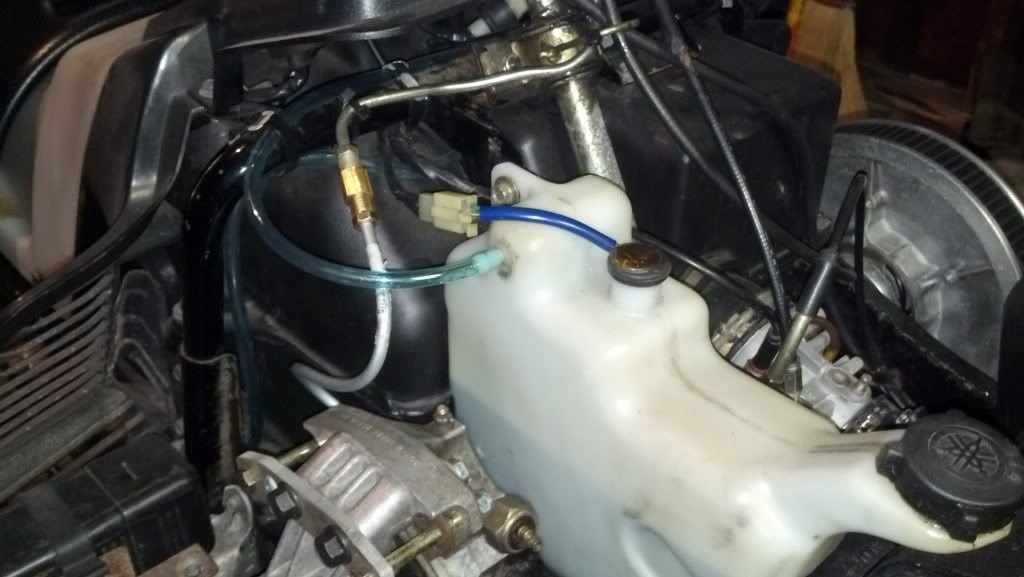
To gain the clearance needed to get the brake line installed without contacting the gas tank, I warmed the tank, full of gas, up with a heat gun and used a screwdriver handle to create an indent and flatten the seam out. I also used a 3/16 to 1/4" adapter (Polaris line is 1/4", caliper is 3/16" WTF?!) instead of the factory Polaris cobble job of fittings.
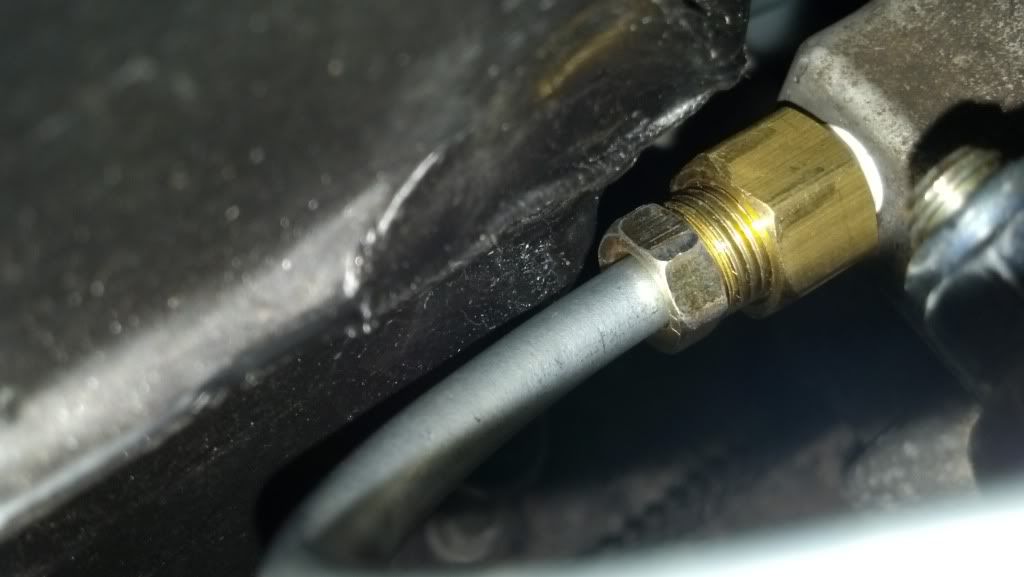
And to make the final connection, I straightened out some of the bends in the Polaris line and used a 1/4" by 10" long extension with an inverted flare union to reach the caliper. No leaks and the brake lever is nice and firm.

Polaris master with Parking brake. You also lose the headlight switch in this conversion which Shawn remedied by making the factory switch work, I opted to go with a Pigolaris switch for the simplicity of it.

1/4" Aluminum bracket necessary to install the caliper. I used 5/16 grade 8 hardware with nylock nuts for the pad pins. The same as Yamaha Nutz (thanks for posting up on this!) in the thread above and 3/8 - 16 flanged bolts to mount the caliper to the chaincase.

Mocked up on a spare case. One caliper mounting bolt uses an original hole in both the caliper and the mount on the case. I used a washer with a whiz-lock on this side. For the other mounting bolt, I had to TIG a hole in the mounting face of the caliper shut and drill/tap for the bolt. I helicoiled the threads so they wont strip out. Ever.

Mounted in the sled showing the brake light switch hooked up.

To gain the clearance needed to get the brake line installed without contacting the gas tank, I warmed the tank, full of gas, up with a heat gun and used a screwdriver handle to create an indent and flatten the seam out. I also used a 3/16 to 1/4" adapter (Polaris line is 1/4", caliper is 3/16" WTF?!) instead of the factory Polaris cobble job of fittings.

And to make the final connection, I straightened out some of the bends in the Polaris line and used a 1/4" by 10" long extension with an inverted flare union to reach the caliper. No leaks and the brake lever is nice and firm.

Last edited:
03viperguy
Moderator
Nice work, looks clean!
Sent from my DROID RAZR HD using Tapatalk
Sent from my DROID RAZR HD using Tapatalk
Backwoods M Max
New member
How firm are those angle iron bumpers that you made? Do they stay straight and true when you start yanking and reeving on them or do they flex around a little bit. They look super clean and a great way to build a tunnel extension.


