daman
New member
Crank halfs are done in two steps;
first/ 9.4 ft.lb
second/ 19 ft.lb
-------------------------
primary clutch/ torq to 87 ft.lb then fully loosen up re torq to 43 ft.lb
secondary/ 4.6 ft.lb(seems a little low go to 5 or 6 ft.lb)
first/ 9.4 ft.lb
second/ 19 ft.lb
-------------------------
primary clutch/ torq to 87 ft.lb then fully loosen up re torq to 43 ft.lb
secondary/ 4.6 ft.lb(seems a little low go to 5 or 6 ft.lb)
daman
New member
Like i said if you need the patterns let me know.
take your time and do it right.")
take your time and do it right.
Huva huva morning!.
OK daman, great, thanks alot man!.
There was one nut that I forgot, the flywheel nut.. . Do you know the torq for it?.
However, I`m 100% sure that I could have put this engine back together without knowing any torque values and that everything would be OK, but you know, it`s nice to get that good feeling of knowing that everything is done 100% right.
I guess most guys, including me, tend to overtighten most nuts and bolts.. . I remember I few years ago when was out riding my old Suzuki GSX400E, the other day I put a new front tire on it, and somehow I forgot to tighten the wheel bolt nut. I noticed it one day when I was out riding, I got kind of scared. I rode together with a friend that had "strong" hands, I told him to tighten the nut as hard as he could, by hand, and so he did. And today when I recall that, I`m shocked that I actually havent touched the nut since, ridden 1500kilometers since that incident, gees.
(however, I don`t have the motorcycle license nor do I have plates on the bike, well I live on the countryside.. ).
.OK daman, great, thanks alot man!.
There was one nut that I forgot, the flywheel nut.. . Do you know the torq for it?.
However, I`m 100% sure that I could have put this engine back together without knowing any torque values and that everything would be OK, but you know, it`s nice to get that good feeling of knowing that everything is done 100% right.
I guess most guys, including me, tend to overtighten most nuts and bolts.. . I remember I few years ago when was out riding my old Suzuki GSX400E, the other day I put a new front tire on it, and somehow I forgot to tighten the wheel bolt nut. I noticed it one day when I was out riding, I got kind of scared. I rode together with a friend that had "strong" hands, I told him to tighten the nut as hard as he could, by hand, and so he did. And today when I recall that, I`m shocked that I actually havent touched the nut since, ridden 1500kilometers since that incident, gees.
(however, I don`t have the motorcycle license nor do I have plates on the bike, well I live on the countryside.. ).
daman
New member
flywheel/ 61 ft. lb
Ok daman thanks again, my torque wrench scale is in newton, but I there is a conversion paper so I guess it will not be a problem.
Today I painted the roof in my workshop. It was wood-coloured before, now it`s white. Did it to incease the amount of light, maybe I`ll put the cylinders on the right way now.. haha.
Going to start reassembling tomorrow if everything goes according to the plan.
Today I painted the roof in my workshop. It was wood-coloured before, now it`s white. Did it to incease the amount of light, maybe I`ll put the cylinders on the right way now.. haha
.Going to start reassembling tomorrow if everything goes according to the plan.
Hi!.
I just converted all the ft. lbs values into newton meters:
Crankhouse:
Two steps
1st
9.4 ft.lbs= 12.7nm
1nd
19 ft.lbs= 25.7nm
Primary clutch:
first: 87 ft.lbs= 118nm
loosen, tighten to: 43 ft.lbs= 58,3nm
Secondary clutch: 4.6 ft.lbs= 5.83nm (might go up to 6 ft.lb= 8,1nm)
Flywheel: 61ft.lbs= 82.7nm
Heads: 16 ft.lbs= 21.6nm
Cylinders: 24 fbs.lbs= 32.5nm
Reeds: 10 ft.lbs= 13.5nm
Then I took a look at the wrench, and gees, it had ft. lbs. afterall.. hehe.
But, should the primary be torqued to 118 newtonmeters?. That`s pretty much.
And I find it wierd that the reed bolts, 6mm bolts, should be tightened harder then secondary bolt.. . Have all of you guys used these torq numbers with success?.
Wellwell goodnight
daman
New member
kimoaj said:Hi!.
I just converted all the ft. lbs values into newton meters:
Crankhouse:
Two steps
1st
9.4 ft.lbs= 12.7nm
1nd
19 ft.lbs= 25.7nm
Primary clutch:
first: 87 ft.lbs= 118nm
loosen, tighten to: 43 ft.lbs= 58,3nm
Secondary clutch: 4.6 ft.lbs= 5.83nm (might go up to 6 ft.lb= 8,1nm)
Flywheel: 61ft.lbs= 82.7nm
Heads: 16 ft.lbs= 21.6nm
Cylinders: 24 fbs.lbs= 32.5nm
Reeds: 10 ft.lbs= 13.5nm
Then I took a look at the wrench, and gees, it had ft. lbs. afterall.. hehe.
But, should the primary be torqued to 118 newtonmeters?. That`s pretty much.
And I find it wierd that the reed bolts, 6mm bolts, should be tightened harder then secondary bolt.. . Have all of you guys used these torq numbers with success?.
Wellwell goodnight
yea.. i didn't get that secondary torq but thats what the man. says
it may be a typo
Good evening!.
So you also think that 8,1nm on the secondary clutch bolt sounds way to little?. A normal 6mm bolt should be tightened with about 6nm , that`s the "general" torque, the secondary bolt is much bigger then 6mm and should only be tightened with 2,1nm`s more?.
Anyway, I spent some time in the workshop today.

The upper crank half, cleaned and ready to be assembled.

Here I am together with the crank, she is so nice. Oh btw my face is full of oil.

When I tore this engine apart I noticed some "bruces" on the outside of the crank bearings, no one knew why or how they could have "come" . When I put the crank back in and got the steering pins inside the bearing holes, I noticed that the steering pins where slightly smaller then the holes in the bearings, so that the bearings could move about 1-2mm back and forth. It`s not that hard to understand that this rubbing can create some "bruces".

Here I have put some gasket sement on both of the halfs and I`m about to put them together.
So you also think that 8,1nm on the secondary clutch bolt sounds way to little?. A normal 6mm bolt should be tightened with about 6nm , that`s the "general" torque, the secondary bolt is much bigger then 6mm and should only be tightened with 2,1nm`s more?.
Anyway, I spent some time in the workshop today.
The upper crank half, cleaned and ready to be assembled.
Here I am together with the crank, she is so nice. Oh btw my face is full of oil.
When I tore this engine apart I noticed some "bruces" on the outside of the crank bearings, no one knew why or how they could have "come" . When I put the crank back in and got the steering pins inside the bearing holes, I noticed that the steering pins where slightly smaller then the holes in the bearings, so that the bearings could move about 1-2mm back and forth. It`s not that hard to understand that this rubbing can create some "bruces".
Here I have put some gasket sement on both of the halfs and I`m about to put them together.

Got them together and tightened the bolts with the correct newton.

This is how I stopped the flywheel from rotating when I tightened the nut. As you can see I jammed a little tire lever against the bolts/crankhouse. Tightened to the right nm ofcourse.

Here`s how I stopped it when I mounted the belt sheaves.

I prefer to remove old gaskets with the blade from a "taped knife) (u know what I mean. I then like to carefully go over the gasket surfaces with 800-1000 grit sand paper with some oil on it, to make the surface 100% even. (this basically isn`t necessary, but I do it if I have good time).
Last edited:

I checked all the end gaps on the new rings, all were OK.

Time to install the pistons.

Nice and clean cylinders.

Soon done.

Here she is
.The only trouble I ran into when rebuilding this engine was that the 14mm socket that I had to use on the cylinder bolts, was to large so that I didn`t reach the nuts properly. I there for had to use a socket from my mid sife socket size, and had to make a "transfer" socket from the large socket set to the mid size socket set, so that I got to torque the bolts with the right nm.
Well tomorrow I`m going to start putting back in the sled.
I have a few questions:
After having rebuilt an engine like this, when thinking of the oil mixture system, are there any special procedures I should follow?. How to make sure that the system is working correctly?.
Do I have to bled air out of the cooling system?.
Should I just fill it up, start the engine and then fill more and more until it`s full?.
.Wellwell
daman
New member
Great pics. kimoaj,, looks like your doing a good job man. !")
What did you use for sealer in the block halfs??
Yea i would torq that secondary a little more that what my book stated.
What did you use for sealer in the block halfs??
Yea i would torq that secondary a little more that what my book stated.
Thanks daman.
I used Loctite "Permatex - form a gasket" , should be good stuff. I`ve used it for several years on all the moped and dirtbike engines I`ve wrenched on.
Do you guys put sealant around the crank seals themselves?. I didn`t, shouldn`t be necessary.
.I used Loctite "Permatex - form a gasket" , should be good stuff. I`ve used it for several years on all the moped and dirtbike engines I`ve wrenched on.
Do you guys put sealant around the crank seals themselves?. I didn`t, shouldn`t be necessary.
daman
New member
. What about the oil mixture system and air bleeding of the coolant system ?.
daman
New member
kimoaj said:
What about the oil mixture system and air bleeding of the coolant system ?.
Check the tech section on the coolant
the oil, put pre mix in the tank at 50:1 and use the bleed screw on top of the oil pump.
Hi !.
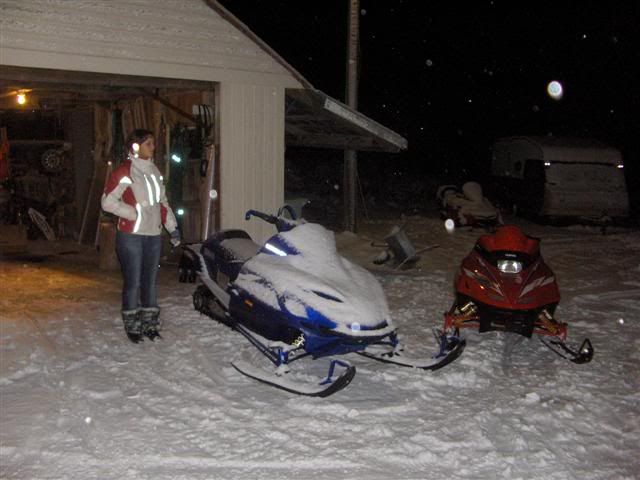
Today I went out and finished the V-Max. Everything took less time then I expected, I spent almost three days getting the engine out, mainly because the primary was a bitch to get off, but I only used a few hours to install the engine.
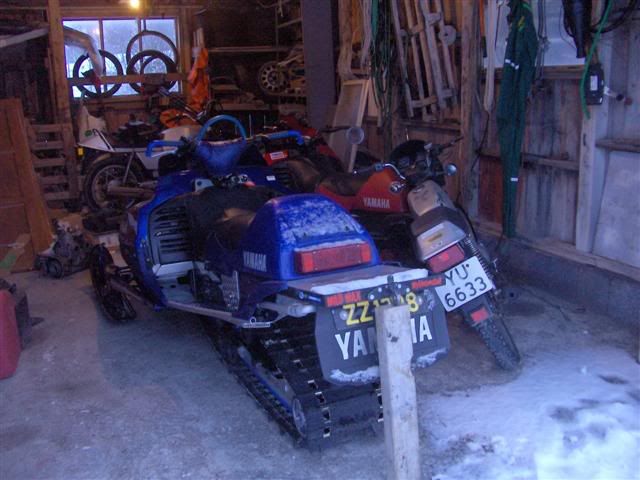
The garage
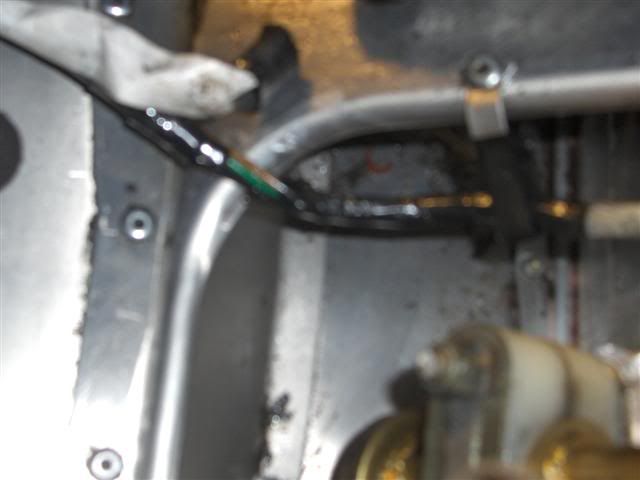
(sorry for the bad pic). I found a wire (almost) rub through, to the right of the steering axle, I degreased it and re-taped it.
I drained the tank and put 5liters with 1% oil mixture back in the tank.

I used this to fill the empty oil hoses from the oil pump, in order to reduce the amount of time it would take for the mixture system to start lubing, if you see what I mean.
Today I went out and finished the V-Max. Everything took less time then I expected, I spent almost three days getting the engine out, mainly because the primary was a bitch to get off, but I only used a few hours to install the engine.
The garage
(sorry for the bad pic). I found a wire (almost) rub through, to the right of the steering axle, I degreased it and re-taped it.
I drained the tank and put 5liters with 1% oil mixture back in the tank.
I used this to fill the empty oil hoses from the oil pump, in order to reduce the amount of time it would take for the mixture system to start lubing, if you see what I mean.
daman
New member
When you think you'll be fireing it up??
As I wrenched, it started snowing outside!
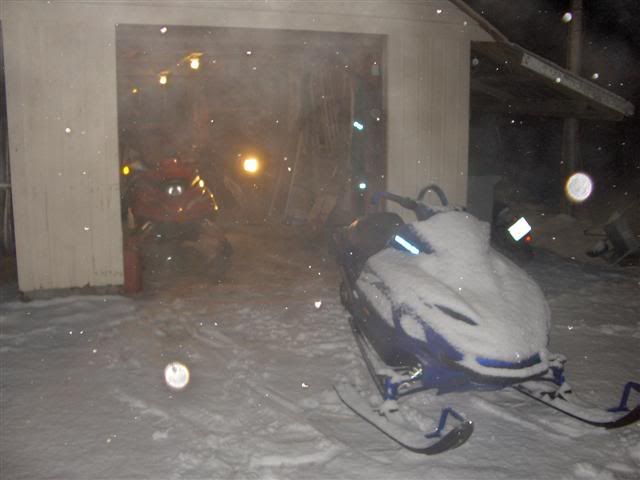
(it`s raining outside now.. gees).
Anyway, everything went fine.
I pulled about 12-15 times before the engine started, guess it takes some time to fill up the empty float bowls.
The engine sounded healthy and ran MUCH nicer now. Just after it started I loosened the air bled screw on the oil pump. Came some oil out and I then tightened it.
I rode 1km with the sled, then I put some more gas in the tank (10liters, with 0.5% oil in it). I took a pen and marked the oil level on the oil tank. I then rode 8 kilometers with the sled and checked that the engine had used some oil, which it had, the level was about 1,5cm under the pen mark on the tank, so I guess the oil mixturing system is working.
The sled idles fine and there is no hesitation what so ever, so it clearly was the mag side seal that was my problem.
One thing I wonder , is if there is enough coolant in the engine. I put about 2,5 liters in it, I squeezed the hoses to get the air out. I also loosened the bled screw on the cylinder head while the sled was running. The coolant level in the expansion tank was a little over "full" after the ride. I checked that the coolers under foot boards got warm, which they did.
How can I be sure that I don`t have air in the system?. Remember that a girl will be riding this sled, and shes not that familiar with this kind of stuff, hehe.
I just went out to fire up the sled, it started on 1st pull, without choke, been sitting for 4 hours, so I think that`s good.
Oh another thing I wonder is if there is a drain plug for the oil in the chain case?.
I asked about this before and I was told that there was a drain plug, put I can`t seem to find it. There are two tiny holes in the plastic under the chain case, the holes are only about 5mm wide, so it would be impossible to reach or handle a drain plug from those holes.
?. The oil in the chaincase was really thick and white, (saw it on the dipstick).
Should the chain tensioner be "finger tight" ?. I turned the tightener bolt in so that it just hit the tensioner and I then tightened the lock nut.
Is it normal that the chain case gets a little warm after riding?.
Well guys that`s all for today.
Thanks so much for all the help, I couldn`t have done this without you guys !.
Joakim.
(it`s raining outside now.. gees).
Anyway, everything went fine.
I pulled about 12-15 times before the engine started, guess it takes some time to fill up the empty float bowls.
The engine sounded healthy and ran MUCH nicer now. Just after it started I loosened the air bled screw on the oil pump. Came some oil out and I then tightened it.
I rode 1km with the sled, then I put some more gas in the tank (10liters, with 0.5% oil in it). I took a pen and marked the oil level on the oil tank. I then rode 8 kilometers with the sled and checked that the engine had used some oil, which it had, the level was about 1,5cm under the pen mark on the tank, so I guess the oil mixturing system is working.
The sled idles fine and there is no hesitation what so ever, so it clearly was the mag side seal that was my problem.
One thing I wonder , is if there is enough coolant in the engine. I put about 2,5 liters in it, I squeezed the hoses to get the air out. I also loosened the bled screw on the cylinder head while the sled was running. The coolant level in the expansion tank was a little over "full" after the ride. I checked that the coolers under foot boards got warm, which they did.
How can I be sure that I don`t have air in the system?. Remember that a girl will be riding this sled, and shes not that familiar with this kind of stuff, hehe.
I just went out to fire up the sled, it started on 1st pull, without choke, been sitting for 4 hours, so I think that`s good.
Oh another thing I wonder is if there is a drain plug for the oil in the chain case?.
I asked about this before and I was told that there was a drain plug, put I can`t seem to find it. There are two tiny holes in the plastic under the chain case, the holes are only about 5mm wide, so it would be impossible to reach or handle a drain plug from those holes.
?. The oil in the chaincase was really thick and white, (saw it on the dipstick).
Should the chain tensioner be "finger tight" ?. I turned the tightener bolt in so that it just hit the tensioner and I then tightened the lock nut.
Is it normal that the chain case gets a little warm after riding?.
Well guys that`s all for today.
Thanks so much for all the help, I couldn`t have done this without you guys !
.Joakim.
Last edited:
daman
New member
Hey..your girl freind looks hot!!...
the drain for the case is under the sled by the heat exchanger right side
10mm bolt.(yes finger tight)
just tell your girl to keep an eye on the temp light,,and shut her down asap
if it comes on.
keep checking the coolant when it cools down,,keep it toped off in the over
flow bottel.
the drain for the case is under the sled by the heat exchanger right side
10mm bolt.(yes finger tight)
just tell your girl to keep an eye on the temp light,,and shut her down asap
if it comes on.
keep checking the coolant when it cools down,,keep it toped off in the over
flow bottel.