kimoaj said:OK man!.
Do the gears sit on a cone or spline?. Will I have to grind the weld down and then pull the gears of?.
How much force does it take to push them off?.
Thanks for all the info you have given me !")
Yes, Grind off what you get and then press gear out. Shaft is straight with some small tooths. Mark some how present position before remove.
Reimond.
Ok man thanks! . How much force will it take to press them off?. Will I need an hydraulic press or can I just a sort of puller?.
Is the gear "shrimped" on (might be the wrong word hehe, I mean that the gear was heated before it was installed, and when it got cooler it got smaller and got stuck on the axle?) ?.
I think it`s wierd that it`s made like that.. what happens if the loosen?. In theory they cant come far since the two gears are so close to eachoter.. ?.
. How much force will it take to press them off?. Will I need an hydraulic press or can I just a sort of puller?. Is the gear "shrimped" on (might be the wrong word hehe, I mean that the gear was heated before it was installed, and when it got cooler it got smaller and got stuck on the axle?) ?.
I think it`s wierd that it`s made like that.. what happens if the loosen?. In theory they cant come far since the two gears are so close to eachoter.. ?.
WOW that cyl. was HOTTTT
crimsonride
New member
- Joined
- Sep 29, 2005
- Messages
- 183
just curious. Why do you have to worry about debris in the exhaust? Won't it just blow out?


the cylinders scavange some from the exh so it could draw it back into the cyl and trash the new parts.
Hi guys!
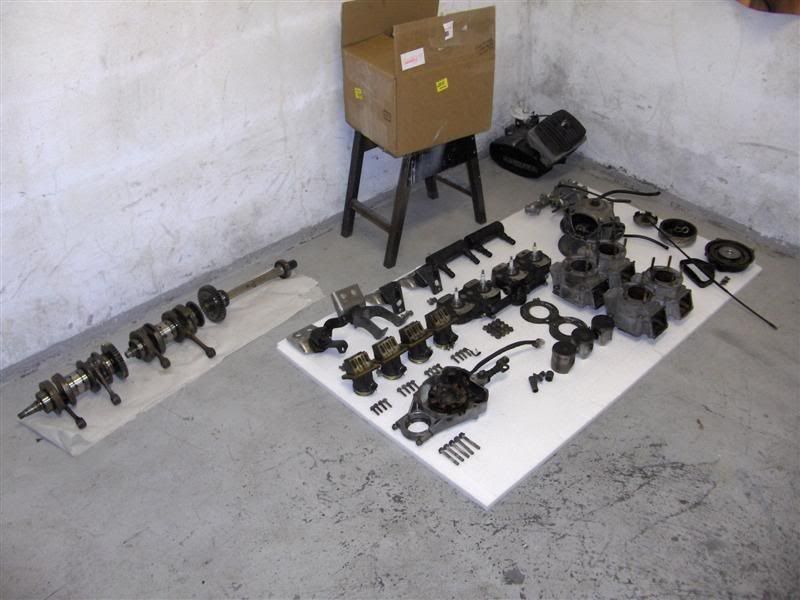
As some of you know I`ve got the new parts for the V-Max 4, 4 new pistons, one new cylinder and a complete gasket kit. Plan to start rebuilding on Tuesday, can`t wait to get started.
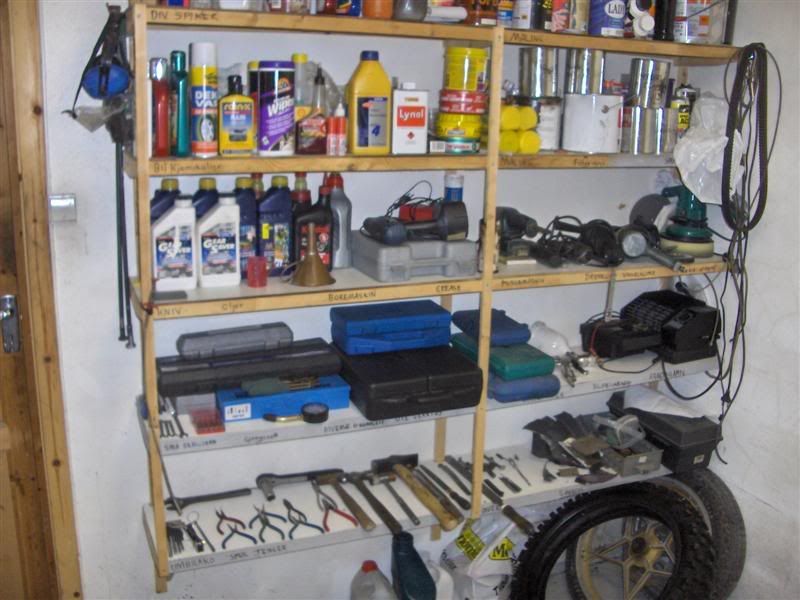
Today I finished the "yearly" cleaning of my workshop, the floor was really dirty so I washed with degreasing soap, much better now.
I also ligned up the v-max 4 parts (had to stowe them away since I was working on other things in the workshop).
I guess I will have to spend quite a few hours on cleaning the parts, will be fun though.
Wellwell I`ll keep you posted
As some of you know I`ve got the new parts for the V-Max 4, 4 new pistons, one new cylinder and a complete gasket kit. Plan to start rebuilding on Tuesday, can`t wait to get started.
Today I finished the "yearly" cleaning of my workshop, the floor was really dirty so I washed with degreasing soap, much better now.
I also ligned up the v-max 4 parts (had to stowe them away since I was working on other things in the workshop).
I guess I will have to spend quite a few hours on cleaning the parts, will be fun though.
Wellwell I`ll keep you posted
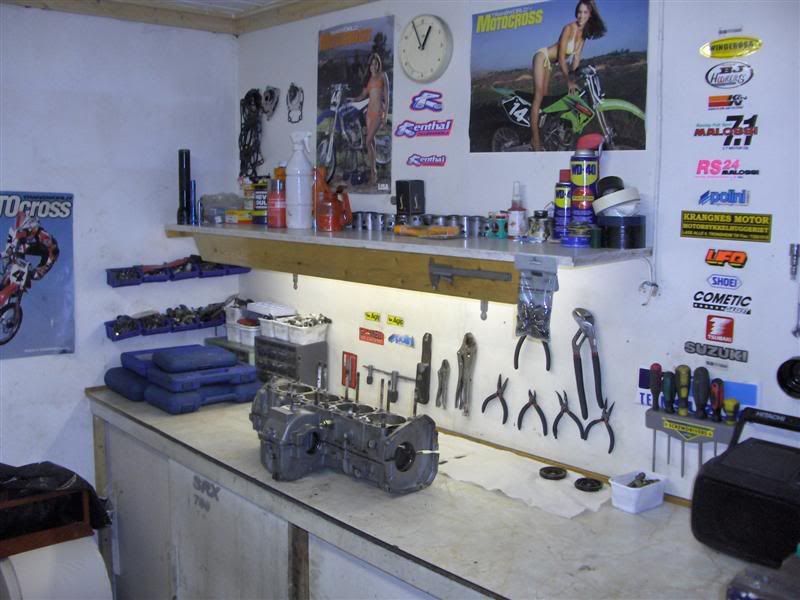
Like the posters you got there. Looks like a male sanctuary.. LOL!
Keep up the good work!
Ike
Keep up the good work!
Ike
Thanks man. Yeah they are nice, but the other day I kind of ran out of space to hang up tools, so I was thinking of removing them.. but.. nah.
I probably wount be able to start rebuilding before Thursday because a guy at work had to go away some place so I have to work for him.
Last night I checked the rod big end side clearance just for the fun of it, all 4 had about 0,55mm free play, so all of them was within spec.
Gees, the weather situation is getting worse. Seems like our season gets shorter and shorter, down to about 2 months now.. February and Mars are the best months.
Gees.
. Yeah they are nice, but the other day I kind of ran out of space to hang up tools, so I was thinking of removing them.. but.. nah. I probably wount be able to start rebuilding before Thursday because a guy at work had to go away some place so I have to work for him.
Last night I checked the rod big end side clearance just for the fun of it, all 4 had about 0,55mm free play, so all of them was within spec.
Gees, the weather situation is getting worse. Seems like our season gets shorter and shorter, down to about 2 months now.. February and Mars are the best months.
Gees.
03viperguy
Moderator
wow, thats a project! I have heard (from yamaha mechs) those motors are tricky to rebuild. no idea why, just be careful and go over everything twice nice pics and progress!
nice pics and progress!Hi man! Hmm I hope what you`re saying ain`t right.
I really can`t see why it should be harder then for example a V-Max 600, but I wount know before tomorrow night will I?.
Going to start rebuilding tomorrow morning, I`m so excited.
The only thing that I`ve been thinking of is the circlips that sit on the inside of the crank seals, when I removed the lower crankcase the circlips spin (span?? ) freely on the crank, I thought that was wierd, but I guess I`ll just have to make sure that they hit their grooves in both the upper and lower case.
When it comes to torquing up everything, should I torque one cylinder at a time?. (I guess so).
My friend printed out the manual from the tech section, so I`ll take a look in it and see if I find some bolt torque information.
Any tips?. This is my second sled engine rebuild.
Wellwell
. I really can`t see why it should be harder then for example a V-Max 600, but I wount know before tomorrow night will I?.
Going to start rebuilding tomorrow morning, I`m so excited.
The only thing that I`ve been thinking of is the circlips that sit on the inside of the crank seals, when I removed the lower crankcase the circlips spin (span?? ) freely on the crank, I thought that was wierd, but I guess I`ll just have to make sure that they hit their grooves in both the upper and lower case.
When it comes to torquing up everything, should I torque one cylinder at a time?. (I guess so).
My friend printed out the manual from the tech section, so I`ll take a look in it and see if I find some bolt torque information.
Any tips?. This is my second sled engine rebuild.
Wellwell
03viperguy
Moderator
I thought it was all the extra stuff that is in the motor. we had a dealer rebuild ours...they had to try it twice as after the first time it wouldnt run  like I said not sure why it is harder or different, but the guys on vmax-4.com would be the ones to ask
OK 03viperguy thanks for the reply, I`ll take a look at vmax4.com .
I guess the dealer messup something because it really shouldn`t be any worse then other engine, just more fun since there are more pistons & jugs to install
I guess the dealer messup something because it really shouldn`t be any worse then other engine, just more fun since there are more pistons & jugs to install
03viperguy
Moderator
yeah, I stopped using that dealer since they seemed to suck (that wasnt the only incident!!) but the dealer I used afterwards was extremely competent and even they told me that if we still had it (by then we had sold the sled) that they would be iffy to work on it. like I said, never knew why, just what I have been told! good luck, keep the updates and pics coming
Your dealer probably had a bad day, month, year, or years or something. Like, did the new dealer "want" to work on it?. Cool.
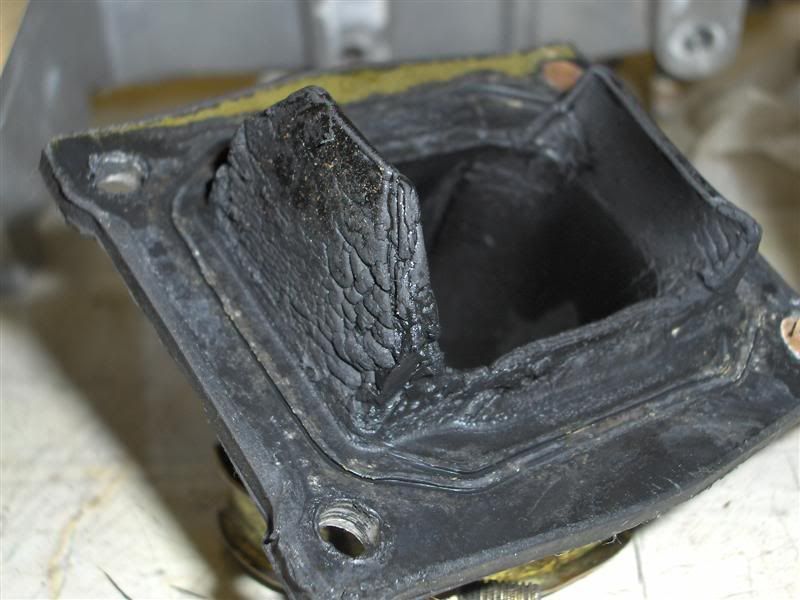
Well anyway, this morning I went down to the workshop to start putting the engine together. Having looked forward to putting it together for a long time, my discovery felt like a slap in the face.
The first thing I did was to start cleaning the lower crankcase.
Look what I found:
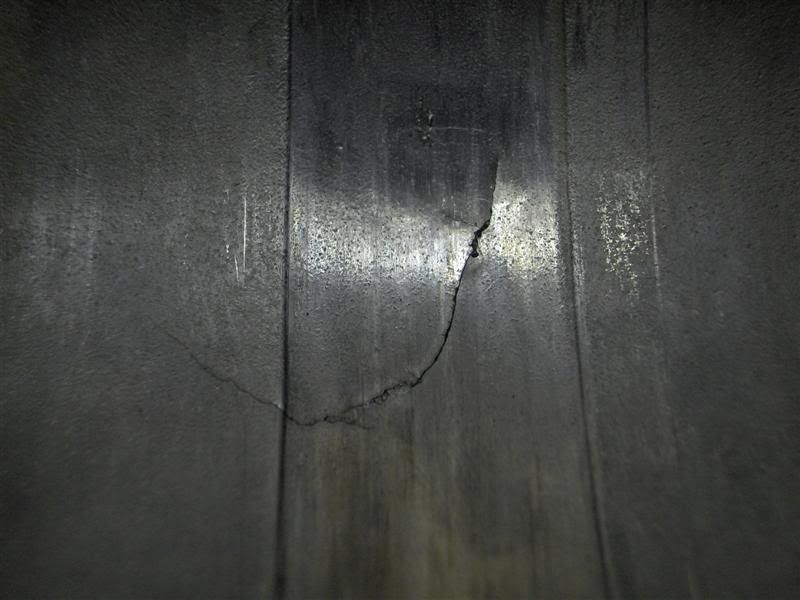
A crack in the crankhouse
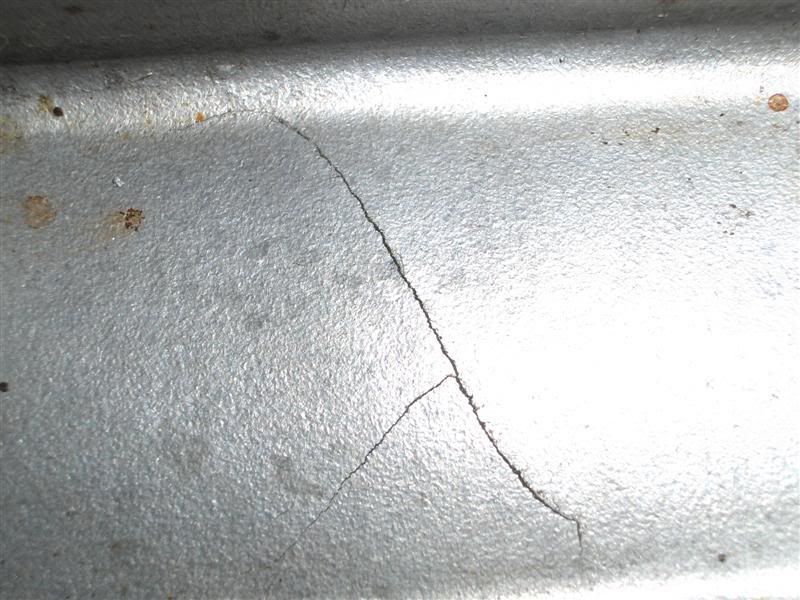
Outside
Gees I wish I`d discover that just after I tore it apart.
Wellwell first I called a local guy who works at the army-workshop-station in Ramsund, half an hour drive from me. He told me to call a Yamaha dealer and ask if the crankhouse-material was weld-able. I thought it sounded unessesary since as we all know, aluminium can be welded. But I called the dealer, "can you call me back in half an hour" , hehe. Instead I jumped in my car and drove to Ramsund, I went to the supermarked where I work because I knew that all the guys on the army-workshop-station normally comes to the store around 11.00 to buy lunch.
I walked into the supermarked and the first man I saw was their welder, so I showed him the crankhouse and he smiled and said that it was no problem, but he didn`t have time to fix it today, so he told me to call him tomorrow at lunch time, figured he`d have it ready by then.
It`s so nice with helpful people.
(gees I tend to make a short story long, sorry for that, hehe).
When I got home I started cleaning parts, actually spent 7-8 hours just on cleaning parts.
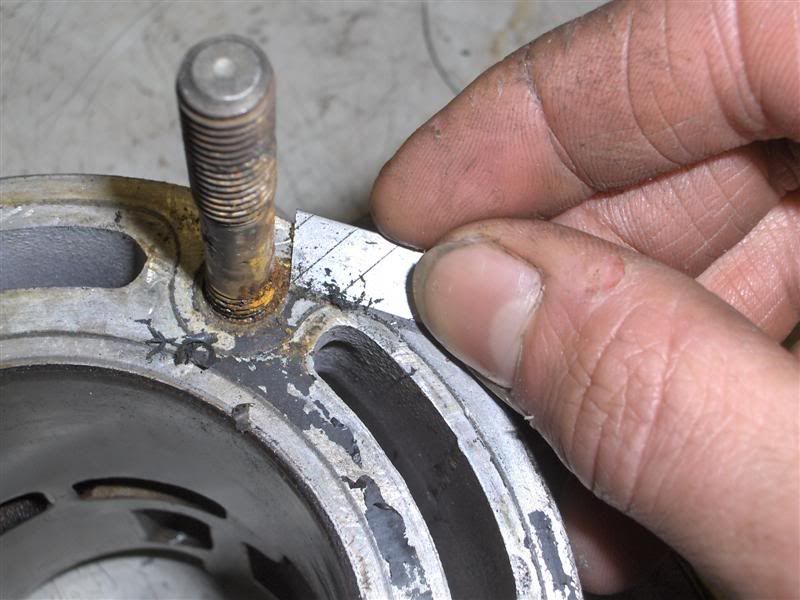

I like to use a broken carpet-knife blade.
Then I clean the surfaces with fine sandpaper and oil, not like "sanding" but just cleaning.
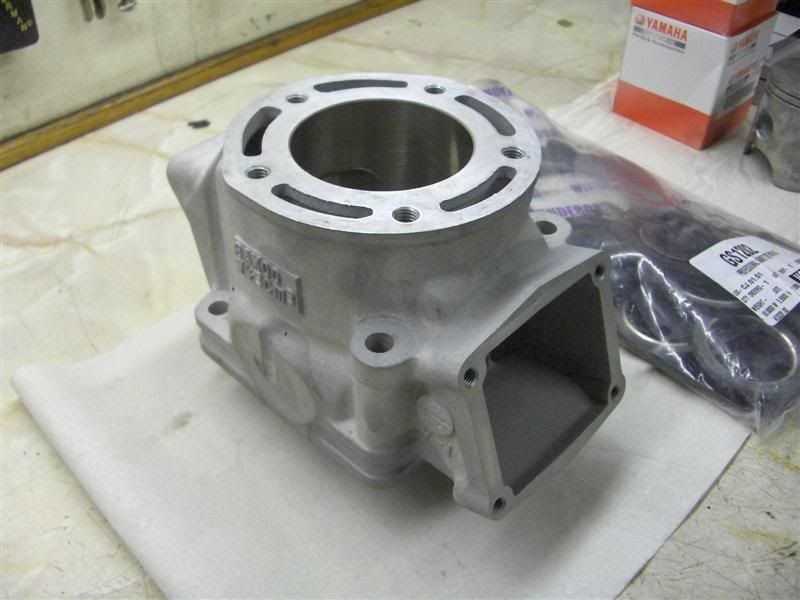
The new cylinder
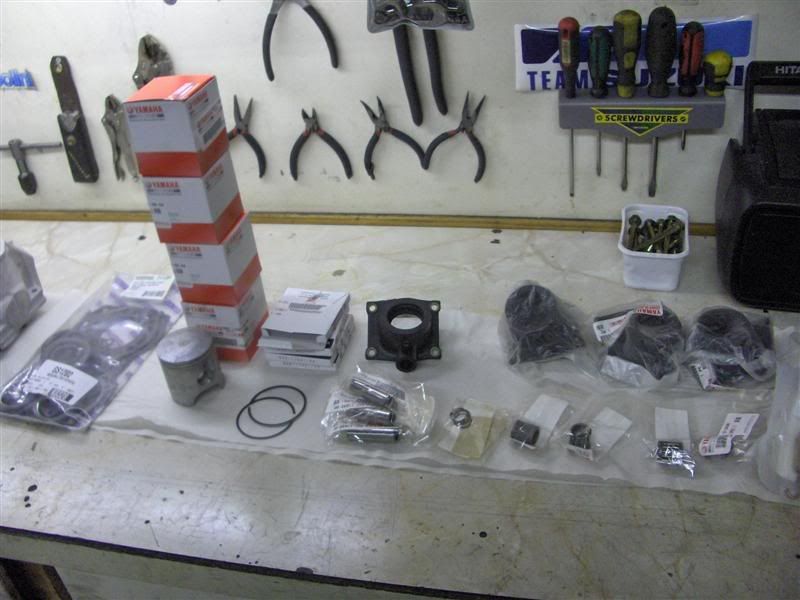
Other parts
Well anyway, this morning I went down to the workshop to start putting the engine together. Having looked forward to putting it together for a long time, my discovery felt like a slap in the face.
The first thing I did was to start cleaning the lower crankcase.
Look what I found:
A crack in the crankhouse
Outside
Gees I wish I`d discover that just after I tore it apart.
Wellwell first I called a local guy who works at the army-workshop-station in Ramsund, half an hour drive from me. He told me to call a Yamaha dealer and ask if the crankhouse-material was weld-able. I thought it sounded unessesary since as we all know, aluminium can be welded. But I called the dealer, "can you call me back in half an hour" , hehe. Instead I jumped in my car and drove to Ramsund, I went to the supermarked where I work because I knew that all the guys on the army-workshop-station normally comes to the store around 11.00 to buy lunch.
I walked into the supermarked and the first man I saw was their welder, so I showed him the crankhouse and he smiled and said that it was no problem, but he didn`t have time to fix it today, so he told me to call him tomorrow at lunch time, figured he`d have it ready by then.
It`s so nice with helpful people.
(gees I tend to make a short story long, sorry for that, hehe).
When I got home I started cleaning parts, actually spent 7-8 hours just on cleaning parts.
I like to use a broken carpet-knife blade.
Then I clean the surfaces with fine sandpaper and oil, not like "sanding" but just cleaning.
The new cylinder
Other parts
Last edited:
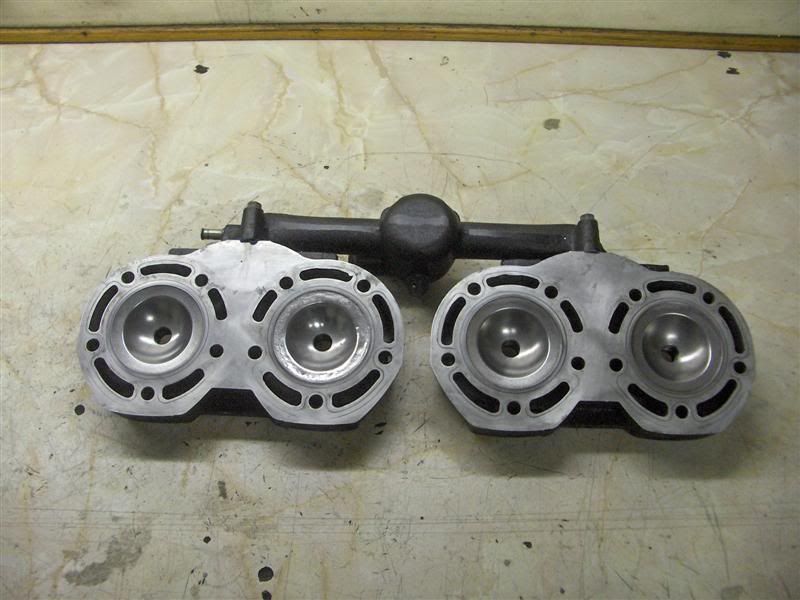
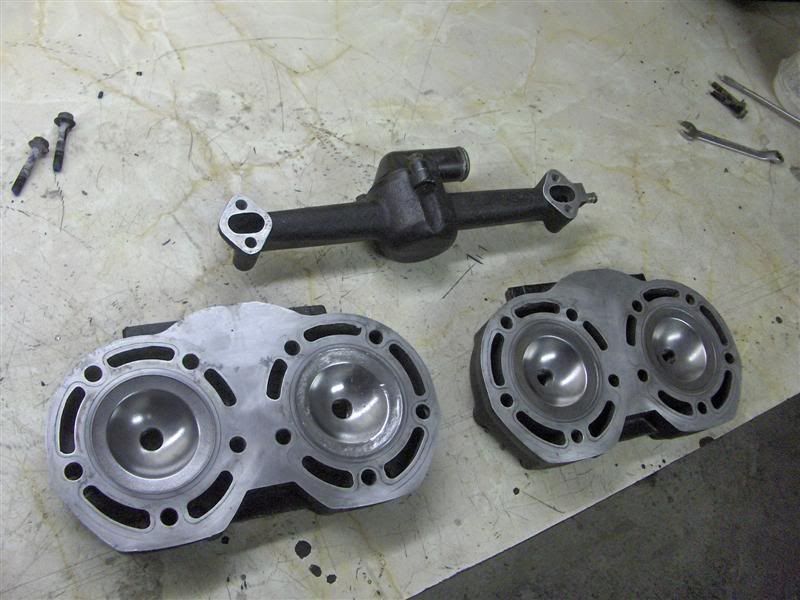
The heads
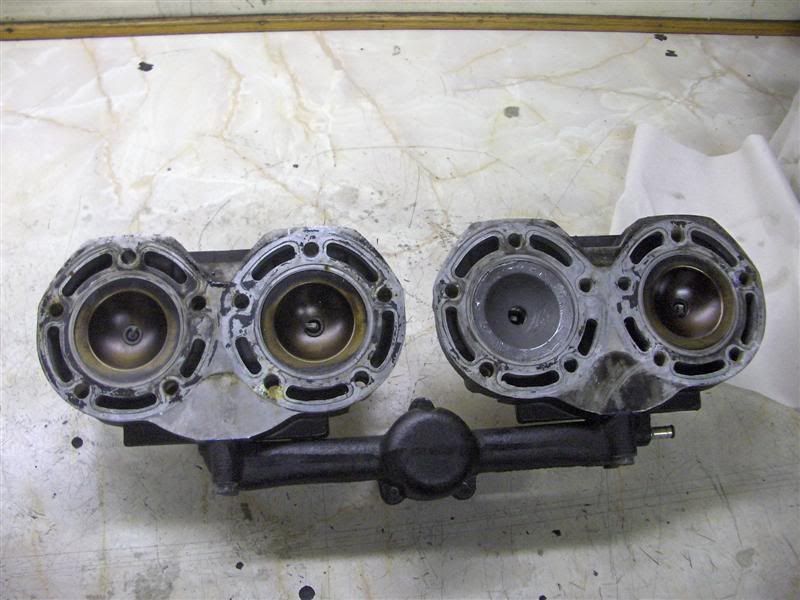
As you can see the smashed metal debris has made some "bruces" on the head.
After cleaning, I used a grinding device in my drill to remove some of the bruces in the 2nd head. Used a steel-wool device in the drill to generally clean them.
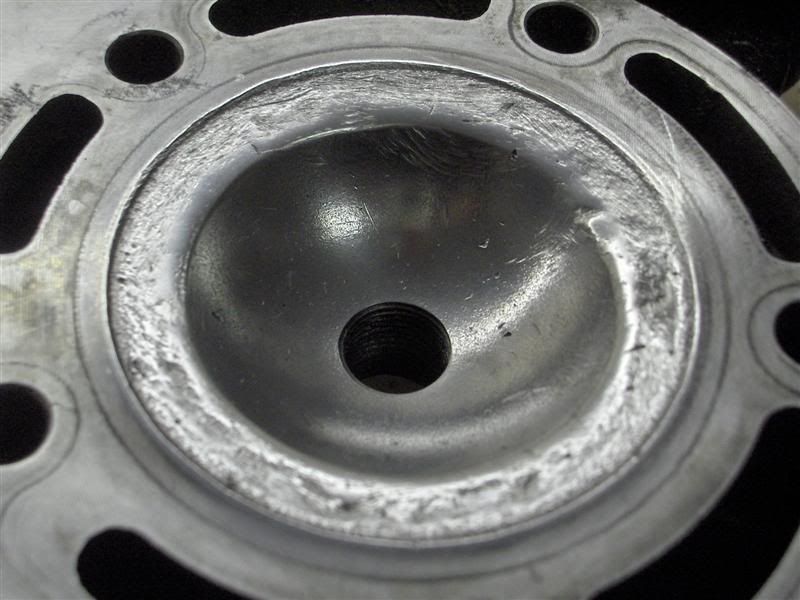
close up of bruces, ok?
As I was working on the heads I discovered that the pipe that joins them together, was loose on one head. (gees, maybe the coolant leaked out and that seizing cylinder nr. 2 only was a random seizing due to overheating?, hehe). Guess not.
I didn`t get gaskets for that pipe so I`ll have to use loctite gasket sement.
As you can see the smashed metal debris has made some "bruces" on the head.
After cleaning, I used a grinding device in my drill to remove some of the bruces in the 2nd head. Used a steel-wool device in the drill to generally clean them.
close up of bruces, ok?
As I was working on the heads I discovered that the pipe that joins them together, was loose on one head. (gees, maybe the coolant leaked out and that seizing cylinder nr. 2 only was a random seizing due to overheating?, hehe). Guess not.
I didn`t get gaskets for that pipe so I`ll have to use loctite gasket sement.
Last edited:
The cleaned and ready to be put together parts. I think I spent two hours on the crankhouse half, hehe.
Gees, look at these inlets:
All of them looked like this.

Cleaned all the reeds.. .
Here`s how the workshop bench looked when I was done for the day.
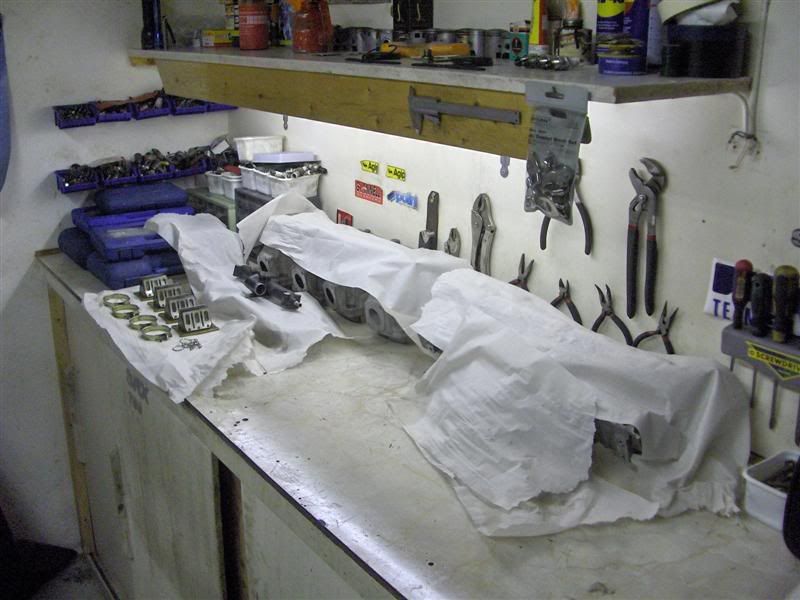
Gees I`m a picture whore, but who cares.
I checked the pistons/rings today just to make sure they were correct, which they were. I discovered that the rings had a "T" mark on them, I guess the "T" side should face upwards?.
Wellwell
silversnow
New member
Wow! your doing a really meticulous job on that! But I have to say that that head still looks pretty banged up  But I guess it will work.


Total Recreation
New member
He is doing a good job but that head does look really bad it is too bad you are so far away I would give you a head just to help you out but the shipping would be a killer. I think I would see if you could find a head. Just my opinion.
03viperguy
Moderator
wow, FANTASTIC WORK!!!! hoping my old mercury trail twister comes out that nice! more details on the cleaning! what solvents did you use, etc. glad I only have 2 cylinders, but with the cooling fins (its a fan cooled motor) I have my work cut out for me! and the pics are sweet, the more the better!
daman
New member
Yup "T" goes up,,nice pics.....