stanage
Member
I finally decided to start my own thread to record all the work that was done to my sled.
So here goes,
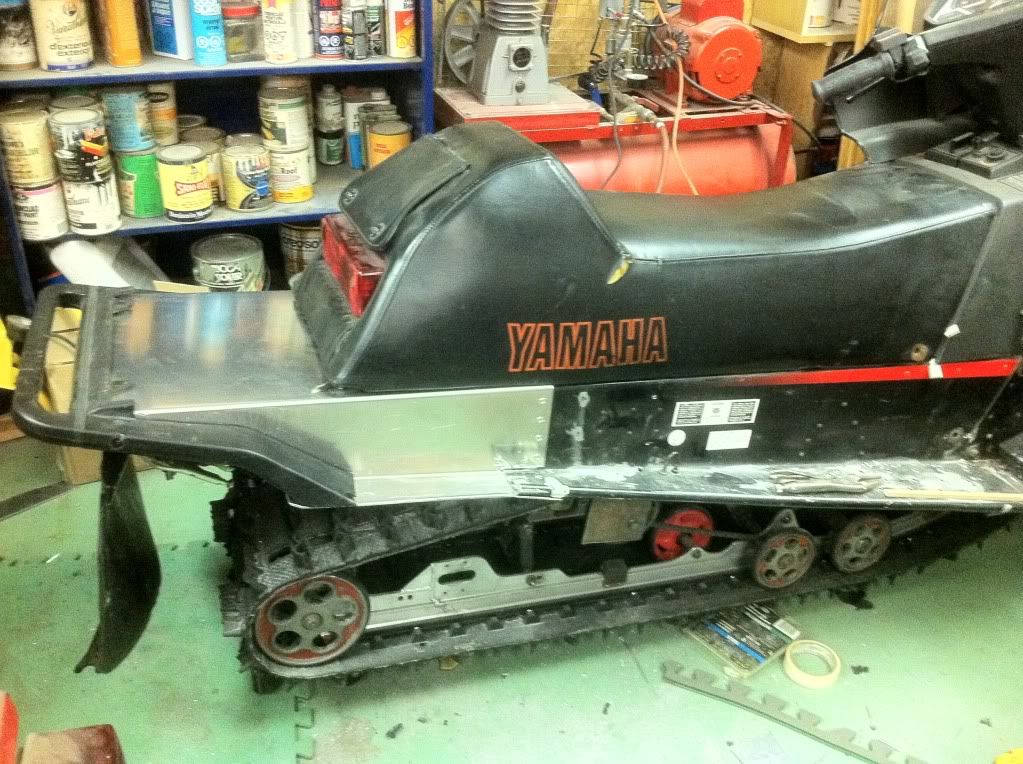
Here it is when I got it, barely working, 89 EX570 LC.

Compression was low on one side, so when I opened it up I noticed a Piston was blown and no thermostat - no thermostat = broken piston!


My buddy does Port And Polish jobs on the side, lucky for me!

Look at those knife sharp transfer ports")

While the PSI Single exhaust was off, it went through a makeover,

TY Member VMAX540 gave me the inspiration(And parts!) to widen the front end,
http://www.totallyamaha.net/forums/showthread.php?t=22988&page=7&pp=10
I found a donor sled, 96 Vmax, and raided what was left of the front end.
Stock width and 96 vmax width(Almost 42")

I also managed to get the 96 Vmax front struts with the sway bar and control bar

So here goes,
Here it is when I got it, barely working, 89 EX570 LC.

Compression was low on one side, so when I opened it up I noticed a Piston was blown and no thermostat - no thermostat = broken piston!


My buddy does Port And Polish jobs on the side, lucky for me!

Look at those knife sharp transfer ports

While the PSI Single exhaust was off, it went through a makeover,

TY Member VMAX540 gave me the inspiration(And parts!) to widen the front end,
http://www.totallyamaha.net/forums/showthread.php?t=22988&page=7&pp=10
I found a donor sled, 96 Vmax, and raided what was left of the front end.
Stock width and 96 vmax width(Almost 42")

I also managed to get the 96 Vmax front struts with the sway bar and control bar
stanage
Member
And then I started to cut and weld!


The result gave this!


The result gave this!


Last edited:
stanage
Member
Next, I order up a custom valving on the front struts from Schmidt Brothers Motorsports, and I asked them to give me a stage 2 strut bar!
New skiis, in the form of Camoplast CamoSkiis, 7 inch wide, great for powder!


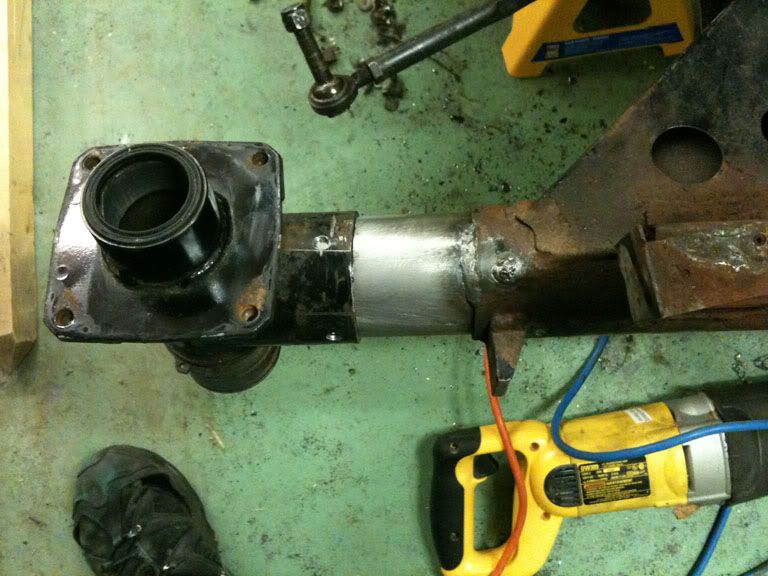
I added a fourth bogie wheel to the rear end, and stretched it to a 136" instead of a 121" by cutting spare rails and having them welded to my existing rails.


New skiis, in the form of Camoplast CamoSkiis, 7 inch wide, great for powder!


I added a fourth bogie wheel to the rear end, and stretched it to a 136" instead of a 121" by cutting spare rails and having them welded to my existing rails.


Last edited:
stanage
Member
Next step was to finish the engine, so I sent both cylinders off to be re-sleeved to stock bore, and with my existing P&P cylinders, and brand new SPI pistons, things will kick *** this year.

I also freshened up all the gas and oil lines, as well as my carbs. Made a custom cold air intake box. More pictures on that later, but basically each carb will be filtered in a cold air box, more on that later - its not finished.

I went through the entire rear suspension and replaced everything that was dead....


I lowered the rear suspension as well as made my own drop brackets,


Last edited:
stanage
Member
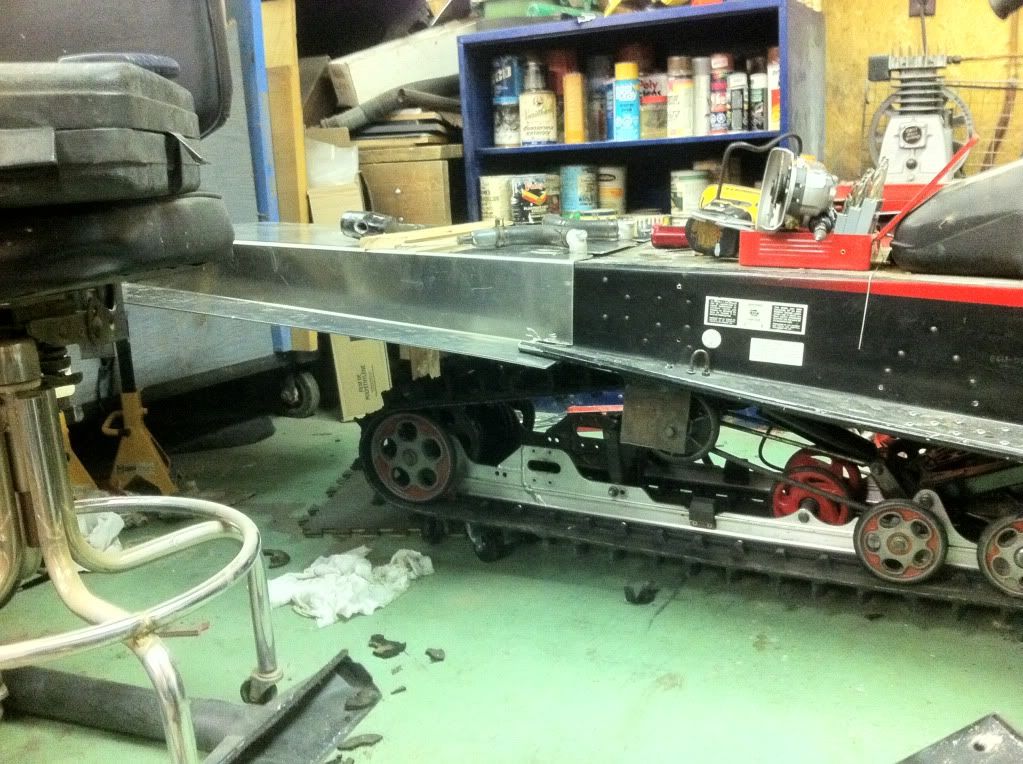
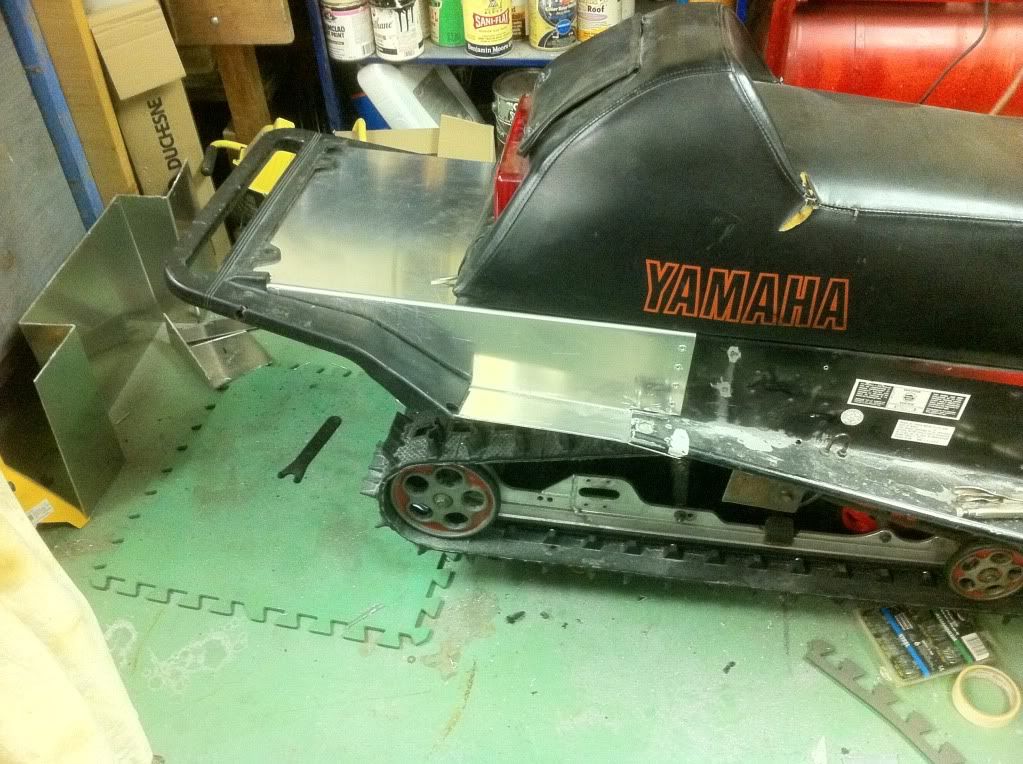
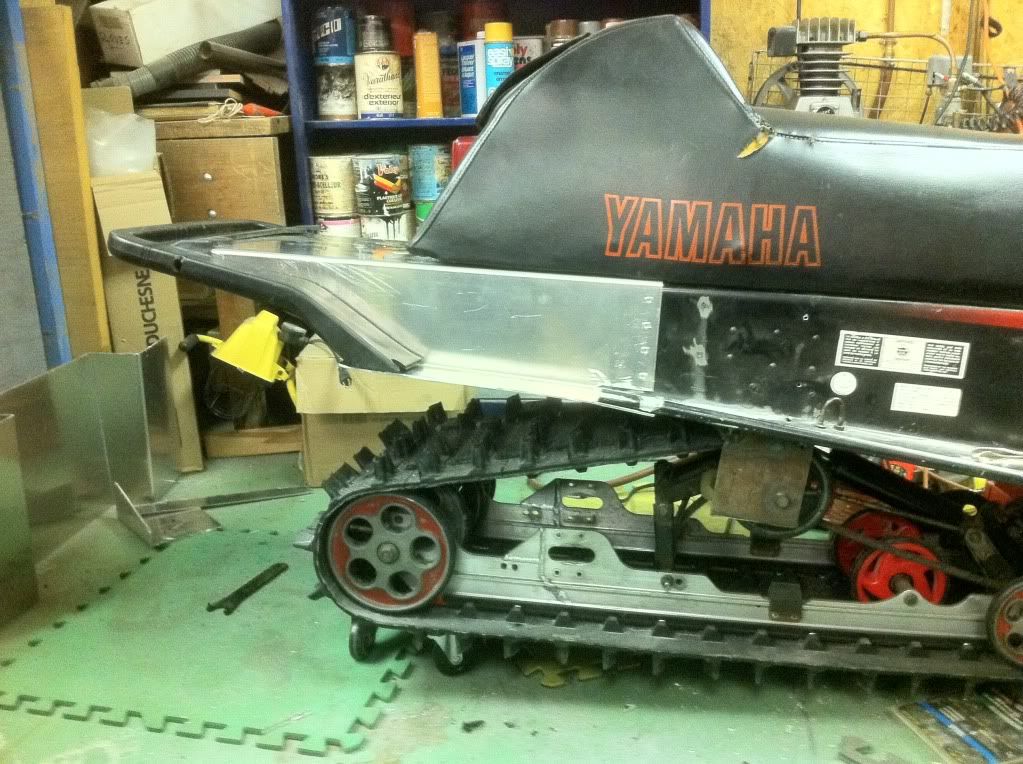
Here it is as a 136" with the new Camoplast Cobra 136 x 15 x 1.352 track,


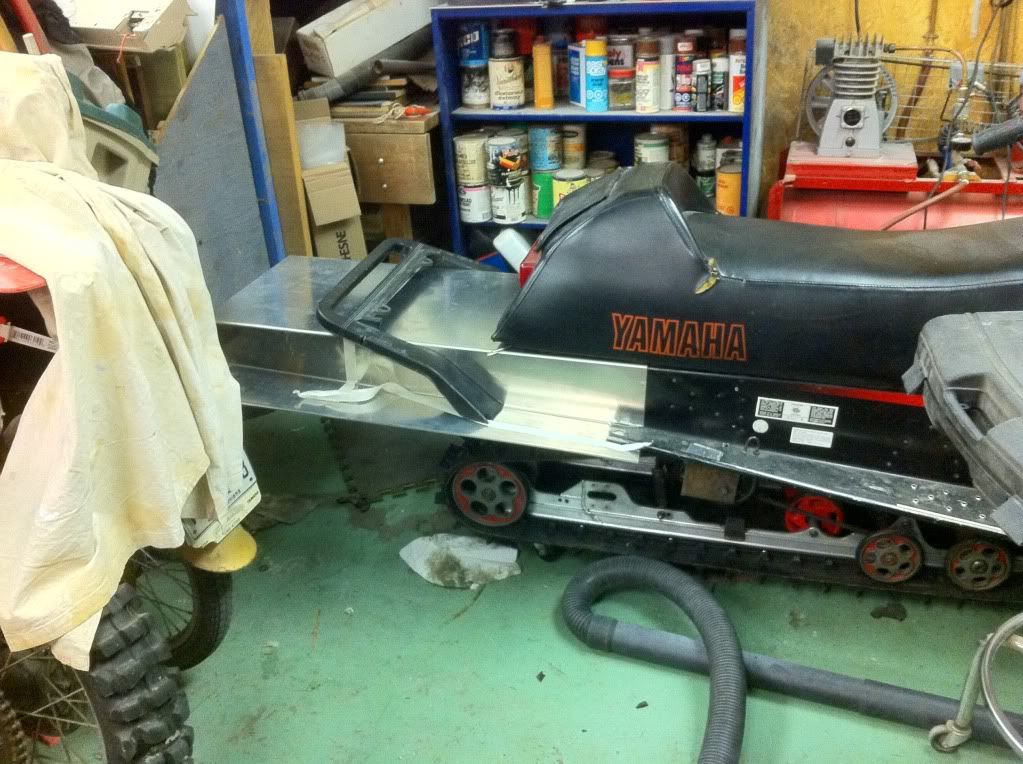
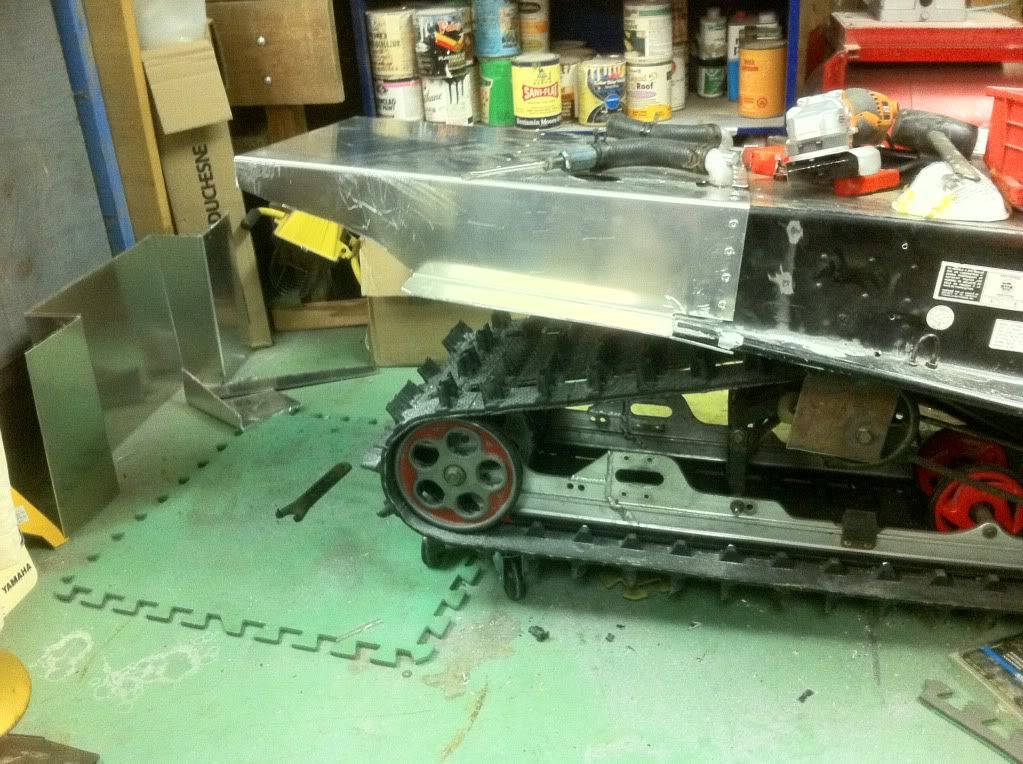
Tunnel extension in progress,


For more pics go to http://s1120.photobucket.com/albums/l482/stanage2/?start=0
Otherwise, stay tuned!


Tunnel extension in progress,


For more pics go to http://s1120.photobucket.com/albums/l482/stanage2/?start=0
Otherwise, stay tuned!
Great too see this old beast in it´s own thread! I followed this from the beginning and i must say that u done a great job with it! Looks really cool and i hope this thread gives inspiration to others that is thinking of doing the same type of mods as we did
BTW the extension looks great! Do u need to move the hoses or are u gonna have them in stock position?
BTW the extension looks great! Do u need to move the hoses or are u gonna have them in stock position?
Last edited:
stanage
Member
prankster said:Great too see this old beast in it´s own thread! I followed this from the beginning and i must say that u done a great job with it! Looks really cool and i hope this thread gives inspiration to others that is thinking of doing the same type of mods as we did
BTW the extension looks great! Do u need to move the hoses or are u gonna have them in stock position?
Thanks man! It's been atleast a year, on and off, replacing one thing or another. It was so sweet last year, even with half the stuff I did on it, so I'm stoked about this year.
The tunnel extension is probably going to be shorter than what you see. And I will have to extend the hoses to the back of the extension, instead of flattening the rad. I'm not sure how well that would turn out - although I'd love to do it - Im just scared the coolant won't flow through it as well anymore. It must have internal passages or something - which might be blocked by welding the rad, if I cut it and weld it back together. And it's aluminum, so I need an aluminum welder...$$
Decisions, decisons...

Very Cool!!! Great Job so far!!
justheman80
New member
The rear radiator on mine was open, no baffling or passages. So I just cut the angled portion off.
Dropped my suspension like you did in the front and rear. Just curious...why did you move your forward and inch or two?
Dropped my suspension like you did in the front and rear. Just curious...why did you move your forward and inch or two?
stanage
Member
justheman80 said:The rear radiator on mine was open, no baffling or passages. So I just cut the angled portion off.
Dropped my suspension like you did in the front and rear. Just curious...why did you move your forward and inch or two?
Interesting! Maybe if I cut off the angled portion, I can have it welded back on flat? You wouldn't happen to have any pics of yours would you? It might sooth my fears a bit
I REALLLY don't want to extend my coolant hoses and make my tunnel extension ugly...And for the front end, I lowered and brought it forward an inch or so because I was under the impression that when the suspension was lowered, it had to be "rotated around the jackshaft i.e. bring it forward and down, instead of straight down. I probably did it too much, but I can always move it back, and make more holes later. That position was my first attempt, so until I try it out, and see if it puts too much pressure on the front skiis, I'm gonna leave it there. Should I be worried?
akrievins
New member
Wow man... very cool! Can't wait to see your report on how it rides! Very light and nible machines. I had a 91 Phazer II 480 fan and that thing ran like a champ.
stanage
Member
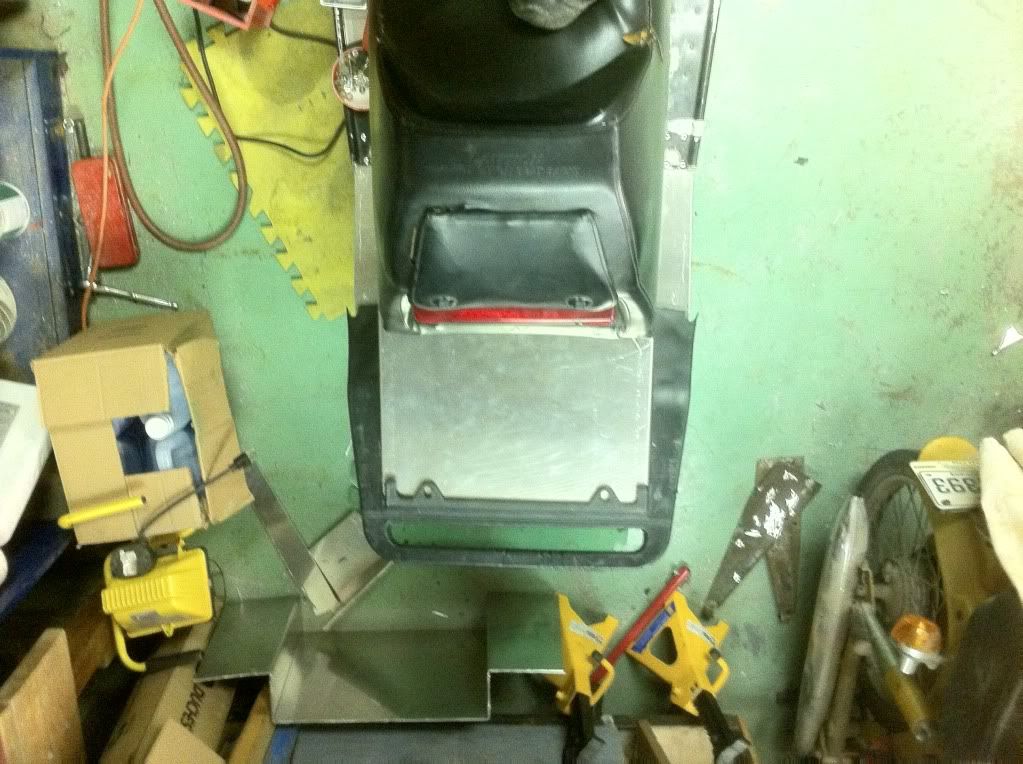
Tunnel extension - update
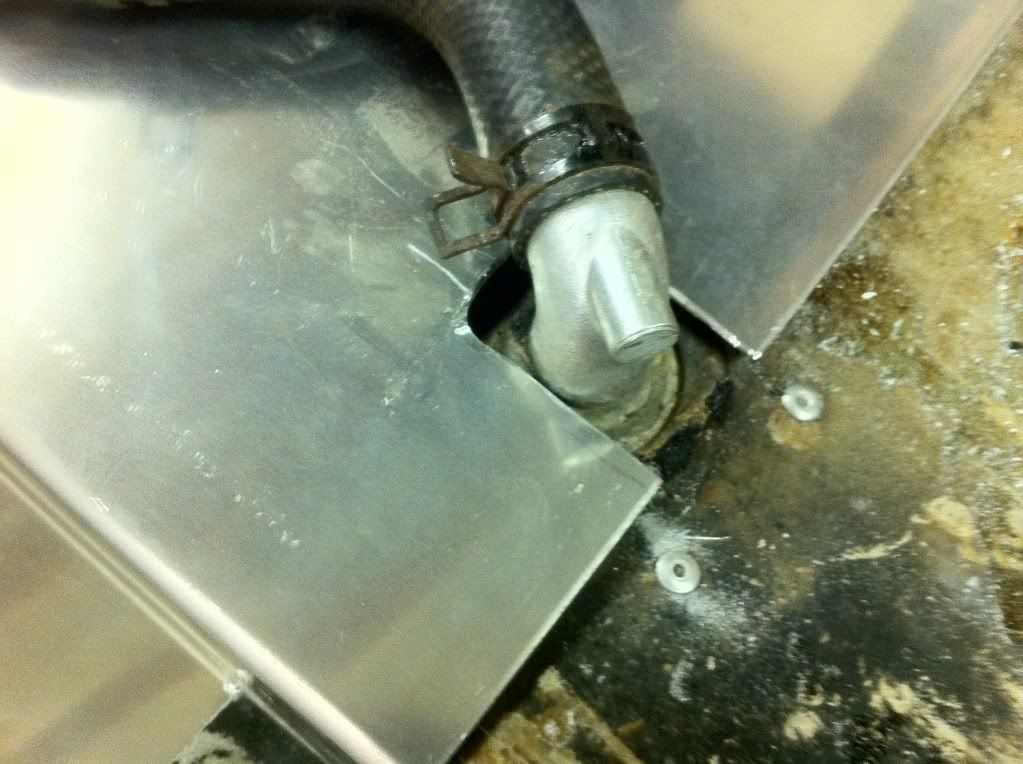
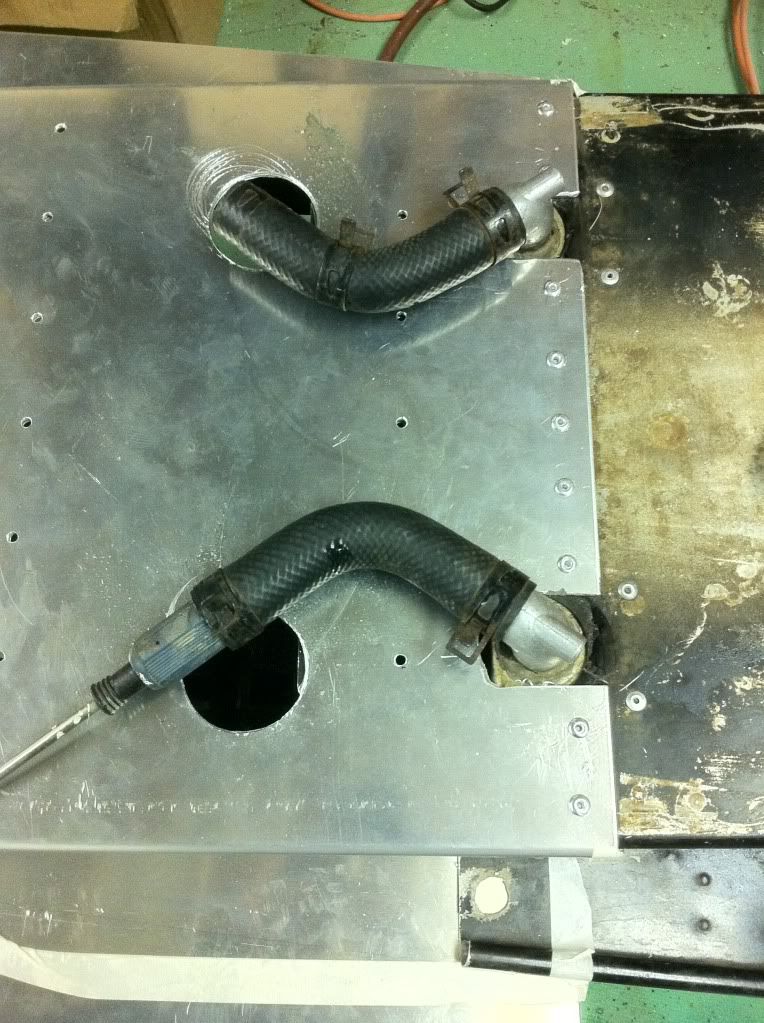
So, I decided not to move the rear rad back, instead Im going to slice it and have it welded flat. Coolant goes through the bent part, so it needs to stay there in my opinion. My extension will look nicer without any hoses over it, or a decoy for the hoses.
I removed the two metal braces on each side and am ready to move them back and rivet to the extension.
More to come!
That extension looks a little long..LOL
stanage
Member
MrSled said:That extension looks a little long..LOL
Yea, it's not cut yet. The tape is where it'll be cut. Im waiting till it's secured to the frame before I put the grinder to it.
thefullmonte
New member
Very nice build !") i Was noticing the pic of the front torque arm of the rear suspension. I have 3 of them cracked just like it in my garage. Can't figure out why they do that. A good welder can fix it, but what is happening back there that is causing it in the first place. I can't help but wonder.
i Was noticing the pic of the front torque arm of the rear suspension. I have 3 of them cracked just like it in my garage. Can't figure out why they do that. A good welder can fix it, but what is happening back there that is causing it in the first place. I can't help but wonder. 
i Was noticing the pic of the front torque arm of the rear suspension. I have 3 of them cracked just like it in my garage. Can't figure out why they do that. A good welder can fix it, but what is happening back there that is causing it in the first place. I can't help but wonder. stanage
Member
thefullmonte said:Very nice build
The one that was originally in it was cracked six ways from Sunday. I figure a whole lot of ditch banging, and hill jumping are the main culprits. But you're right, mine cracked at the main shaft, and along each side. The fix was basically to add more metal. Do you think it'll last one season without re-inforcements, considering it's brand new? I figure I'll take it apart next season and weld reinforcements, just in case.
stanage
Member
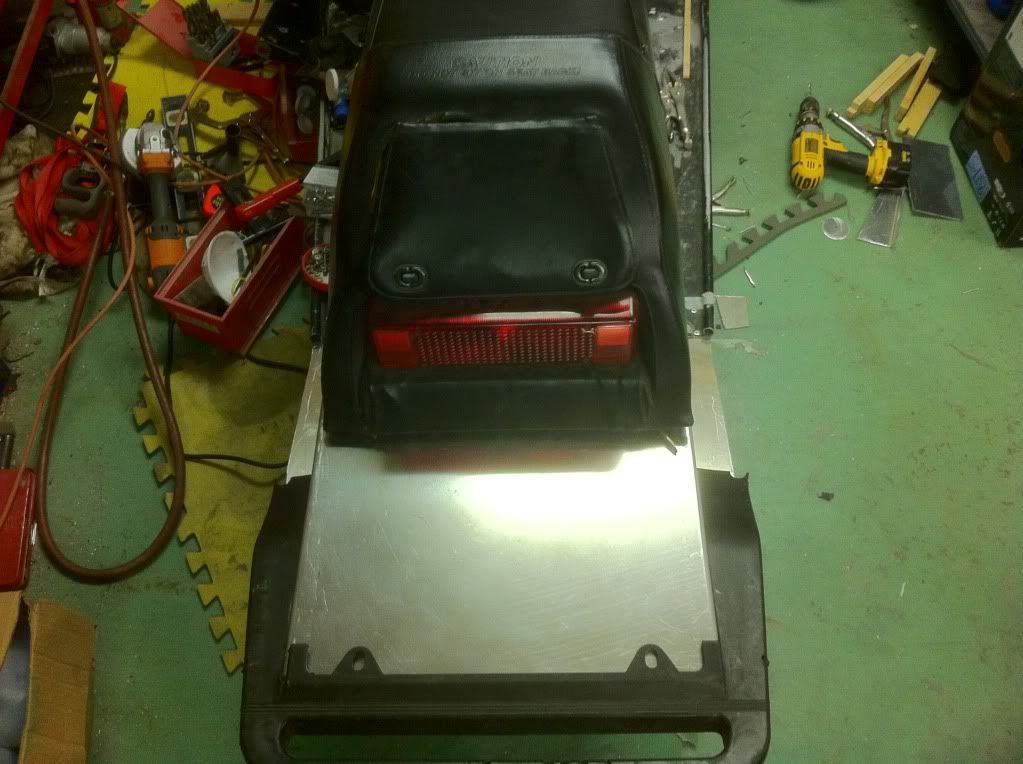
Today's update, brought to you by the letter P and R ! For Pop Rivet!
Ok, so I started riveting the tunnel down. Made holes for the coolant hoses. Called my buddy for the rad welding, and he's looking into it. If he can't do it, I've got some other folks who are dead on - just look at my rear suspension rails.

That and all the rivets needed for the rad support, as well as rivets going on the side, will make this seld rock solid.
Ciao for now, its a wrap for tonight.
Ok, so I started riveting the tunnel down. Made holes for the coolant hoses. Called my buddy for the rad welding, and he's looking into it. If he can't do it, I've got some other folks who are dead on - just look at my rear suspension rails.
That and all the rivets needed for the rad support, as well as rivets going on the side, will make this seld rock solid.
Ciao for now, its a wrap for tonight.
stanage
Member
Tonight I sliced up the extension the way I wanted it. Its now ready for the tunnel supports to be riveted in. Then the bar will be screwed on. It's getting there!!! Still no snow 
And the rear rad is off to be sliced open, flatened and re-welded.
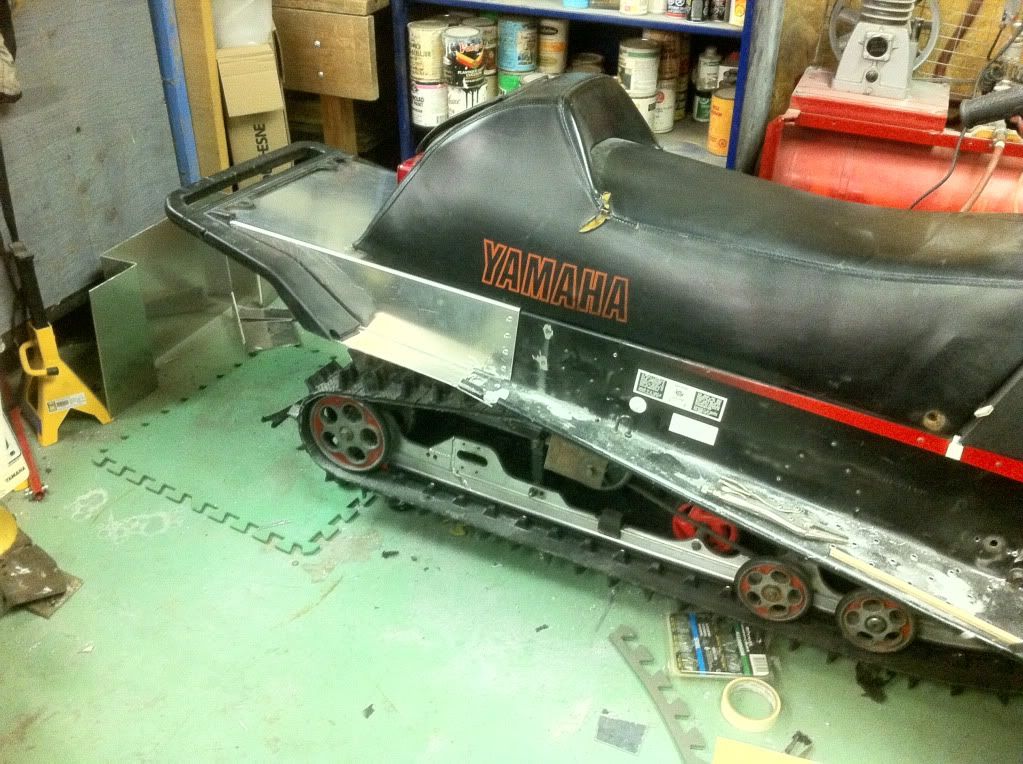
More to come, I think Im gonna paint it black to match!
And the rear rad is off to be sliced open, flatened and re-welded.
More to come, I think Im gonna paint it black to match!
Nice Job!!!
thefullmonte
New member
Yes, very nice. Often times these projects can end up looking cobbled together. Yours looks very professional. If you paint it black it will almost look factory. Keep up the great work I for one really appreciate all the pics and details of your build.