super1c
Super Moderator
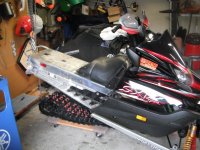
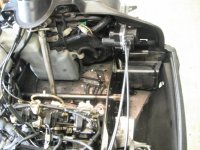
Well the summer project has started. I dont have all my parts yet and it will be slow going with this one but ya got to start somewhere. With nothing going on around here boredom got the best of me. Which usually means ill be spending too much money also! LOL! Quick rundown on project. I will be taking both my 04S and wifes 02 viper to 144". Will still be riding a lot of trail with some off trail mixed in now, 60/40ish.
---Will be using hartman 144" tunnel kit and brace with MTN apex bumpers
---Track USA tip up rail ext with a 1.352 cobra track
---New style apex/nyto snow flaps
---No studs so going with 9 tooth drivers
---C&A razor skis with bergstrom tripple points
---Boss seats with nytro tail light
---Skinz nytro xtx tunnel bags
---Side kick ice scratchers
---RSI flat bars with 7" risers (just for mine)
---Running board mod with cat rails (just for mine)
Im sure a few things will change as the project devolpes, but thats a pretty good start. I know this has been done a million times and nothing will be new but i had so much fun with the "father, daughter" working log i thought i'd do one for this. Plus its slow around here in the summer and will give us somthing to look at. LOL! Few pics of the teardown today.
Attachments

staggs65
Moderator
sounds like a good project. I'm going to be getting into the off-trail riding more this year too. It looks like so much fun, I just never really had a sled to really get far off trail before. where did you get the ohlins rear shock from? I knew the S sleds had them in the front but I thought they had non-rebuildable shocks in the skid.
super1c
Super Moderator
staggs65 said:sounds like a good project. I'm going to be getting into the off-trail riding more this year too. It looks like so much fun, I just never really had a sled to really get far off trail before. where did you get the ohlins rear shock from? I knew the S sleds had them in the front but I thought they had non-rebuildable shocks in the skid.
Yes it did come with the non rebuildable shocks in the rear. I got the ohlins here in the classifieds off a 03 rx-1. Had them rebuilt and revalved by carver and the improvement in ride was unreal. First year i had this sled with the old shocks was a kidney buster. Next with these was like riding on a couch. I could not believe the difference. Nice and smooth and lots of adjustment depending on the riding conditions. This is why im going to keep this skid with the ohlins and see how it goes before i make a change. I just got the wife into off trail a bit last year and she love it, but found out the 121's" just dont cut it. Ive done some u.p. riding before so always like off trail but had to wait for the wife to give me the all in. LOL! So ill see if i can get these sleds to work for what we want them for. Mostly groomed (not really groomed, beat to death gaylord trails) and any off trail adventure we get ourselves into.

Just thought of another pointer. Shoot me a Pm when you are in final mock up with that ext. before you rivet it on.
musselman
Active member
Cool Projects !") , if you have any more questions let me know.
, if you have any more questions let me know.
, if you have any more questions let me know.
super1c
Super Moderator
Thanks for the help so far guys! I hope they turn out as cool as they look in my head!!
Drop brackets are a nice addition if you are going to spend that much time off trail. Something you might want to think about.
super1c
Super Moderator
sasksrx said:Drop brackets are a nice addition if you are going to spend that much time off trail. Something you might want to think about.
Drop brackets are a good idea i havent really thought of yet. I will have to see how it sits as i get things back together.
super1c
Super Moderator
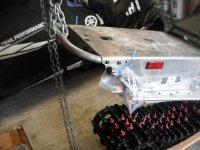
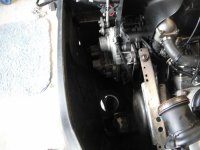
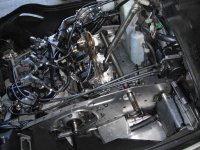
Got the drive pulled today and everything came apart really well. I might pull the primary and do a little cleaning before work tomorrow depending how motivated i get. I would really love to pull the engine and do a complete chassis clean but not up to tackling that this year with 2 sleds to long track. I sure hope my primary comes off easy. For some reason it was a bear to get off last year. I had to throw the whole book of tricks at it to get it to pop. Water, grease, tension overnight, heat, and finally got it with hydrolic fluid and a impact wrench. usually it just takes a little water and a few turns of the wrench. So here's to a little luck with getting it off. Few pic's of today.
Attachments
Last edited:
sleddineinar
VIP Member
Sweet! Once you start modding things it's hard to stop isn't it? Enjoy your project!
super1c
Super Moderator
sleddineinar said:Sweet! Once you start modding things it's hard to stop isn't it? Enjoy your project!
It seems to be that way, its a lot of fun for sure!! LOL!! I call it my therapy!!
super1c
Super Moderator
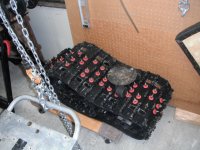
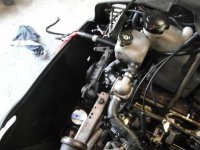
I got at the clutch this morning. To my delight the clutch popped right off. Went right for the grease trick once again and it was like a hot knife through butter. Not sure what happened last year? Maybe i over torqued it or somthing? Started a little cleaning and it came out pretty good for now. Not bad from where it started.
Attachments
super1c
Super Moderator
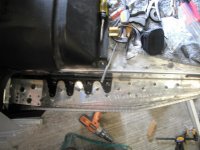
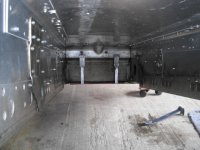
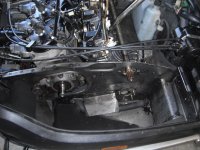
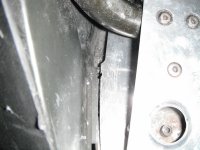
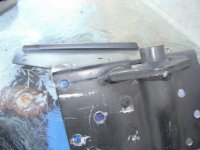
Well got some of the running board mod started today. Unrolling went great but the footwell part not so much. Messed up the bracket for the trailing arm under the rolled part. It wont let me post pic or edit in BTV's post so pic is added here and link to my problem in BTV's running board mod post. http://www.totallyamaha.net/forums/showthread.php?p=586787#post586787 The rest of it turned out really nice. Just have to knock out the small bumps with a body hammer and cut to angle i want when i get my rails.
Attachments
Last edited:
super1c
Super Moderator
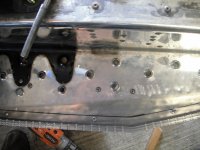
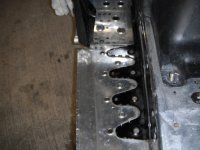
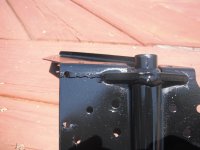
Well i went with a gut feeling and drilled out the bracket. Not a biggie at all. New drill bit and a sharp chisel and it was out in 1 beer after watching the tigers lose to the pirates and a bunch of beers. LOL! My neighbor is going to weld it up for me in the morning. So now just to find the right rivets so this lasts forever. Then i have to replace the darn bolt that just spun that holds the belly pan where you put your hood latch over. Had to drill the head off and remove the whole thing. OF COURSE i would. LOL!! So overall so far no harm no foul. I HOPE!!! Here is a pic of the real damage it did. And any repair help would be great other then the weld to help future folks!!
Attachments
staggs65
Moderator
you made the best choice by getting it welded. If you didnt have access to getting it welded or just didnt want to take it apart I was going to suggest riveting in a piece of angle to the upright and bottom to give it some strength back. another option for someone who cant get it welded but what your doing would be my first choice

staggs65 said:you made the best choice by getting it welded. If you didnt have access to getting it welded or just didnt want to take it apart I was going to suggest riveting in a piece of angle to the upright and bottom to give it some strength back. another option for someone who cant get it welded but what your doing would be my first choice
Right!!!
Looking good
super1c
Super Moderator
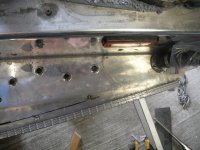
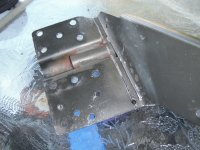
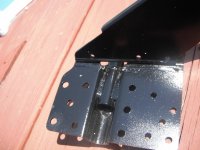
Well my buddy glen welded it up for me this afternoon. He is not an expert by any means per him but it looks great to me. I even got a free paint job. I need to learn how to weld, would be another great addition to the skill set and tools. Problem is by the time i learn everthing i want to ill be to old to work on sleds! LOL! Now to find the rivets. I found the part numbers in my tech manual so i should be able to just order them from dealer. Im checking with BTV to see if he can get them first. I know Ding had them to but he's a hard find this time of year. Here's a few pic's.
Attachments
staggs65
Moderator
if Scott doesnt have them Crewchief sells them through his company too.
sleddineinar
VIP Member
staggs65 said:if Scott doesnt have them Crewchief sells them through his company too.
DING sells them also.
super1c
Super Moderator
Got the running board almost done. It turned out way better then i expected. I did a few things different in the transition part from the top to the bottom at the footwell. Thanks to musselman and BTV this came together very nice. I really like these cat rails and at $18 a piece you cant beat it. Just a little smoothing out and a good polish and it will look factory. I am going to make a paper template for the other side to take a lot of the work out of it. Will do the same for the rail. When i do the other side i will take lots of step by step pic's for those still wanting to do this. It started out rough but ended up great.