
staggs65
Moderator
SX700triple said:I never would have expected to run into another TY member through Craigslist that's for sure! Once I'm finished getting that srv stripped down and I get the belly pan sides straightened out, it's game on! Hot or not! Looks like that machine got side swiped at one time. The right pan side was crinkled pretty good where it meets the running board.
We're everywhere. lol
xredneckf150x
New member
i like the sled, im looking forward to seeing it look newly upgraded..

I'm starting to find that out. I've met a real solid bunch of guys from this site. I couldn't say a single bad thing about any of them.staggs65 said:We're everywhere. lol
Thanks guy. Should start seeing some real progress pretty soon.xredneckf150x said:i like the sled, im looking forward to seeing it look newly upgraded..
Last edited:
xredneckf150x
New member
your welcome, Corey is the Name fellow yammy-man
I'm Rick, been on Yamaha's since I was 2. Had one ski doo and will never do that again.
xredneckf150x
New member
good to meet ya rick. same here the yammy i have now is the one i have been riding since 96, when my father bought it. ive owned a indy 500 an a jag 440. not a ski-doo snow sled yet but have never planned on it either. so right there with ya man
Alright, here we go... I'm going to do this build in the form of a how-to in case anyone else wants to tackle this job.
Step one, find parts. It's best to get a whole SRV (maybe with a blown motor or a roller chassis). The better its condition is, the easier the swap is.
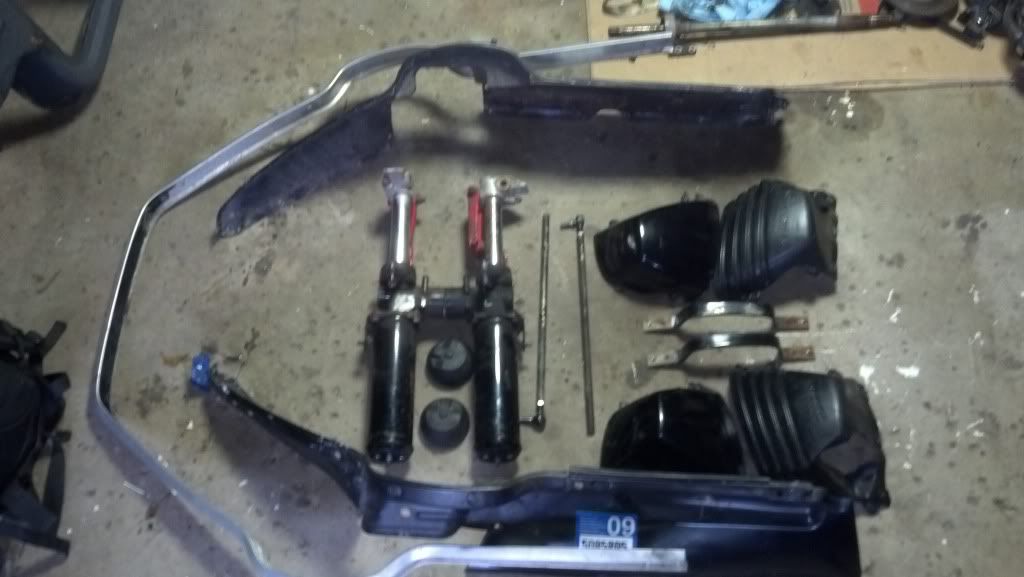
If you can't find one whole and decide to collect all of the necessary parts (good luck) here is what you will need;
-Complete strut assemblies; left and right
-frame stubs: MUST BE FROM AN SRV!!!
-steering tie rods
-front bumper
-hood stiffener brackets
-plastic strut covers: upper and lower
-belly pan sides: these are in two pieces per side riveted together with some brackets
-SRV hood is optional if you don't mind cutting the original SS or XLV hood. If you opt out of getting an SRV hood or your parts sled didn't come with one, PM me and I will send you a template with directions and dimensions to make your cuts.
Step two; make a mess.
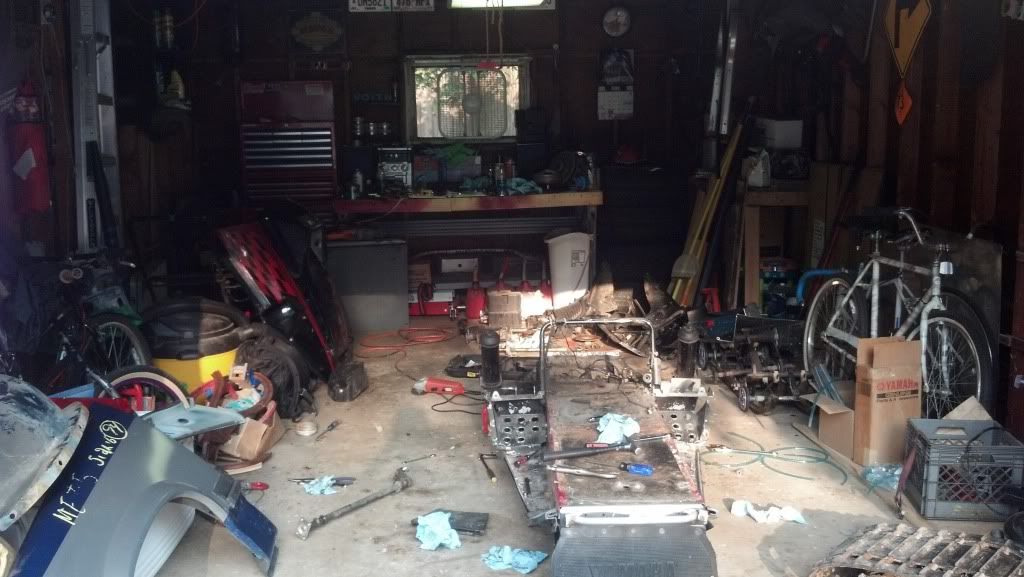
Step three; remove everything from your parts sled that you want to keep an everything you need for the swap. I always keep the hardware when I strip a sled out.
Step four; cut the stub ends off the SRV frame (you can swap tunnels and use the whole front frame section but that creates a ridiculous amount of extra work and requires more expensive tools. Not to mention the drive shaft is in a different location on the SRV which would require the chain case as well)
PTO side: cut as close to the gusset on the back side as possible
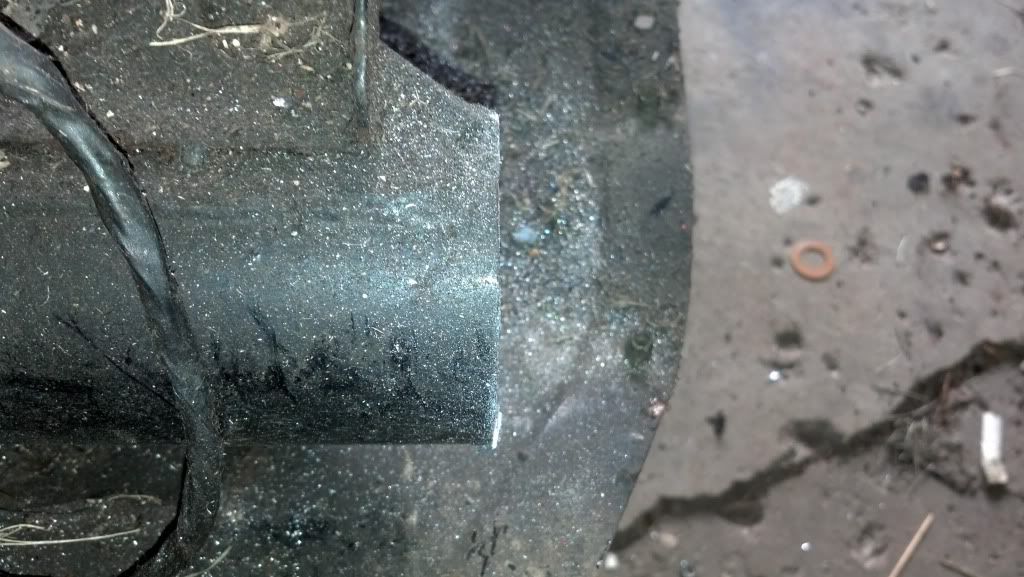
Mag side is the same as PTO. It is not necessary to cut the exhaust perch on the parts sled but will be on your good sled to aid in welding.
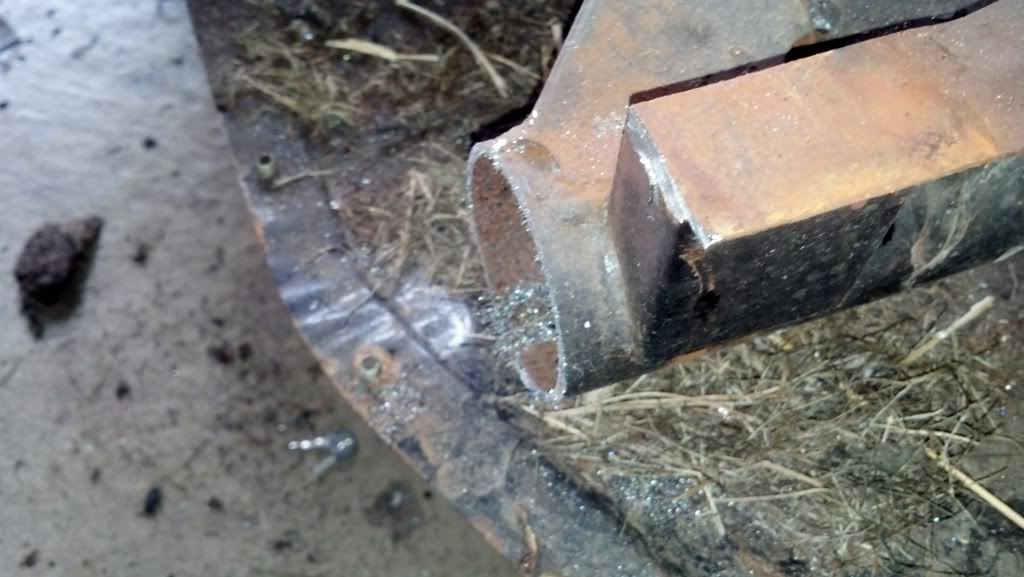
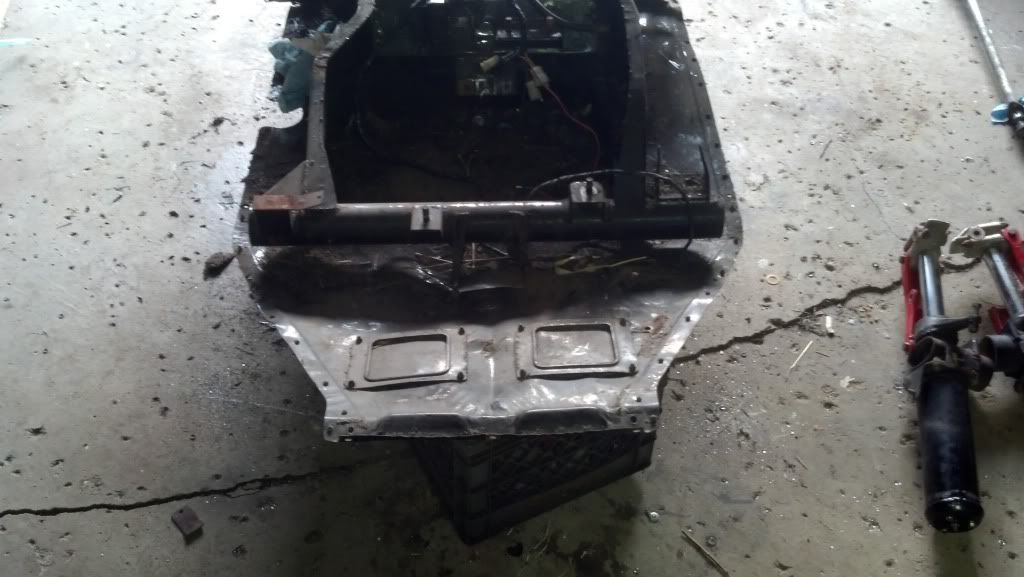
I made my cuts right next to the welds for the gussets on both sides. When you are done, this should be all that is left of the front end;
Stay tuned, more to come as things progress.
Step one, find parts. It's best to get a whole SRV (maybe with a blown motor or a roller chassis). The better its condition is, the easier the swap is.
If you can't find one whole and decide to collect all of the necessary parts (good luck) here is what you will need;
-Complete strut assemblies; left and right
-frame stubs: MUST BE FROM AN SRV!!!
-steering tie rods
-front bumper
-hood stiffener brackets
-plastic strut covers: upper and lower
-belly pan sides: these are in two pieces per side riveted together with some brackets
-SRV hood is optional if you don't mind cutting the original SS or XLV hood. If you opt out of getting an SRV hood or your parts sled didn't come with one, PM me and I will send you a template with directions and dimensions to make your cuts.
Step two; make a mess.
Step three; remove everything from your parts sled that you want to keep an everything you need for the swap. I always keep the hardware when I strip a sled out.
Step four; cut the stub ends off the SRV frame (you can swap tunnels and use the whole front frame section but that creates a ridiculous amount of extra work and requires more expensive tools. Not to mention the drive shaft is in a different location on the SRV which would require the chain case as well)
PTO side: cut as close to the gusset on the back side as possible
Mag side is the same as PTO. It is not necessary to cut the exhaust perch on the parts sled but will be on your good sled to aid in welding.
I made my cuts right next to the welds for the gussets on both sides. When you are done, this should be all that is left of the front end;
Stay tuned, more to come as things progress.
Last edited:
shaggyzr2
Active member
That project looks like fun!!
It is quite a bit of fun. I just realized how overwhelming the mess is in my tiny garage though. Two sleds worth of parts strewn all over the place.
Throttle Junkie35
New member
There is a good chance that it got hit sometime during its service since I know who was riding it. LOLSX700triple said:I never would have expected to run into another TY member through Craigslist that's for sure! Once I'm finished getting that srv stripped down and I get the belly pan sides straightened out, it's game on! Hot or not! Looks like that machine got side swiped at one time. The right pan side was crinkled pretty good where it meets the running board.
Throttle Junkie35
New member
I'd kill for your tiny garage. I think I have you beat in the mess department.SX700triple said:It is quite a bit of fun. I just realized how overwhelming the mess is in my tiny garage though. Two sleds worth of parts strewn all over the place.
!")
Vmax540
VIP Member
Might be helpful ?
http://www.vintagevmax.com/widening.htm
http://www.vintagevmax.com/widening.htm
Ha! You sure do but there are some real gems hiding in your mess. I can't believe how nice your srv is.Throttle Junkie35 said:I'd kill for your tiny garage. I think I have you beat in the mess department.
I've read that a couple times before. That's partially what turned me on to doing these swaps to begin with.Vmax540 said:Might be helpful ?
http://www.vintagevmax.com/widening.htm
Last edited:
Ok so I made some more progress on the SS yesterday. I decided to get the phazer skid cleaned up and gone through. I want to put it in before the struts get welded on so I can set the caster/camber at ride height.
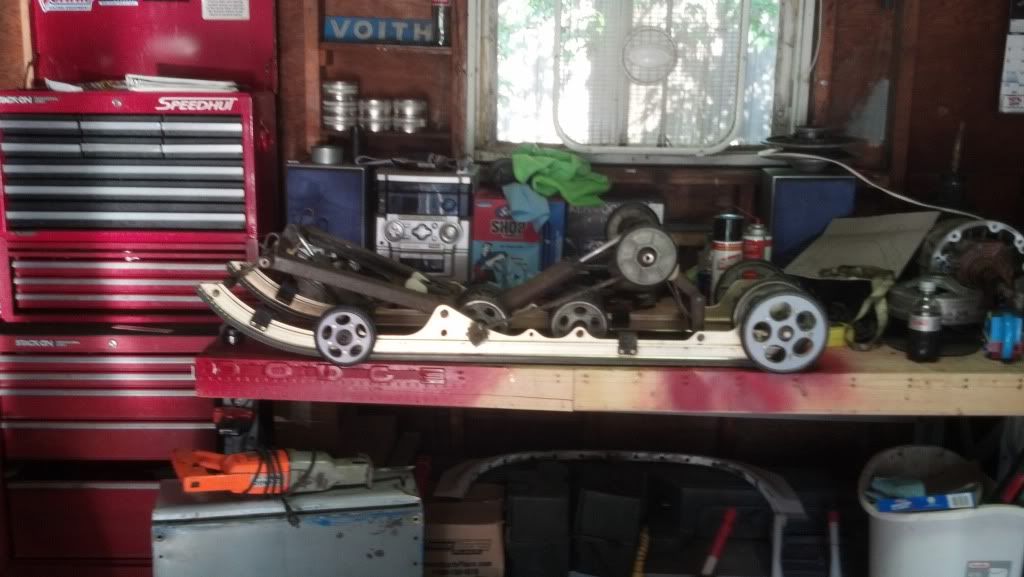
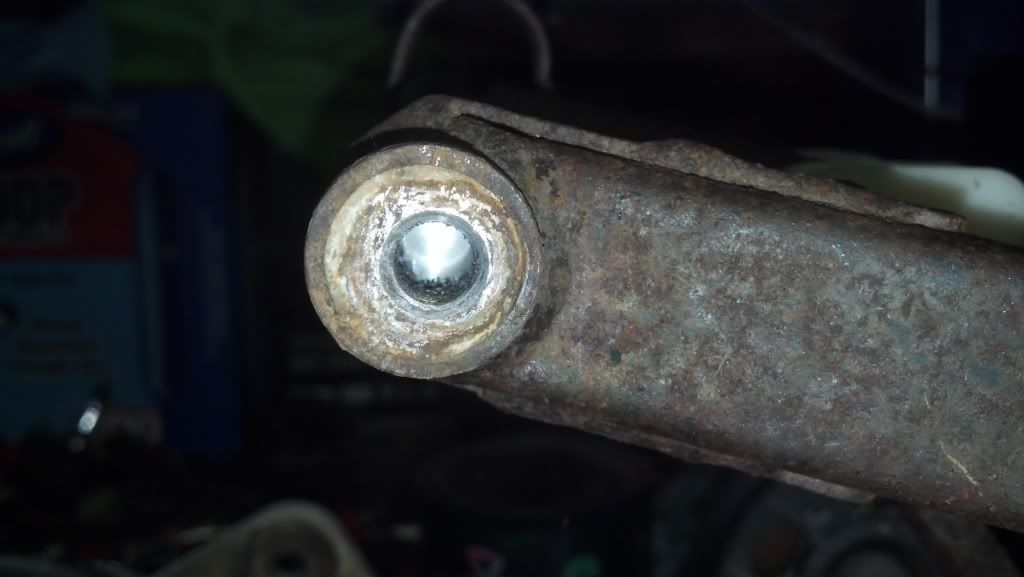
The skid had three stuck shafts in it. One aluminum (front arm) and two steel (rear arms). I stole the whole rear arm assembly off of a spare XLV skid I have that had free shafts and drilled out the aluminum shaft that was stuck up front. I replaced the aluminum shaft with the steel one from the XLV skid.
Got the entire sled tore down for cleaning and also took the time to lay out and drill my holes for the "new" skid. I'm not going to do any cosmetic stuff like painting and fixing cracks until the sled is mechanically sound so the skid looks ugly as sin.
Tomorrows attention goes immediately to finishing the rear skid install then I will power wash the chassis and continue on the front end.
Phazer II skid from JDviper, thanks again!
Stuck aluminum shaft. The tan area around the shaft on the left side is all corroded aluminum.
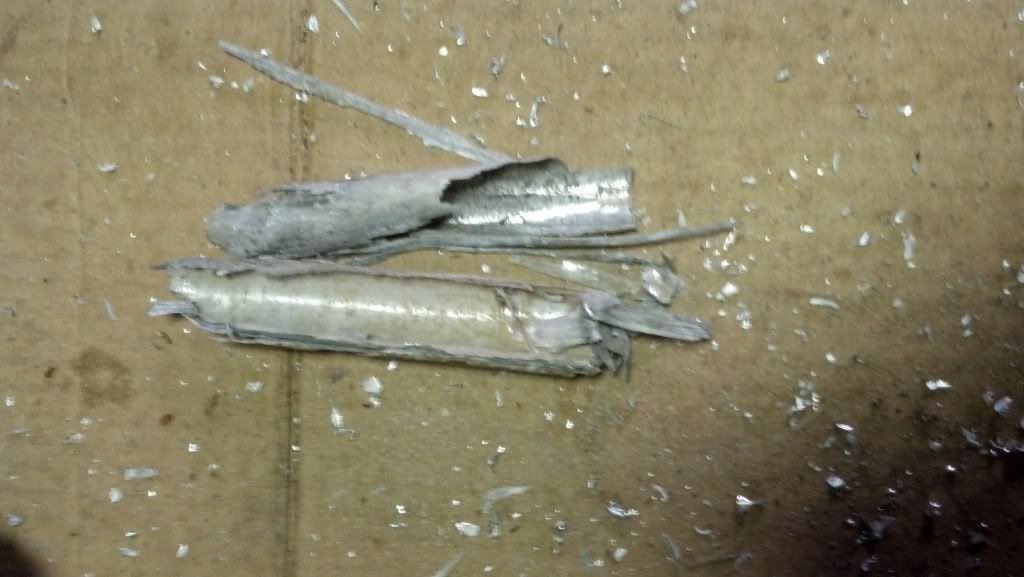
The remnants of the shaft after drilling it out. Sorry for the blurry pic!
Found this...
And this while removing things to pull the motor
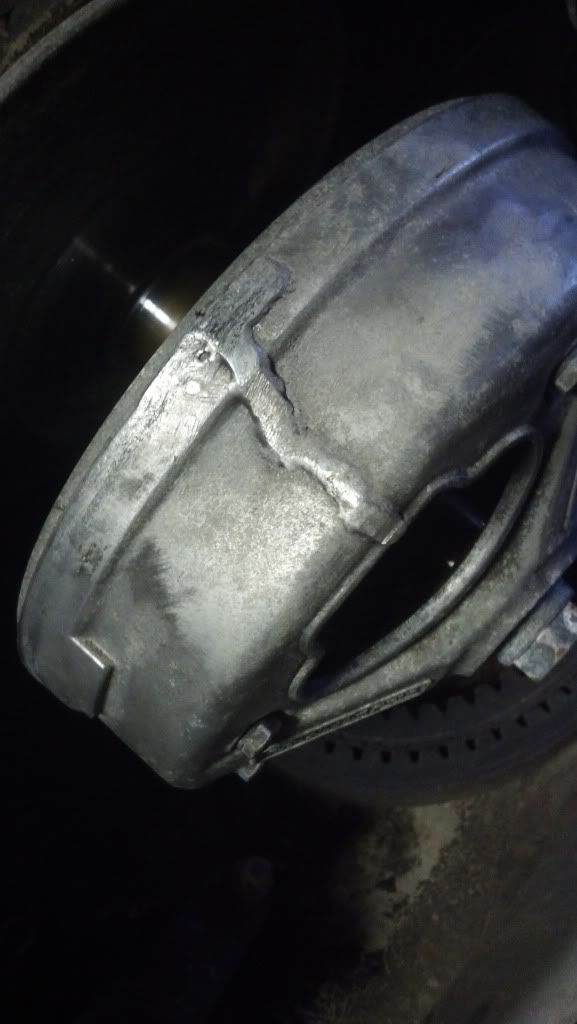
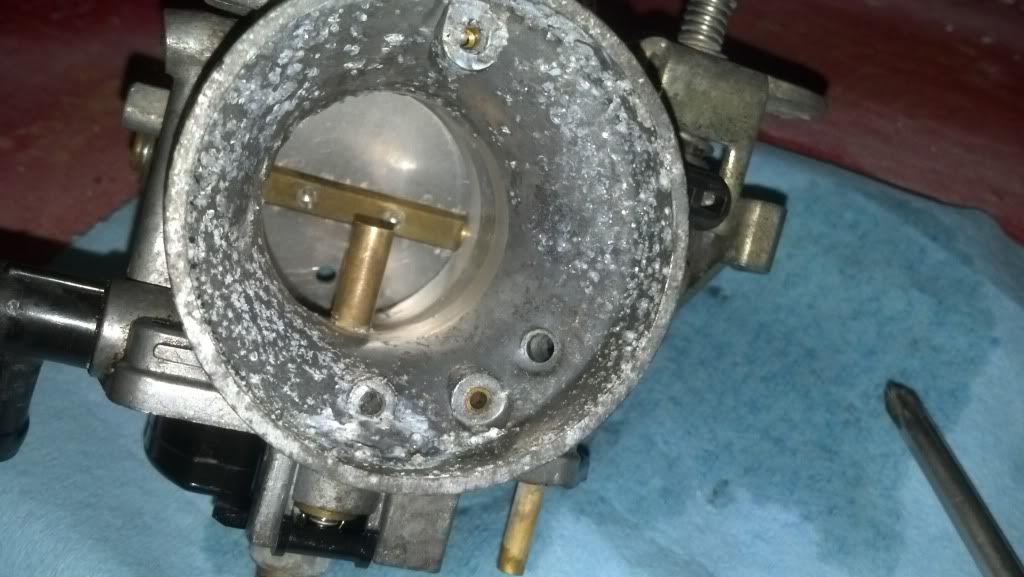
The carb didn't surprise me but the clutch made my stomach churn.. Ticking time bomb!
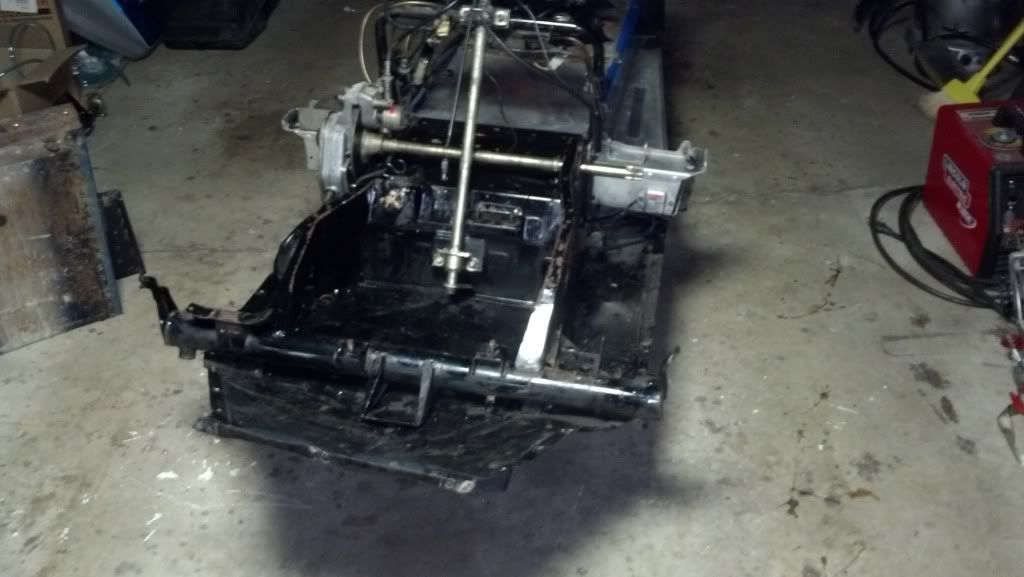
Motor is out... Tons of greasy stuff in the bottom of the pan. My empty plastic garbage can weighed about 20 lbs after I scraped the gunk out. The belly pan should look almost new all cleaned up!
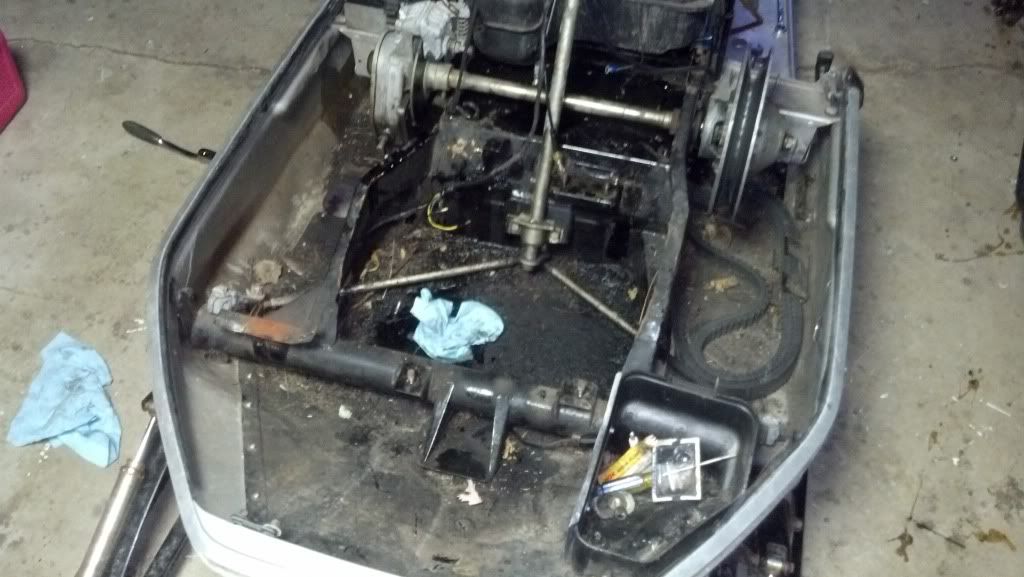
Not much more that a bare chassis
Hole lay out. The factory rear mounting brackets were only 1/8" off location compared to my measurements from the phazer so I'm going to try mounting it in them and see if anything binds.
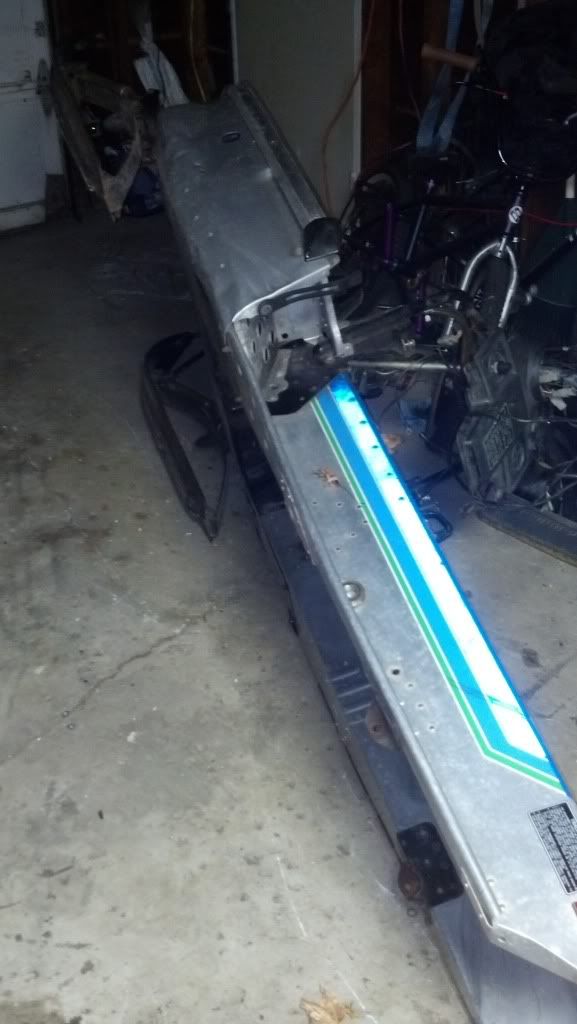
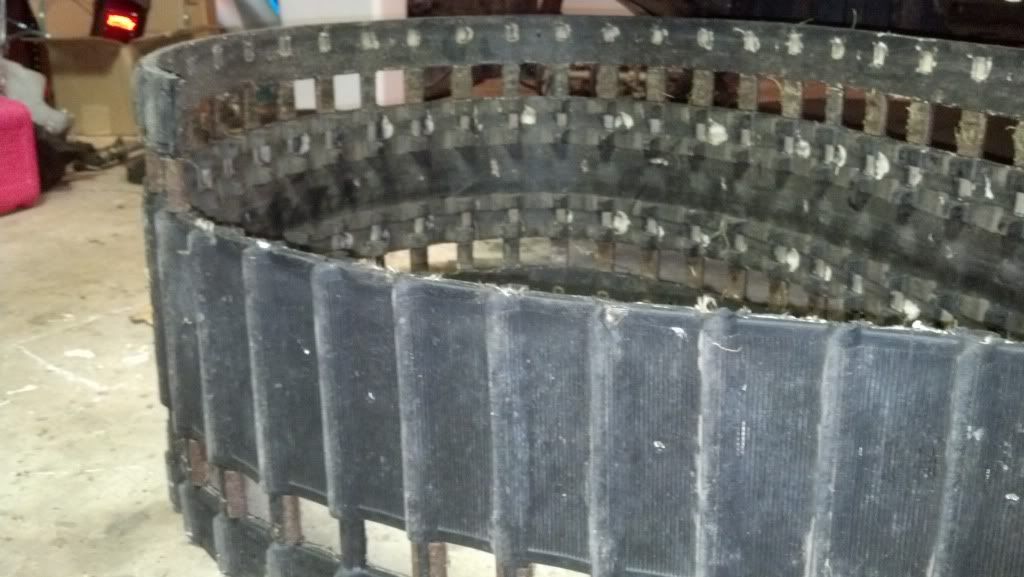
Anyone need a "slightly used" 116" track? Only missing about 10 lugs
The skid had three stuck shafts in it. One aluminum (front arm) and two steel (rear arms). I stole the whole rear arm assembly off of a spare XLV skid I have that had free shafts and drilled out the aluminum shaft that was stuck up front. I replaced the aluminum shaft with the steel one from the XLV skid.
Got the entire sled tore down for cleaning and also took the time to lay out and drill my holes for the "new" skid. I'm not going to do any cosmetic stuff like painting and fixing cracks until the sled is mechanically sound so the skid looks ugly as sin.
Tomorrows attention goes immediately to finishing the rear skid install then I will power wash the chassis and continue on the front end.
Phazer II skid from JDviper, thanks again!
Stuck aluminum shaft. The tan area around the shaft on the left side is all corroded aluminum.
The remnants of the shaft after drilling it out. Sorry for the blurry pic!
Found this...
And this while removing things to pull the motor
The carb didn't surprise me but the clutch made my stomach churn.. Ticking time bomb!
Motor is out... Tons of greasy stuff in the bottom of the pan. My empty plastic garbage can weighed about 20 lbs after I scraped the gunk out. The belly pan should look almost new all cleaned up!
Not much more that a bare chassis
Hole lay out. The factory rear mounting brackets were only 1/8" off location compared to my measurements from the phazer so I'm going to try mounting it in them and see if anything binds.
Anyone need a "slightly used" 116" track? Only missing about 10 lugs
Ok made a little more progress today.
Phazer II skid is in and moving freely. Had to wrestle it around all the rivets inside the tunnel up front which was a pain in the... Yeah.
Sooo continuing on the front end,
Step five; strip the receiving sled down in prep for its new front end.
-remove the seat, plastic "knee panels", gas tank and air box
-remove the hood
-remove the carb and oil tank
-remove the clutch guard and primary clutch
-pull the motor. This step is necessary to change the tie rods unless you decide to cut and extend the SS tie rods. Chances are your tie rod ends are sloppy anyways and need to be replaced so just do the dirty deed and pull the motor.
-remove the cdi as well as anything else that shouldn't get wet pending step six.
Step six is also optional but worth the time.
-Wheel the thing outside, degrease the engine bay and pressure wash it
Step seven; bring it back in and finish disassembly.
-remove the hood hinges and hold down straps for the rear
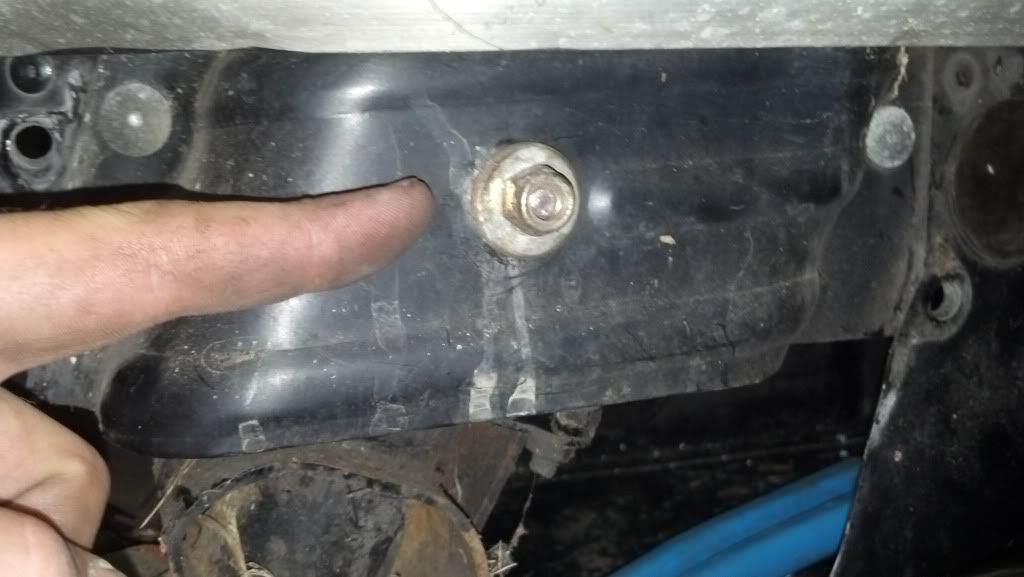
-remove the front bumper. **There is a rivet holding the bumper to the support bracket welded to the ends of the cross member** drill it out on both sides.
-loosen up the ski spindle on both sides. You will need to remove them to get the BP sides off.
-remove the belly pan sides. One side at a time with the sled tipped on its side. There are three rivets up the back by the foot wells and a dozen or so along the bottom of the belly pan. Remove the nut from the top of the spindle and pull it out. Pull the side off and slide the spindle/ski assembly back in. Reinstall the nut finger tight to hold it in. The reason for this is the sled wont stay up on its side without the ski to hold it.
-set the front of the sled up on something sturdy. I use a milk crate
-pull the spindle/ski assembly out of both sides
When you are done, you will be left with this
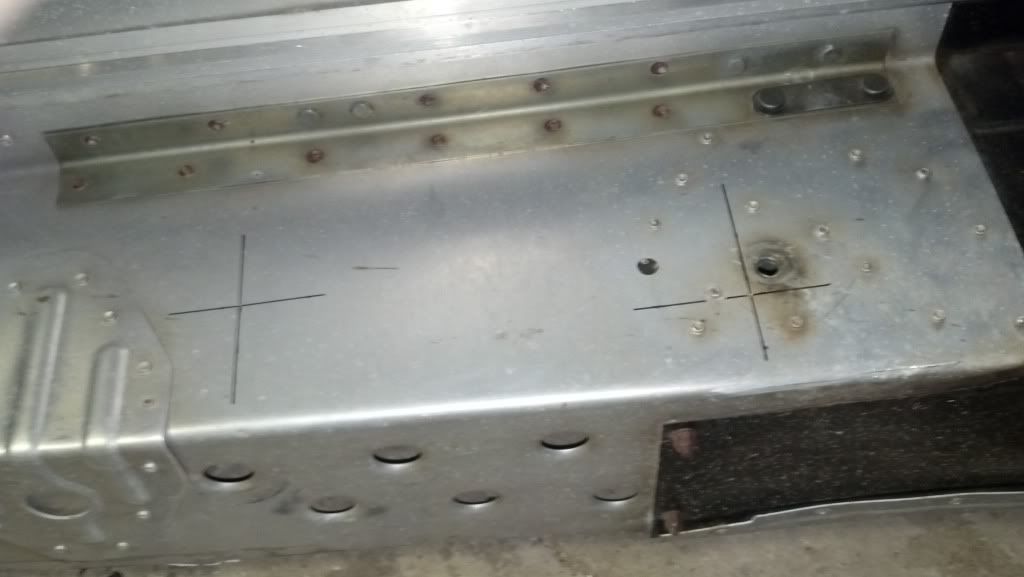
At this point it is a good idea to measure and mark out a center line on the crossmember tube.
Step eight; cut the stub ends off the frame. Same process as step 4. The only real difference between the SRV, SS and XLV bulkhead is the crossmember tube.
Step 9; you need to pound a sleeve into the cross member. The inside diameter of the crossmember is 2.18" or 2 3/16". For this I use 2.25" or 2 1/4" tube and cut a .25" slit up the side, squeeze the seam shut and weld it back up. This reduces the outside diameter of the tube to 2.18" and should be a fairly tight fit inside the crossmember.
You can also have some .25" wall, 2.25 OD tubing turned down to 2.18" at a machine shop. I've never had luck finding anything with a 2.18" OD at my steel suppliers. Maybe a piece of schedule 40 pipe will be close
You can also drill .375" or 3/8" holes through the cross member and srv stubs for plug welds but I don't see it necessary.
Your sleeves should be approximately 4 inches long. 3 inches inside the cross member and 1 inch inside the stub. Tack the sleeve to the cross member.
Step nine; pound the stub on to the sleeve. Use a chunk of 2x4 to avoid damage to the strut assembly. **there are grease zerks on each side in very vulnerable spots. Remove these before pounding the stubs on**.
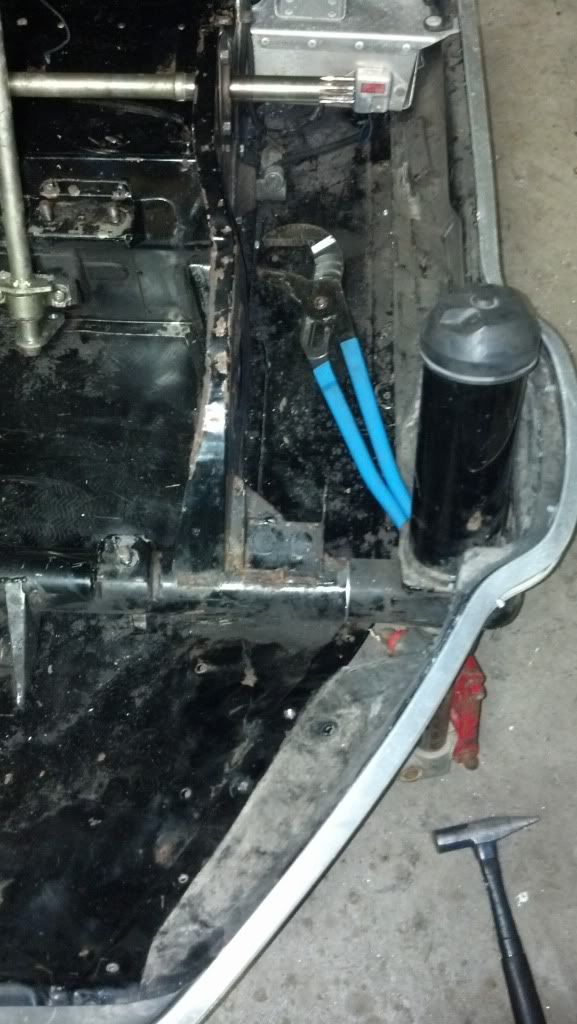
Do not tack the stub to the sleeve until you mock the belly pan sides up. There is a stud on the side of the strut can that goes through a hole in the bracket that attaches the two belly pan sides.
Step ten; mock up the belly pan sides.
-start with the front first
-pop a rivet through the holes next to the hinge bolt holes, then another as close to the strut opening as possible. Not all of the holes will line up but at least two will.
-with the rear of the pan side hanging loose, get the stud on the side of the strut can lined up with the hole in the bracket.
- now pop two rivets in the rear pan side piece. Again, not all holes will line up but at least two will.
-temporarily install the front bumper to add some rigidity. Two bolts up front and two at the rear by the foot wells.
-spin the nut onto the stud on the strut can hand tight
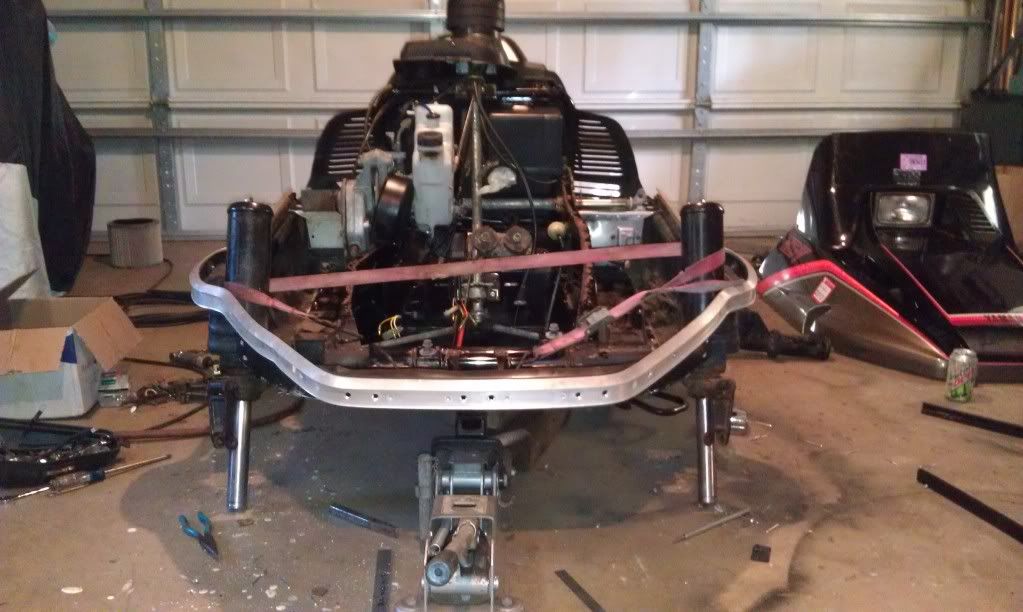
You should now have something like this except with both sides sleeved and ready to have caster/camber set. I've only got one done for now.
The next step will be on its way as soon as I get that far and have some pictures to accompany it. Get your angle finder out and blow the dust off!
Phazer II skid is in and moving freely. Had to wrestle it around all the rivets inside the tunnel up front which was a pain in the... Yeah.
Sooo continuing on the front end,
Step five; strip the receiving sled down in prep for its new front end.
-remove the seat, plastic "knee panels", gas tank and air box
-remove the hood
-remove the carb and oil tank
-remove the clutch guard and primary clutch
-pull the motor. This step is necessary to change the tie rods unless you decide to cut and extend the SS tie rods. Chances are your tie rod ends are sloppy anyways and need to be replaced so just do the dirty deed and pull the motor.
-remove the cdi as well as anything else that shouldn't get wet pending step six.
Step six is also optional but worth the time.
-Wheel the thing outside, degrease the engine bay and pressure wash it
Step seven; bring it back in and finish disassembly.
-remove the hood hinges and hold down straps for the rear
-remove the front bumper. **There is a rivet holding the bumper to the support bracket welded to the ends of the cross member** drill it out on both sides.
-loosen up the ski spindle on both sides. You will need to remove them to get the BP sides off.
-remove the belly pan sides. One side at a time with the sled tipped on its side. There are three rivets up the back by the foot wells and a dozen or so along the bottom of the belly pan. Remove the nut from the top of the spindle and pull it out. Pull the side off and slide the spindle/ski assembly back in. Reinstall the nut finger tight to hold it in. The reason for this is the sled wont stay up on its side without the ski to hold it.
-set the front of the sled up on something sturdy. I use a milk crate
-pull the spindle/ski assembly out of both sides
When you are done, you will be left with this
At this point it is a good idea to measure and mark out a center line on the crossmember tube.
Step eight; cut the stub ends off the frame. Same process as step 4. The only real difference between the SRV, SS and XLV bulkhead is the crossmember tube.
Step 9; you need to pound a sleeve into the cross member. The inside diameter of the crossmember is 2.18" or 2 3/16". For this I use 2.25" or 2 1/4" tube and cut a .25" slit up the side, squeeze the seam shut and weld it back up. This reduces the outside diameter of the tube to 2.18" and should be a fairly tight fit inside the crossmember.
You can also have some .25" wall, 2.25 OD tubing turned down to 2.18" at a machine shop. I've never had luck finding anything with a 2.18" OD at my steel suppliers. Maybe a piece of schedule 40 pipe will be close
You can also drill .375" or 3/8" holes through the cross member and srv stubs for plug welds but I don't see it necessary.
Your sleeves should be approximately 4 inches long. 3 inches inside the cross member and 1 inch inside the stub. Tack the sleeve to the cross member.
Step nine; pound the stub on to the sleeve. Use a chunk of 2x4 to avoid damage to the strut assembly. **there are grease zerks on each side in very vulnerable spots. Remove these before pounding the stubs on**.
Do not tack the stub to the sleeve until you mock the belly pan sides up. There is a stud on the side of the strut can that goes through a hole in the bracket that attaches the two belly pan sides.
Step ten; mock up the belly pan sides.
-start with the front first
-pop a rivet through the holes next to the hinge bolt holes, then another as close to the strut opening as possible. Not all of the holes will line up but at least two will.
-with the rear of the pan side hanging loose, get the stud on the side of the strut can lined up with the hole in the bracket.
- now pop two rivets in the rear pan side piece. Again, not all holes will line up but at least two will.
-temporarily install the front bumper to add some rigidity. Two bolts up front and two at the rear by the foot wells.
-spin the nut onto the stud on the strut can hand tight
You should now have something like this except with both sides sleeved and ready to have caster/camber set. I've only got one done for now.
The next step will be on its way as soon as I get that far and have some pictures to accompany it. Get your angle finder out and blow the dust off!
Last edited:
Ok this build is at a brief stand still... Stephanie had an episode with her MS that sent us to the ER for the better part of a day last weekend. She gets blinding headaches and numbness in her extremities which makes it hard for her to walk for a few days..
I have everything welded up and the belly pan is all riveted together. Bumper is bolted on and the hood is cut and fitted. Waiting on all of the bushings, bolts/nuts and shim kit for the scissors from Yamaha so I can get skis on and set the alignment. Then I can drop the motor back in and finish putting it back together. I think I'm going to run Motovan Uni-ski's on this one with WPS rail extensions and the 136 Cobra track off my XLV. The XLV will get a new Cobra as a replacement. Perfect track on this chassis IMO. The XLV happily skiffs along through 2-3 feet of fluff with ease.
More as things settle down at home.
Vmax540
VIP Member
Thoughts and prayers to the wife. Your write up will inspire many.... ")
Thanks. She's been a real trooper through all of it. I would never wish MS on anyone.
Alright, I'm going to attempt to finish the write up on the front end swap and continue with the build thread.
Step 11;
With both stubs pounded on the frame, its time to set the caster/camber on the struts. Now, the measurement from one end of the crossmember to the other should be 37 inches plus or minus 0.06". The center to center of the top of the struts (measured by the shock rod sticking out the top) should be right around 34 inches. I measure outside to outside as its easier and pulled a dimension of 34.25. Ultimately you want to keep these dimensions intact on the receiving sled and it will take some patience but is achievable.
I forgot to measure and mark the centerline of the crossmember this time around so I had to shoot in the dark and hope it all works out. I ended up at 37 inches total width exactly and 34.25 outside to outside on the shock rods
Now, the struts naturally want to tip down with the tops leaning outward with their own weight so put a ratchet strap around them to suck them in to your center to center dimension. Get it close and slide the strap up and down one side to fine tune it.
(I'll be stealing photos from the XLV build here and there)
Step 12;
Take your angle finder and set it on the tunnel right below the steering gate. Level the sled up side to side so you are at 0 degrees or 90. Which ever it shows.
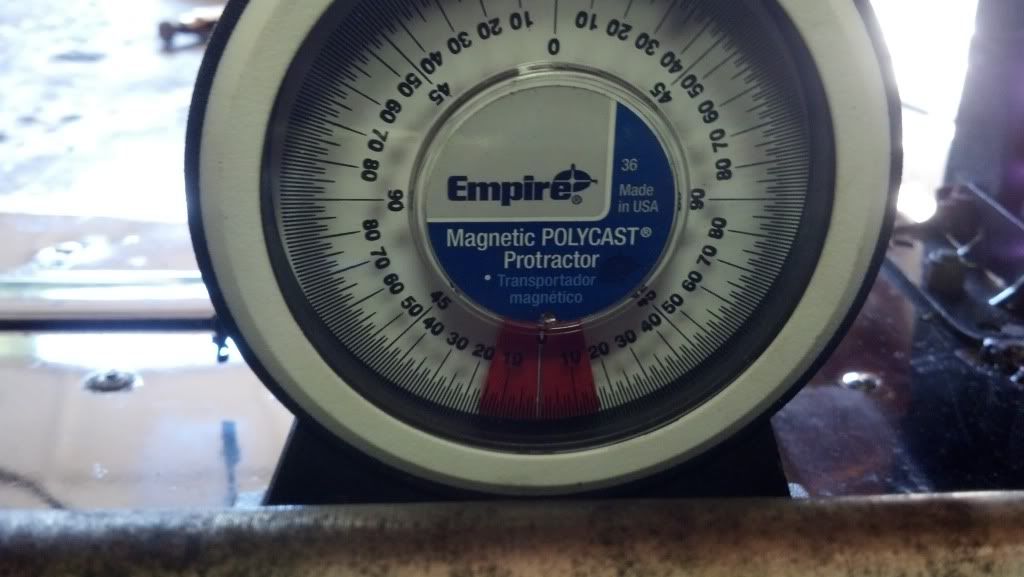
I got lucky again and it was dead nuts at zero just sitting on the crate.
Now turn your angle finder 90 degrees and record your reading there. I had 4 degrees but didn't take a pic.
Step 13;
Set your caster. -20 degrees from what you recorded at the tunnel is the ticket. I had -4 degrees at the tunnel so I set both sides at -24 degrees (tipped back).
PTO side:
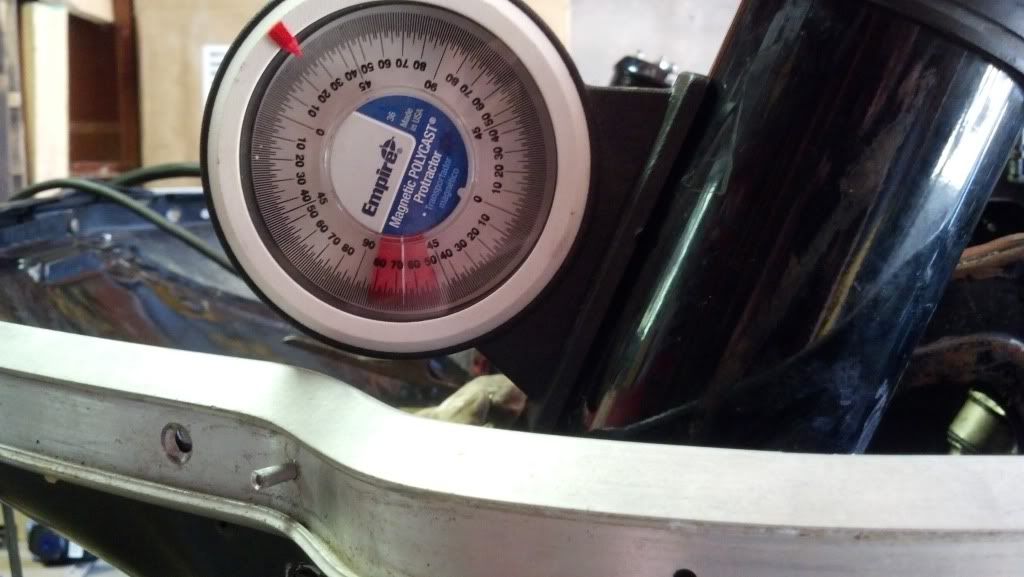
Mag side:
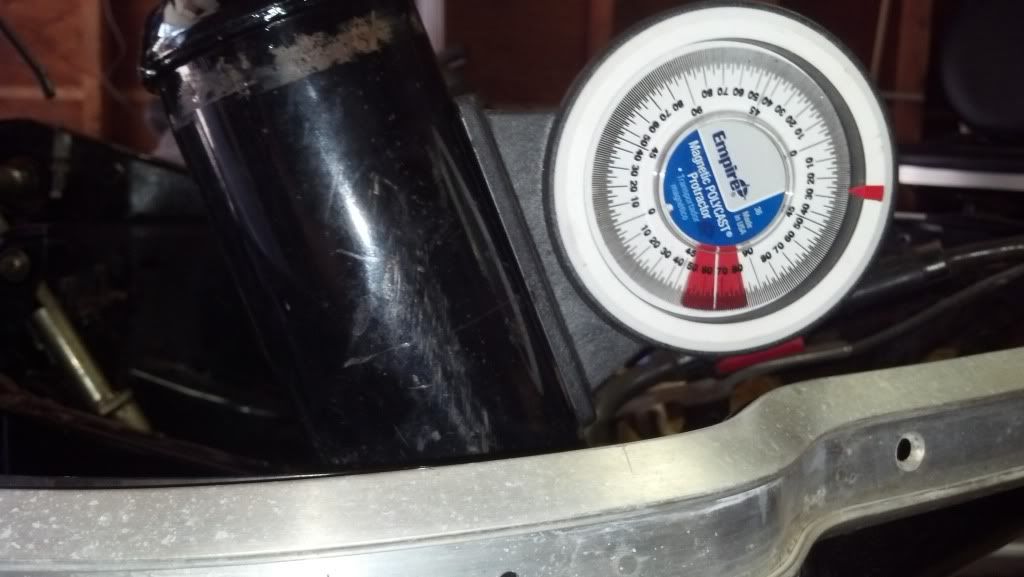
Tack weld the top of the cross member on both sides.
Step 14;
Set your camber. -0.5 degrees is the ticket for this one. You can tip the struts in a little more at the top for oval racing if you wish but I wouldn't recommend it for a trail rider.
This can be a tricky process as you need to retain your center to center distance within plus or minus 0.06" unless you decide to tip the struts in more. In that case you are in uncharted waters and on your own. I once again failed to get a picture of this part... Concentration is key!
Tack the bottom of the cross member at this time. Put a straight edge across the front of the cross member and stub end to make sure it is square and tack the cross member front and back.
Check all of your angles, make your fine adjustments and weld 'er up!
That's it.
The rest is cosmetic.. Cutting the hood, riveting panels back on and putting the sled back together.
I'll post more pics of the SS when I get back to working on it.
Step 11;
With both stubs pounded on the frame, its time to set the caster/camber on the struts. Now, the measurement from one end of the crossmember to the other should be 37 inches plus or minus 0.06". The center to center of the top of the struts (measured by the shock rod sticking out the top) should be right around 34 inches. I measure outside to outside as its easier and pulled a dimension of 34.25. Ultimately you want to keep these dimensions intact on the receiving sled and it will take some patience but is achievable.
I forgot to measure and mark the centerline of the crossmember this time around so I had to shoot in the dark and hope it all works out. I ended up at 37 inches total width exactly and 34.25 outside to outside on the shock rods
Now, the struts naturally want to tip down with the tops leaning outward with their own weight so put a ratchet strap around them to suck them in to your center to center dimension. Get it close and slide the strap up and down one side to fine tune it.
(I'll be stealing photos from the XLV build here and there)
Step 12;
Take your angle finder and set it on the tunnel right below the steering gate. Level the sled up side to side so you are at 0 degrees or 90. Which ever it shows.
I got lucky again and it was dead nuts at zero just sitting on the crate.
Now turn your angle finder 90 degrees and record your reading there. I had 4 degrees but didn't take a pic.
Step 13;
Set your caster. -20 degrees from what you recorded at the tunnel is the ticket. I had -4 degrees at the tunnel so I set both sides at -24 degrees (tipped back).
PTO side:
Mag side:
Tack weld the top of the cross member on both sides.
Step 14;
Set your camber. -0.5 degrees is the ticket for this one. You can tip the struts in a little more at the top for oval racing if you wish but I wouldn't recommend it for a trail rider.
This can be a tricky process as you need to retain your center to center distance within plus or minus 0.06" unless you decide to tip the struts in more. In that case you are in uncharted waters and on your own. I once again failed to get a picture of this part... Concentration is key!
Tack the bottom of the cross member at this time. Put a straight edge across the front of the cross member and stub end to make sure it is square and tack the cross member front and back.
Check all of your angles, make your fine adjustments and weld 'er up!
That's it.
The rest is cosmetic.. Cutting the hood, riveting panels back on and putting the sled back together.
I'll post more pics of the SS when I get back to working on it.

Looking really good... lots of fab work but very fun stuff.