drew24
New member
That looks pretty cool. How do those skis do on it? I have a 96 with steel skis and I can't get it to handle worth a sh!t.
A couple of bucks
VIP Member
Thanks Mr V & Japet. I actually wouldn't have picked that design but it wasn't up to me. It's my daughters sled so she went through all of the designs. I was figuring on something w/ a little pink on it. And I was thinking little, as she is NOT a girly girl. Nope....... a dark design of skulls with lots of depth.
A couple of bucks
VIP Member
They handle really well. I saw a add in the 7 DAY for $150 from a person w/ 1 post. Simmons Gen 1s that were used mabey 150 miles.That looks pretty cool. How do those skis do on it? I have a 96 with steel skis and I can't get it to handle worth a sh!t.
A couple of bucks
VIP Member
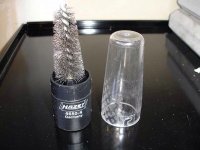
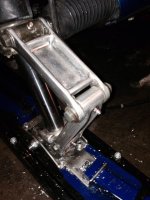
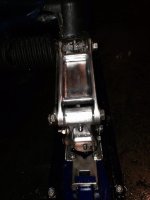
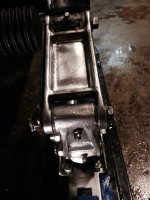
Here's the final outcome. I didn't think grease would harden into dust!! Stuck the male end of a battery terminal cleaner in the hole after the bushings were out. After some vigorous lovin to the area where the grease is suppost to be, I got about 1/4 cup of grease dust out of them. The upper pivot is made for putting a zerk in. It has a V like groove around the internal circumference.
Attachments
Last edited:
drew24
New member
That looks good. They should have put grease fittings in from the factory.
Trappermatt
New member
Cool mods
A couple of bucks
VIP Member
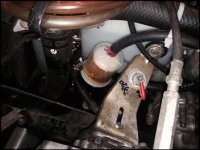
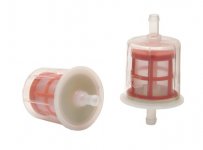
If I were to put the secondary filter on again, I'd go with a screened model instead of one with a paper element. Here's my thinking...... if the paper filter in the tank turns to sh!t because of water, chances are that the paper secondary filter will too. If the secondary filter is a screened one, it certainly is not going to turn to mush and I would be able to see cr@p in it as well. Something like this.
https://www.oreillyauto.com/detail/.../33972/4833158/1965/renault/caravelle?q=33972
This one is the screened sister filter from Wix. I installed their paper filter.
https://www.oreillyauto.com/detail/.../33972/4833158/1965/renault/caravelle?q=33972
This one is the screened sister filter from Wix. I installed their paper filter.
Attachments
Last edited:
A couple of bucks
VIP Member
This is what I used for the scissor/zerk mod.
6 1/4-28 straight(not tapered)shorty grease zerks, a #3 drill bit and a 1/4-28 tap. I also used a 5/16ths nut driver to install the zerk. You need some inward pressure to help w/ installing the zerk and a nut driver is just the ticket. Need to put RED Locktite on all threads. Female and male threads.
Install upper pivot spacer while installing the zerk. Even w/ the short threaded zerks, the upper one can be threaded in too far causing the end of the zerk to interfere w/the spacer. Just snug until it touches the spacer then back it off a hooch until the spacer slides freely side to side. Then let the RED Locktite set up overnight.
Last edited:
MountainMax
New member
I have a set of these ski's I want to put on my 1995 Vmax but if I cut the hole through the bracket and ski won't the snow come up through there? and what keeps it from flipping around with no rubber bushing under them?Put a set of barely used Simmons Gen 1s on. It took abit of modding but well worth it.
A couple of bucks
VIP Member
I just thought of something. Instead of milling the 1/8 or so inch out of the ski, couldn't one just shim up the mount to the desired height for clearance. You'ld still have to trim the inside of the mount out. Just use washers between the mount and the ski. I wish I would've thought of this before.
tippmannator
New member
I don't see why that wouldn't work....but would the separation between the mount and ski be cause for wear on bolt holes leading to play in your mount?
A couple of bucks
VIP Member
Shoot .... 

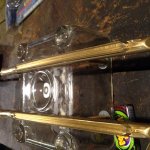
Nice build !I just got back both sets of pipes from the guy that does all my powder coating.
He has never ceramic coated anything. So he said he'd give it a go.
I buy the ceramic coating and he'd do it for free seing how I'm his guinee pig.
The coating was purchased at https://www.powderbuythepound.com
It is the satin one for $60.
They turned out good.

I can not find the satin high heat powdercoat you talking about ???
A couple of bucks
VIP Member
It was under the "ceramic exhaust coatings" tab. But I can no longer find the satin. I'd probably pick the "gray ice ceramic". I like the way that looks.
If someone does do the ceramic coating, block off all vents entering the hood. Ya don't want cold air blowing on that freshly painted pipe before it is FULLY cured. It will peel if ya don't tape them off. Just drive for an hour or until the temp light comes on. Then remove the tape from the vents.
If someone does do the ceramic coating, block off all vents entering the hood. Ya don't want cold air blowing on that freshly painted pipe before it is FULLY cured. It will peel if ya don't tape them off. Just drive for an hour or until the temp light comes on. Then remove the tape from the vents.
Last edited:
A couple of bucks
VIP Member
drew24
New member
That's good service.

super1c
Super Moderator
Bergstrom are awesome! Great husband and wife team, great customer care.
A couple of bucks
VIP Member
I talked to him for the better part of an hour. Very knowledgeable guy who doesn't mind giving you his 5 cent tour of his operation. It's a quick tour seeings how his place is about the size of a 4 car garage. It's really good to know that a WORLD CLASS product comes from a 3(?) person operation. Very very cool.
Last edited:
A couple of bucks
VIP Member
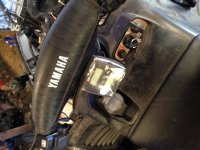
I got my Digitron installed and working. Tapped into the blue wire coming out of the stator.
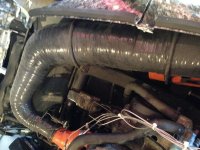
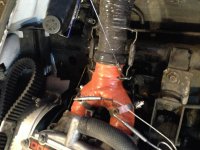
The pipe was already ceramic coated but I could not leave well enough alone. I wrapped it w/ header wrap and then put a wrapping of self-fusing,heat resistant silicon tape.
http://www.techflex.com/prod_sealtape.asp
The pipe was already ceramic coated but I could not leave well enough alone. I wrapped it w/ header wrap and then put a wrapping of self-fusing,heat resistant silicon tape.
http://www.techflex.com/prod_sealtape.asp
Attachments
Last edited:
A couple of bucks
VIP Member
By the way, when I was up at Bergstroms getting those 8" triple points, he said he's upset w/ Viper Dave. After Dave moved to Clinton he doesn't ever stop to visit now.


