
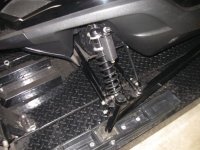
Got the skidframe all back together and squared up. If you know about loosening up all the bolts and getting the skidframe square to the ground so all your wheels touch at the same time and it will not only make your sled faster but it will wear your hyfax and such evenly. It is kinda crazy how far off they can be. I will try and insert the "how to" from the other darth viper build. I did the same exact thing on this one .
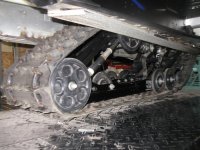
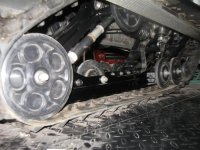
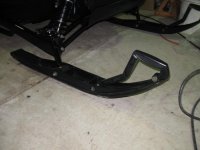
I had a couple pics of the skidframe completed sitting on the workbench but for some reason they are so dark you cant see it .
.
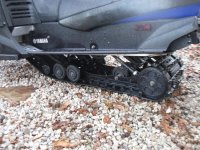
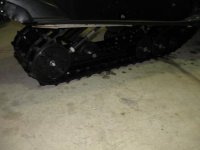
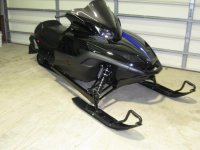
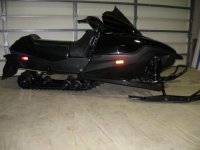
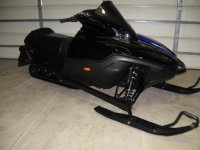
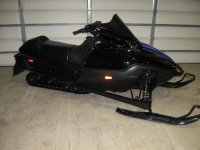
But heres a couple of the dusty skidframe back into the dusty chassis...lol, sorry its kind of ratty looking but it will be nice as soon as I give it a nice warm soapy bath.
As usual the camera flash picks up the differnt shades and makes it look strange but its all super black.
I had a couple pics of the skidframe completed sitting on the workbench but for some reason they are so dark you cant see it
. But heres a couple of the dusty skidframe back into the dusty chassis...lol, sorry its kind of ratty looking but it will be nice as soon as I give it a nice warm soapy bath.
As usual the camera flash picks up the differnt shades and makes it look strange but its all super black.
Attachments
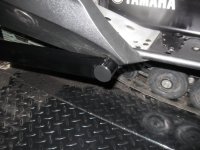
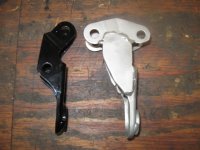
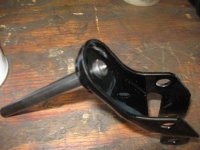
I found a set of "new" old stock yamaha trailing arm caps for the sled, they are the plastic pop in ones, they finish off the trailing arm. They are nice and shiny black match the tr. arm well, except the flash makes them look weird???
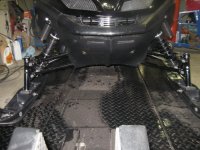
Got the apex skis on and the only thing left to do to the sled now is finish bolting up the front shocks and making a spacer for the tie rod tube so it doesnt rub the bulkhead. I had to modify the shock brackets to allow the canister on the shocks not to hit the bellypan. I will post a couple pics of them tommarrow after I get them painted and ready to go back on.
Its getting really close to comin off the lift and heading straight to the hose for a bath and a wax job! Then it will look like it should!
List of things to finish before completed:
1.) finsh up front shock brackets-tierod tube spacers
2.) stud the track
3.) install new black hyfax
4.) install antifreeze and gas
5.) start it up, check powervalve adjustment,track tension, test clutching set up...........!")

looking at it in these pics,what a pig pen dusty thing....
Got the apex skis on and the only thing left to do to the sled now is finish bolting up the front shocks and making a spacer for the tie rod tube so it doesnt rub the bulkhead. I had to modify the shock brackets to allow the canister on the shocks not to hit the bellypan. I will post a couple pics of them tommarrow after I get them painted and ready to go back on.
Its getting really close to comin off the lift and heading straight to the hose for a bath and a wax job! Then it will look like it should!
List of things to finish before completed:
1.) finsh up front shock brackets-tierod tube spacers
2.) stud the track
3.) install new black hyfax
4.) install antifreeze and gas
5.) start it up, check powervalve adjustment,track tension, test clutching set up...........
looking at it in these pics,what a pig pen dusty thing....
Attachments

yamyrider
Active member
Don, your work in amazing. Your sleds are incredible and so sweet looking. I would love to be able to spend time in your work shop to learn from a master.
Sled looks awesome.
Sled looks awesome.
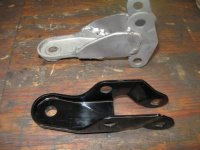
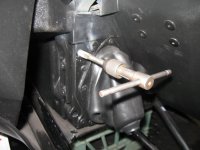
I got the front all done tonight and Darth rolled off the lift! Here is what I did to the shock brackets, I cut them apart and made new sides and welded them up inside and outside. The shocks needed less angle and the adjuster knobs were too close to the bellypan,they now will clear even with suspension bottomed out.
Will still need to shorten the swaybar links and add a spacer to the tie rod end to keep the steering tubes off the bulkhead edge.
Also showed a pic of how you attach the brackets to the bulkhead. I first used a transfer punch to locate the center of the hole, then drilled and tapped for a 10mm bolt.
Attachments
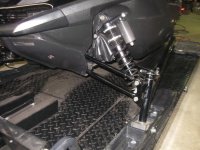
This is how the shocks look installed finally. Seems to go thru the travel very smoothly, I am sure its going to take a few try's to get it adjusted to where I will like it as the springs and valving will be quite differnt from what these shocks came off of to this sled.
It rolls so easy you can push the sled across the floor with 1 hand on the bumper(no skags on it yet and belt off) but it rolls nice..............

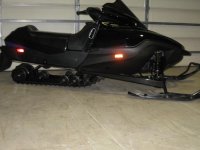
BATH TIME....... this weekend then outside for some pics!!!
. Seems to go thru the travel very smoothly, I am sure its going to take a few try's to get it adjusted to where I will like it as the springs and valving will be quite differnt from what these shocks came off of to this sled.It rolls so easy you can push the sled across the floor with 1 hand on the bumper(no skags on it yet and belt off) but it rolls nice..............
BATH TIME....... this weekend then outside for some pics!!!
Attachments
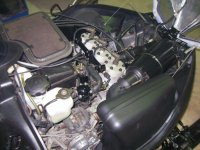
One last thing before I fire it up and test it, the heads were too "bling, bling" and didnt look right being polished aluminum, so I took them to the bead blast cabinet and dulled them down to match the other alum. parts, after all Darth Vader doesnt have chrome or polished aluminum on his stuff!
I also bead blasted the head bolts and painted them satin black.
Gonna trim the mega power domes a tad in the morning and ready to install and start him up!
Sorry I keep jumping around and changing things in this build thread,but I sit and look at it then change my mind....
I also bead blasted the head bolts and painted them satin black.
Gonna trim the mega power domes a tad in the morning and ready to install and start him up!
Sorry I keep jumping around and changing things in this build thread,but I sit and look at it then change my mind....
Attachments
03viperguy
Moderator
looks AWESOME! gotta feel good to have it this close to completion!
looks AWESOME! gotta feel good to have it this close to completion!
Yep, its been a long haul, not because it was a big job but merely because I just dont have time to work on my own stuff, too busy with everyone elses stuff. Thats why you see alot of the post done at the wee hours of the morning. Just have to stay up and get stuff done or it just sits and sits and collects LOTS of dust.....LOL!
Thanx for the compliments!
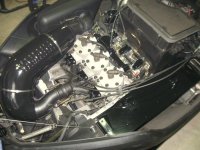
couple pics of engine bay...
Attachments
Last edited:

staggs65
Moderator
Looks good Don. But I liked it better when you weren't working on it, now I feel the need to actually get something done on mine. lol
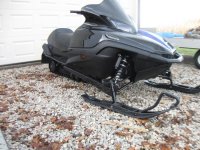
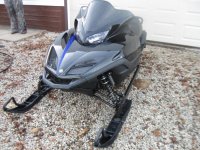
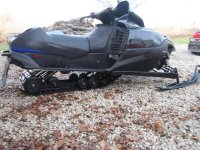
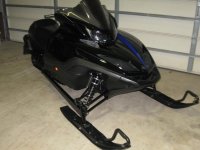
back inside wiped off, you cant see much in a pic but its all black and evil looking!
click on the pics they get bigger, sorry I am obviously not a good picture taker...lol
click on the pics they get bigger, sorry I am obviously not a good picture taker...lol
Attachments
Last edited:
chris700readhead
Member
Looks great don.
nelsonhouse
Member
have you raced the new 2014 viper?
have you raced the new 2014 viper?
no, I have not seen anyone around here yet with one. I will do so if I see one and ask him/her for a friendly little drag.....lol
t-rav
New member
Great job don that is one beautiful unit
staggs65
Moderator
You get this beast out for a test run yet or what?
mattyg1405
New member
Nice job don !!! You just gave me the motivation I needed...
J
jaydougempire
Guest

i thought my viper was murdered out. nice job man its beautiful
I have this feeling this sled is gonna be one of those things where, its never done....I have not even rode the sled yet and am changing things still...
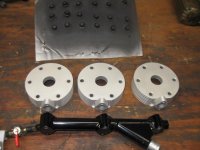
I bought a set of new yamaha 2012 apex ski loops and installed them on the ski's. I had to machine them a little bit on the bridgeport as they are a tad bit wider on the rear stem. I think they look better being more squared off and seem to match the front bumper nice. Now the ski's dont look like the same ones everyone else has.
I also bought a yamaha mono skidframe for the sled. I am keeping it a 121. I bought the skidframe minus the electric shock for a great price, so I have to now decide wether to put in the standard manual adjust shock or go with a electric shock and aftermarket controller, or go with a fox mega float........hmmm.
I bought a manual controller set up off evil bay and will wait till it comes in and see if its gonna work with the running board braces I have on the sled.
Looks like Amato srx is gonna have to do some more black powdercoating yet...lol
Attachments
Whenever u r ready don I will spray them up nice. U will like the mono.