Nice shop by the way. Find out if they need any detailing done. Thats what I do! (Specialize in stairs and railings!) 

Good evening!
familyman, do you ship stairs internationally? . (just wondering hehe, since the shop is in Norway). Do you fabricate them by the way?.
My friend called med 11.00 this morning and told me that he had welded it . He had removed all the "bad" weld, the weld was full of air bubbles and cracks.
This is how it looks now:
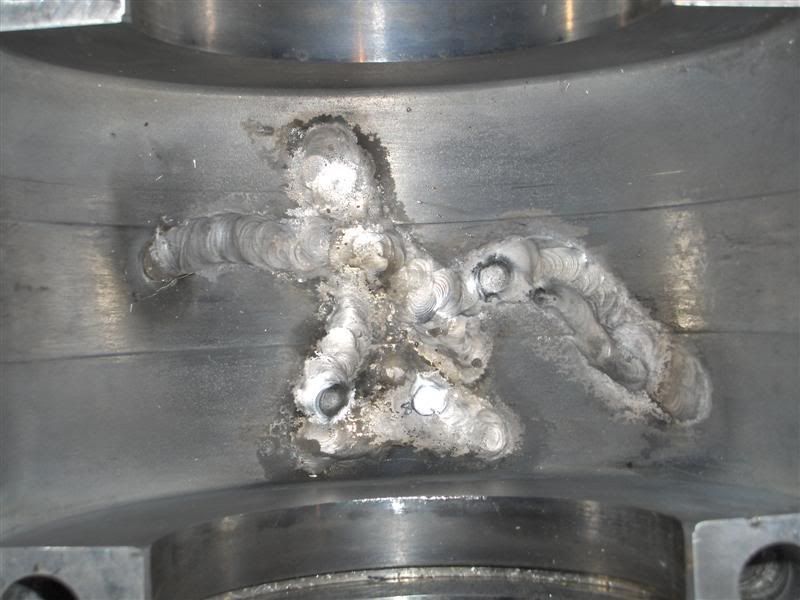
I will have to grind of some weld because I think the crank will hit it, but a little grinding wount hurt .
.
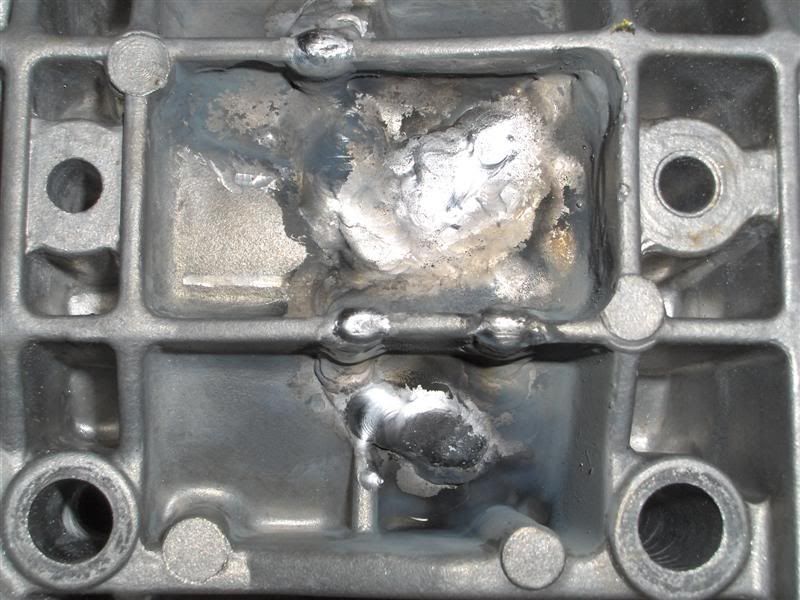
The outside, I think it looks very good, impressed by how nice he got the weld in the "fins" that sticks up.
Wellwell going to make another attempt on the rebuild tomorrow morning.
Gees weather report sais it will be nice weather this weekend, today I got 40liters of gas for my SRX. Hope all of them will be gone by the end of this weekend .
.
familyman, do you ship stairs internationally?
 . (just wondering hehe, since the shop is in Norway). Do you fabricate them by the way?.
My friend called med 11.00 this morning and told me that he had welded it
 . He had removed all the "bad" weld, the weld was full of air bubbles and cracks.
 This is how it looks now:

I will have to grind of some weld because I think the crank will hit it, but a little grinding wount hurt
 .
.
The outside, I think it looks very good, impressed by how nice he got the weld in the "fins" that sticks up.
Wellwell going to make another attempt on the rebuild tomorrow morning.
Gees weather report sais it will be nice weather this weekend, today I got 40liters of gas for my SRX. Hope all of them will be gone by the end of this weekend
 .
.That is a much better welding job than the previous one. I was going to mention that the first one looked porous, but you already found that out.
You will want to grind the inside as you noted to keep the airflow consistent.
You will want to grind the inside as you noted to keep the airflow consistent.
Ding, yeah it`s much better. I have a tendency to have too much "faith" in things done by other people, mostly because I don`t want to disappoint them, but in this case the welder did the best he could with the wrong equipment since he didn`t have the right electrodes to use with TIG welding so I guess he used normal MIG welding instead.
Oh ding is your avatar Johnny Skeptical ?.
Cool guy
Oh ding is your avatar Johnny Skeptical ?.
Cool guy

bluewho
Active member
Looks like john dont it?? I wonder what he is thinking shure has a puzzled look on his face !! Like is it going to snow or were is my wife?ha funny KIMOAJ there is a pik of a guy that looks like you in the dog pile forum.Weld looks alot better by the way.
03viperguy
Moderator
now thats a weld you can hang your hat on  (that means you can trust it, in case I am a wierd NH guy with wierd NH guy sayings
  )
)
 (that means you can trust it, in case I am a wierd NH guy with wierd NH guy sayings
  )
)Well this is what I would do. Sand out those welds on the insides until they are flush and smooth. Double check that crack and make sure there is weld on the outside that seals it up.
Looking good!
(I prepare shop drawings...working drawings for shops like in your picture to build things!)
Looking good!
(I prepare shop drawings...working drawings for shops like in your picture to build things!)
Hi guys ! Thanks for all the replies
bluewho: It mist be John.. cool guy.. but I guess we should hate him since he left the smokers.. but we all know that both smokers and 4strokes rules, as long as they are Yamaha. What, who looks like me??:
03viperguy, yeah much better weld, if you put some dynamite inside the case and blow it to hell, I bet the welded area will be the only one that survies, hehe.
tomseal6, thanks for paying attention but it was only in the picture, no crack in reallife.
Familyman, yes I tried to do as you said, but it wasn`t easy. I didn`t think that I would need to remove that much of the weld, but it turned out that I had to remove all the excessive weld on the inside, the crank hit it.
I started working 07.45, my mum had worked night shift and my workshop is just below her bedroom, but I just couldnt wait so I started grinding with my Dremel multitool, however it didn`t take long before all the grinding discs were worn out. So I tried some different grinding devices for my electric drille, but non of them worked good. The only thing that worked was to use a normal metal bore (bor, ?) and use high rews on the drill. The bad side was that the surface became very rough, but I figured it was more important to get the "obstacles" out of the way, I doubt it will affect the gas/air flow in the crankcase. I spent about 4 hours on the grinding, sounds wierd but the time flew since I didn`t have the right tools.
Here`s a picture of the crankcase after removing the welds:
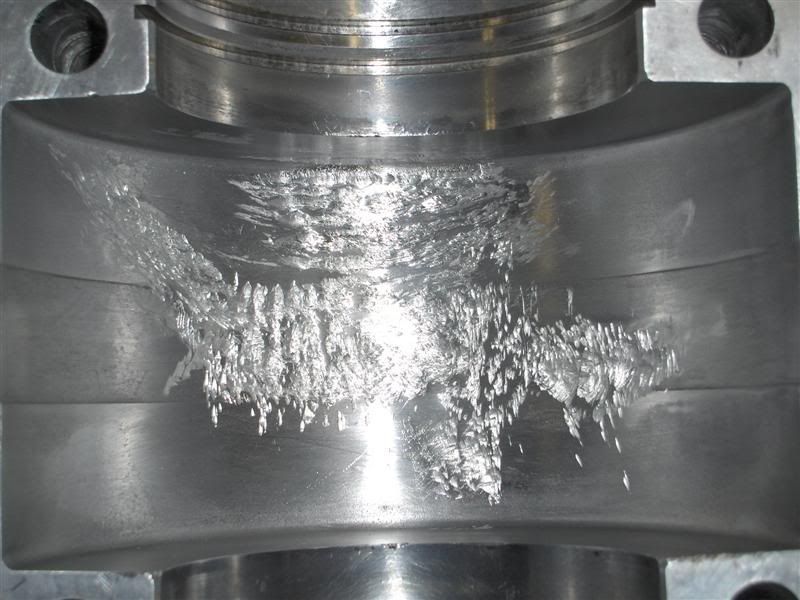
PS, before sanding, looked somewhat better after sanding, forgot to shot a picture.
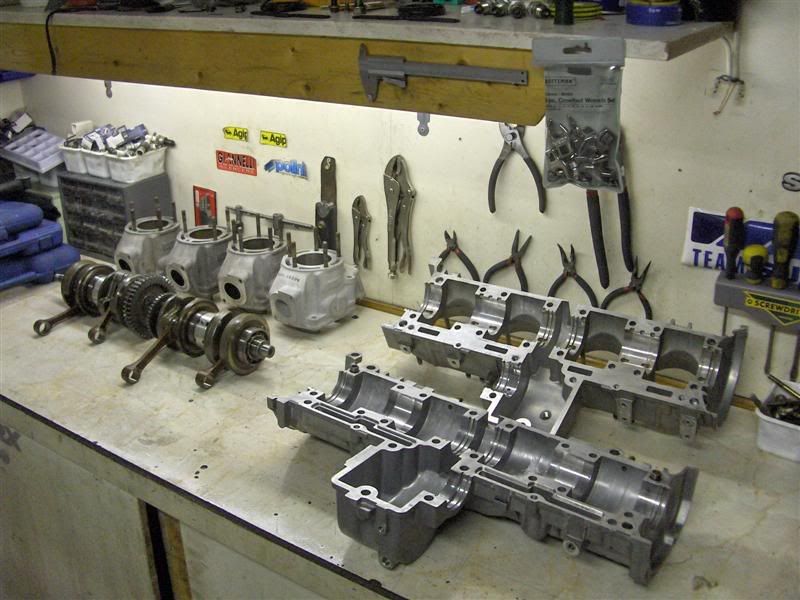
Finally everythings ready to be put together.
I spent half an hour cleaning the crankshaft, used a spray bottle with degreaser solvent and compressed air + a brush, I repeated the procedure until metal debris stopped showing up on the paper I had under the crank.
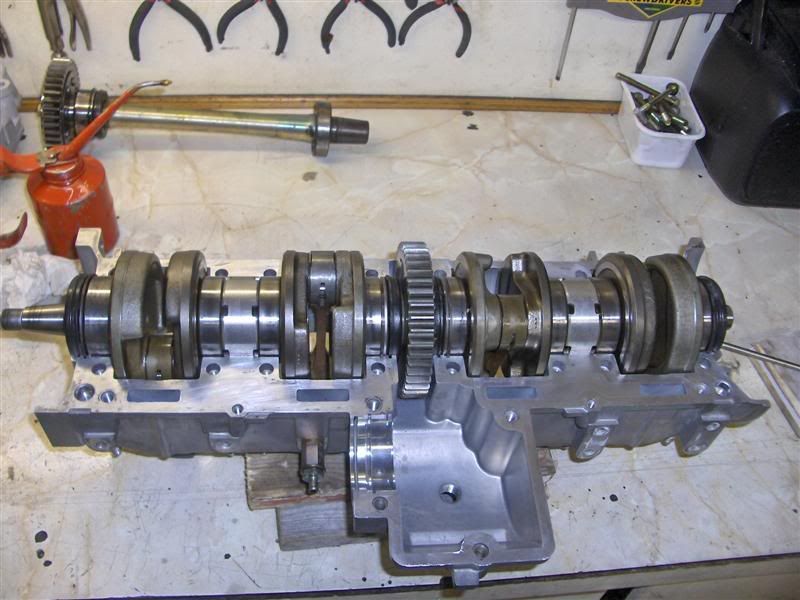
Crank installed

bluewho: It mist be John.. cool guy.. but I guess we should hate him since he left the smokers.. but we all know that both smokers and 4strokes rules, as long as they are Yamaha. What, who looks like me??:
03viperguy, yeah much better weld, if you put some dynamite inside the case and blow it to hell, I bet the welded area will be the only one that survies, hehe.
tomseal6, thanks for paying attention but it was only in the picture, no crack in reallife.
Familyman, yes I tried to do as you said, but it wasn`t easy. I didn`t think that I would need to remove that much of the weld, but it turned out that I had to remove all the excessive weld on the inside, the crank hit it.
I started working 07.45, my mum had worked night shift and my workshop is just below her bedroom, but I just couldnt wait so I started grinding with my Dremel multitool, however it didn`t take long before all the grinding discs were worn out. So I tried some different grinding devices for my electric drille, but non of them worked good. The only thing that worked was to use a normal metal bore (bor, ?) and use high rews on the drill. The bad side was that the surface became very rough, but I figured it was more important to get the "obstacles" out of the way, I doubt it will affect the gas/air flow in the crankcase. I spent about 4 hours on the grinding, sounds wierd but the time flew since I didn`t have the right tools.
Here`s a picture of the crankcase after removing the welds:

PS, before sanding, looked somewhat better after sanding, forgot to shot a picture.

Finally everythings ready to be put together.
I spent half an hour cleaning the crankshaft, used a spray bottle with degreaser solvent and compressed air + a brush, I repeated the procedure until metal debris stopped showing up on the paper I had under the crank.

Crank installed
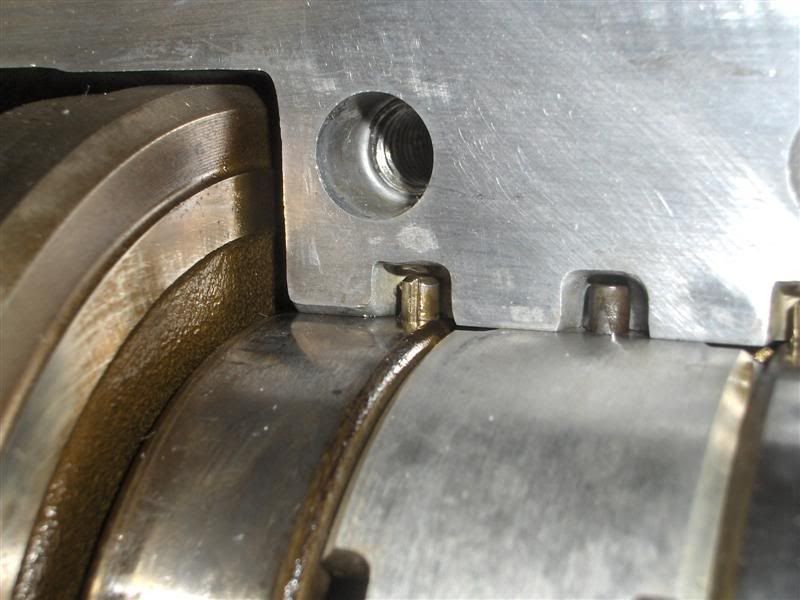
A picture of the notches that has to be positioned into their grooves.
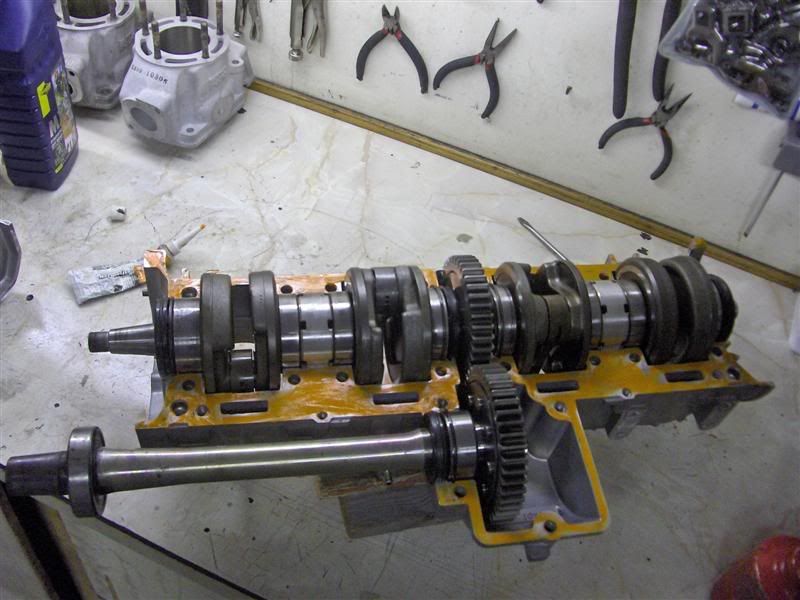
Put the primary axel in and applied a thin coat of gasket sement.
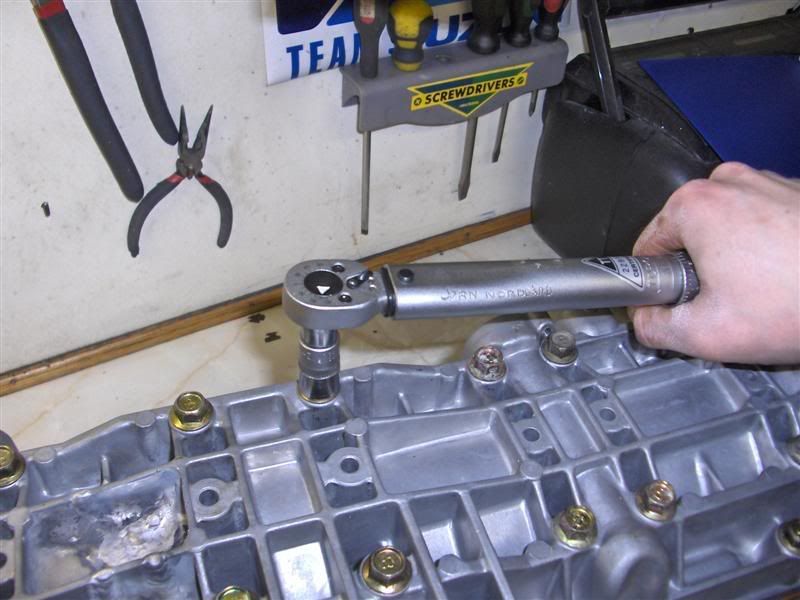
Then put the lower case on and torqued it up to 26newton in the criss cross pattern according to the manual.

As you can see I poured a fair amount of 2 stroke oil into the crankcase to ensure proper lubrication of everything during the first startup, hehe.
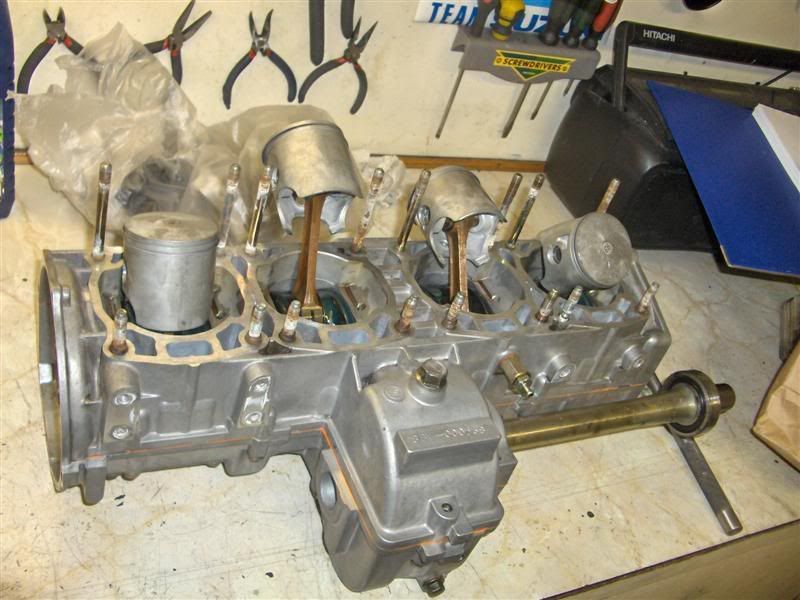
Put the pistons on, gees I tend to forget my technique on the circlips, I struggled a little with getting them in, hehe.
I checked all the piston rings end gap in their specific cylinder before I put them on the pistons.
Last edited:
Then I put the cylinders on and torqued them to 28newton.
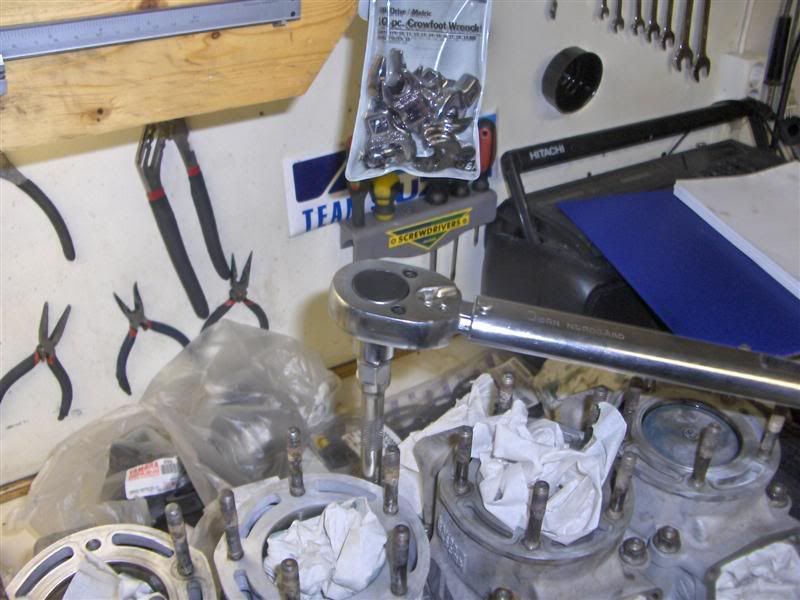
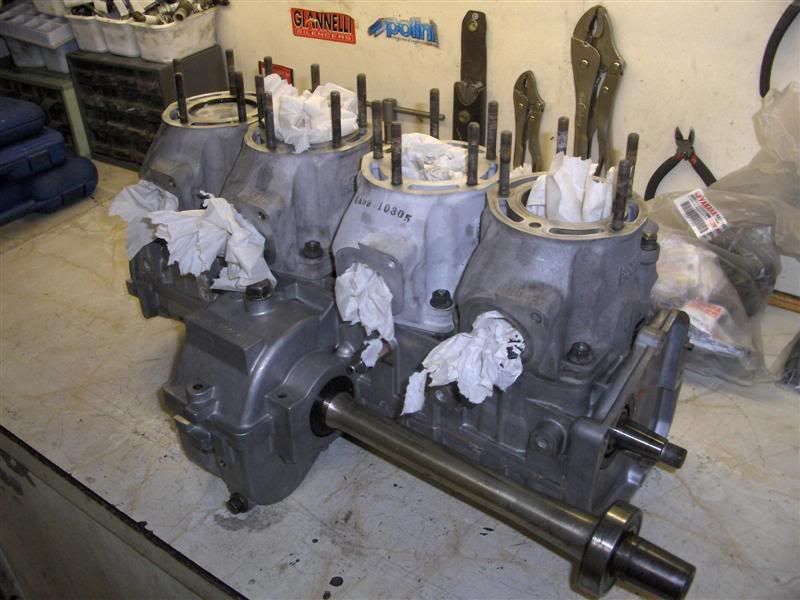
Here`s how I left the engine, I planned on finishing it today but I got really delayed due to the grinding in the crankcase, I don`t like to rush things if I don`t have to, so I`ll continue tomorrow if we don`t go riding .
.
It feels kind of awkward to leave an engine like that in the workshop, having installed the jugs but not the heads, but the reason for that is that my friend has the nuts and one of the cylinder bolts and I didn`t know where he had put them, put he was going to find them tonight so I`ll have them tomorrow .
.
Wellwell that`s all for today, finally some progress, I`m so happy.
Have a nice weekend everybody!


Here`s how I left the engine, I planned on finishing it today but I got really delayed due to the grinding in the crankcase, I don`t like to rush things if I don`t have to, so I`ll continue tomorrow if we don`t go riding
 .
.It feels kind of awkward to leave an engine like that in the workshop, having installed the jugs but not the heads, but the reason for that is that my friend has the nuts and one of the cylinder bolts and I didn`t know where he had put them, put he was going to find them tonight so I`ll have them tomorrow
 .
.Wellwell that`s all for today, finally some progress, I`m so happy.
Have a nice weekend everybody!
03viperguy
Moderator
looks great, nice clean work!
Hi guys!
03viperguy: thanks!
I know this has taken way to long time, but I had to work on my brother in law`s mountain max 700 that went through the ice, but today I finished it.
Here are some pics:
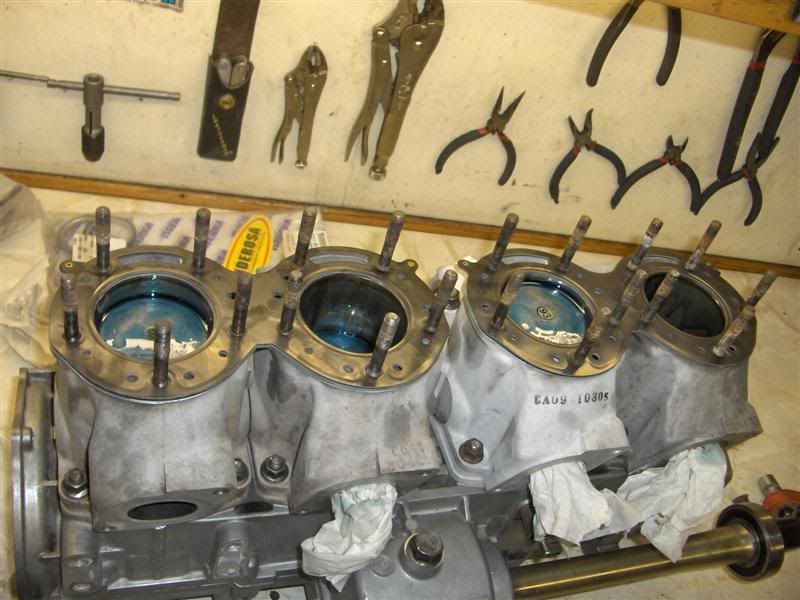
head gaskets installed
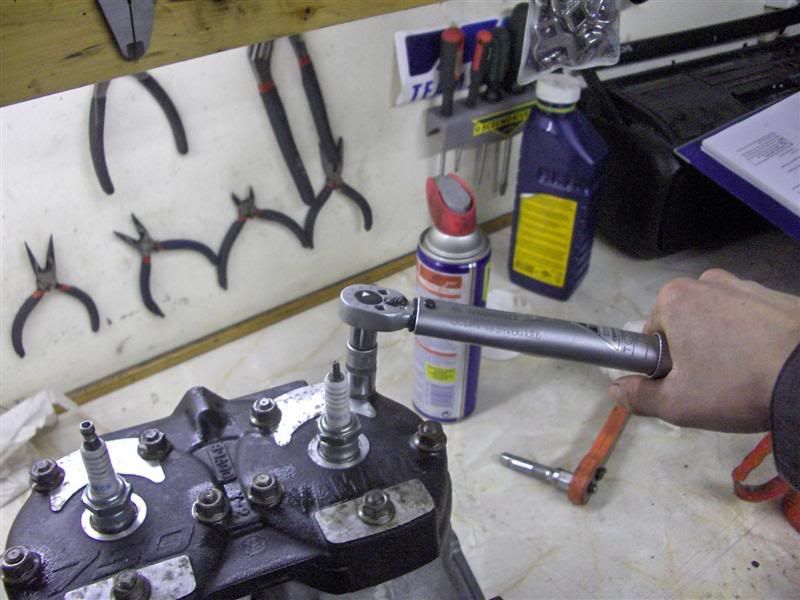
Torquing the head nuts
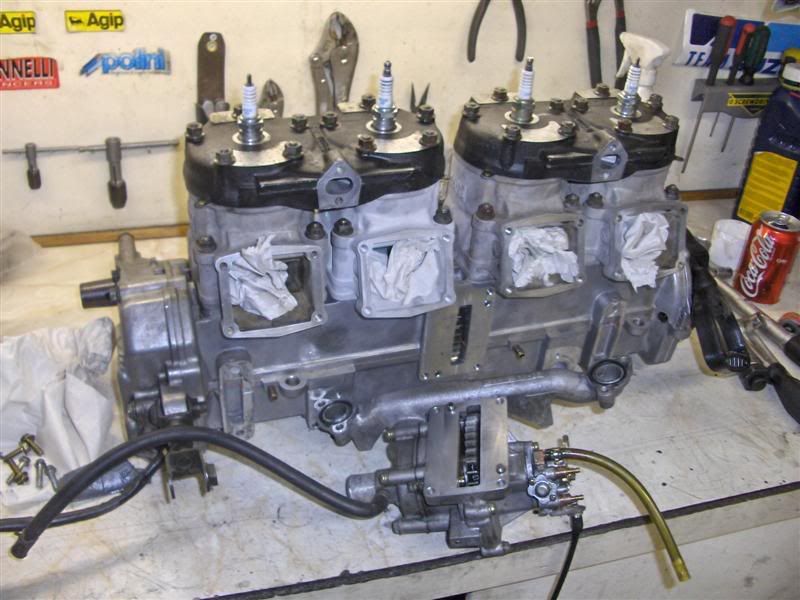
Mounting the water/oil pump assembly
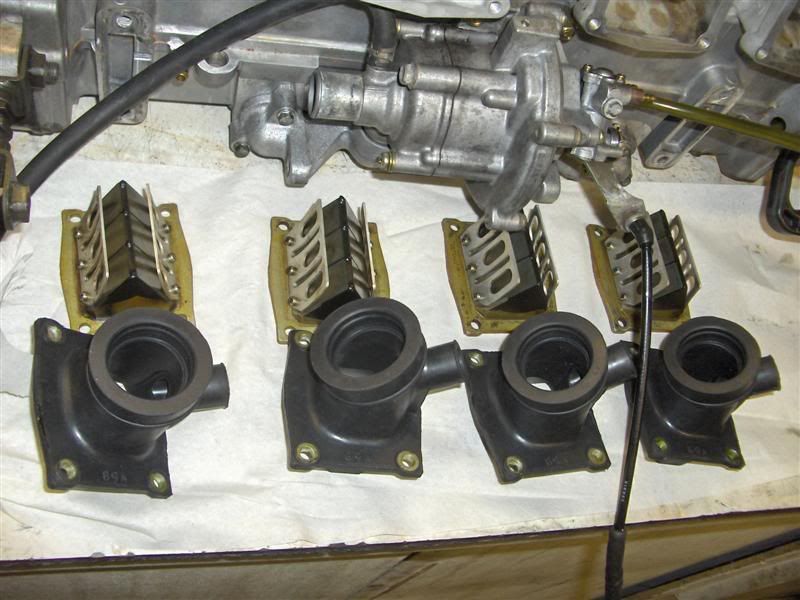
Reed valves with 4 new inlets!
03viperguy: thanks!
I know this has taken way to long time, but I had to work on my brother in law`s mountain max 700 that went through the ice, but today I finished it.
Here are some pics:

head gaskets installed

Torquing the head nuts

Mounting the water/oil pump assembly

Reed valves with 4 new inlets!
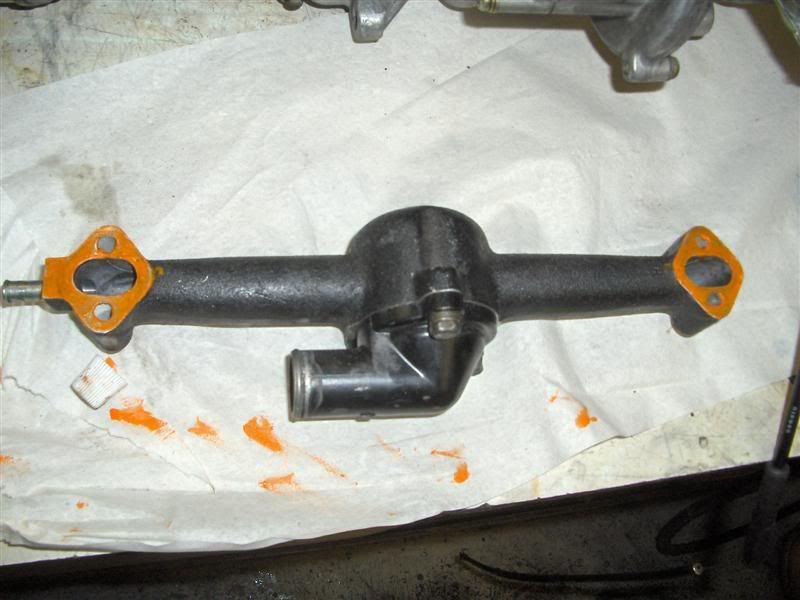
Cooling pipe, couldn`t find any gaskets for it in the gasket kit so I used gasket sement.
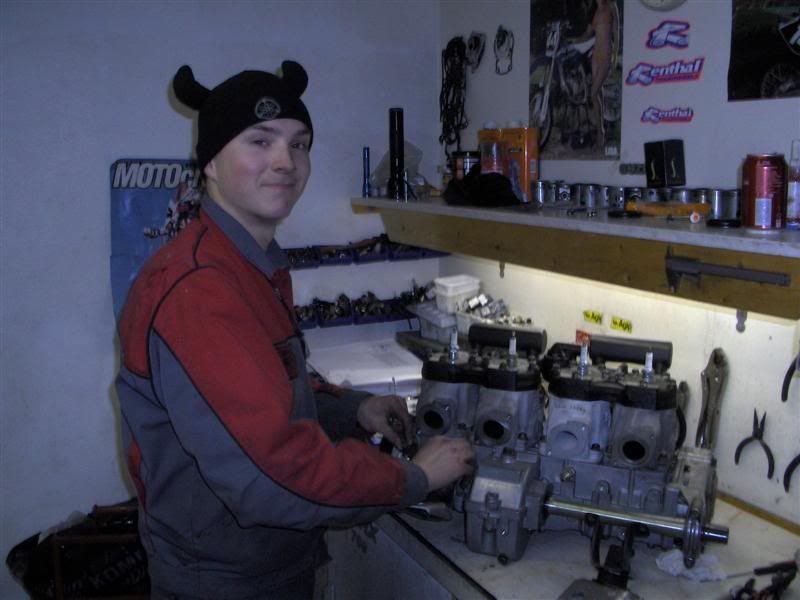
Retarded pic of me hehe
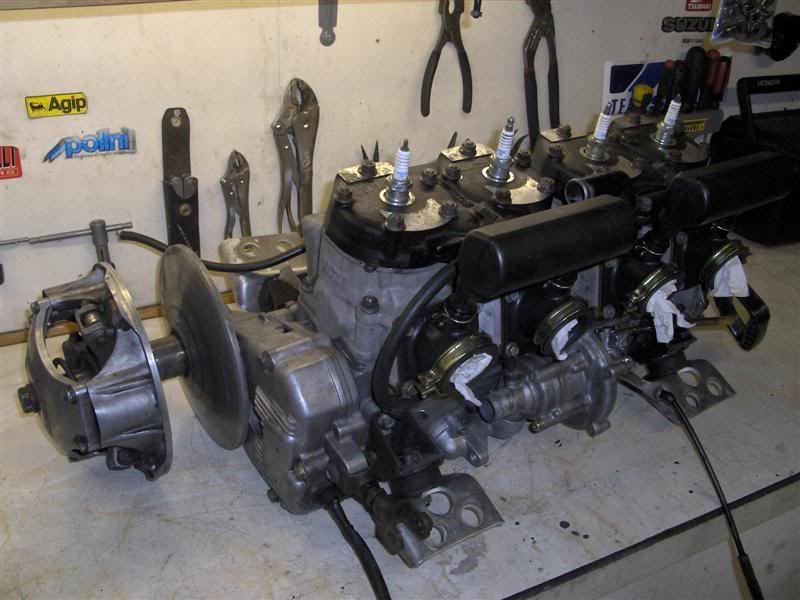
And she`s all done..
 .
.The trickiest part was infact to find a way to stop the flywheel from turning while torquing the nut, kind of tricky when you don`t have the special tools. I put a screwdriver in the little hole on top of the cover where you can see into the flywheel, there was a notch in the flywheel that I put the screwdriver in,I had little faith in that I would manage to prevent it from turning, but I did and the torque wrench made it`s click so everything`s all right.
I just spoke to my friend who ownes the sled, he just got a new job and is every busy these days, he also moved to down so he doesn`t live in my "village" anymore. At first I thought he would like to take part in putting the the engine back in the sled, but he was was really happy when I said that I gladly to put it back in for him, however it might be a little tricky since I didn`t take it out and don`t know where all the cables/wires are routed, but I guess I will figure it out, so if everything goes according to my plan I will start putting it back in on Friday, can`t wait!.
Oh two questions:
1. What oil should put in the gear-primary-axle house ?. And how much?.
2. I`m going to disconnect the oil pump (my friend wanted me to do it), should I just remove all the oil lines or should I just shorten the excisting hoses and block them?.
Oh another thing, how should we run it in?.

Do you mean the chaincase? There should be a dipstick to measure with, and I use amsoil synthetic chaincase oil.
I'm not sure about disconnecting the oil pump on those V-4's.
You have the best posts in the working log forum, lots of detailed pics, keep em' coming (sister and friend pics are nice too)!!
I'm not sure about disconnecting the oil pump on those V-4's.
You have the best posts in the working log forum, lots of detailed pics, keep em' coming (sister and friend pics are nice too)!!
sxviper32
New member
i'll second ejacamaro. its nice reading up on people's builds, and i wouldn't disconnect the oil pump either, and also some pics of the sister and her friends are nice as well!!! 

03viperguy
Moderator
leave the oil pump as it is! no good reasons to disconnect it. and like always, GREAT pics!
Good work!
I believe you ask oil type for center gears? You can use either normal 10-40 motor oil or 80-90 gear oil witch goes in chain case also. Take upper (side) bolt away and fill up until oil comes out from there (Motor must be installed in frame)
And remember, newer use that method again to instal clutch You will spin your crank!
Leave oilpump there and put a little oil for first tank you run. Keep on eye your oil level (in receivor) that you actually see that it drops = Oil going in motor.
Keep up good work!
I believe you ask oil type for center gears? You can use either normal 10-40 motor oil or 80-90 gear oil witch goes in chain case also. Take upper (side) bolt away and fill up until oil comes out from there (Motor must be installed in frame)
And remember, newer use that method again to instal clutch
 You will spin your crank!
Leave oilpump there and put a little oil for first tank you run. Keep on eye your oil level (in receivor) that you actually see that it drops = Oil going in motor.
Keep up good work!
http://media10.filewind.com/g.php?filepath=1762
Great work! Here you can dowload the service manuals for 800 and 750 Vmax4´s. Enjoy!
Ike
Great work! Here you can dowload the service manuals for 800 and 750 Vmax4´s. Enjoy!
Ike
Hi guys!
Thanks for all the replies .
.
ejcamaro: I ment the center gears-house on the crank that drives the oilpump/waterpump. Happy to hear that you like my pots .
.
sxviper32: Thanks!. Will re-consider the oil pump.. they never fail?.
03viperguy: OK now I`m convinced I`ll talk my friend into keeping the oil mixture system.
Reimond: Yeah that was what I was looking for. Thanks!. Isn`t there an oil level screw (6mm?) that I can undo and then just fill it up until oil comes out of it?.
Hmm I did I do anything wrong when I installed the clutch??. Hmm confused.
110% convinced now, will keep the oil mixture system.
Ike: Awesome, but my friend who ownes the sled already downloaded it and printed it out for me, so I already have it .
.
Guess it sais something about the oil in the center-gear-house, I didn`t think that far.
Wellwell I can`t wait to start putting the engine back into the sled, will be very interesting. I just hope that I`ll find all the nuts & bolts, (I didn`t take the motor out of the sled).
Will start working on Friday morning, hope we will hear it run sometime on Friday or Saturday. Will shoot some video of the first start up, just for the fun of it.

Oh, any run-in tips?. Don`t keep it pinned longer then necessary and don`t load it to much?.
Thanks for all the replies
 .
.ejcamaro: I ment the center gears-house on the crank that drives the oilpump/waterpump. Happy to hear that you like my pots
 .
.sxviper32: Thanks!. Will re-consider the oil pump.. they never fail?.
03viperguy: OK now I`m convinced I`ll talk my friend into keeping the oil mixture system.

Reimond: Yeah that was what I was looking for. Thanks!. Isn`t there an oil level screw (6mm?) that I can undo and then just fill it up until oil comes out of it?.
Hmm I did I do anything wrong when I installed the clutch??. Hmm confused.
110% convinced now, will keep the oil mixture system.
Ike: Awesome, but my friend who ownes the sled already downloaded it and printed it out for me, so I already have it
 .
. Guess it sais something about the oil in the center-gear-house, I didn`t think that far.
Wellwell I can`t wait to start putting the engine back into the sled, will be very interesting. I just hope that I`ll find all the nuts & bolts, (I didn`t take the motor out of the sled).
Will start working on Friday morning, hope we will hear it run sometime on Friday or Saturday. Will shoot some video of the first start up, just for the fun of it.

Oh, any run-in tips?. Don`t keep it pinned longer then necessary and don`t load it to much?.


